
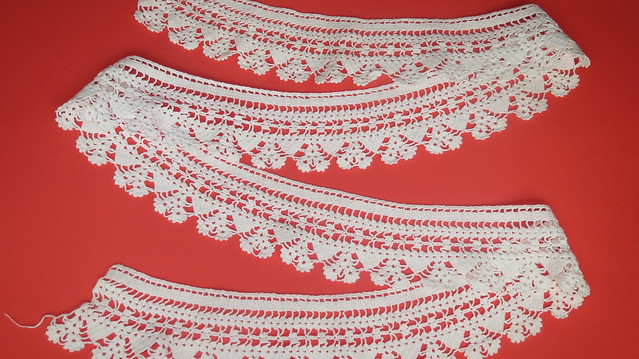
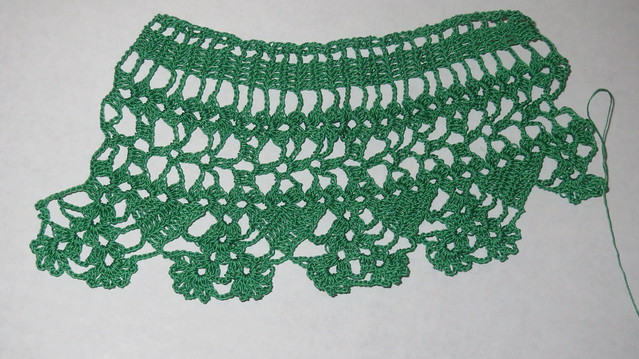
 My friend and neighbor JoDee had this piece of antique lace. She knows I like all things handmade and vintage so she brought it over for me to see it. She was kind and let me borrow it for a few months until I had time to sit down and copy it. She had a few yards of it and she plans on sewing it to a dress. I figured it was a pretty simple pattern but elegant so I wanted to copy it and figured others might like it too.

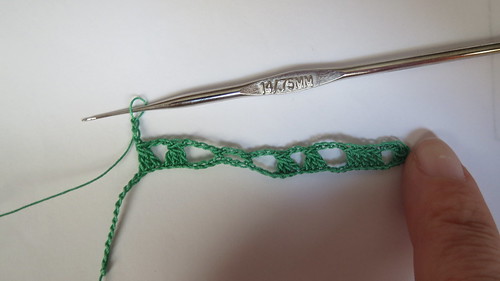
I am using size 30 thread in this tutorial and a size 14 steel hook ( I was matching original work)
But any size thread/yarn will work with its matching hook size
shell =(3dc, chain 2, 3 dc in space)
large shell = (3dc, chain 2, 3 dc,chain 2, 3 dc in space)
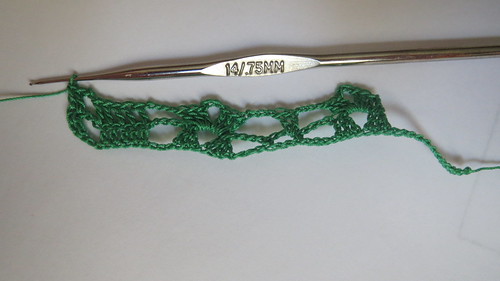
chain 50 also known as foundation chain
- Row 1(also known as foundation row in this patterns repeats): dc in 4th stitch from hook ( skip stitches count as first dc), chain 2, skip 2 stitches, dc in the next 5 stitches, chain 4, skip 4 stitches, (dc in the next 3 stitches, chain 2,dc in the next 3 stitches)foundation shell made,ch4, skip 4 stitches sc in next stitch, ch 3, skip 2 stitch , sc in next stitch, chain 4, skip 4 stitches, make foundation shell over next 6 stitches, ch 3 turn work
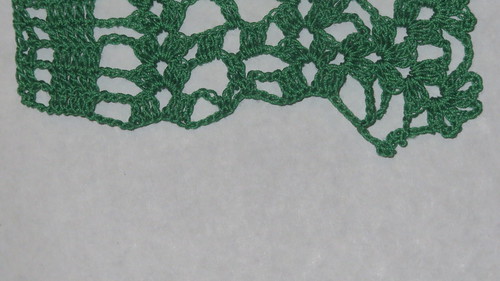
- note: ignore ( shell stitches in photo in that the first go round I tried cluster stitches at later revisions I changed that as it did not look right do as it reads above)
-
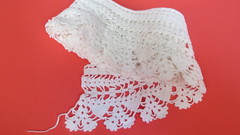
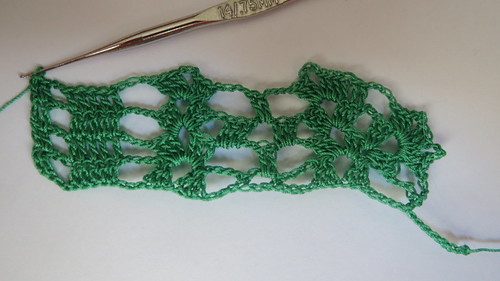
- Here is a later picture version2. This photo that is correct for the starting row and chain. But since that first was going to be in all the photos I wanted you to know why it was different and what it should look like
- Row 2: make shell in shell ( 3dc, chain 2, 3dc), chain 4, 2dc in chain 3 space, chain 4, shell in shell, chain 4, 1dc in each of the next 5 dc, chain 2, 1dc in each of the next 2 dc,turn work
- Row 3: chain 3 (counts as first dc), dc in the 2nd dc of previous round, chain 2, 1dc in each of the next 5 dc, chain 4, shell in shell,chain, 3 dc in chain 4, chain 2, 3 dc in chain 4, chain 1, shell in shell,chain 4, shell in turning chain at end of the foundation row, chain 4, skip 4 stitches on foundation chain, sc into next stitch chain 4 turn work

- Row 4: large shell in shell, chain 4, 1dc in each of the next 3 dc, shell in shell, chain 4, 2 dc in chain 2 space, chain 4, shell in shell, chain 4,1dc in each of the next 5 dc, chain 2, 1dc in each of the next 2 dc,turn work.
- Row 5: chain 3 (counts as first dc), dc in the 2nd dc of previous round, chain 2, 1dc in each of the next 5 dc, chain 4, shell in shell,chain4, sc in chain 4, chain 2, 1 sc in chain 4, chain 4, shell in shell,1 dc in each of the next 6 stitches, chain 4, shell in shell chain 2 shell in shell chain 4, skip 4 stitches on foundation chain, sc into next stitch ( should be the last one on the foundation chain, chain 4 turn work
- Row 6: in first shell do (2dc chain2)4 x 2 dc in same shell, chain 4, in second shell do (2dc chain2)4 x 2 dc in same shell,chain 4, 1dc in each of the next 9 dc, shell in shell, chain 4, 2 dc in chain 2 space, chain 4, shell in shell, chain 4,1dc in each of the next 5 dc, chain 2, 1dc in each of the next 2 dc,turn work.
- mark the 1st dc in the serious of 9 and mark the 6th dc in the serious of 9 as your new foundation chain these will be the two posts you go into when it tells you to skip 4 stitches on the foundation row and sc into a particular stitch these are those 2 stitches.
-

- Row 7(also known as foundation row in this patterns repeats): chain 3, dc in 4th stitch from hook ( skip stitches count as first dc), chain 2, skip 2 stitches, dc in the next 5 stitches, chain 4, skip 4 stitches, shell in shell,ch4, sc in chain 4 space, ch 3, sc in chain 4 space, chain 4, shell in shell, ch 3 turn work
- repeat rows 2 through 7 to desired length
**If you like my blog and the free patterns and tutorials and want to say thank you
I have a wish list on ravelry of patterns I would like to make.
Thank you in advance for being kind and
saying thank you back.
Love Sunshine
But please do not feel like you have to**

Amazing! I can crochet but I'm not good enough yet to figure out how finished pieces are made. You are very clever :)
ReplyDeleteif you can see a mistake in your own work when crocheting you are good enough to copy a pattern that is antique as you already know what the stitches look like it is just counting and recognizing patterns
ReplyDeleteThanks for sharing this. Hope to give it a try soon.
ReplyDeleteyou've done a wonderful job! thank you for sharing it.
ReplyDeleteI'm having trouble understanding some of the instructions. Such as in row 7 and row 1; "(also known as foundation row in this pattern repeats)' can anyone provide clarification on this please. :)
ReplyDeleteThank you so much for your work - awesome effort. I am going to give this a try :-) Love the idea of the Ravelry Wish List. I can't do anything at the moment but I have favourited your blog and will be back again. Best wishes for 2016 and happy hooking :-)
ReplyDeleteHello,
ReplyDeleteI noticed a small mistake (typo) in row 3, which I think I translated properly. There's a missing comma as well as a single number.
I assume it meant to say ch 1, 3dc in ch 4, ch2, 3dc in chain 4, chain1, but the first number 1 is missing.
And at the end of the paragraph, the comma after the foundation sc a comma between "next stitch" and "chain 4 turn work"
It took me a few minutes looking at it to get it, but once I did I'm more than 20" into my lace now.
Thank you for a lovely pattern!
Kim
Thanks for sharing, I hope I can follow your instructions
ReplyDeleteI'm looking for this antique (lace trim, red velvet) Christmas stocking pattern, similar to this one. I found it in a book at my library about 5-6 years ago. I cannot remember the book, or find the pattern. Just thought maybe someone knows what I'm talking about or may have a similar pattern. It was about the same size. Looked like Dutch dolls or angels. I would LOVE TO FIND THE PATTERN!!
ReplyDeleteSunshine, this pattern is perfect for a lace edging for a table cloth out of some Chistmas mterial that my granddaghter gave me. I love it and will try n post a picture when finished.
ReplyDelete