
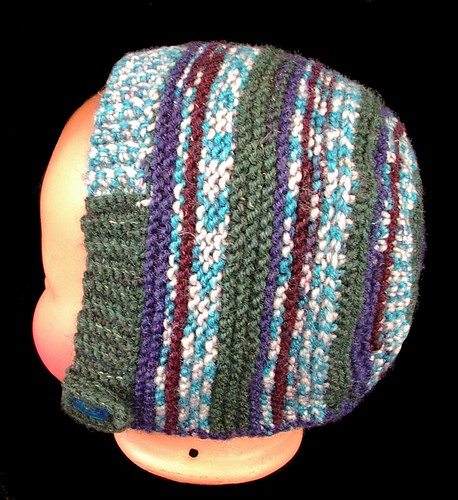
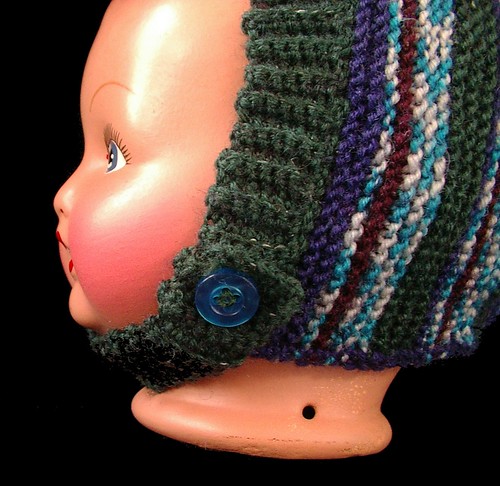
Monday, August 31, 2009
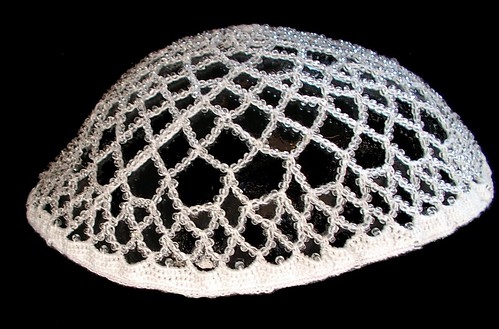
Reworked edge of Juliet cap
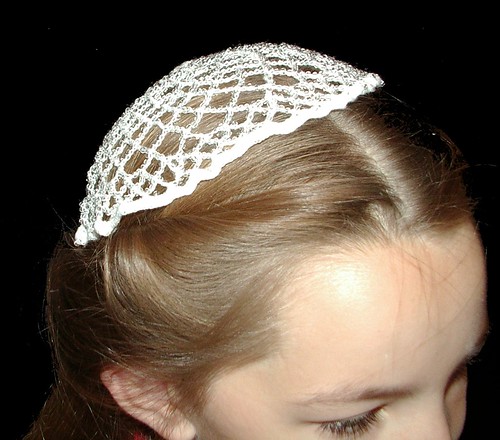
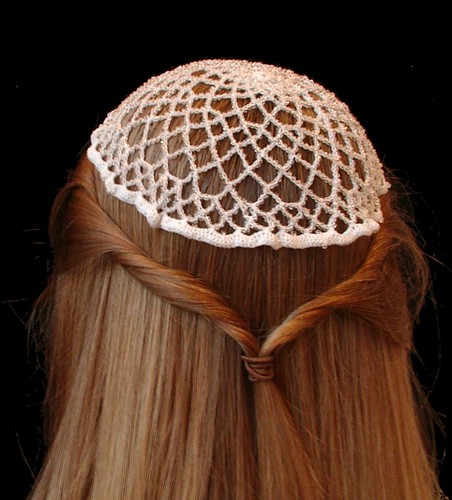
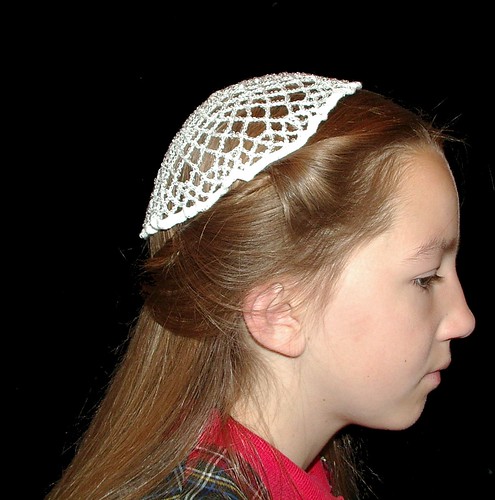
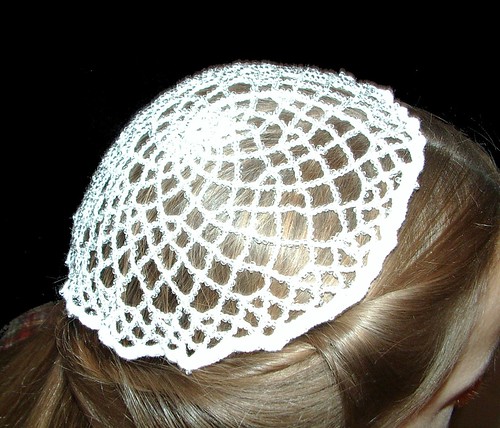
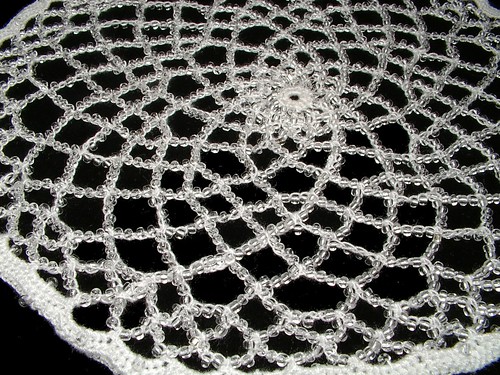
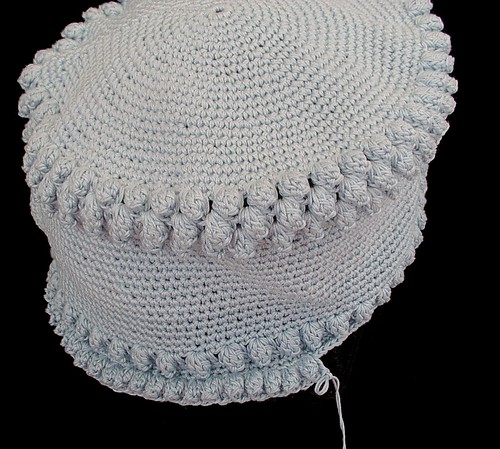
Juliet cap on oldest daughter
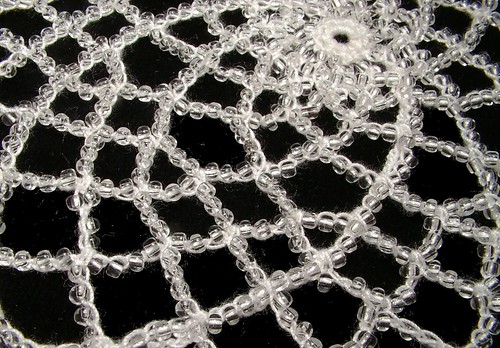
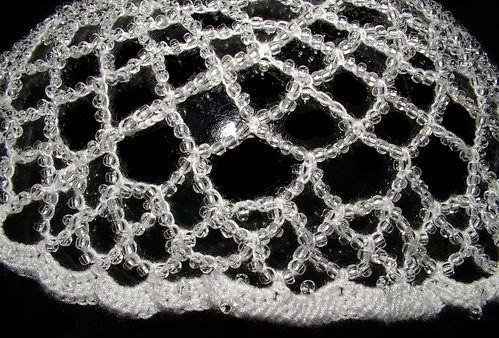
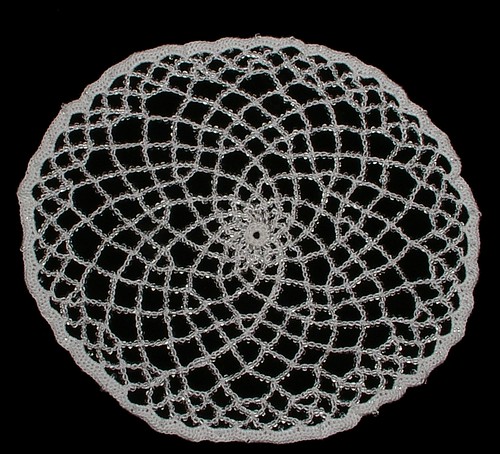
Beaded crocheted Juliet cap
My children have a Shakespeare week near the end of the year at their school. For an entire week they get to dress up in Shakespearean costumes. I few days ago while thrifting I found some beads with a ton of sequins. My children and I pulled out all the beads and set them on a string to tie them and keep them from getting lost. But once they where on the string I decided not to tie them up for safety but to make a Juliet cap for them to wear at the end of the year.
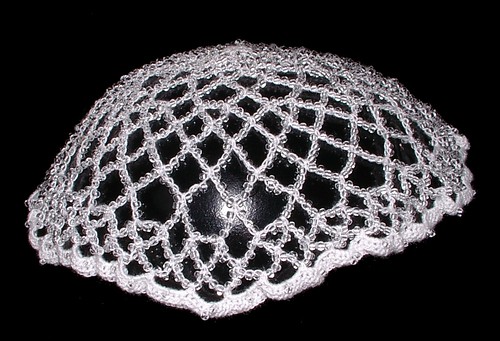
I crocheted till the beads ran out (not able to make a complete round that is) there is a bead for every chain stitch in the cap and the remaining ones ( the ones that wouldn't make a complete round) are scattered on the caps edge. It actually ended up a nice size for them to wear. I don't have a child with her hair fixed correctly at the moment to show you. It is held on the head with Bobbie pins that is why I have a wide crochet edge so it can be pinned to. I will post a photo later on one of my kids so you can see how it is on a real person. So in supplies it cost me 50 cents but two days of time to sort and crochet. Beads usually cost a ton to buy so that was nice to get them so cheep that probably wont happen again if I wanted to make this hat again it would be around 60 dollars in supplies alone. There is not a pattern I made it up as I went along.
Saturday, August 29, 2009
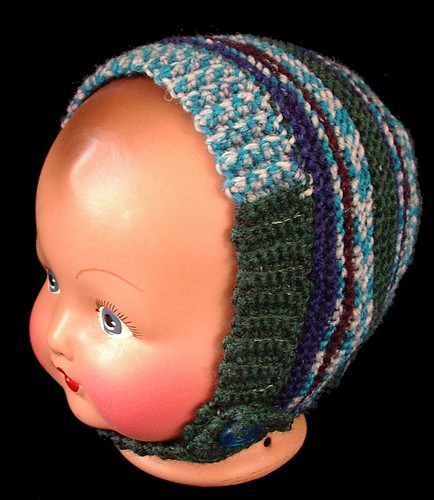
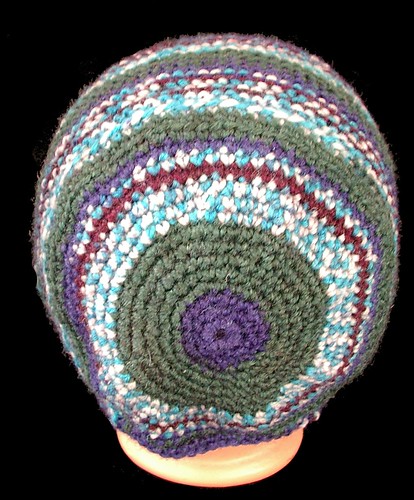
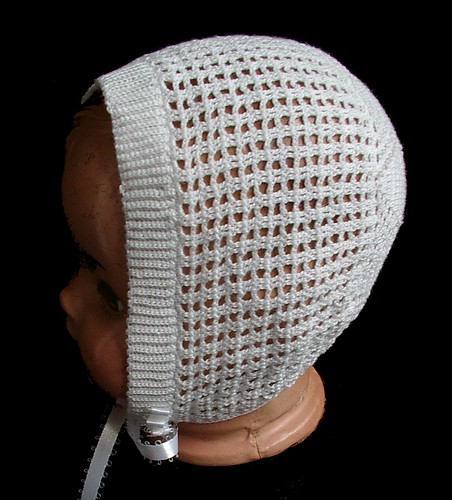
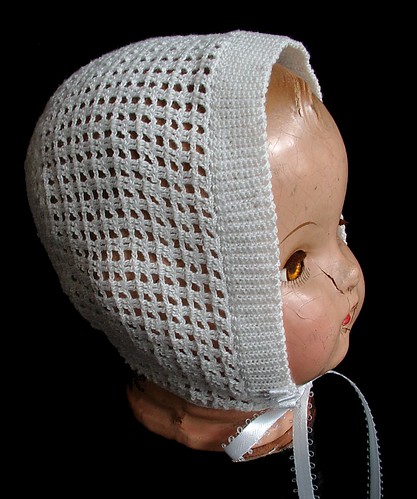
Newborn varigated baby bonnet

Friday, August 28, 2009
On the way to school


Thursday, August 27, 2009
Two projects but all hexes
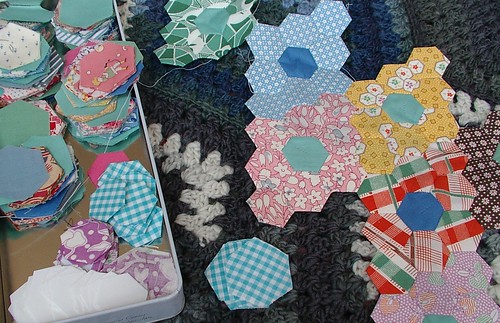
It might be hard for you to see but there are two projects being worked on in this photo. One is obvious a hexagon english paper piced quilt ( small wall size) tutorial here. Which happenes to be using the real thing vintage feedsack fabrics. The other is right below it and is an all wool afghan made using this tutorial. Still have some work to do on both of these. You may not have seen me for a few days but that never means my hands are doing nothing they are always busy.
Good Morning
I am still here just a little busy with class reunion, back to school, soccer, remodeling, doctors, yard work, life..... But I needed to just enjoy a few moments to stare at the sunrise Enjoy!!!

Yep life is always good no matter how crazy! Be back soon!!
Friday, August 21, 2009
Look what I found
Wednesday, August 19, 2009
Rock Climing at School
 She got about 5 feet higher than this then came down.
 Right before ringing the bell
 Right before ringing the bell.
Today was the party for the last day of summer school. To finish off the summer they had their Summit To The Top party. Yep rock climbing at school, it is Utah what can I say lots of climbers here and it is fun. Two of the girls made it to the top. The third got half way there. I think they all did great and fun was had by all. Now back to normal school on Monday.
Monday, August 17, 2009
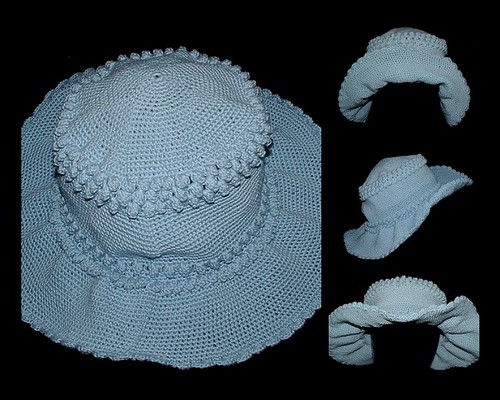
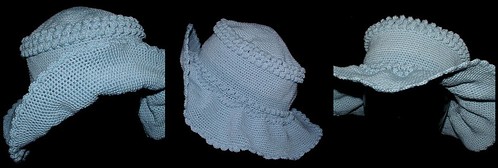
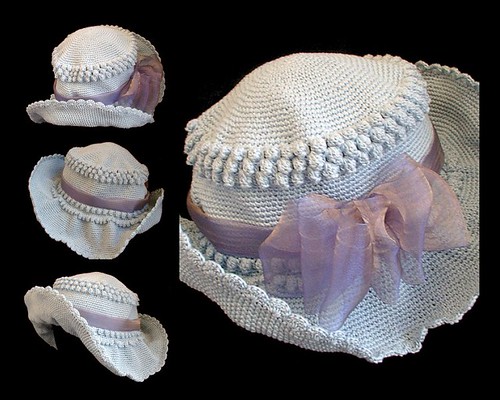
1912 Hat

I think it would be a lovely Christmas or Easter bonnet. For either adults or little girls. I will show a finished hat in a few days I still have to finish the floppy brim. The pattern is done just not the item.
Saturday, August 15, 2009
Reginal Golf Tournament for NHF

 Our children played in the golf tournament for the National Hemophilia Foundation our family as those who read my blog know is part of the bleeding disorders community as I and my daughters all have Von Willenbrand's Disease.
Oldest daughter got third place. First girl in the 9 years of the competitions history to place in the top three. She also won a set of golf clubs with bag and a trophy as well as a participation medal.

The next level is national which the children do not go to they ( the top winner of each region) have their scores put in and compared against the 3 other regional winners and the wild cards. Which is what my oldest daughter got also. There are three winners at the next level one for golf one for baseball and one for the wild card slot. Those winners go to the National Hemophilia meeting in October.

First time the younger two have played in competition in golf they have always done baseball in the past.


Friday, August 14, 2009
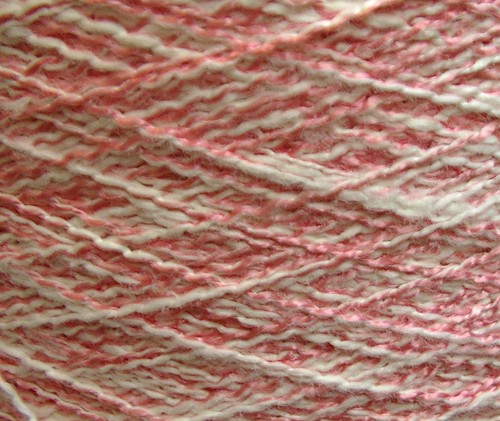
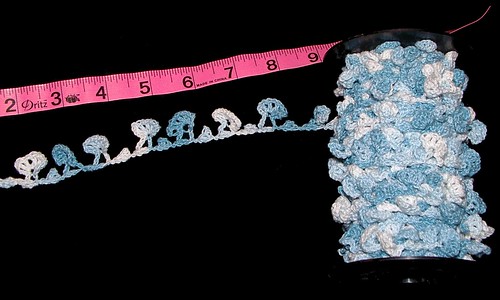
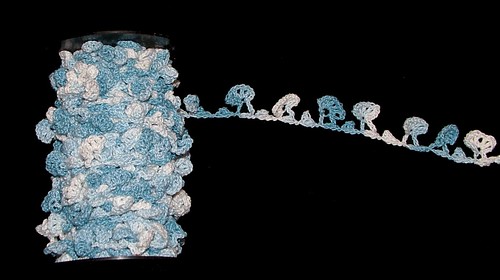
Yards and yards of lace
Thursday, August 13, 2009
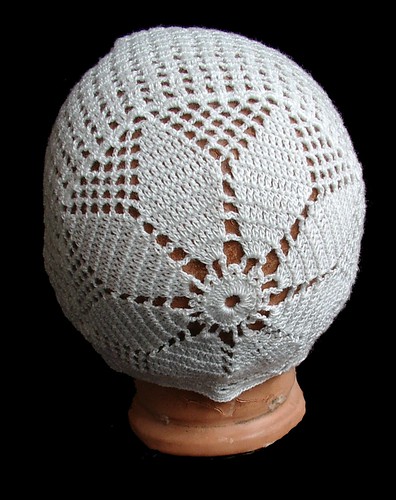
New bonnet in store 0-3 mos
I ended up giving this to my children's principle at their school.
Wednesday, August 12, 2009
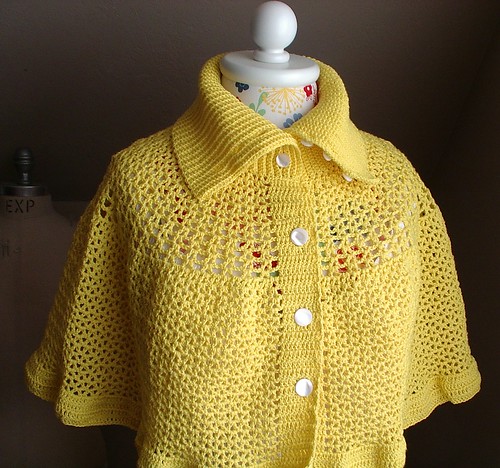
Caplet pattern is available
The caplet pattern is now in my ravelry Shop it is available for 3.75 dollars. It is also available on Etsy for the same amount of course.
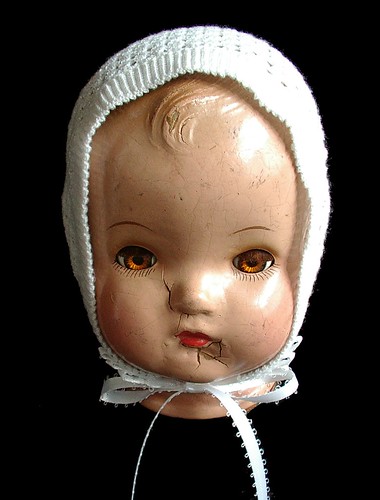
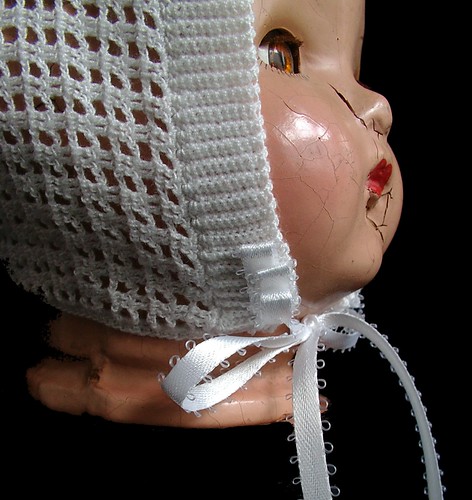
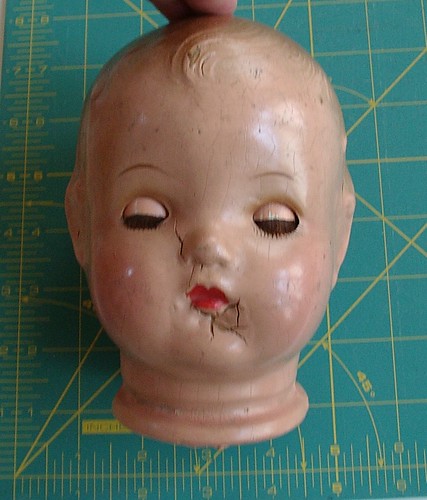
Help I want some doll heads
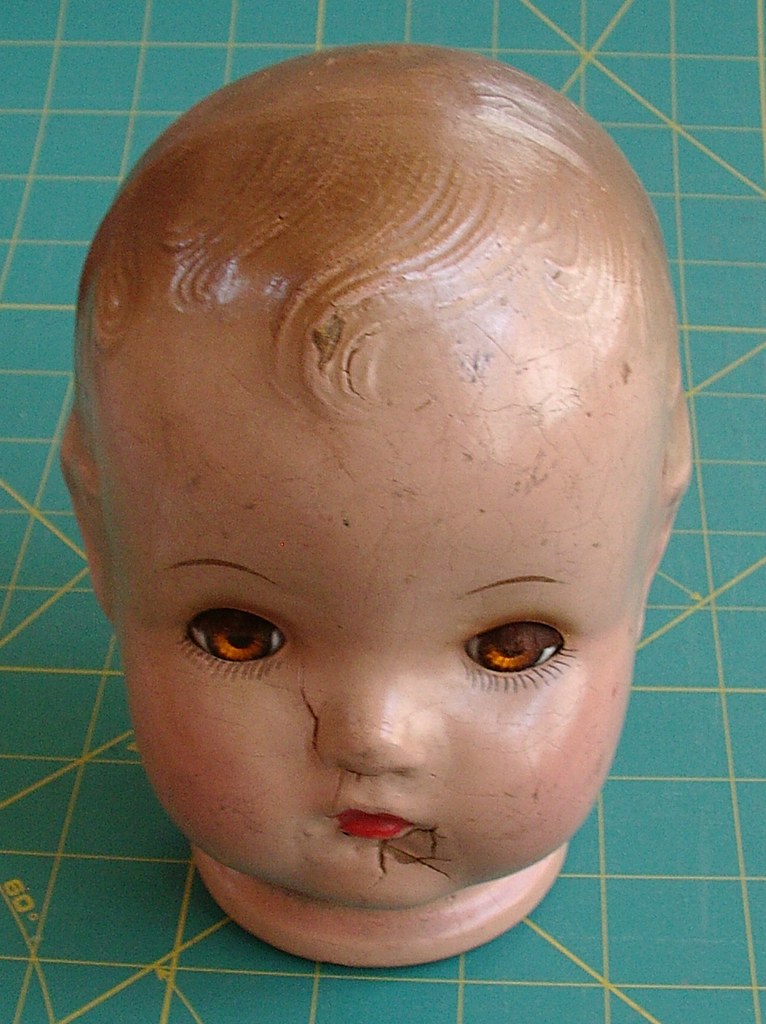
I am wanting some baby doll heads to use as mannequins if any one has some happy to trade for them or pay (a reasonable price). I will give you a better deal for the trade over the money. Meaning I am happy to make a 50+ dollar item (or you can pick something from my store for around that price) for a 20 dollar head but I am not wanting to pay much for the head. Not all heads are worth 20 most are 8 dollars and such. If the head is real nice I am happy to go even higher (on the trade) on the item I make for it but I want it to be very old looking and be a baby with molded hair no wigs I hate those things on them. It has to be life size from newborn to a one year old. I don't want little heads as this is to be a life size mannequin to be of any use to me.
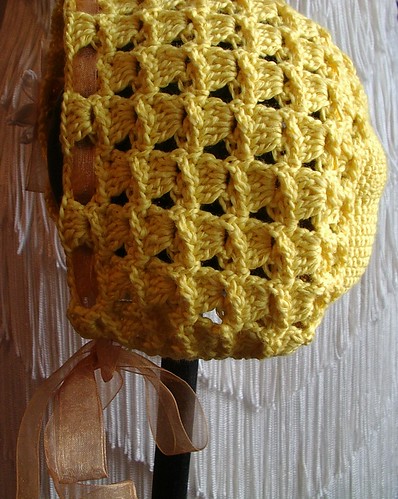
about 5 inches wide
and 13 inches around
0-3 mos
I want the dolls heads to be bigger than this one. I like the aged look of this one it is made of composition ( I don't want vinyl as I already have some of those) I really want composition, bisque or porcelain.

Thanks if any one has some. I only want the heads I know this sounds kind of morbid but it looks cool in photos of baby bonents and since my store is Vintage Threads Inc. I want a vintage baby to model items.
If you are interested send a few photos to the email address on the right side of my blog and in the photos include a tape measure so I can see how big the item it. Or send me a link as to where I can see them on the internet in your email or post here. Also what you think it is worth in trade then we will discuss if I am interested and if I agree with the trade.
If you are interested send a few photos to the email address on the right side of my blog and in the photos include a tape measure so I can see how big the item it. Or send me a link as to where I can see them on the internet in your email or post here. Also what you think it is worth in trade then we will discuss if I am interested and if I agree with the trade.
New bonnet 3-6 mos
I have been in school meetings for the last few days and will be for a few more. So on my breaks I have been working on this bonnet. I decided I wanted it finished last night so I worked till it was done sorry not good lighting at night.

 Copyright Vintage Threads Inc.2008
This is for personal use to not sell or barter items made from this pattern. This pattern comes from the early 1940's: Woolies for Babies ( it has been brought up to date with changes by me)
SUPPLIES:
• Chadwick's red heart baby wool, 1 ball (3/4 oz) (ie.. baby yarn wool) fingering weight yarn
• steel crochet hook, no 2/0 (double zero) steel hook
• 1 1/2 yards ribbon, 3/4 inch wide organza or double sided satin
• 2 ribbon rosettes (these you make yourself) you can buy store made flowers or make your own easy to do on a flower loom
•GAUGE: (pattern stitch) 3 shells make 2 inches
PATTERN:
starting at center of back, ch2.
 1st rnd: 6 sc in 2nd ch from hook. Do not join rounds.
2nd rnd: 2 sc in each st around (12 sts) place marker here
3rd rnd: *sc in next st , 2 sc in next st (an inc). Repeat from * around (18 sts) 4th rnd: *sc in next 2sts , 2 sc in next st. Repeat from * around (24 sts)
Continue thus increasing 6 sts on each rnd until there are 90 sts on the rnd and piece measures 4 1/4 inches from side to side across center. ( this is 15 rounds)
Now work 1 rnd without increasing, sl st in next st. Ch 1, turn and work back and forth as follows: ( this helps to start curve of hat to transition to rows going back and forth)
1st row: sc in same place as sl st, * make crossed dc's over the next 3 sts to make dc's , skip 2 sts, dc in back loop of next st, ch3, holding last dc and ch3 down with left thumb make dc in back loop of first st skipped, sc in st following crossed dc's. Repeat from * until there are 18 crossed dc's ending row with sc in st following last crossed dc. (91 stitches over 73 stitches) Remaining sc's are back of neck.
2nd row: Ch 3, turn Make 5 dc( a shell) in each ch3 across, end row with dc in last sc. Ch 1 turn. (92 stitches)
3rd row: sc in dc, * make crossed dc's over the next 3 sts, sc between shells. Repeat from * across, ending with sc in top st of turning chain. Ch3, turn.
Repeat 2nd and 3rd rows alternately until piece measures 4 1/2 inches from last rnd of sc, ending with the 2nd row. (if your tension is correct should be 7 or 8 repeats because the repeats land between these two measurements so pick which ever you like)
Do not fasten off work sc along lower edge and back of neck, holding edge it to fit (1 sc per round on front of cap and join two together on transition to back of cap the rest on the back is one stitch into one stitch) (about 9 inches) fasten off.
Finishing...
Run the 3/4inch ribbon under and over the shells of 1st row on front edge. Make the ends even for ties and tack ribbon at each side of cap.
It is actually pictured second row in this gives a little soft ruffle around the edge. Sew on rosettes. I also suggest fray checking all ribbon raw edges so it can easily go through in the wash without worry of fraying; or you can fold edges of ribbon to a point and stitch down instead to do the same.
This is for personal use to not sell or barter items made from this pattern. This pattern comes from the early 1940's: Woolies for Babies ( it has been brought up to date with changes by me)
SUPPLIES:
• Chadwick's red heart baby wool, 1 ball (3/4 oz) (ie.. baby yarn wool) fingering weight yarn
• steel crochet hook, no 2/0 (double zero) steel hook
• 1 1/2 yards ribbon, 3/4 inch wide organza or double sided satin
• 2 ribbon rosettes (these you make yourself) you can buy store made flowers or make your own easy to do on a flower loom
•GAUGE: (pattern stitch) 3 shells make 2 inches
PATTERN:
starting at center of back, ch2.
2nd rnd: 2 sc in each st around (12 sts) place marker here
3rd rnd: *sc in next st , 2 sc in next st (an inc). Repeat from * around (18 sts) 4th rnd: *sc in next 2sts , 2 sc in next st. Repeat from * around (24 sts)
Continue thus increasing 6 sts on each rnd until there are 90 sts on the rnd and piece measures 4 1/4 inches from side to side across center. ( this is 15 rounds)
Now work 1 rnd without increasing, sl st in next st. Ch 1, turn and work back and forth as follows: ( this helps to start curve of hat to transition to rows going back and forth)
1st row: sc in same place as sl st, * make crossed dc's over the next 3 sts to make dc's , skip 2 sts, dc in back loop of next st, ch3, holding last dc and ch3 down with left thumb make dc in back loop of first st skipped, sc in st following crossed dc's. Repeat from * until there are 18 crossed dc's ending row with sc in st following last crossed dc. (91 stitches over 73 stitches) Remaining sc's are back of neck.
2nd row: Ch 3, turn Make 5 dc( a shell) in each ch3 across, end row with dc in last sc. Ch 1 turn. (92 stitches)
3rd row: sc in dc, * make crossed dc's over the next 3 sts, sc between shells. Repeat from * across, ending with sc in top st of turning chain. Ch3, turn.
Repeat 2nd and 3rd rows alternately until piece measures 4 1/2 inches from last rnd of sc, ending with the 2nd row. (if your tension is correct should be 7 or 8 repeats because the repeats land between these two measurements so pick which ever you like)
Do not fasten off work sc along lower edge and back of neck, holding edge it to fit (1 sc per round on front of cap and join two together on transition to back of cap the rest on the back is one stitch into one stitch) (about 9 inches) fasten off.
Finishing...
Run the 3/4inch ribbon under and over the shells of 1st row on front edge. Make the ends even for ties and tack ribbon at each side of cap.
It is actually pictured second row in this gives a little soft ruffle around the edge. Sew on rosettes. I also suggest fray checking all ribbon raw edges so it can easily go through in the wash without worry of fraying; or you can fold edges of ribbon to a point and stitch down instead to do the same.
Subscribe to:
Posts (Atom)
Copyright/permissions info
I like to share on this space my ideas and projects.
Please don't take ideas or photo and claim them as your work.
I am always happy to have new links to me. So if you like something just link back to me and give the source some credit thanks.
Any questions? just ask. I am happy to work with you if you need something
 This work is licensed under a Creative Commons Attribution-Noncommercial-No Derivative Works 3.0 Unported License.
2006-2019
Copyright Vintage Threads Inc.
All content and images.
This work is licensed under a Creative Commons Attribution-Noncommercial-No Derivative Works 3.0 Unported License.
2006-2019
Copyright Vintage Threads Inc.
All content and images.