[google6a7b7d93c7100df5.html] Sunshine's Creations.Vintage Threads Inc.com: December 2013

friends and followers

If you like my blog and the free patterns and tutorials and want to say thank you
I have a wish list on ravelry of patterns (click here)
I would like to make.
Thank you in advance for being kind and saying thank you back.

Love Sunshine

Search This Blog

Saturday, December 14, 2013

pull tab corset/vest

front
So since my daughter wanted to learn a little about making chainmaille from pop tabs.  I made this to show her the way she was going about it was a weak way of construction and it messed with the integrity of the piece.  I am making something (a tunic) using that technique that she was using but yeah not my favorite item.  She has since undone what she had made and is now using a weaving technique from the pattern I said I liked last time.  She can still use the tabs she cut but they will be stronger even though they have been cut.
back

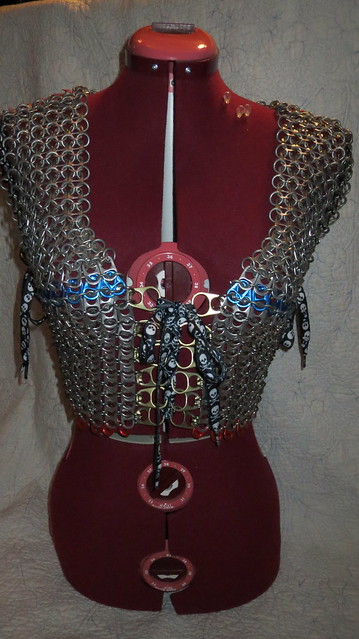
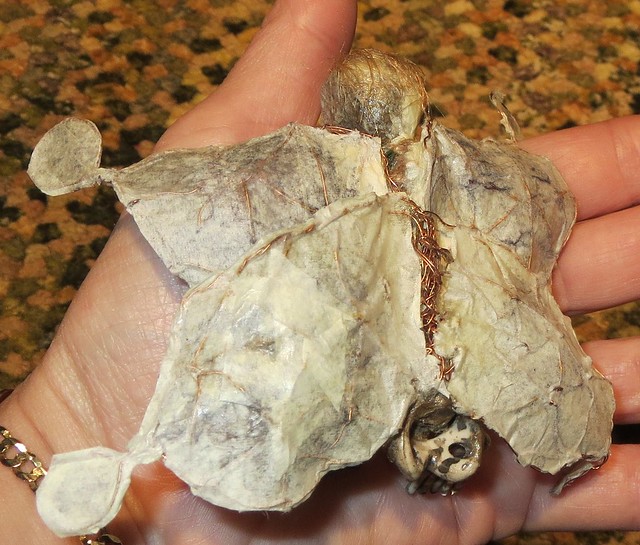
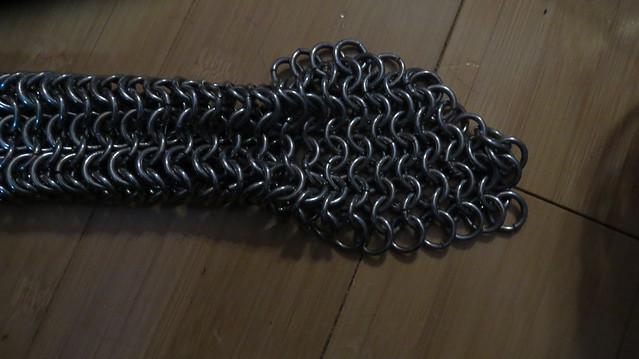
My brother-in-law years ago as a teen made two sample pieces of maille.  He used wire hangers to make his.  He placed a metal rod in a vice and bent the hangers around it and then sawed the coil open to make his rings.  Then he hand sanded them and assembled them.  Because I remember him doing all this and discussing how to make maille with him I wanted the pieces when he no longer did.   He had two different colors of metal ring in the same size. So I and my children were excited when he gave them to my girls  the girls wanted to be able to use it but could not because of the size of the pieces.
old maille
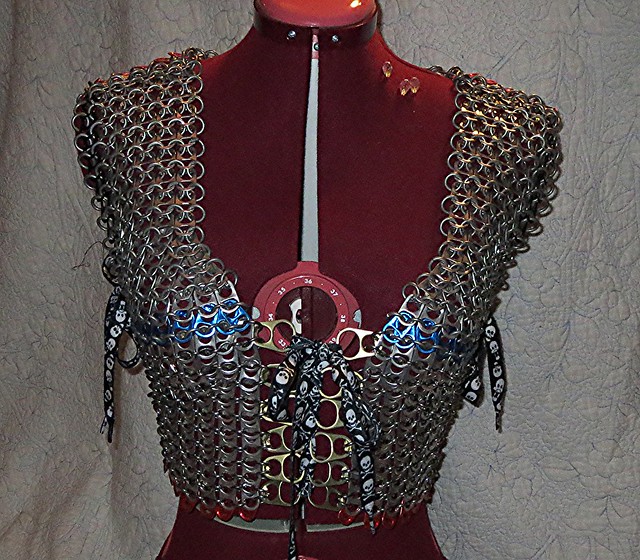
Because they were not usable in the size and shape he left them in we dismantled them and added the pull tabs so that my girls could wear this piece of costuming that is half made by him and half made by me with a little help from my girls.

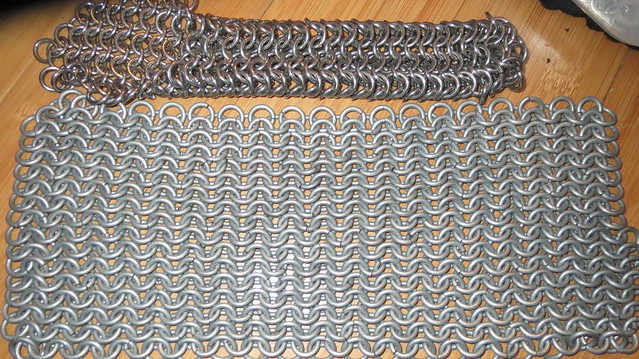
They (my girls) got hurt hands from trying to open the 10 rings.  My hands are bruised too as it is hard work but I persevered much more till done.  I can still do more but in time my hands would get use to it again.  They just are not there currently.
dismantelling

one my brother in law made

 supplies minus the tools
We plan on making 5 at least items one for each family member to wear but this vest can be worn by 3 out of 4 females in the house.  My youngest does not quiet fill out the top yet give her 1 to 2 years and all the females in the family will be able to wear it.  The skull shoes laces in the pictures are a temp thing it is what I had on hand.  I plan on leather laces or cording.
making out of pull tabs and old maille that i am dismantaling
corsetright front detail
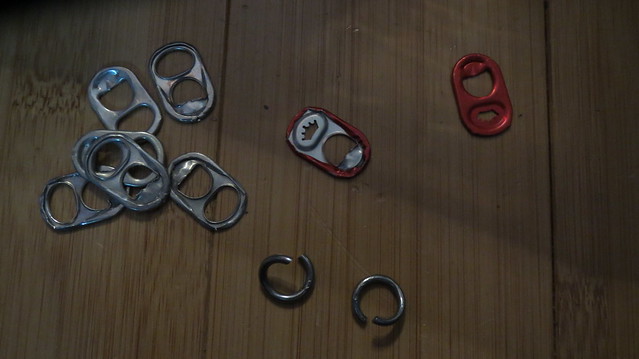
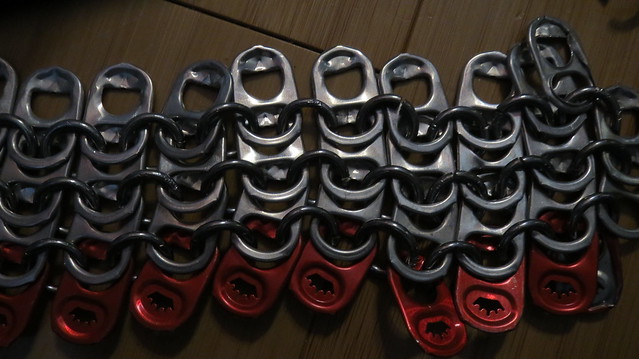
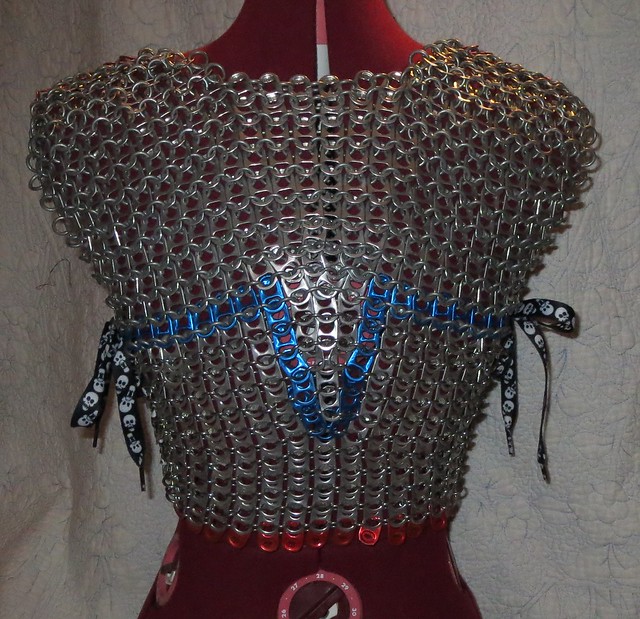
I do not drink beer or energy drinks which are where the colored tabs come from.  But you can buy them on line if you look around which is what I did.  If you look closely at the photos you will notice the blue row is where I changed from one color of metal rings to the other.  The bottom half is shinny metal rings where as the top is the dull metal rings.  I used the blue to make it look more purposeful.  But truly it is just wear the colors changed on their own and I added the blue to make it a purposeful design element.

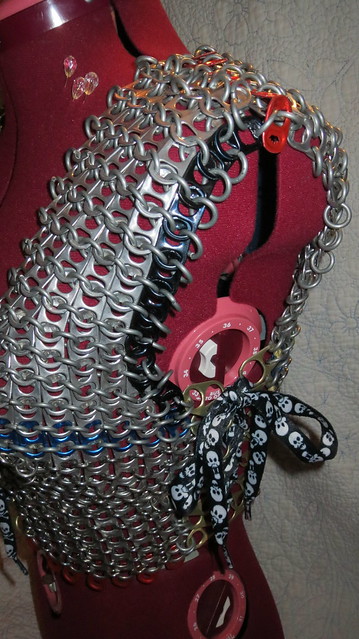
I did do some shaping on the breast areas and center back and around the side to make it fit nicer than just a straight tunic style would have.  Yes this is heavy because of the rings.  As pop tabs are light in general but the added metal rings adds lots of weight to the piece.  When trying this on my girls all commented on the coldness of the metal it is winter here with snow on the grown.  Now think about wearing this in summer at a RenFair in the middle of the heat yes I expect the metal to heat up and be screaming hot.  But the girls said they did not mind.  There is oxidation that comes off of both the aluminum pull tabs and the rings so spraying with clear acrylic is a good thing to seal the metal or you will end up with a gray dusk permeated probably permanently into your shirt that you wear with this.
front

Tuesday, December 10, 2013

Origami Helmet

frontMy oldest daughter has been working on this project on and off for a while.  At times it drove me nuts with little bits of paper all over the place.  But she was being creative.  She designed the helmet herself.  Yes it does fit her head. The design is that of a Phoenix  interesting that she sort of made it an ice Phoenix (which does not exist except in her head)instead of a fire one.

right sideleft sidetop righttop leftOver Thanksgiving break she finished it.  The reason she decided to finish it was so that she could enter it into an art show the same on the fairy house was entered into.  At the time I am writing this post i have been notified that she got best of show for this but I am not able to tell her.  So this is set to post several days after I have written it so that she can be notified in front of her entire school.  The people that judge the show noticed our last name on several entries and stated it must be a very talented family.  The part i love about this is that my children this year two out of three are not in art classes but doing their own things and these are the items they came up with.
back
This is a video tutorial that shows the way she folded these little bits of paper to make this item.  This technique if you Google it usually called a 3d fold in origami.

My children have made me easter eggs in the past using this technique with lots of different colored pieces of paper.  sometimes they use the computer mishaps when printing if you do that just make sure the ink part is on the inside when folded if you want a clean look.

Monday, December 09, 2013

A few blasts from the past


UNCLE ROLLYS STOOL
A long time ago when i was in Junior collage I took some oil painting classes.  One of the assignments was to decorate a small piece of furniture ie stools and the like.  This was a stool i had since I was a little girl so it was beat up scratched and dented. I decided to decorate it and make it nice with some tole painting.  Very heavy on the paint layers so that I could varnish it and make it look older.  When I moved to Utah I gave it to my great Aunt Deannie.  Years later I noticed it was missing from her home ( my other aunt still lives in that home).

 TOP
I figured it had gotten broken and tossed i was sad but glad it had been well used.  Over the thanksgiving break I was at my Uncle Roly's house ( pronounced Rawlee). I had not been in this house in years like before I had painted the stool that long ago.  So what a great surprise to see it there.  The funny thing was my cousin who now lives there had a story for it which was funny to me.   He said see this old stool I am sure it is the stool that gave Vova ( our grandmother) the idea to paint stools  he loved it being in his home .  Made me smile and sort of sad that I would break this dream of what the stole was.  I said no it is one I painted when I was nineteen years old and thought it was gone.  I am truly glad this cousin has it as I have always stayed with him when I go visit family he is such a good guy.  Little bits of the past are nice to see.
detail of pINITN
There was another item there a quilt I made when my husband and I were engaged it was a Christmas present for my uncle Roly something else I thought had gone by the wayside when Roly died but it is preserved and saved in a trunk along with photos of four presidents  ( Ford, Nixon, Reagan, and the first George Bush)  make me feel proud that is was a treasured item and saved with these types of gifts letter  from the presidents.  Thanksgiving was a hard week for me mentally this year long story but this made it so much the nicer.  Next time I go out I will have to take a picture of the quilt.  nothing fancy at all just a small lap quilt that is tied not even quilted as I was a collage student with not much time to make such things but it was an item I wanted to make as a thank you to my uncle for all he had done for me in my life.  He helped pay my way through collage and because of that I was able to go to BYU where I met my husband and the rest is history.
old stool

Saturday, December 07, 2013

Mummified fairy houses

house
front of house with fairy insideOver  Thanksgiving break my daughter made a Fairy house for her mummified fairies that she makes.  I think it came out pretty well for a first attempt at it. Plus she had to take all the supplies with her as we traveled good job on guessing what she would need to have to make this item.  It took her several days to make as she had to wait for the glue to dry several times for the different stages of construction.  She plans on making more of these.
house


fairy inside ( way to much flash used)
This is also a new fairy she made.  The last one was a girl this one she tells me is a boy thus the reason the close look different.
front

mummified fairy front

back

Copyright/permissions info

I like to share on this space my ideas and projects.
Please don't take ideas or photo and claim them as your work.
I am always happy to have new links to me.  So if you like something just link back to me and give the source some credit thanks.
Any questions? just ask. I am happy to work with you if you need something
Creative Commons License This work is licensed under a Creative Commons Attribution-Noncommercial-No Derivative Works 3.0 Unported License. 2006-2019 Copyright Vintage Threads Inc. All content and images.

LinkWithin

Related Posts Plugin for WordPress, Blogger...