[google6a7b7d93c7100df5.html] Sunshine's Creations.Vintage Threads Inc.com: May 2007

friends and followers

If you like my blog and the free patterns and tutorials and want to say thank you
I have a wish list on ravelry of patterns (click here)
I would like to make.
Thank you in advance for being kind and saying thank you back.

Love Sunshine

Search This Blog

Thursday, May 31, 2007

Flower Fairies

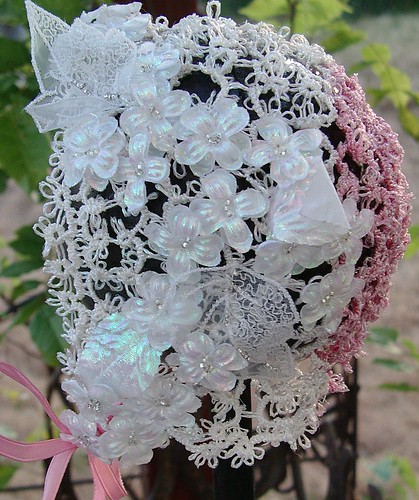
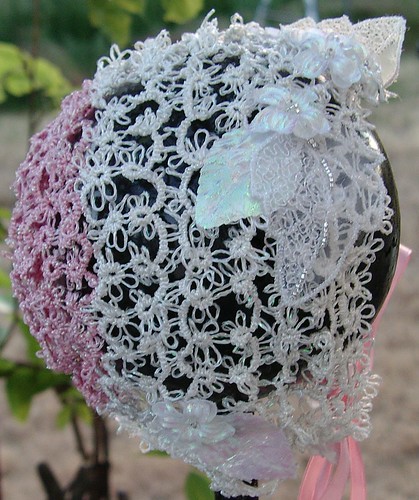
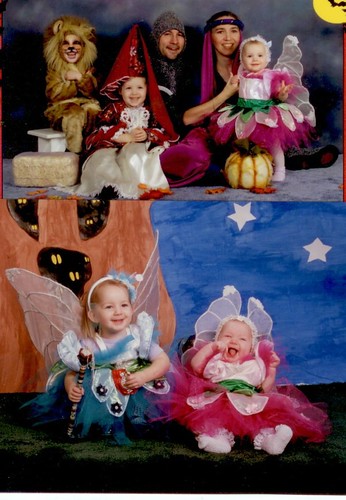
Yesterday in a group I was in on the internet discussing tatting and tatting techniques. I ended up talking about some fairy costumes that two of my daughters have worn that I made many years back. The costume on the youngest daughter in the bottom photo, who is actually my middle daughter, has a tatted bonnet on. Since at that time the class I was going to take for beginner tatters wasn't going to start for one week and Halloween was in three days, I decided to teach myself to needle tat to have the desired look for the cap for the baby fairy. So, in less than two days, I did just that. When I went to class for the first time the other students said, "Why are you here? You know how to tat." My response was, "Yeah, but not very well and not with a shuttle."

At the time I had a book by Nina Libin and really wanted to do some things like hers, but I wasn't skilled enough, so I embroidered beads on the bonnet in stead of tatting them into it. I wish I had been a better tatter at that time because it would have been real cool to have the beads tatted in. In the same breath, I probably would not have been able to finish it on time since I was teaching myself to tat, without much leeway in time for mistakes. I always seem to do things like that. I haven't a clue why I get an idea I want to make and, if it takes learning a new skill, so be it.

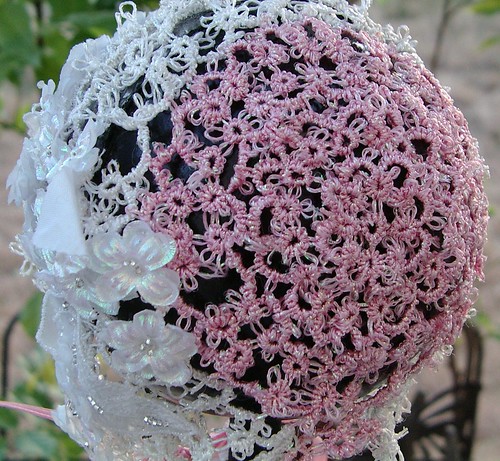
back of flower fairy bonnet

The baby in pink is wearing a costume I designed and created while watching the movie "Everafter" over and over again for months on end. I really loved the wings in that movie that they portrayed as having been made by Leonard De Vinci for Cinderella. Since I had no idea how to make them like they did, I designed and created these wings without a pattern. They are made from craft-wired floral tape and organza, with beads sewn at the tips of the wings and silver ribbon on the veins of the wings, which are also craft wire. The wings have a body harness to keep them from bouncing funny on the body and make them more stable. To make the wings, I had my daughter lay next to piece of poster board and drew my idea of a wing on the board with veins and all. Then I bent the craft wires to this shape and covered them with floral tape, then covered it all with fabric and other items.

The dresses are made from a sort of pinafore concept so the back would be open and allow for the wings to come out. The waist has satin leaves that have, on top of them, another set of leaves that are crocheted individual pineapples made out of rayon embroidery thread. There is embroidery on the hem of the tool netting, too; it's just real hard to see in the photos. That embroidery was also done with rayon embroidery thread. On each of the fabric petals are store-purchased flowers, from the wedding section of the fabric store; each had a beaded center. The bonnet was also rayon embroidery thread. Trust me, it's not a good idea, as a beginner, to give your self two days to learn a skill, make a project and, on top of it, add a super-slick substance that doesn't want to stay put! I also stitched flowers and leaves, both iridescent, all over the bonnet with accents in beads. The bonnet purposely has real long picots on it. I hoped it would make it look more like a flower's center -- a blown dandelion, sort of.

The baby also has on crocheted fishnet tights that had booties for the feet; these were made out of metallic size 10 crochet cotton. I put normal tights on under them because they were way too itchy and rough to be next to a 5-month old's skin. As you can tell, she was happy and didn't seem to mind. A few years later my youngest daughter wore it for her first Halloween, too, but she was much older so the fishnet tights wouldn't work for her since she was almost a year old.

left side of bonnet

My other daughter, the fairy in blue, has a pretty cool wand in her hand that I made using gourd stitch (some people call it Peyote stitch). This was done over a dowel with a bead at the top of it. The wood bead was covered with batting, too, then the bead work done over it. This is something else I taught myself to make (the gourd stitch and brick stitch). Then I did the brick stitch for the petals on the flowers and added streamers of beads.

Please, don't ask me how long it took to make that. All I remember is that I started it in June for Halloween (I take that back. I remember I went to a Memorial Day sale at the fabric store, so it was May). So way too long, in other words. Just so you know, the last thing I made was the bonnet because it had to fit the baby. If I made it too soon, it wouldn't fit the baby when needed since I had to fit it as I made it. The Blue fairy also had bigger wings. She could not sit in her costume because the wings would bend; thus the harness was great since we could unbuckle the wings and off they came, and the rest of the costume stayed intact. The pink fairy's wings accommodated the fact that she could not stand and could only sit slightly, so they went sideways -- more or less up and down.


Right side of bonnet

In the top photo, I also made the burgundy Princess. The previous year we had two princesses -- a blue one and a burgundy one. The other three costumes I purchased because it became too much for me to keep up with the costumes with the number of kids and the details I wanted to put into the costumes.

Wednesday, May 30, 2007

Vintage and Antique

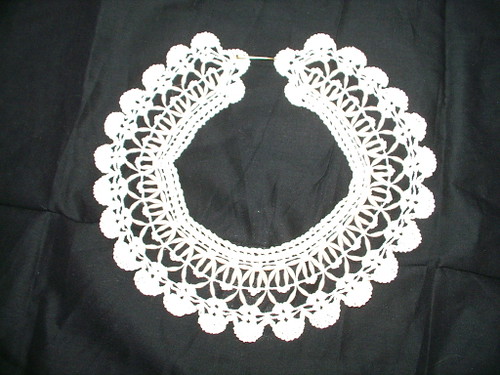
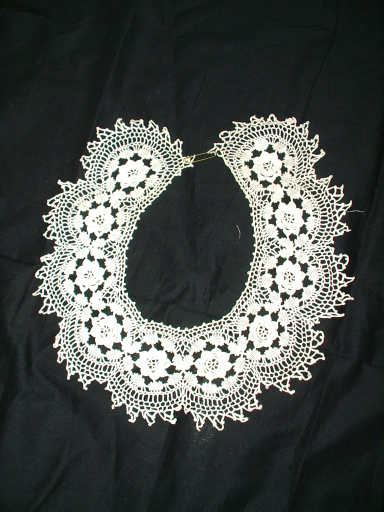
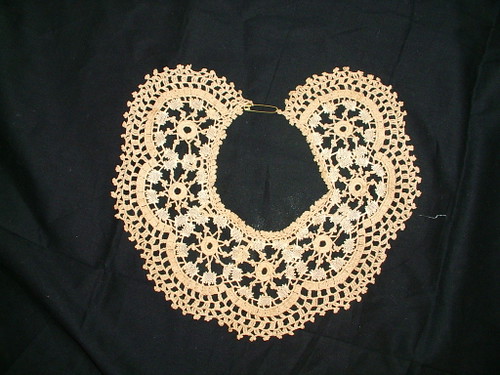
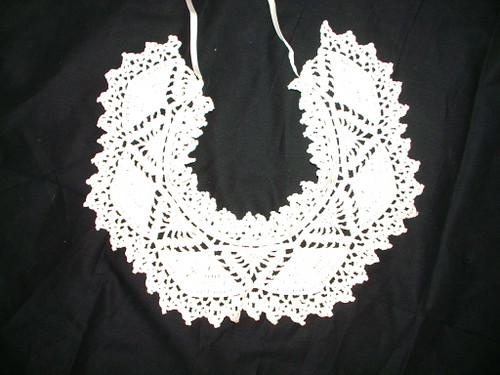
I have a small collection of vintage and antique collars that I have been given and have purchased. The whole purpose of collecting these was not to stare at them and admire them in a drawer, but to use them to make dresses for my children. You see, a collar that is meant for an adult is just the right size to become the bodice on a little girl's dress.

This first four are true antiques and have some very special features to them.
This first one has coronation cord that hasn't been made in over 80 years. Size 10 thread.
antique <span class=

The next two have turtle braid in them that, like wise, has not been made in over 80 years. They are both in size 30 thread. I will also finish them all with the same size thread the collar was made with. If I believe the collar to be antique, the thread used will also be antique. The first also has Irish crochet. The second, somewhere along its life, has been dyed and not very well mind you. I gave it a light soaking; it got about 30 shades lighter, and the water turned brown. This was not dirt but un-set dye. Now it is fine and the color will stay as is.
antique <span class=


The next I believe to be antique, but I'm not sure; it could just be vintage. I lean more toward vintage even though, when purchased, I was told it was an antique. Most people don't realize to be an antique it has to be 100 years old; to be vintage, just 20 or 30 will do.
crochet antique collar
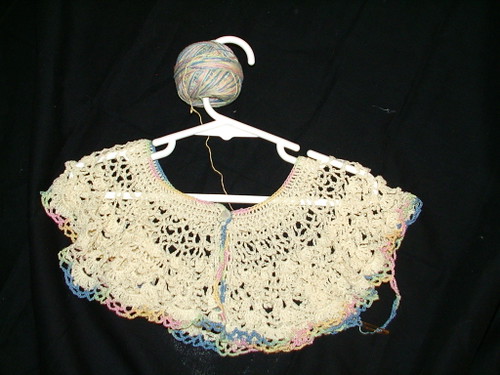
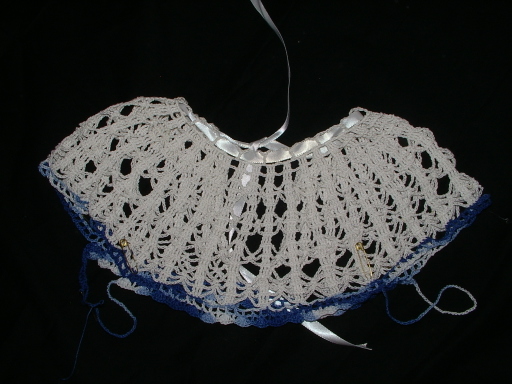
The next two are definitely vintage, and I have started to convert them into bodices for my children's dresses.
vintage <span class=
vintage collar crochet

Monday, May 28, 2007

Tatted Bodice

I was asked in some of my group/ forums what type of things do I tat. I have tatted lace gloves for a baby and a bonnet for a baby (same baby). I am currently tatting a bodice for a child's dress. It is in two different colored threads; one is variegated (a discontinued Manuela thread color) and the other is a discontinued color by Anchor.

Since most of you do not belong to the thirty-some groups I do on the internet, I thought this was probably the best place to post it. This way others could see it, too. I figured others, not just those in my forum/group, might like to see this as well.

When finished tatting the bodice, I will make the sleeves and the skirt. They will be crocheted, then I might put tatting around the hem of both sleeves and skirt. The buttons are mother of pearl.

Just in case you are wondering, I do not have a pattern to give you. I am making it up as I go along which I do for most things I make. It is in size 20 thread.

Saturday, May 26, 2007

Tatting Thrift

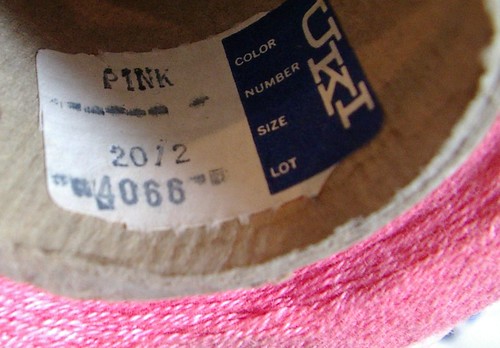
pink thread

I like thrift shopping and finding things I can use that other people toss. This is one of my favorite places to find supplies to make things.

I found this real bright pink thread on a cone a few weeks ago and thought it would be lovely as rings and chains in tatting. It is a real soft thread, so it has a nice drape to it. It almost looks like a full cone of thread, so this will make hundreds of yards of tatted lace.


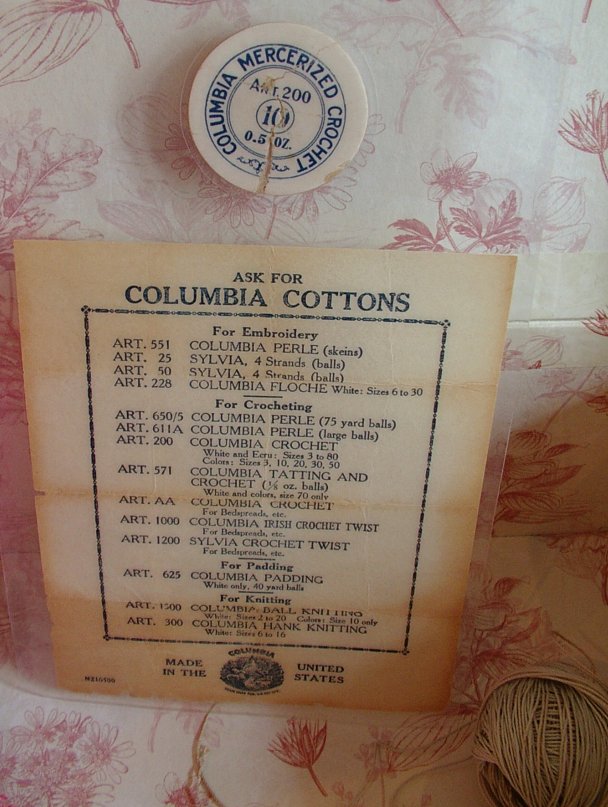
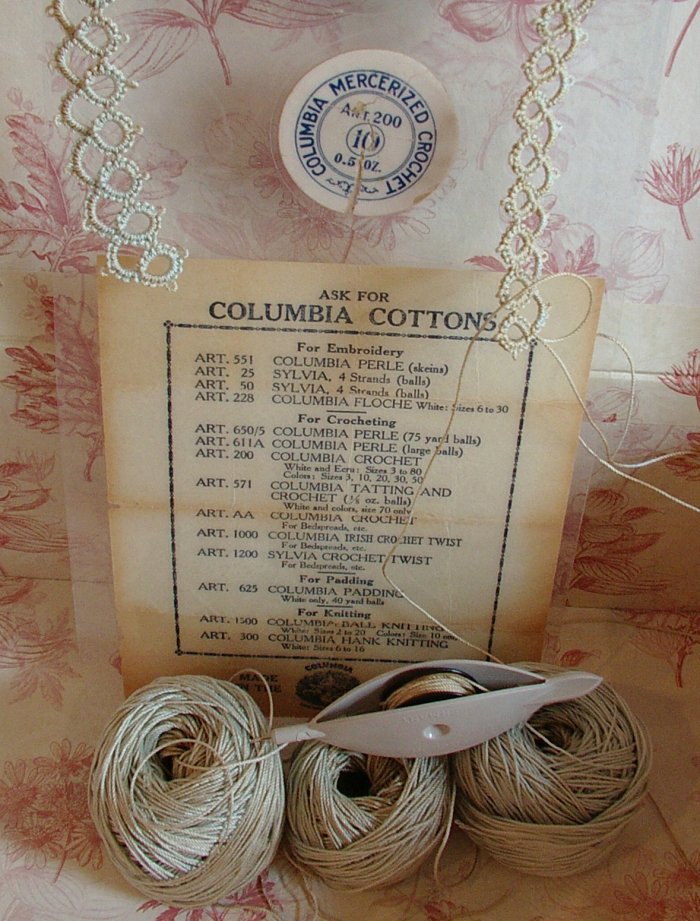
That same day I also found this very old antique even size 10 Columbia thread, pale blue in color; yeah, not exactly what label said. I always love it when I find the original papers still in them. This one had the colors of thread and styles of thread that they sold at that time. Sometimes they have coupons in them for free patterns; of course, you can't get those free patterns any more even if you sent in the coupon.

I like to hard laminate these papers so I can stop the deterioration and keep them and use them as book marks in my pattern books. With this one I even laminated the size cards so I would know what it came from.

The thread was still super strong and could stand up to tatting which can be very rough on thread when closing a ring. It does have discoloration which makes the blue travel from faint blue to a medium brown. I sort of liked that on this. I don't want all my threads that way, but every now and again it's OK. Because this does have a use this way, such as on a primitive doll or prim pincushion, it would look lovely as an accent and the technique used, tatting, would work nicely with those things too.

tatting I am making

If you are into tatting check out the 25 motif challenge group and check out the tatting group on flickr. I joined the tatting challenge with this post this is number 1 and 2 out of 25 things/motifs I am to make in the next year.

Pattern for above just copying an old piece of lace.
Pattern is chain = 1 picot term four
ring = 3 picot term four with joins on 1 and 3 picot.
DO NOT USE THIS PATTERN TO MAKE THINGS TO SELL FOR PERSONAL USE ONLY!!!!

my photos on explore

Friday, May 25, 2007

Sale Sale Sale Sale

Vintage Threads Inc. is having a sale
Memorial Week; it runs May 25 (today) thru June 4.
When it asks for a code, type in Memorial
and you will receive 20% off merchandise.

Have a nice weekend!
Sunshine

Sisters / Friends

The last few days have been full of school recitals, dance festivals and sick kids. My kids' school has a habit of doing these two things (recital and festival) every year during the last two weeks of school.

My youngest was feeling left out, so half way through the performance she went to sit with her older sister's class. This made her feel a little better; she was starting to get sick. It is always nice when, for a split second of time, you see that your kids truly love each other. This isn't to say that they don't show it all the time; it's just that I don't always get to notice it like I should.

So while I was behind them watching the second oldest daughter dance and perform, who is just getting better from being sick for the last three days, I noticed this picture happening. Just could not resist the chance to catch that moment in time.

Then Mom takes a picture and the older sister notices. So she tells little sis to turn around for a photo. Well little sis doesn't want her photo taken. So big sister tries to make her look and the moment is gone; aren't sisters great!

I have two sisters myself, and I remember my big sister taking care of me and teasing me, and it is all good. She is still someone I look up to even as an adult. Our lives have taken different turns throughout the years, but I always know we are there for each other.

My little sister was the one I was teasing and taking care of as a child. and my older sister took care of our little sister when she was a teenager. It is great to see that my children are learning to pull together, too, and still have fun with being sisters and best friends.

Thursday, May 24, 2007

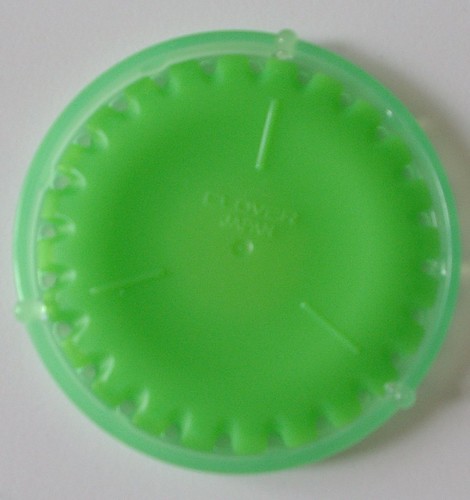
30 mm Clover Yoyo Maker " The Green One'

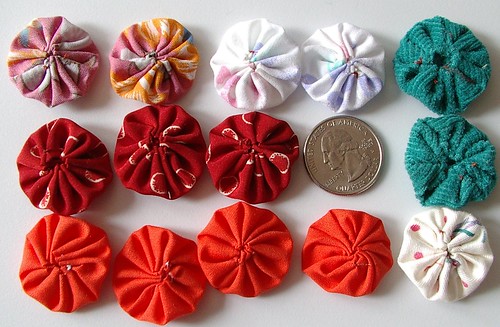
I was given two clover yoyo makers as gifts from my MIL as a birthday present. I didn't really know what size they would work up as. Today I got a chance to sit down and play with it, finally. I wasn't sure if it was going to be to gimmicky or real cool. I think it is cool; it allows you to make a quarter size yoyo super easy. This isn't easy to do in the hand because the fabric flips and fights you. In this tool, it lays real nice and still. I also tried it with other fabrics. If you wanted to work in silk or satins or other slick hard-to-hold fabrics, it is great. Also I tried corduroy; it did work, but was a little more difficult to get the gizmo to lock as it should. But once in the tool, it worked great, too. Just formed a little larger yoyo than cotton or silk did because the center hole couldn't get as tight due to the bulk inherent in the fabric.
yoyos made with clover 30 mm tool
Clover even makes a size smaller than this in circle form and two bigger. I am so excited to get the smaller one I am hoping it makes dime or nickel size yo-yos. How cool would that be. My friend Seiko makes them this small by hand without a gizmo; I'm not sure how she does that, but I think I will, too, once I get the smaller size. My friend Buttercup in Japan said she was sending me some, all the styles and sizes clover makes. I am so much more excited now that I got to play with one, anticipation for these to come is going to drive me a little crazy. I was excited before my playtime; now I am more so, to say the least. Those she will be sending are flower and heart shapes and more circles. Yes, many more things to make with yoyos.

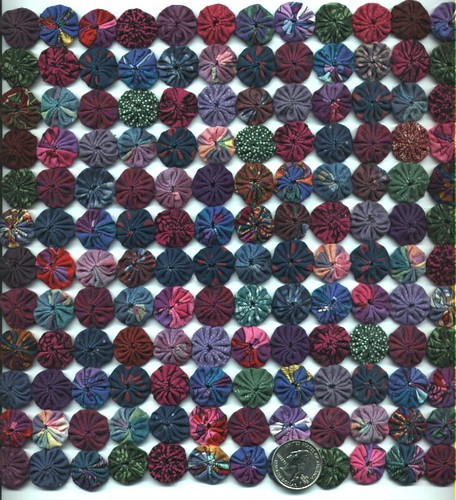
Below is Seiko's Quilt; if you look closely, you can see hers are smaller than a quarter. The ones made with the second smallest clover tool are just a little bigger than a quarter. This was a gift from Seiko about nine years ago.

Tuesday, May 22, 2007

JuSt FoR fUn PrIzE gIvE AwAy

So, I thought because I missed giving out prizes previously at my 100th post and 200 post (and same goes for the 300th post), I am going to do a drawing for this quilt that I just did the tutorial on. You have to post a comment on this topic. The drawing will be held on July 4th in celebration of the birth of the United States of America. You do not have to be a US citizen to play this game. If there are over 368 comments then I will add more prizes. Let's see how many posts we can get. All items will be something made by me, Sunshine. If more items are added, I will post their pictures. The idea is to have multiple winners to make up for the other times when I didn't do a give away. Please leave some way for me to contact you because blogger doesn't make it easy to contact people who leave comments (such as a flickr address or blog address). Only one comment per person, please. So tell your friends; more people equals more prizes.

My blogiversary is on July 5th, so winners will be announced on that day, and I might do an added surprise on that day as well.

I decided to change this; I will add a new prize every 100 comments. I will do something different at comment number 368. If you are wondering why that number, that is this post number.

Prize #1
front
Prize #2 ?

Late Mother's Day swap items

Group #1
  1. sunshine: knitted and crocheted washcloths and an angel coin
  2. Mikki: handmade bookmarks; she ran out of time or she would have embroidered everyone one
  3. celebrate 2727: soap and either bath salt or body spray (hasn't come yet)
  4. Candismom: travel kleenex holder
  5. Buttercup: flower candles, magnetic dominoes, chop sticks (she lives in Japan)
  6. ktknits: knitted headband
  7. cinnamongirl: rag doll
  8. kathie: decorative little screen door and handkerchief
  9. mommom: wood box full of chocolate
  10. suzyhomemaker: quilted picture frames
Group #2
  1. sunshine: crochet and knitted wash cloths and an angel coin
  2. levisgrammy: hanging pillows
  3. willowtreecreek: java cozy
  4. herbquilter:soap and salve
  5. tina michelle: handmade rose pin
  6. naomi michelle: handmade tomato
  7. knewslady: Scented candles
  8. firemama: variety of items -- wall plaques, sachets, apron, pin cushions, hand-decorated ink pens with flowers, receipe box...
  9. smoothiejuice:handmade Japanese-style stab binding books
  10. beckels: 2 pails and tea

Copyright/permissions info

I like to share on this space my ideas and projects.
Please don't take ideas or photo and claim them as your work.
I am always happy to have new links to me.  So if you like something just link back to me and give the source some credit thanks.
Any questions? just ask. I am happy to work with you if you need something
Creative Commons License This work is licensed under a Creative Commons Attribution-Noncommercial-No Derivative Works 3.0 Unported License. 2006-2019 Copyright Vintage Threads Inc. All content and images.

LinkWithin

Related Posts Plugin for WordPress, Blogger...