[google6a7b7d93c7100df5.html] Sunshine's Creations.Vintage Threads Inc.com: February 2013

friends and followers

If you like my blog and the free patterns and tutorials and want to say thank you
I have a wish list on ravelry of patterns (click here)
I would like to make.
Thank you in advance for being kind and saying thank you back.

Love Sunshine

Search This Blog

Wednesday, February 27, 2013

Capes for the play

frontside with lining
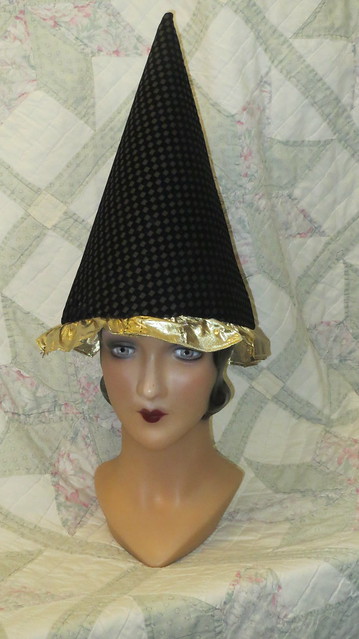
Because my brain is tired from sewing so much I decided I would go to an easy sewing project capes.  There are about 5 capes in the play Aunt March has 2, Marmei 1, and Jo 2 can't think of others at the moment.  So I think that is all of them I have to make.  Which is not to say I have made all of them yet.  I have made 3 have the fourth one cut out and still figuring out the 5th one what I want to do for it....  Oh yeah! just remembered 1 more, funny I already made it and I forgot that Meg has one too when she is a witch.

hood
front with hood pinned up
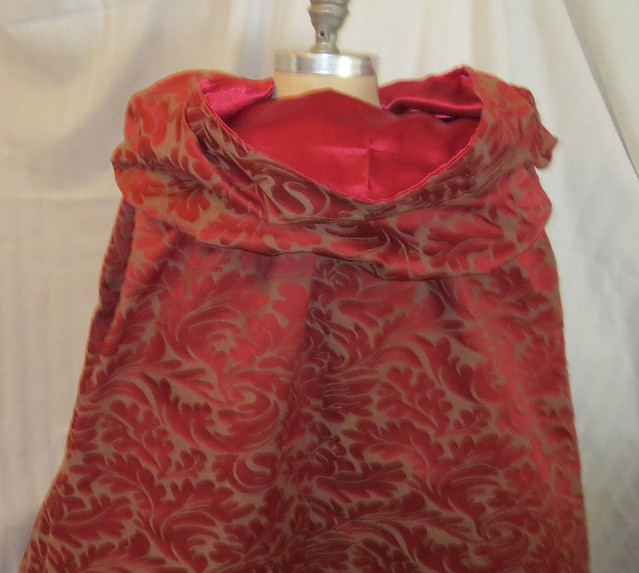
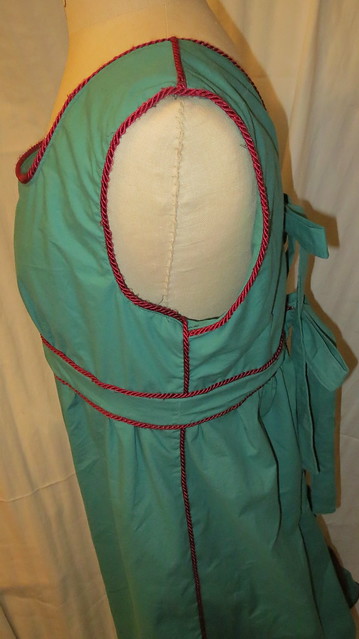
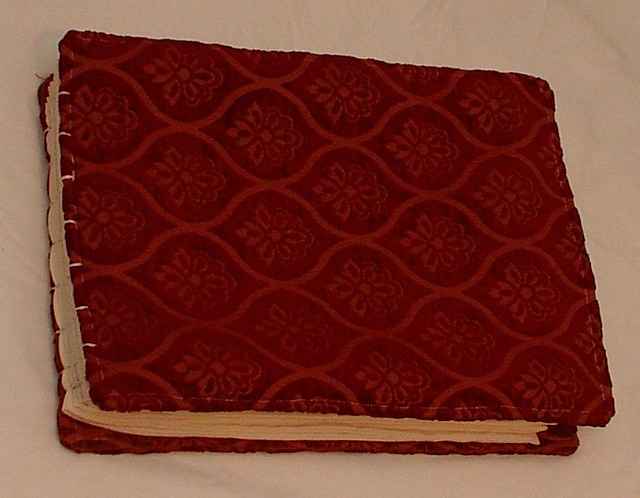
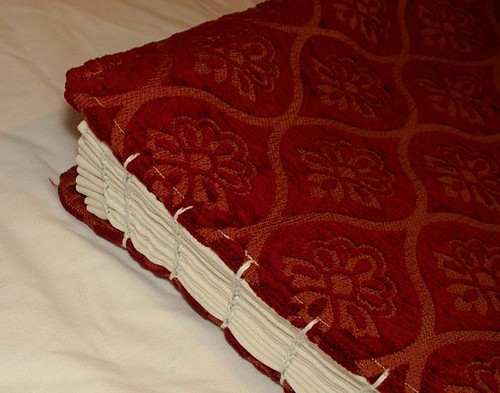
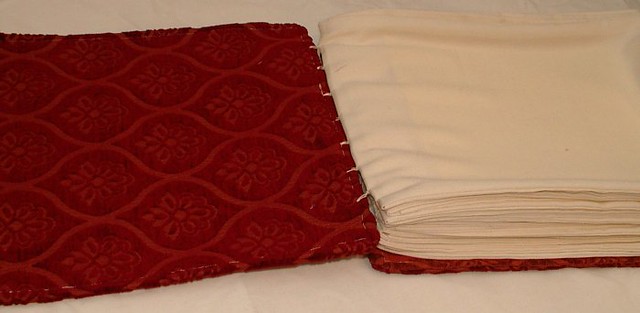
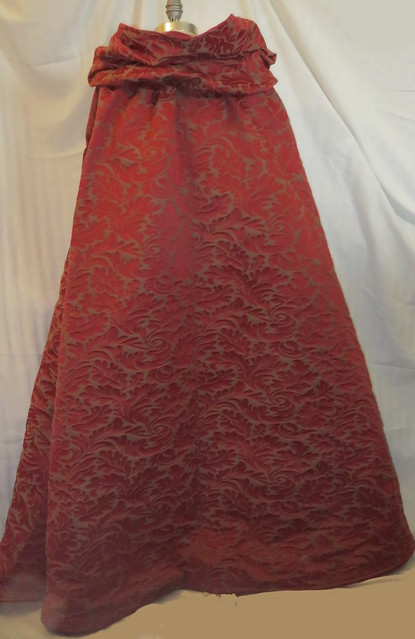
This first one above is Jo's to wear during a winter scene.  The only embellishments I used was cording at the hem for strength in wear and pretty metal hook and eye closures. I figured the fabric itself was enough, especially with a shinny satin lining.  Both of these fabrics and the cording are the same ones I used on my daughters Shakespearean Halloween outfit this last October.  Yes these are scrapes and yes I still have more of both to make other items in the future.  This cape is reversible if I want it to be just not sure who would want shinny satin on the outside of a cape like this.   She also has a hood on her cape the only one in the play to have a hood.   Jo sort of has a theme color of red in the beginning of the play to show she is strong and powerful and more dominate in personality than most females of the era as the play goes on her colors become more subdued as she learns life has trials and love.  But her clothes still lean towards the masculine side of fashion because she is still a woman doing a mans career in a day and age when women did not.
 jo's cape
backfront
black and red
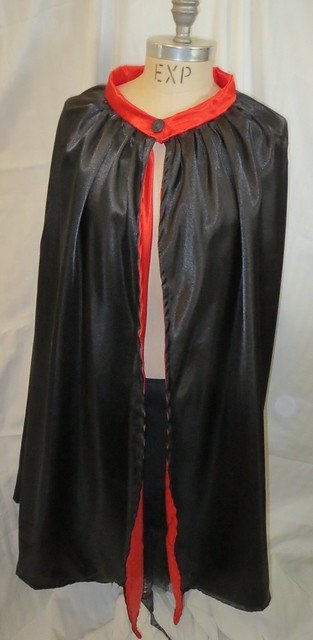
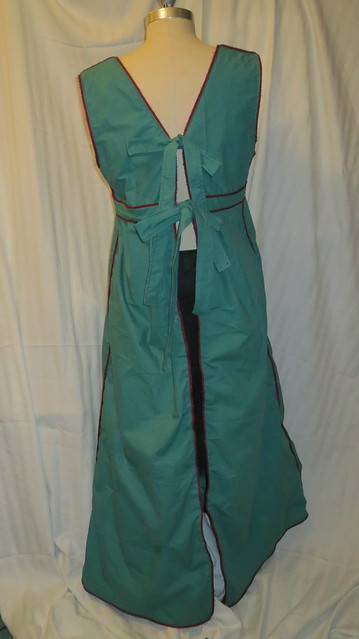
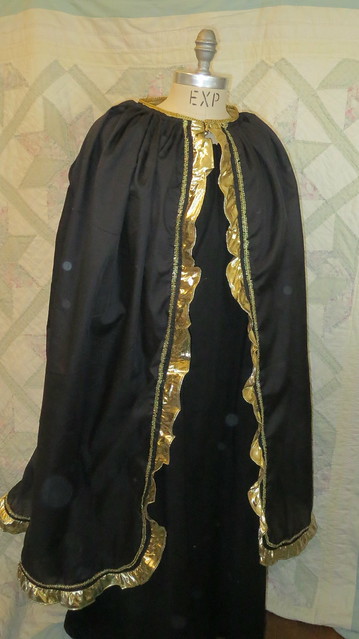
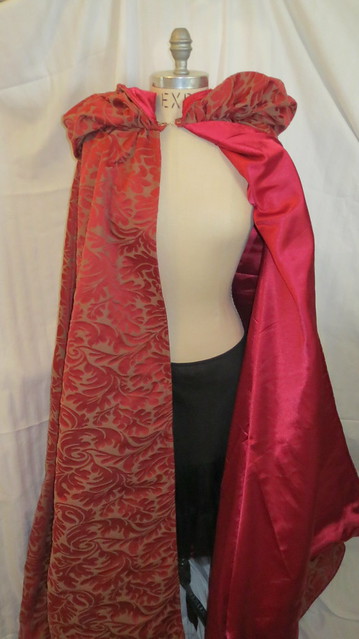
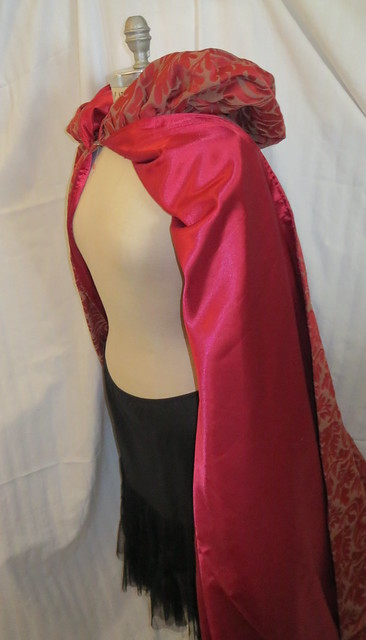
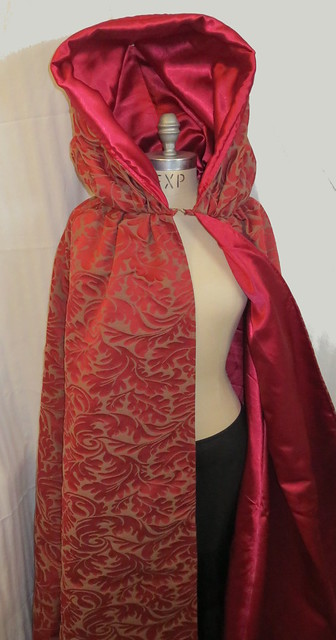
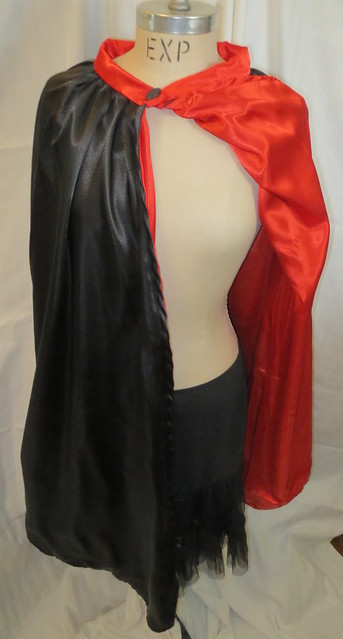
This second one is also Jo's in the play when she is acting as Rodrigo in the play within the play.  The character is supposed to be over the top with a shinny cape that is lined bright screaming red.  I have images of Dracula and phantom of the opera and other old sci-fis going through my head with this one.So this was born the button closure is antique Jet and is period to the play.  The red satin came from a set of new sheets still in the package I found thrift shopping around valentine's day.  Which I bough specifically for this purpose $2.00 how could it go wrong.  The black satin is new for the play but bought with a coupon to make it 40 % off.


red lining


Mrs march's capeblack lining
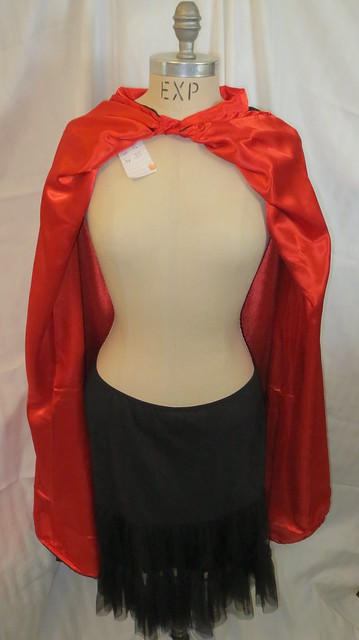
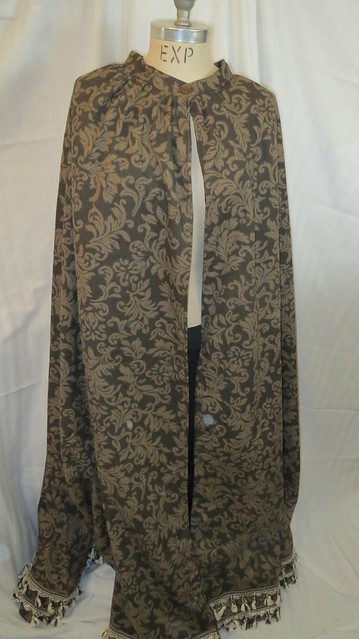
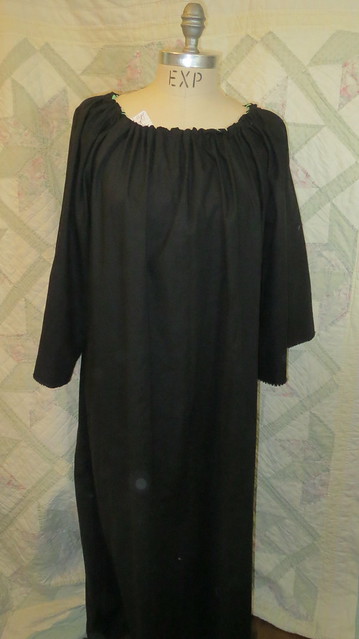
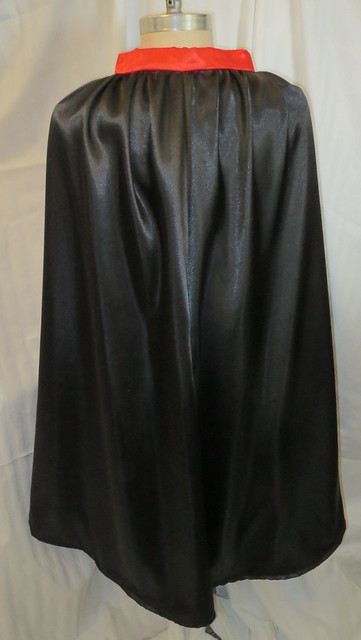
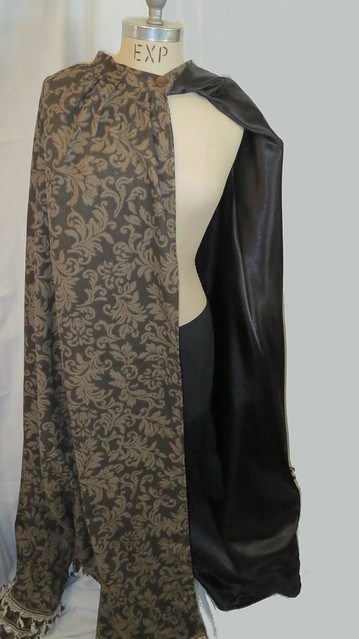
The last cape for the day is Marmei's for when she come in at the beginning of the play from the cold winter outside.  This is during the war so dark colors and a somber look.  Only trim is fringe around the hem a simple brown button and no hood and simple black lining same used in the other cape above as the outside fabric.  All three capes are reversible.
back with fringe at hem


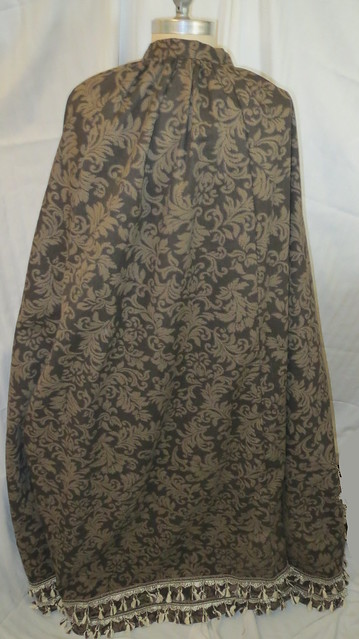
On a note from my husband.

Saturday, February 23, 2013

Hanna's last apron

IMG_2418
IMG_2424IMG_2420This is the last apron for the character Hanna.  She still needs two dresses made for her.  This apron was sort of a pain to make I think I have not had enough good sleep lately becasue of all the sewing.  I tore out at least 10 different seams at least 3 to 5 times each.  It was truly a simple pattern I just could not think straight while sewing.  Once again I used a sheet I found thrift shopping to make the apron.

IMG_2422 
IMG_2423IMG_2421
The red lines are upholstery cording.  I like the two tie closure for the back it is a little different than most aprons.  The original pattern did not have cording or anything in the seams but it was too plain for me.  So I added the cord but still think it has a simpleness to it that I like.

Amy's blue apron...and petticoat

pockets
This does not look like much by itself but with the blue dress that has a lot of details I thought it would be over the top to add a lot of detail to this apron. amy art apron to wear with blue dress
back and sidepocket detailsThis is supposed to be Amy's Art apron to keep her other clothes clean.  So not really supposed to be a fashion plate item.  It is blue gingham with blue rick rack trim on pockets and three different laces one edging all over the place.  An insertion on the pockets that has rick rack woven through it.  The on the hem is  a longer nicer lace. c
sideSorry I had a hard time photographing this apron.front


Also I promised to show the petticoat hem of Amy's blue dress.  Blue lace that I wove double sided purple satin ribbon through and antique rick rack trim that is blue and white.amy's petticoat

Thursday, February 21, 2013

Amy's remake of Meg's dress

 back
In the play to show time passing there is a dress that both the characters Meg and Amy wear.  Meg's dress has long sleeves and a high collar and a different belt I showed a little bit of it a few days ago with Mr. Laurence's scarf  I will try and post the finished dress tomorrow.   But Amy has her own style so when she gets the hand-me down she remakes the dress into this.  A short sleeved fancy belted lower neckline dress.   The dress does have a little too wide of a neckline so I am going to go back and rework that area by adding prairie points.  Will make a post about that when it is redone. Which should make the area around the neck less wide by a few inches and more comfortable for the actress.
sleeve
waist bandSome detail points of the dress I have used lots of different trims in the hopes of it looking like the March's like to embellish their clothes but because of finances do not have the money to buy trims so they are using up little bits of this and that to make their dresses pretty.   If you look in the picture just above you will see 7 trims just between the sleeves and waist and there are about 7 more on the dress. So I got my little bits of this and that and used up a lot of scrapes that are not big enough to make any one project but all grouped together work just fine.  I also could not find a striped fabric I liked well in my stash or at the store so yes I reverted to a bed sheet again for the striped fabric.  I think it came out well.  Since the character Amy is all about things fine and such I gave her hints of lace around the neck area.
detail neck


frontfrontI also used lots of upholstery trims again.  Around the neck, sleeves and hem of the dress ( hard to see in these photos sorry).  Very grateful for my friend who gave me 8 totes of upholstery trim at the beginning of the school year perfect timeing for this project.

I forgot to take a Epictetus of the petticoat with this dress it has wide blue lace on it and antique blue and white striped rick rack. I will try and remember when I take pictures of the new neckline when I get it done.

update remade neckline to not be so wide.  It was difficult to sew through 16 layers of fabric and trims with two trims being thick upholstery trim and one being heavily gathered lace ...  So it did not come out exactly as pictured in my head but I must go forward to other dresses and this will do for now. In case you are wondering those are called prairie points.
remake of neck line

Wednesday, February 20, 2013

The witch's gown...for the play within the play

witch hatThere is a play with in the play of little Women.  In that scene Meg is a witch, Amy is a princess, and Jo is Rodrigo the hero.  This is the outfit for Meg to wear in that part of the play.  The costuming description for this out fit said " long black cambric witch's cloak with gold paper trimming -- black peaked hat of same".  Very vague description so this is what I came up with.

The gown my middle daughter wore at thanksgiving time as part of a pilgrim costume for school.  The hat and cape I made yesterday.  I did not like the lack of durability of gold paper trim, so gold la-may and gold braid are employed.  I also used a scrap of checkerboard like fabric for the hat to add texture to the outfit.  The gown is opaque but the cape is actually pretty sheer hard to  see in these photos.
witch cape
I wanted the hat to have the feel of an over sized dunce cap that was popular to use in schools back then. The core of the hat is poster-board.  The hat is fully lined with the same fabric I made the cape out of.
witch gown
Sorry for the bad lighting.

Tuesday, February 19, 2013

Assembly: Coptic Sampler Book

sampler book cover
A very long time ago i showed a sampler book I made I made this tutorial and put it in draft form and forgot it was here.  Looked at all the drafts I had for my blog that I did long ago and realized this one was complete and never poster for the last 5 years.  Not sure how that happened but enjoy this new but old post.


Bookbinding
Supplies for link stitch book (aka coptic book)
  • Finished covers: 
    • wood :plained, sanded smooth, with holes drilled in them
    • davey board :covered in decorative paper
    • fabric : sewn
  • signatures :Pressed and punched pages (pages in a group are known as signatures)
  • Curved or straight needle
  • Bone folder or iron (if it is paper, use a bone folder; if  it is fabric, you can use either a bone folder or iron)
  • Scissors
  • thread for sewing ( has to be strong can be waxed)
  • Teasing needle (or awl)

Picture 1
  • Shows how the first signature is sewn to the cover.
  • To tighten stitches use your needle to pull at the stitches.
  • Always make sure you have enough thread to sew on covers.
  • Never add thread when sewing on the covers, only add on the inside of a signature.


Picture 2
  • If you have been careful not to get your threads twisted, your book should look similar to picture 2.
  • If you have been sewing right to left, instead of left to right, all of the instructions are mirror-opposite.
Picture 3
  • Hold the loop from the kettle stitch hole to keep it from pulling through, and pull on the first stitch (out of the fabric hole) to snug up the slack inside of the signature.
  • See picture 3
Picture 4
  • Then pull on the left side of the loop stitch so that the first stitch pulls up snug.
  • See picture 4

Picture 5 A and 5 B
  • Pull the loop stitch snug by pulling the second stitch up out of the cover hole as in picture 5A or 5B
Picture 6
  • Pull the rest of the stitches snug in the same manner.
  • The loop from the kettle stitch should still be there.
Picture 7
  • When the first gather and the cover have been sewn together, it should look like picture 7.
Picture 8
  • Check between the cover and the first gather .
  • The thread should look like picture 8 and the outside should look like picture 7 with the first stitch and the second stitch lying next to each other.
  • If the stitches are twisted over each other, you should undue them and re-sew.

Picture 9
  • Press the thread into the fabric with the board folder after you sew on each signature.
  • The link stitch is used to sew the signatures together.
  • The basic pattern is shown in picture 9.
  • The links are sewn in the opposite direction of the sewing direction

Picture 10
  • Picture 10 shows how to sew the second signature onto the first one.
  • The link stitches go between the fist signature and the cover.
  • The thread comes out the kettle stitch hole of the second gather and sews through the loop in the kettle stitch hole in the first signature.
  • The tail end of the thread can then be pulled snug, to pull the loop snug, as shown at the left of picture 10.
Picture 11
  • Check again between the cover and the first signature.
  • The link stitch should be only around the bottom of the first and second stitch as shown in picture 11.
  • It should not be sewn through the loop stitch, or any of the threads.
  • When sewing onto cover, it is a good idea to part-way open the cover as you sew the links onto it to avoid sewing through any previous cover attachment stitches.
  • There are fewer problems sewing the rest of the link stitches.
Picture 12
  • Sew on the third signature as shown in picture 12.
  • The link stitches are sewn only around the previous gather.
Picture 13A
  • In picture 13 A it shows the kettle stitch, sewn from either end of the book.
  • After the third signature, a kettle stitch is sewn, and after every signature for the rest of the book.
  • To sew the kettle stitch, pull the thread toward the cover center (A on figure 13 A)
Picture 13B
  • Point the needle between the two previous signatures for example, if you have just finished sewing on the third signature, your needle goes between the first signature and second signature (see right hand side of figure 13A) or, if you have gone on and finished the fourth signature, the needle goes between signature 2 and 3 as in picture 13 B.
  • The needle always points into the book.
  • The needle goes under the previous loop joining the previous signatures and over the thread that is pulled toward the base of the book.
  • Pull your needle straight up.
  • Do not go back under any thread.
  • You should have a loop that is sewn through

sampler book spine


Picture 14

Picture 15

Picture 16
  • tie off and cut thread


sampler book inside

Copyright/permissions info

I like to share on this space my ideas and projects.
Please don't take ideas or photo and claim them as your work.
I am always happy to have new links to me.  So if you like something just link back to me and give the source some credit thanks.
Any questions? just ask. I am happy to work with you if you need something
Creative Commons License This work is licensed under a Creative Commons Attribution-Noncommercial-No Derivative Works 3.0 Unported License. 2006-2019 Copyright Vintage Threads Inc. All content and images.

LinkWithin

Related Posts Plugin for WordPress, Blogger...