
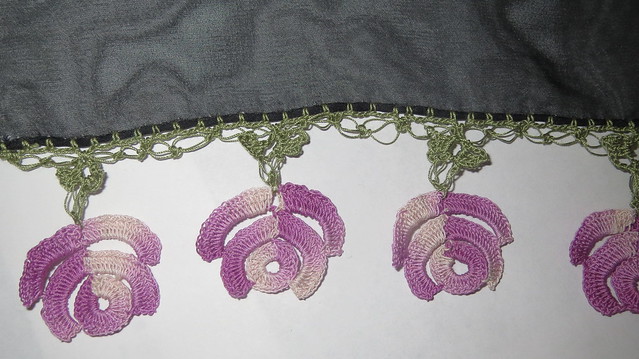

I am using size 30 crochet cotton for mine on a simple black organza scarf that belonged to my grandmother. Traditionally this would be done with either silk, 100 % polyester thread or 100% nylon thread. If using thread just hold enough strands together to get to the thickness of size 30 crochet thread as it is hard in the USA to find the correct supplies to do it traditionally if you are lucky enough to know where to get the correct supplies please leave a comment/ message here so others can do it that way thank you.

Free pattern in the read more section
**If you like my blog and the free patterns and tutorials and want to say thank you
I have a wish list on ravelry of patterns I would like to make.
Thank you in advance for being kind and
saying thank you back.
Love Sunshine
But please do not feel like you have to**
Supplies
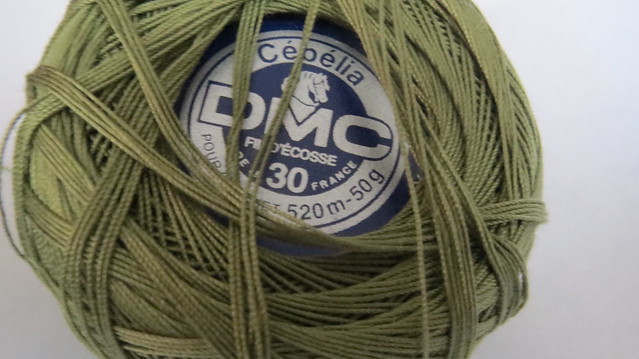
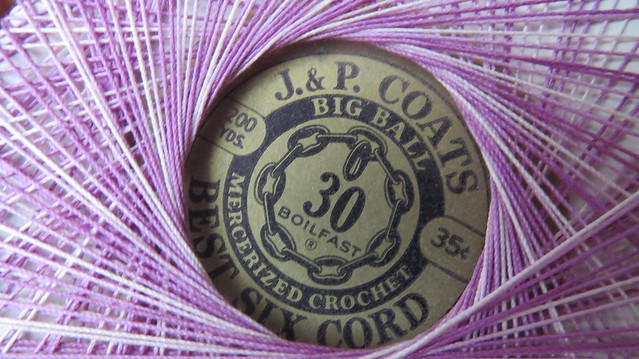
- 2 colors size 30 thread
- 1 green for stems and leaves
- 1 color for roses
- crochet hook size 14 steel crochet hook
- 1 nice scarf to edge (mine was my grandmothers)
- sc =single crochet
- dc =double crochet
- s.k.= solomon's knot
- sp/ sps = space / spaces
- slst = slip stitch
- ch = chain
- sk = skip
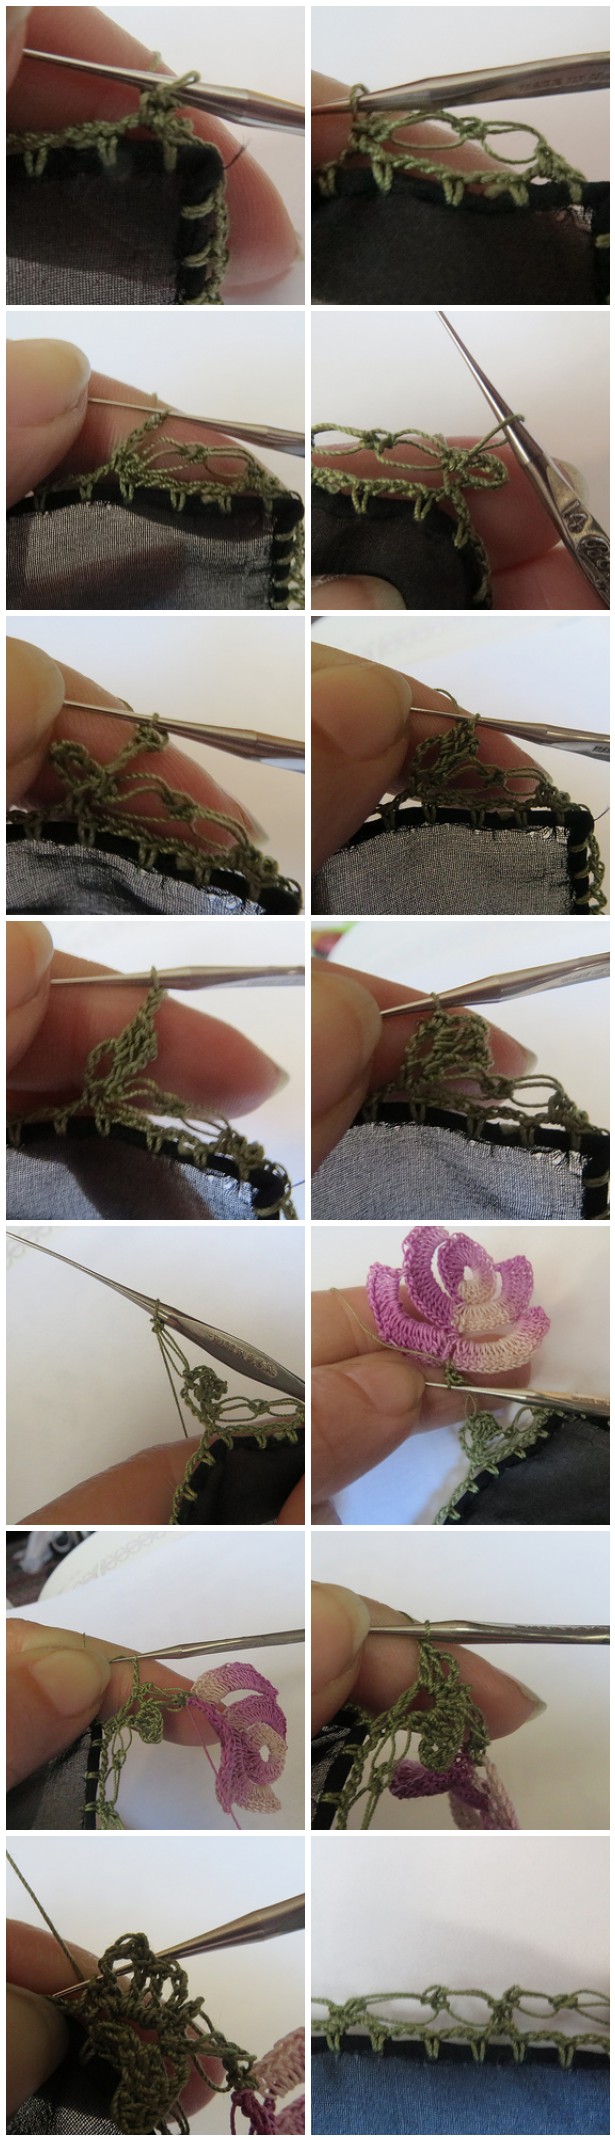
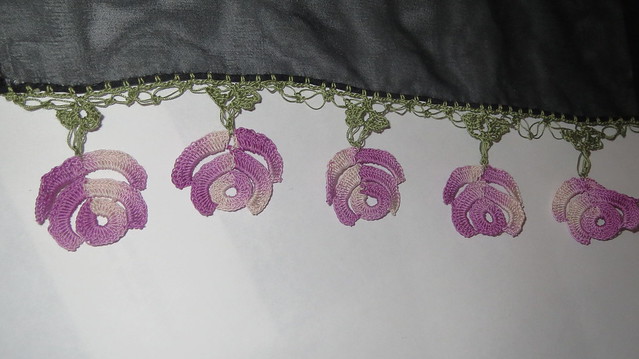
First start with roses make as many as you think you will need to go around the scarf make a few extra encase you miscalculate. You can use the extra on a bracelet, a set of dangle ear rings, as embellishments of other projects. You could also save them and as you other projects save all the left overs and make one with lots of colors of roses. If you don't make enough you will just have to make a few more at the end and add them in. either way works. Nice travel project as the roses do not take long to make and take almost no thread to make them either. My repeat is about 2 inches (do a swatch so you know your repeat) I will be expecting 13 per side on mine so I will make 54 roses with 2 extra so 56. Work all chains tight you want your stitches compacted together.
- ch 10 close ring with slst

- (center of rose)ch 3 and place 24 dc into the ring join with slst to the top ch.

- (1st petal)chain 10, sc into the 9th dc from hook ch 3 turn, place 20 dc into the ch sp just made, ch 3, slst into the same sp as the dc's
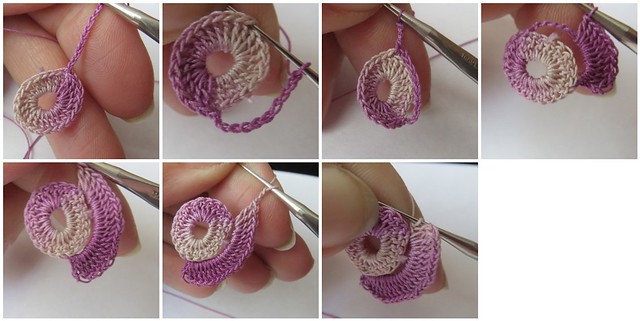
- (2nd petal) ch 10, sc into the 9th dc from hook (opposite the first one) ch 3 turn, place 20 dc into the ch sp just made, slst into the into top of the ch 3 from petal 1
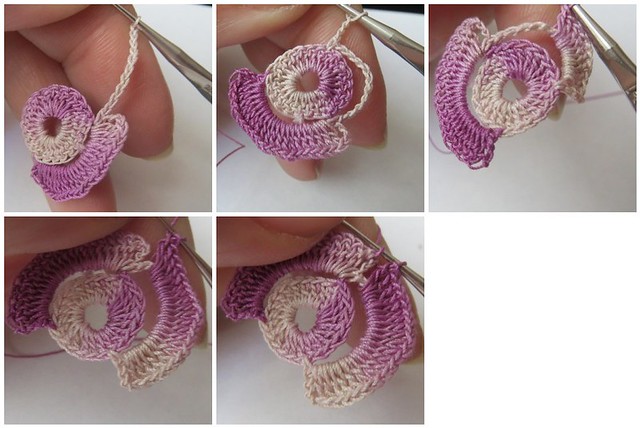
- (3rd petal or leaf if you want to change color) ch 10, sc into the 12th dc from hook ch 3, turn, place 20 dc into the ch sp just made, ch 3, slst into the same sp as the dc's
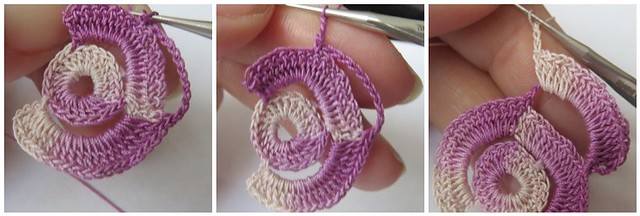
- (4th petal) ch 10, sc into the 12th dc from hook (opposite the first one) ch 3 turn, place 20 dc into the ch sp just made, slst into the top of the ch 3 from leaf 3
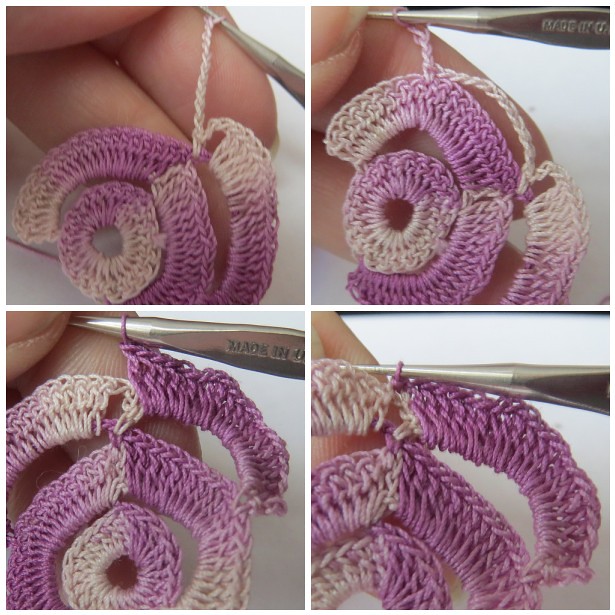
Now go to green (if you have questions look below at images they are in order)
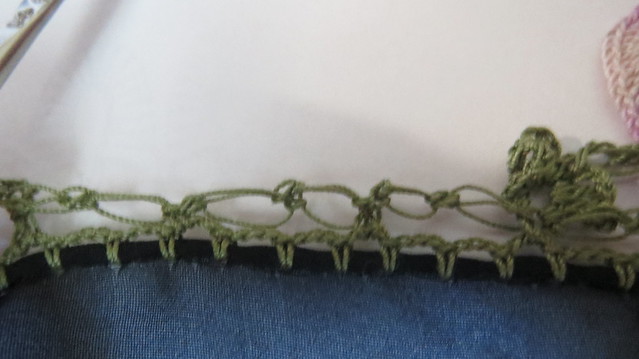
- join thread to fabric *1sc, ch 3 (creates ch 3 sp),* repeat as many times as need to go around scarf end slst into 1st sc, and into next ch 3 sp
-
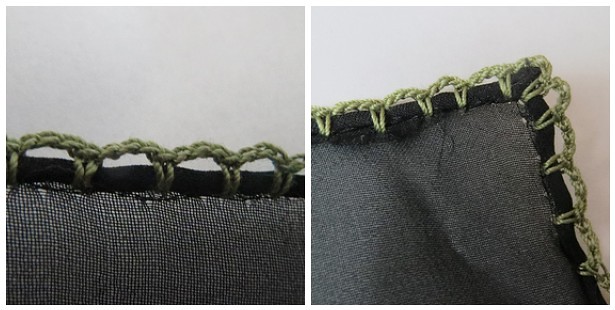
- sc in sp, 2 s.k.,sk 2 sps, sc in next space, * ch 6 (turning work), slst into back of last sc made ,(turn work back) ch 4 slst into 3rd ch, 2dc in ch6 sp,ch3, sc into ch6 sp, 1 s.k., sc into base of a rose, s.k., sc into ch 6 sp, ch 3, 2 dc into ch6 sp, ch1, sc into top of last dc made,ch 3,sc into ch 6 sp, slst into sc at base of ch6 sp, (2 s.k., sk 2 ch 3 sp, sc into next ch3 sp)3x total* repeat around entire scarf end with s.k and a slst into the top of the first sc. cut and finish threads if using polyester or nylon that means burning the tips of the thread. If using cotton weave in tails.

When I follow the photo links, the site says I do not have permission to see the pictures.
ReplyDeleteyes that is true they are supposed to only be visible on my blog not in my flicker account. So if you want to see them here is the place. they are marked private on flicker
ReplyDeletethank you! These are beautiful
ReplyDelete