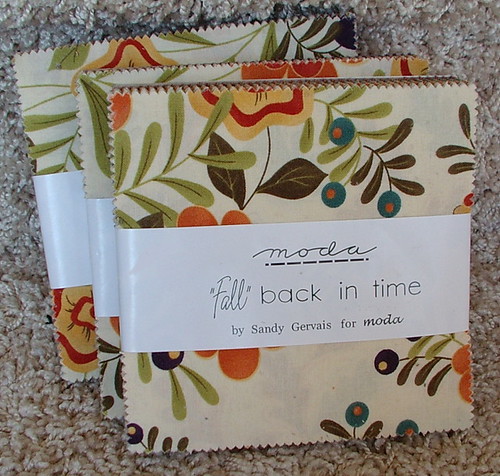
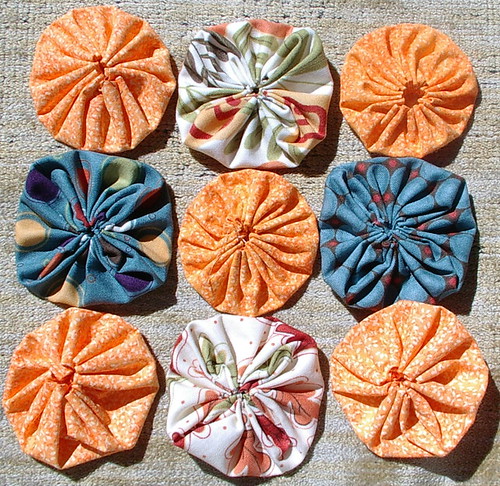
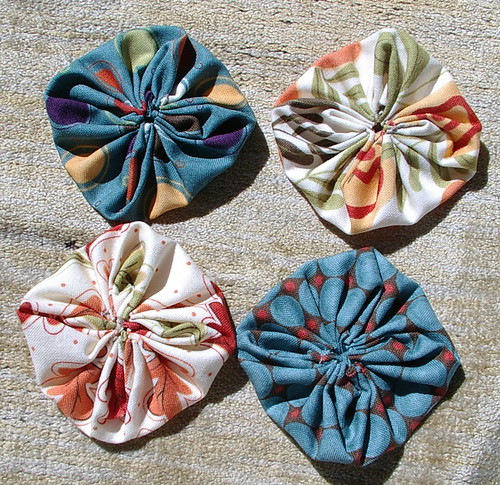
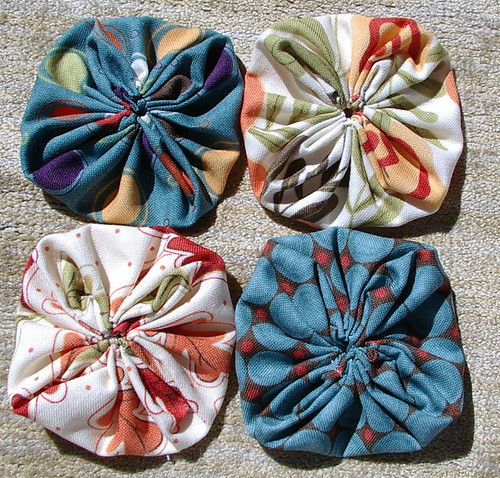
So you want to know what I do on a day when I have over 100 degree temp I make a yoyo tutorial. So now you know why I was able to do this other wise I would have been helping out at my kids school. Oh well I hope I feel better tomorrow as this was a miserable day. If you are cutting your own instead of buying a charm pack these are 5 inches square.
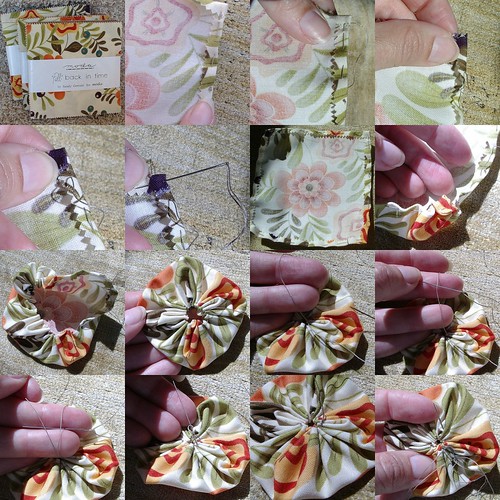
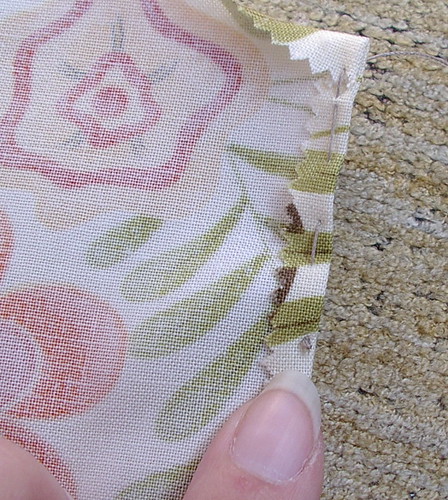
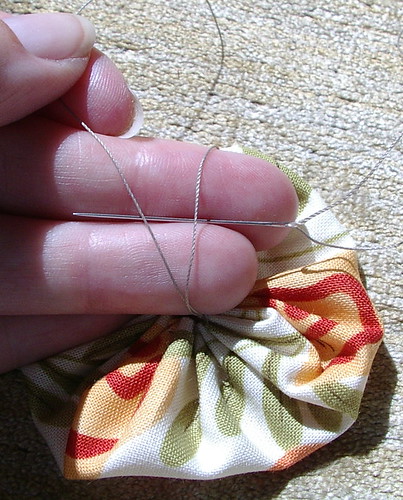
- Thread and knot needle place about 1 to 2 inches from corner with 1/4 edge turned down do a running stitch two corner flip corner down and continue around square do not back stitch at corners or you will not be able to close your squared up yoyo.
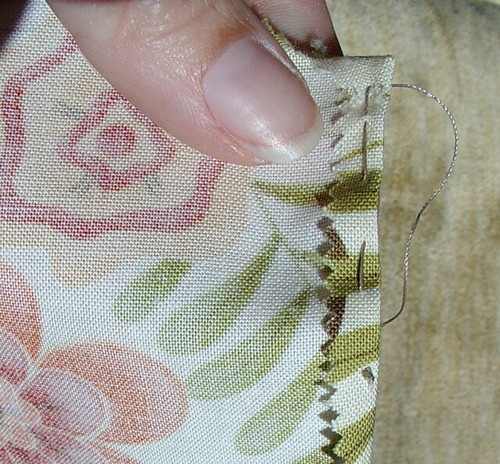
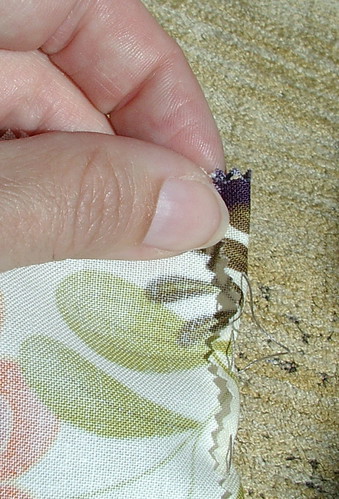
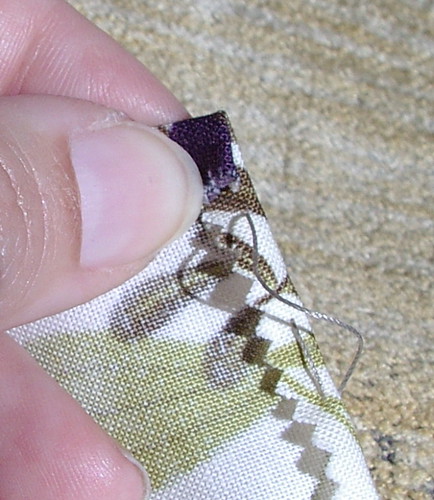
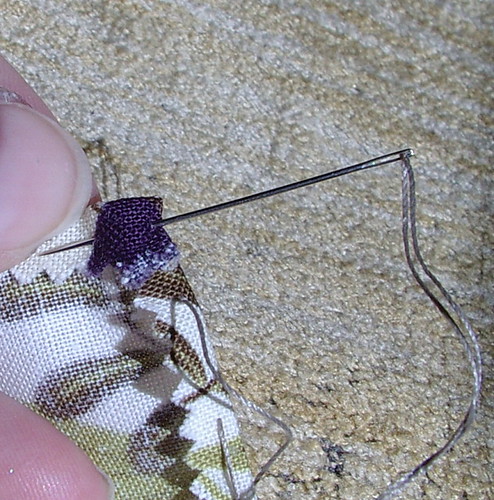
- Draw up thread carefully so as not to get knots in your thread.
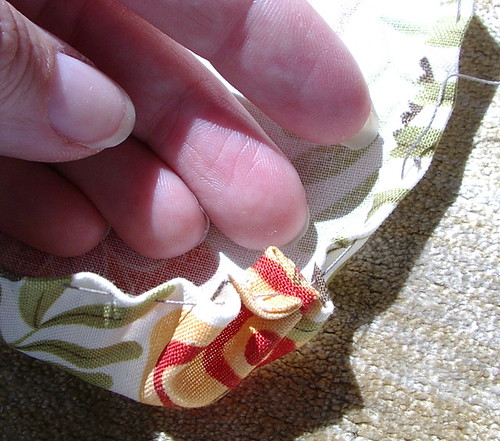
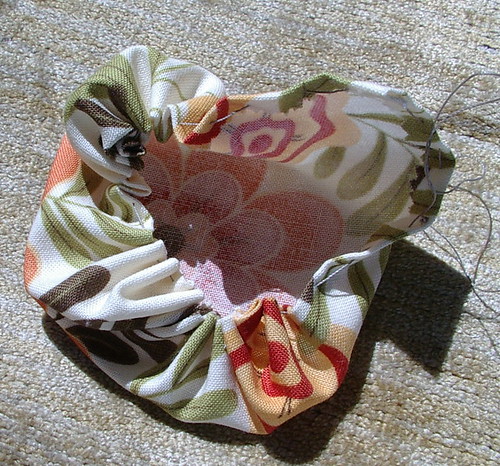
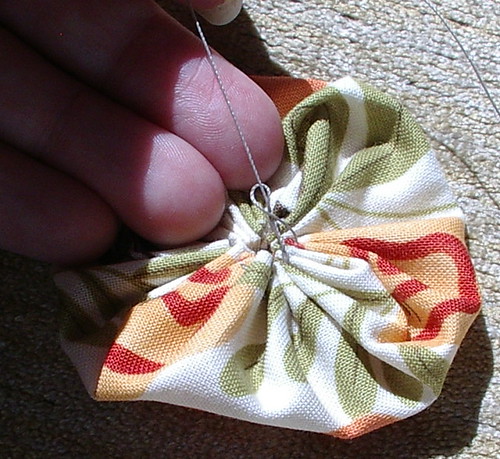
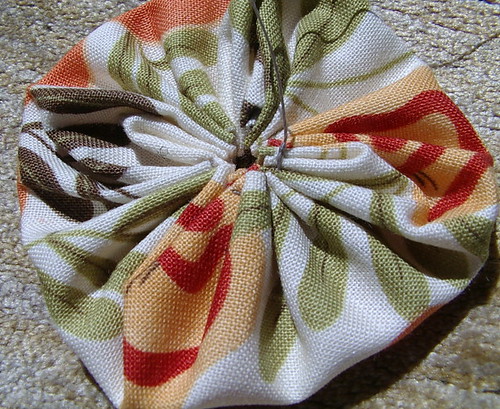
- Close yoyo all the way and go through all the gathers again I like to do this to give my yoyo added strength you can also double your thread up. I have done this both ways and the whole in the middle is smaller the way I do it now but it takes a tiny bit longer to make. this whole is before I went around a second time.
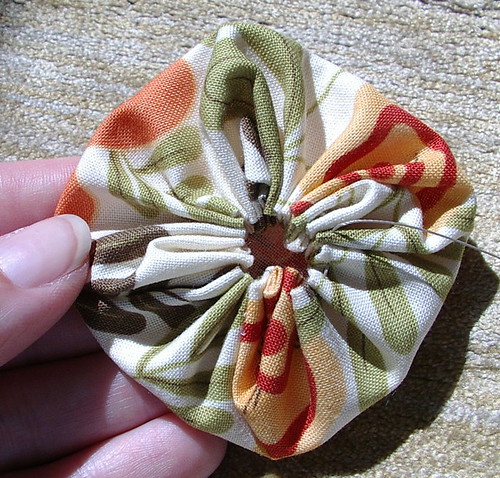
- Finish yoyo with a figure 8 knot make loop pass needle through loop twice draw up knot.
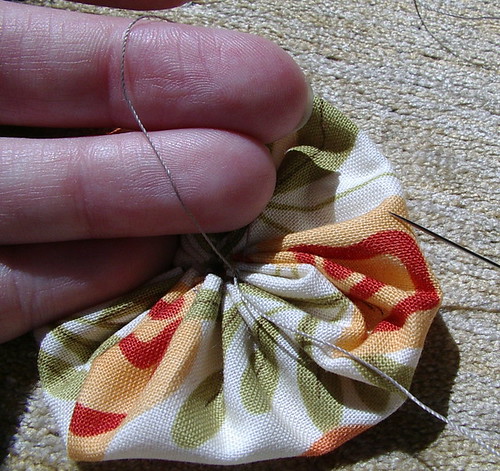
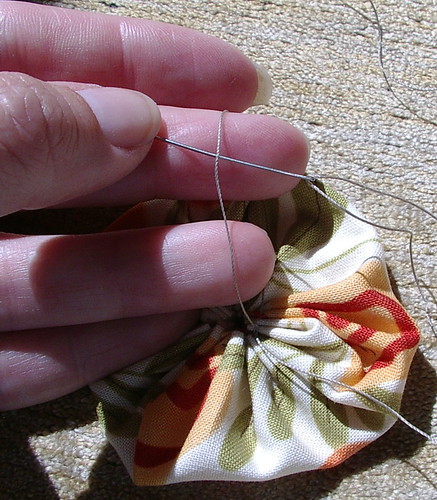
 .
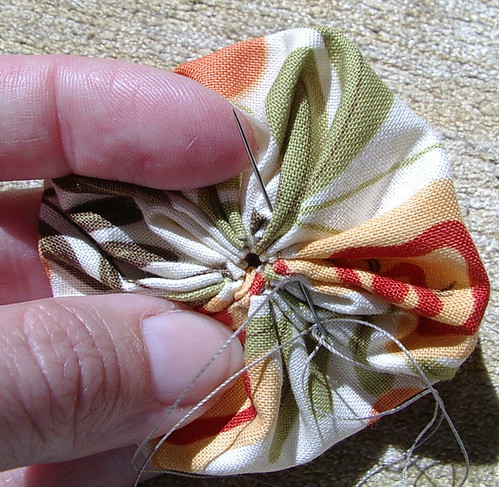
. - pass needle through gathers one more time and cut thread. This whole is after I have gone around twice see the size difference.

Update Sep 22 7:39 a.m.
After I finished making this tutorial I decided to go on line and see if I could find other square yoyos out there. Here is what I found. A template with a lot of work involved in it but gives a real nice square. There is a wall hanging quilt made out of square yoyos on this site.
DO NOT USE THIS PATTERN TO MAKE THINGS TO SELL FOR PERSONAL USE ONLY!!!!


Fantastic tutorial and the squared-up yo-yos are fabulous. I honestly did not know about squared yo-yos before--sometimes I'm so behind in things that I'm lucky I remember my own name. Thank you so much for this tutorial!
ReplyDeleteI love the square yoyos! The fabric is beautiful too! Thanks for showing the tutorial!
ReplyDeleteI love the square yoyos. The fabrics are beautiful too. Thanks for the tutorial, you are too good to us!
ReplyDeleteTammy
i love that orange and green fabric you used. i will have to be on the look out fo rhtese charm packs.
ReplyDeleteWow! I finally did a few little yo-yos (on my blog) and now you're showing squared-up yo-yos -- never saw them before, but they sure are nifty. And I love the clarity of your tutorial. Will give them a try!
ReplyDeleteWow! I finally made my first little yo-yos and now you're showing how to do squared-up yos. Never saw any before, but they sure are nifty. Will give it a try. And I love the clarity of your tutorial. Thanks, Sunshine!
ReplyDeleteI am glad so many people seem to like this tutorial. I hope you all have fun making a few and please post your images of things you have made to the flickr group or leave a link here in comments to your blog if you did make something so I can check it out thanks sunshine
ReplyDeleteWow! Thanks for this!
ReplyDeleteYou are a really wonderful teacher. Thank you for always sharing what you discover.
ReplyDeleteSid
Yoyo Square… that good idea… I will try to make!
ReplyDelete; -)
Wonderful tutorial, many thanks for sharing. I've often struggled with yo-yos, this makes it simpler.
ReplyDeleteSunshine!! They're so cool! I will have to try that for sure! Thanks for such a great tutorial. You rock. :)
ReplyDeleteKarin
Sunshine, Thanks for sharing. Great tutorial.
ReplyDeleteCheryl
Love, love, love them!!!
ReplyDeleteExcellent tutorial for the yo-yo impaired like myself. I'll have to give it a shot.
ReplyDeleteAunt Jo - 24 nieces and nephews and counting
Sushine,
ReplyDeleteThe square yo-yos are entirely too cute! I can't remember where, a quilting catalog maybe, where I saw templates for making yo-yos that were flower shaped and heart shaped. I was really amazed and still can't quite wrap my head around how to do it! lol.
I'm so behind on my sewing but yo-yos are up there on my list!
Jana
glad you all are having fun with it
ReplyDeleteAwesome tutorial, Sunshine! You make it look almost easy, even for those of us (like me) who are definitely craft-challenged.
ReplyDeleteJo
great tutorial! p.s. hope you get to feeling better real soon.
ReplyDeleteThanks so much for the tut , Sunshine! ;)
ReplyDeleteOh, be still my heart. I have not had any time to work on yo-yo's in weeks since I finished the table runner. I can't wait to get moved so I can start again. I can make them while I sit and talk to my g.ma
ReplyDeleteJc
Awesome sunshine!!! Thank you for sharing!!
ReplyDeleteTracey,
mama to Callum 14, Katie 9, Wil 6.5, Benjamin 4 and Andrew 18 months!!
I have the cold/flu/cough crud that has taken over my family. Yuck Yuck and double Yuck. not much sleep last night abd I swear I drink over a gallon of water a day just to keep hydrated.
ReplyDeleteI love the square yo-yo's and the perfect thing to work on when sleep is not an option. I am definately trying this. Found a bag of pre-cut quilt squares recently. Going to pull them out and give it a whirl. Wendy- you have the best ideas.
blessings
beth
wow!!!!
ReplyDeleteOK- so at the last three days of hockey tryouts I have made 10 of them- slow but going well. I love these. I will have to check out your blog to see how these all go together. How many do I need for a small throw blanket?
ReplyDeleteblessings
beth
There are several ways of attach them either just in the rounded corners or along the sides to make a pretty solid piece of cloth with little openings in the corners. You can place otehr shapes between them and see how that works out like the clover heart or flower or penny heart.
ReplyDeleteYou can also place crochet around them and incorporate them into a crocheted item just use a small hook and stab it straight through the edges of the yoyo.
If you do needle lace filling stitches like you would use in hardanger, or teneriffe lace, or drawn or pulled thread work.
I am sure there are other ways as well just have fun and experiment just because you haven't seen it done before doesn't mean it wont be pretty in a new way of attaching.
I will try that- thanks. Sure had alot of hockey moms looking at me while I sat and sewed. Like it was something very foreign!!!!!!
ReplyDeleteblessings
beth
I didn't notice that you said 10 in 3 days wow that is slow was it causing you lots of problems as the four I made for the tutorial took about 7 minutes.
ReplyDeleteThis makes a cool project. I made a colorful clown for my little niece using yo-yos. I added small bits of cotton filling to make it plumper. She's now in high school and the yo-yo clown still claims its place in her bed.
ReplyDeleteLouella
FANTASTIC IDEIA
ReplyDeleteLOVE THAT
YOU MADE A BEAUTIFULL THINGS
THANKS FOR SHARING
KISS
ROSA
CORTEYGRIF.BLOGSPOT.COM
Oi !
ReplyDeleteLindo esses fuxicos!
Obrigada por compartilhar!
Beijos
This squared yoyo idea is very good. Your work is beautiful.
ReplyDeleteI'll try it very soon.
Thanks for share!
Tatiana
Olá
ReplyDeleteI'm from Brazil.
I love your tutorial, it is Wonderful.
Thanks for this.