
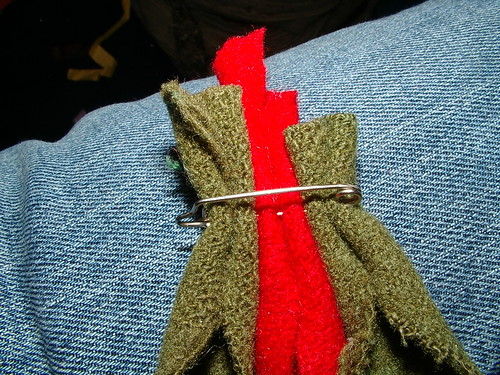
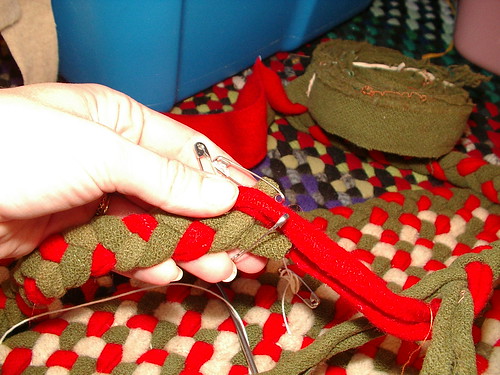
- The last round is braided while not attached to the rug. Safety pin three strands of material together -- see picture below.
- Just start doing a normal braid.

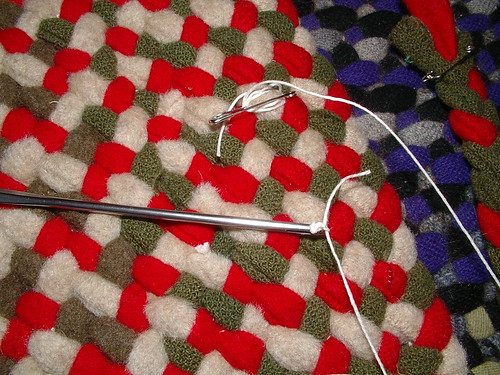
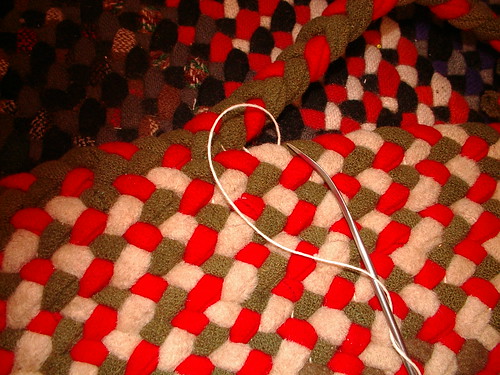
- When you have enough braid then some to go all the way around the rug, place a safety pin near the edge of the rug. This is to wind your lacing cord around (see photo) that will be used to tie a knot when you stitch all the way around.
- Attach lacing cord to needle.
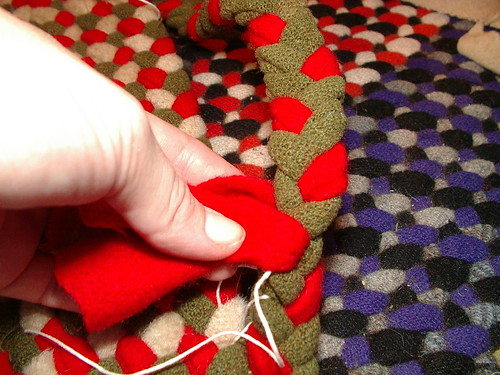
- Start stitching braid to main body of the rug. Leave about 2 to 3 inches of the beginning of the braid not stitched down. Also do not start where you taped the last row.
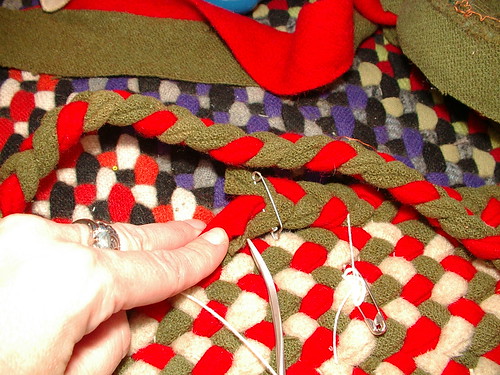
- When you get to the taper, see photo for to how to handle the small parts of the braid; they mainly get skipped.
- Then continue stitching it down 'till you get within about 5 inches of your starting point.
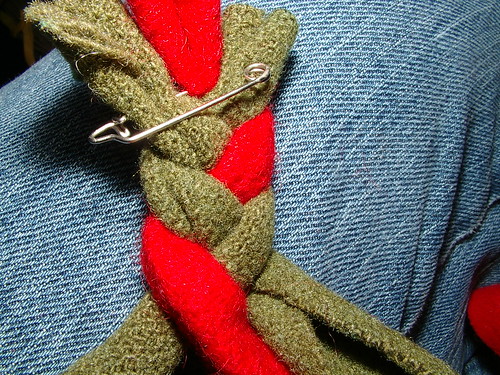
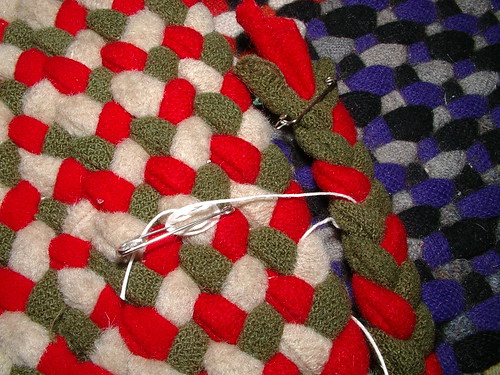
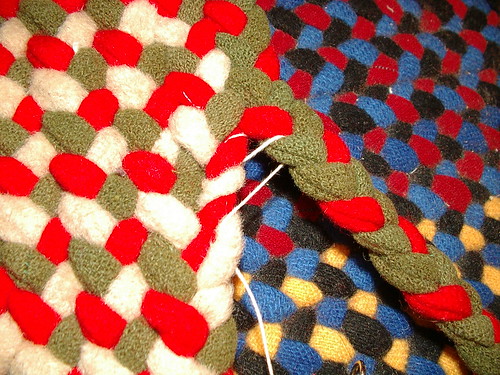
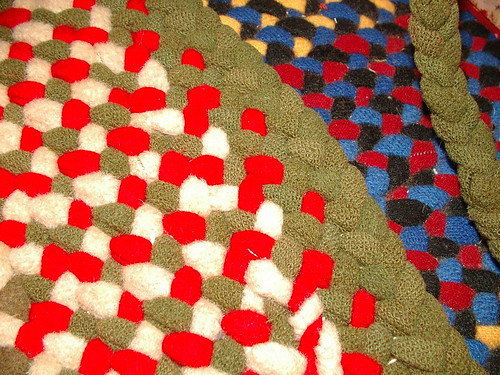
- Overlap ends of the braid, line up colors and place safety pins where they match up in color and in number of loops left on inside of rug. Needle is pointing to where my first twist is of the first braid; the next braid needs to match and end here, too.
- You may need to have one or two more twists on the braid being attached to get the patterns to line up. Just your basic increase when stitching. The left side of this braid will be stitched down. Then sewn to the starting point of this braid. The right side of the braid (the side on the right of the safety pins) will be cut off.
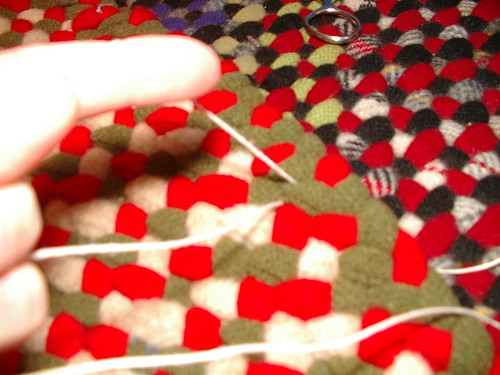
- Leave one strand long to use to weave at the end
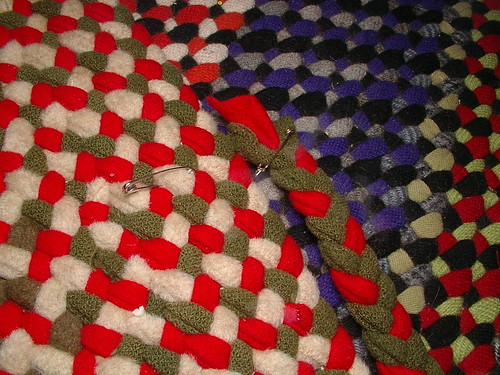
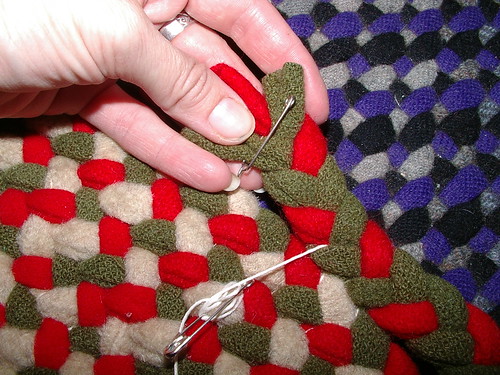
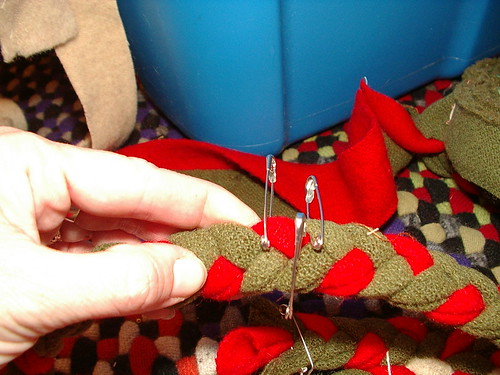
- Unbraid a little and match up the colors to their counter parts with the beginning and end of the rug, and safety pin two sets of strands together. Then stitch those two as well; I do this by hand, but you may use a machine if you want to.

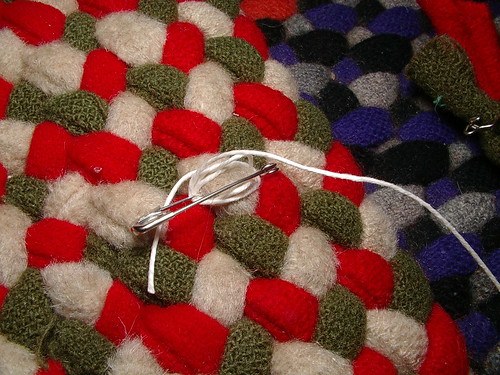
- This part is kind of hard to explain -- you weave the two that are stitched back and forth while weaving the third loose strand into it to reform the braid.
- Match the last loose strand, pull it tight and stitch the two together by hand.
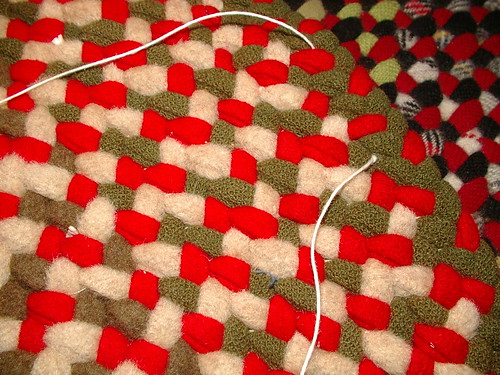
- Then go back to lacing the rug together all the way to the end. That is 'till the two ends of the lacing cord meet at the beginning of your work. Tie knot. Sorry bad photo.
- weave in ends for about an inch or two away from knot
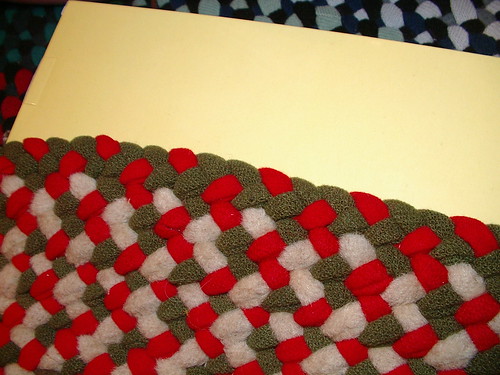
- Repeat last row 1 or 2 more times so you have two or three butted rows.

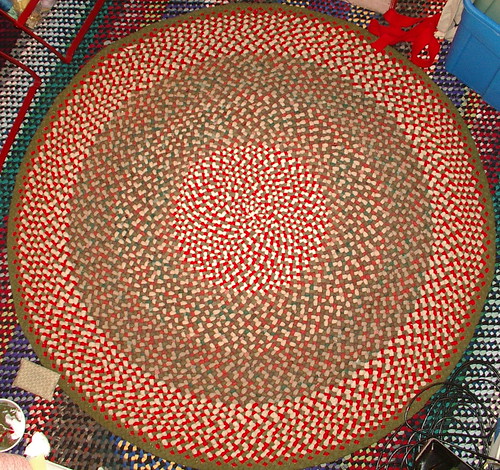
- All done with the rug, now find a home for it
Part 2: Sewing the strips together & forming reels
Part 3: Starting a t-started rug
Part 4: How to start a round rug, apple peel style
Part 5: Sewing and increases / tools
Part 6: How to change colors
Part 7: Ending in a taper/hemostat tool
Part 8: Butting last rows for a smooth finish
DO NOT USE THIS PATTERN TO MAKE THINGS TO SELL FOR PERSONAL USE ONLY!!!!

Oh thank you thank you!
ReplyDeleteI have a rug made by my husband's grandmother that I need to stitch together again (it came unsewn and is now just a snakey rope of braid). I don't think she did this butt end part. I will probably add that when I put it together again.
BTW, I linked to you here:
ReplyDeletehttp://shallowthoughtsfromiowa.blogspot.com/2008/08/great-tutorial-on-making-braided-rugs.html
Thank You!!!! My gramma spent years teaching me to quilt, sew, cook and then passed away before teaching me how to make her rugs. This has been absolutely THE most beneficial site and lessons that I've found to date. I can't possibly thank you enough.
ReplyDeleteI agree with sunandmoonschild ---- This has been absolutely THE most beneficial site and lessons that I've found to date. I can't possibly thank you enough.
Deletethat was very kind of you to let me know I greatly appreciate it. once done with your rug I would love to see it or email me if you have questions.
ReplyDeletetake care sunshine
This comment has been removed by the author.
ReplyDeletesorry it is a tutorial of images and the images are small actually there is jsut a lot of them. I feel bad for people with dial up but a blog about crafting has to have images and lots of them especially in a tutorial.
ReplyDeleteHi! My name is Alyssa and I just wanted to say thanks for the braided rug tutorial. I made one and I couldn't have without your site. Yours is the best I've found. My rug does not look nearly as good as yours but maybe in time... Anyway, thanks!
ReplyDeletethanks alyssa that was kind of you yes in time it gets easier and you get better at it too. But keep your first rug it will be a treasure when time passes to see how far you have come from your first to your last
ReplyDeleteI love this--by far the best tutorial I've seen. I can't wait to try it, but I think I'm going to ditch the cotton idea and wait until I collect enough wool (though it's tough to find fabric here in the UK). And by strange coincidence, I'm also a BYU alumna. Go cougars! ;)
ReplyDeleteI, too, agree with those replying before me here - you have done an excellent job of explaining how you make such absolutely gorgeous braided rugs! I'm 71, have enjoyed ones my Gramma McF made years ago, and am about to again enjoy one my mother made umpteen yrs ago when I was a youngster in her home (grin).
ReplyDeleteHubby and I have been fulltime RVers in our retirement for the last 15 yrs, and recently purchased our 'last address' - lol - a home in Arizona up in the mountains above Phoenix. I will be inheriting my mom's rug, and using it in our new and last abode, but I also want to make a couple throw rugs for the entry doors and for both sides of our bed, and in the two bathrooms - hopefully each of those smaller rugs will get better as I progress through the process (grin). Thank you ever so much for the time and talent you've spent making up this 8 part tutorial for those who follow (like me) - it is ever so greatly appreciated! I knew there were things to learn other than simply braiding wool and then sewing the braids together and you've certainly covered every one of those things we'd need to know, to end up with a very pleasing finished item. Words are easy to type here, but all that goes into them and behind them, well, you'll have to wait until Heaven to learn the whole truth of what I say/feel about your great tutorial - k? You have made a world of difference in my life for these simple steps you've shared with so many! I am humbly grateful !! NancyB
LOVE YOUR TUTORIAL~~ I LOVE WHEN TALENTED PEOPLE ARE WILLING TO SHARE THEIR KNOWLEDGE...questions I had were answered in comments - about 5 lbs. of wool per square foot rugs....when I talked to Pendleton they didn't know what mill ends were but we were wondering if headers which they did know about where the same...last question....what kind of wool do I want?
ReplyDeleteI use coat or blanket weight wool... If I remember correctly headers are the same but not sure
Delete