"sponsored links"

Powered by WebRing.
Google
 

Friday, March 30, 2007

Friday WIP/ store/ mini doll quilts

large and small yo-yo mini quilts
My husband and I have been working on different projects with the same end goal. He is working on setting up our new site; Vintagethreads.com is still a work in process. I have been making head wraps and yoyos for mini wall quilts that will be framed and for sale at the new store. Yes, those vintage yoyos are scattered in with new yoyos to make these mini quilts so some of the fabrics are current, a few are up to 50 years old, and a touch are close to 100. I doubt anyone besides me and the lady who gave the fabric to me will know which is which, but it is fun all the same to share vintage surprises.If you get a chance, check out the new site; it is still a work in progress so not much works there, but there is a poll. I would love to see what everyone's favorite fiber art form is. This may help decided what type of stuff is carried in the store that will be on this site in the coming weeks.

If it feels like I have not been posting as much I haven't because I am working like crazy getting things made for the store opening.

Thanks for all your input
Wendy "Sunshine" Harbaugh
http://vintagethreads.com/
Ga-Ga for Yo-yos. Get yours at bighugelabs.com/flickr

Thursday, March 29, 2007

A heart transplant


No! I am not getting a new heart, at least not in that way. I made a heart for Dana and it now resides with her and she has made one for me and it now lives with me, so our hearts have been transplanted into each other's homes, so to speak. This heart is needle felted. I think it would make a lovely Valentine's picture or even the center of a seasonal pillow; not sure yet. I will have to think on that for a while.

Wednesday, March 28, 2007

Mother Nature is so Confused

Nature is <span class=
So are my plants. I actually woke up to more snow than this, but after taking kids to piano then school, I went to my mother-in-law's to drop off Easter stuff, the bank, the doctor, and the grocery store. By the time I got home the snow had melted mostly away. Wacky weather to say the least. My kids played outside two days ago and were asking when I was going to pull out the blow-up pool. They were having so much fun blowing bubbles and playing on skateboards and skates, you never would have anticipated snow today. Go figure!!

Tuesday, March 27, 2007

Easter swap

I am in charge of a swap at MJF. When the items came in this time, I decided to take pictures of the big groups instead of waiting 'till after I sent everything back to everyone. This way you can see what everyone got, not just the items I kept myself. There are ten people in the group; each makes ten handmade items and sends them to me, then I sort them out and mail the boxes back to each person with 10 different items in them.

First one to arrive was momof2jrt. She sent some cute bookmarks for every one to have; no two are exactly the same.

The next package to arrive was from Suzyhomemaker. She sent handmade bags for everyone, with a bag of handmade bath salts in it. My house has smelled so nice I hated to see them all go to their homes. She also gave everyone sunflower seeds to start their spring flower beds. You also see a corsage made out of felt and a yo-yo that was a extra gift she sent as a thank you for me hosting; I love it.

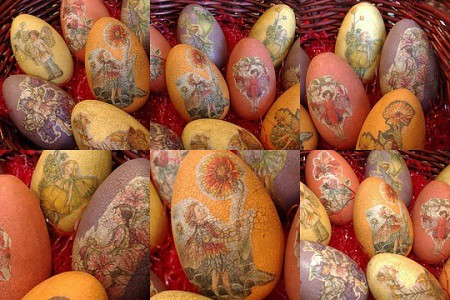
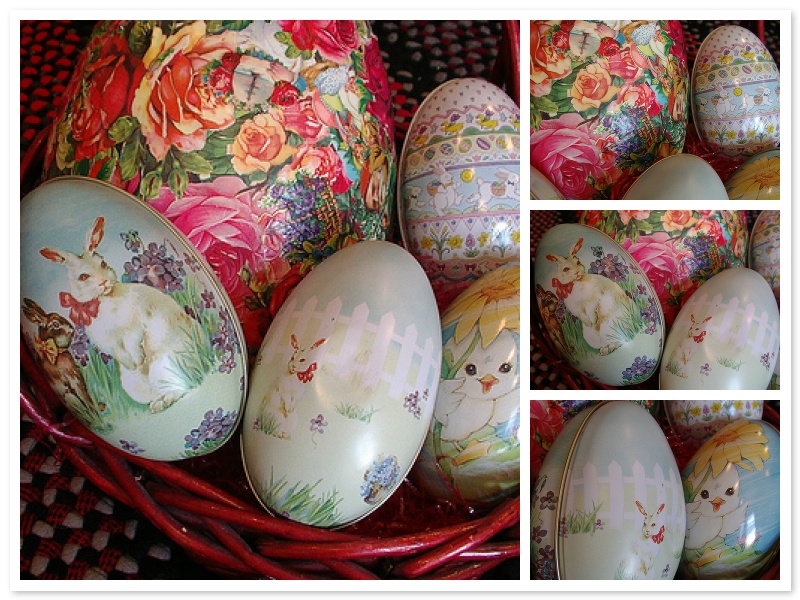
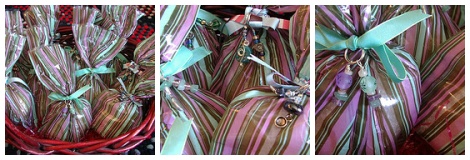
Kitchenwitch's box was the next to arrive. She thought hers didn't come out well. I think they are quiet lovely. I love all the soft colors. There are actually two images per egg. It is just impossible to show the front and back of the eggs at the same time. I wish I knew how she made these; I love flower fairies. It was a hard thing to give these up, but since there was only one that could me mine, I picked a purple one. Not an easy decision.

At this point I lost track of the order the items came in so I will just post them.

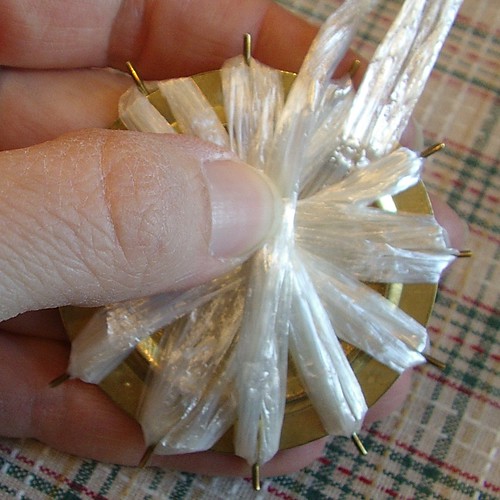
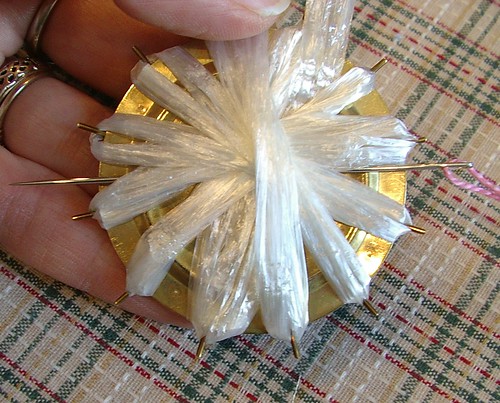
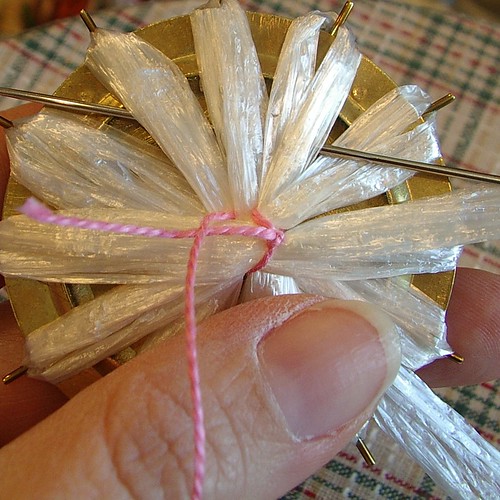
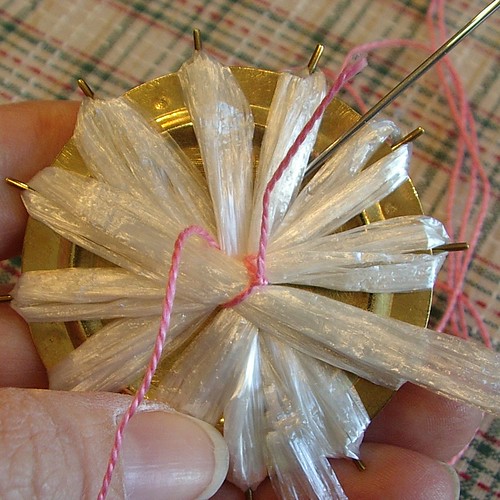
I didn't know summerbreeze was a glass blower. When these items came I was just floored. When I get my store up and running this will be a featured item in the store, so look for that around May first or sooner. I wish I had taken better photos; next time I will because these are gorgeous in real life. You would think glass would be fragile, but these are thick and solid yet still look fragile. I just loved them; so did my family. When in the upcoming months I open my web store, it will be dedicated to hand made items from all different types of artisans. I hope to carry lots of different things like this

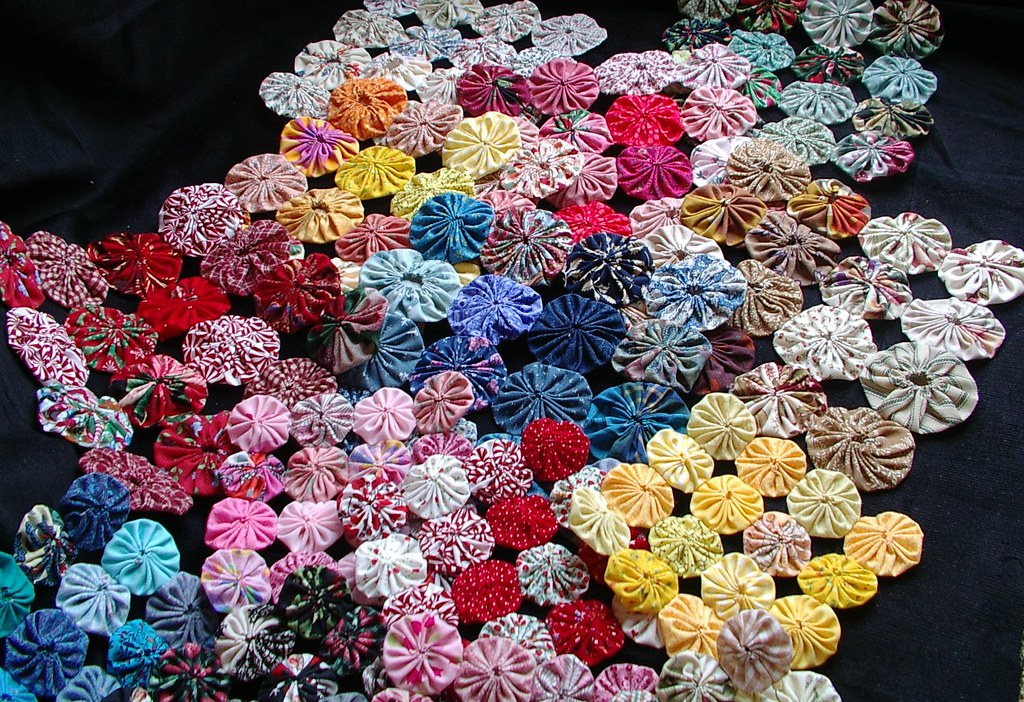
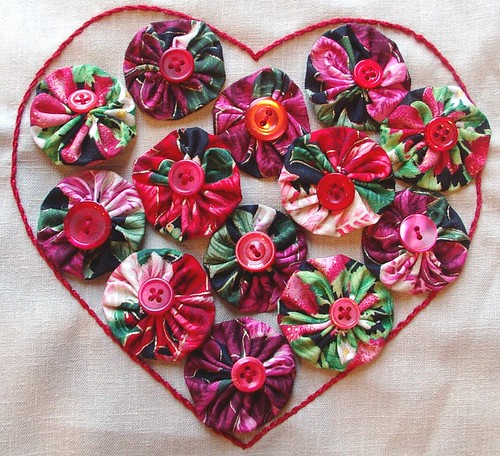
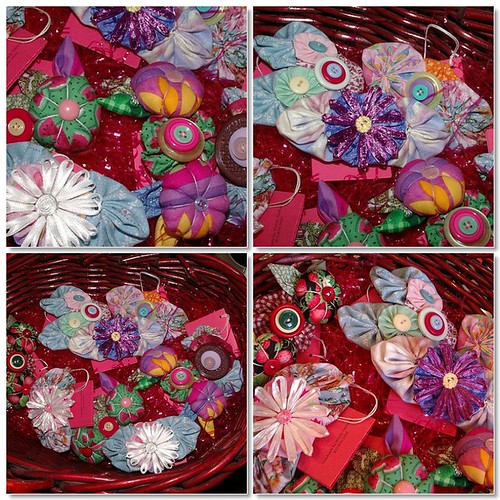
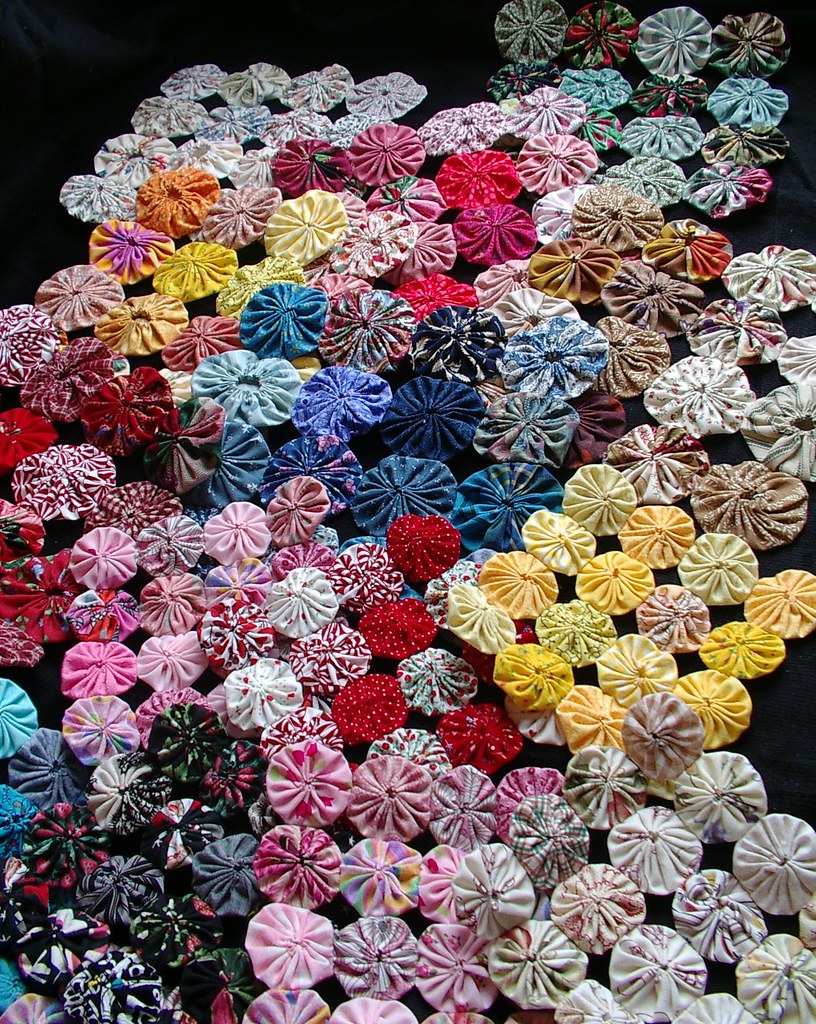
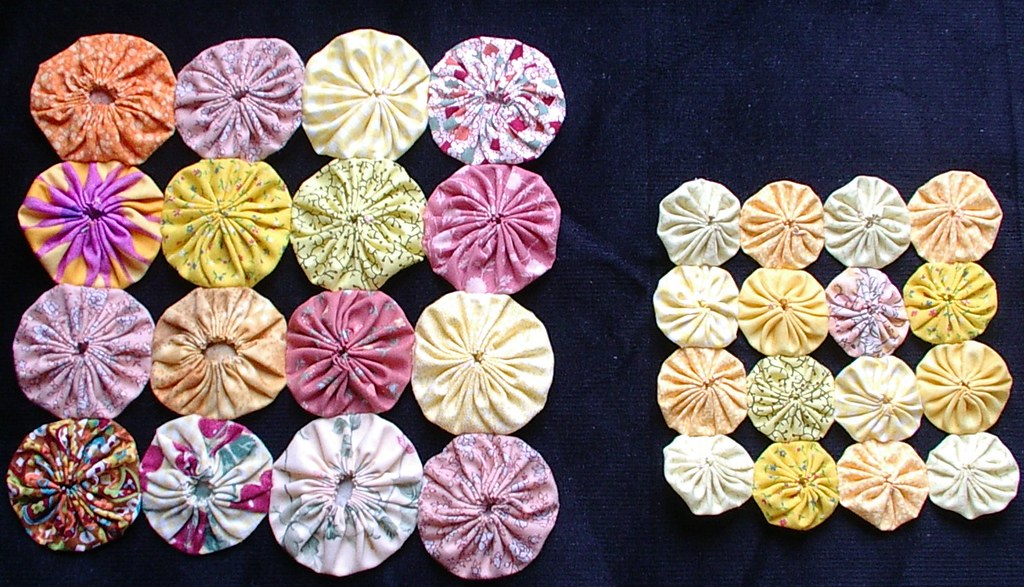
Ktknits sent two different items -- bugs and pillows. There are two types of bugs but each person gets one bug, so it will be a surprise which bug each person gets. My kids just loved the ladybugs because they collect them, but we kept a caterpillar. For the farm girls involved, you may not recognize the yo-yos but I do; they are from another swap at MJF a while back I was in charge of that one too, every one sent in four different colored yo-yos to be traded with 12 other women (everyone made 48 yo-yos or something like that). So the yo-yos on these pillows represent a lot of farm girls not mentioned in this post.
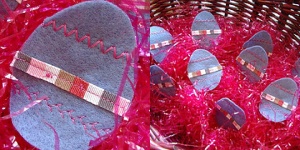
Willoetreecreek sent these sweet little Easter egg pins for everyone to wear. I think they are darling. She machine stitched decorative details with pink thread and machine stitched on ribbon. She hand stitched a pin on the back of all of them.

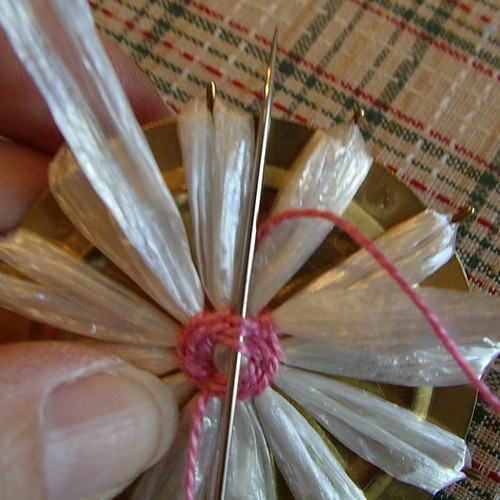
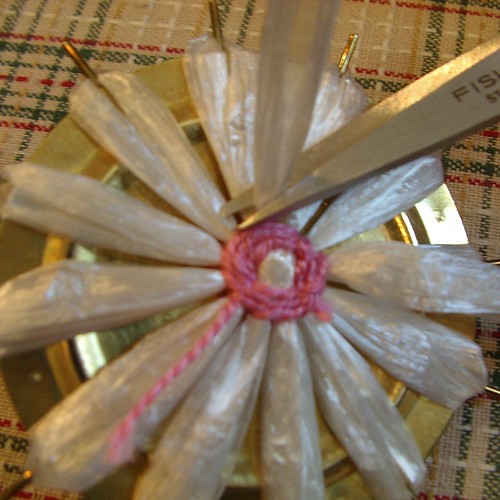
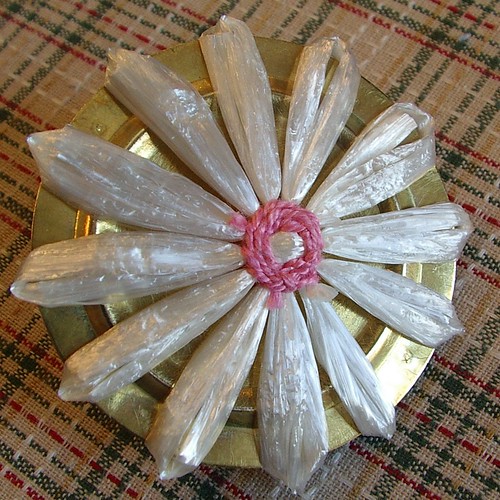
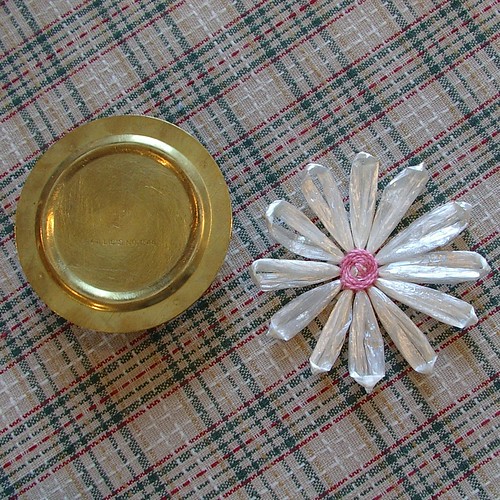
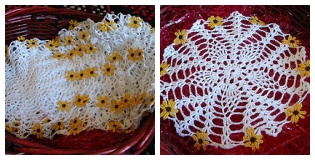
Leslie made doilies for everyone. I think she crocheted them then added the daisies. They will be cute as a decorative accent at Easter time.It has been a real interesting swap; I think the variety of items in this swap is the greatest I have seen thus far. It never ceases to amaze me the different talents people have, especially when they say at the beginning of the swap they have none.

I made hair clips for everyone. Funny I don't even know if everyone has long hair; oh well, I have no problem if they give them away. Some have crazy daises on them, others Easter egg yo-yos, and some plain yo-yos with buttons on a few too.Shmeg made bath salts for everyone, and she also handmade stitch markers. Stitch markers are a knitter's thing. I think they came out real nice. I kept oriental-looking ones. 
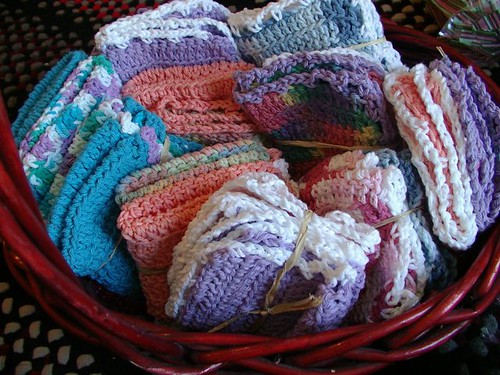
My kids wanted to keep all of the item that Mommom sent. She made two hand crocheted dish/wash clothes for everyone. These are some of my kids favorite things for in the tub. You should have seen the disappointment on their faces. Mommom is so sweet she then sent each of them one, too. Excitement galore!

Monday, March 26, 2007

last signature block for swap at MJF


I got the last block for the swap today. This one was made by Ktknits (her screen name). Her real name is on the block to I removed it from the picture as I like to keep peoples' identities private. I think she did a great job. The others that are sent into the 2nd swap are here and here from the first swap.

Friday, March 23, 2007

crazy daisies/ WIP


crazy daisies, originally uploaded by sunshine's creations.

These are made using the daisy loom that I have the tutorial for. These are using double sided baby-width satin; also used is rayon crochet thread as the embroidery around the center of the daisies. These are considered a type of weaving. I want to make some more because I think they would be lovely in pasted colors with crochet holding them together as a lace edging on a little dress for Easter or a little Easter cardigan jacket with trim at the waist. You can see an apron I did using similar styled flowers made out of Hi-straw instead of double sided satin.


Please join flickr group if you have made any of these types of flowers
Crazy Daizies. Get yours at bighugelabs.com/flickr

My new old Victorian

I bet you thought I bought a new old Victorian house, well not exactly,

pop up doll house Paper dolls
although I wish I owned a real Victorian home; but that is another story. When I was a child, my Vavo started me collecting paper dolls and porcelain dolls. I actually still collect both, just not as rapidly as I did as a child. That is probably because as a child I always got them at holidays and birthdays as gifts. I still love both but, because it started out as gifts I would receive from my grandmother, it has always seemed a little weird to me to go out and add to the collection. Although, every now and a gain, I do.
kids bedroom and kitchen in pop up doll house

I remember one Christmas as a teenager my Vavo was given a paper doll pop up house as a gift. I was heart broken; I know, silly for a teenager to be sad about a paper doll. It was a really awesome paper doll pop up house. She knew I liked it and wanted to give it to me, we actually both love paper dolls and doll houses, but she couldn't because it was a gift to her and we didn't want to make the other family member sad or mad. My grandmother didn't play with paper dolls and neither did I anymore; they were just things we liked looking at, with all that amazing detail that go into things such as these.
pop up doll house

This last Christmas, 2006, my Vavo surprised me. She had saved that doll house for 17 years and gave it to me. I was so excited, now my kids are the ones wondering why is mom getting paper dolls and not us. The previous year, 2005, I had searched all over the country to find the Mary Engelbreit magnet paper dolls, they had been discontinued for years already at that time. I found enough for each of my daughters to have one and each of my first cousins little girls to have one, and I also found 2 more for 3rd cousins plus a few for friends of my Vavo. I was sad because I could not find enough for me to keep one. She paid me for them and said thank you as she thought the little girls would have fun playing with them. She had a little surprise up her sleeve; my Vavo actually saved one and gave it to me this last Christmas, 2006. I have not received so many paper dolls at Christmas since I was a little girl. It was just great!
paper doll family for pop up house

I thought the doll house was so great that I just had to show it for all those doll house and paper doll lovers out there. This has been in storage since 1989 when my Vavo received it. Everything is still there. You have to look closely to see the details -- the doors open on cupboards and pantries and things like that.
upstairs landing

master bedroom

downstairs dinning room

upstairs bath above kitchen

music <span class=

Wednesday, March 21, 2007

Scraps and Tin

easter egg hunt

I don't know about you, but when I was a child we hunted for tin eggs. I am not an old person (mid thirties) so this wasn't to terribly long ago. During the time it took me to go from being a child to having a child they seemed to have stopped making this type of Easter decoration and converted to plastic. I have been looking for tin eggs since 1998. I know that may seem silly, but they hold fond memories for me, and I have a hard time likening the plastic ones to Easter even though I own a ton of them. I have found all of these tin eggs at thrift stores. So here is my requests from anyone who reads this blog. If you know of places on the Internet to buy them, please let me know by leaving a comment to this post with the location on the Internet. Thank you.

The other item pictured is a real large paper mache egg that I covered with antique scraps about eight years ago. I just thought it was neat and figured there had to be other people out there who like scraps, so I showed it.

Tuesday, March 20, 2007

Part 2: Monte L. Bean Museam

A little while back I posted about my family going to a museum; here is some more from that trip. We had a lot of fun that night; I just feel like showing pictures for the kids to see. So if you have some boys who are into reptiles and some girls who are not squeamish, have a look. Iguana
I have never been fond of animals that have been to a taxidermist. They are educational but creepy.
I just love the color of this monitor lizard. They had some tortoises there; this one was playing hide and seek a lot and had a thing for trying to eat white tennis shoes.We saw a reptile show while we where at the museum, both a girl and a guy hosted the show. The guy was way more into reptiles than the girl was; half the animals, I think, were his own personal pets. See, she doesn't look very happy and she was not happy with the reptiles the whole time, either; just not her thing.Really large snakes and other things! The girl in the bright pink is dinner size for the snake skin if it was still alive.
Blood python, Dumas boa ( from Madagascar), reticulated pythonBlood python

Monday, March 19, 2007

A Heart for Dana


A heart for Dana, originally uploaded by sunshine's creations.

I was in a heart swap at Valentine's. After I posted my finished pieces on my blog, Dana said she wanted to trade for a heart. So this is the heart I made for her. I worked on this while taking care of my daughter at the hospital on and off these last few weeks. The fabrics are the same as the ones I used in my swag/garland at Christmas. Plus a strawberry one I received from my friend Berries at MJF.

Some of the buttons are new; some are vintage. The pearl cotton bordering the heart is antique pearl cotton.

This item is meant to be finished by the recipient. It can be added to in any way she wants, such as boarders to make it a little bigger to make a small pillow out of it; make it into an appliqué; or make it a pocket on an apron, you name it; what ever she can think off. I hope she likes it, too, because I did a different technique than I did before. Some love and some worry for my daughter are in this heart -- every stitch.

Saturday, March 17, 2007

Happy St. Patrick's Day

st. patrick's day

Friday, March 16, 2007

How to make straw flowers

I decided to make a tutorial for those of you that might have this item from a thrift store but don't have the instructions.

Steps
  1. Lay straw across loom from bottom to top. You can also use yarn or any other fabric type material that will bend nicely around spokes.
  2. Bring straw back to bottom of loom. Moving straw from left to right behind spoke. Then wrap the next spoke on the bottom left moving straw from right to left behind spoke.
  3. Moving to next spoke at the top right wrap straw around it and go back down to bottom. This time you wrap the spoke to the left of the last one you did on the bottom.
  4. Repeat last step all the way around
  5. You will finish wrapping your straw to the left and on the opposite side of the loom from the first wrap. The two tails should be next to each other. If you are using yarn or something like that you can go around the spokes 1 or two more times to have a petal with 24 or 36 petals instead of 12 like one row has. If you do this make sure to fluff flower at the end and separate the petals they tend to get stuck together.
  6. Have needle threaded with pearl cotton ahead of time and make sure your needle is longer than your loom is wide.
  7. Pass needle under all the straw.
  8. Tie pearl cotton in knot. You are looking at the back of your work and are working from the back knots won't show on front when completed.
  9. Pass needle from right to left under 3 petals of flower.
  10. Bring needle up and go back under last two petals and pick up one new one to the left of the last petal from the previous round. You will be rotating the flower in a clockwise direction with each pass of the needle.
  11. Continue this till you have 3 completed rounds of pearl cotton forming your center of your flowers and holding everything together .
  12. Finish thread by weaving it in and out of the pearl cotton do this about 5 times in different spots on the back. I like to do mine in the space between each set of petals and work my way around to each space.
  13. Cut straw and pearl cotton. You can make it more secure by using fray check or something like that.
  14. If using fray check let it dry. You can also do this step off the loom.
  15. Remove from loom and sew onto desired item. See apron I made using these here. You can also see this same technique using double sided satin ribbon here.

step#15
If you don't have this tool and you want to buy some flowers they are for sale at my store already made.


whipup whipup

Please join flickr group if you have made any of these types of flowers
Crazy Daizies. Get yours at bighugelabs.com/flickr

Thursday, March 15, 2007

Crazy with flowers

My flowers decided to bloom after all, just a few days late, but that is all fine with me. I went out to take pictures, and there was a little bee in one on the flowers. So I have little bee bum in half my pictures. Oh, well!! At least the flowers are happy about it. I guess that is all that really matters on that one.I got inspired by the flowers to make some flowers of my own. Look at the mosaic picture; the stuff in the top left photo is called Hi-Straw and Swistraw. My supply is from the 40's through mid 1960's. They are made out of Viscose Rayon so they can be washed just like clothes. I just love thrift stores!I got this idea around 4 am this morning. "Why" you ask, "was I up at that time.?" Well, my kids woke me because of their fevers. After I took care of them, I couldn't go back to sleep. Yep!! I started making flowers on my looms. The looms are on the top row, middle picture. They are from the same time period as the straw and were actually meant to be used with it. In addition, you can use ribbon and yarn with the looms, too. I think they would work well with wire work like beadders use; pretty much any thing you can wrap around them without breaking the pegs.

The next picture shows the smallest loom with a flower almost completed on it after having been woven on the loom and embroidered with pearl cotton to form the center. This is considered a type of weaving, just not very complicated weaving.

That same blue flower is show again in the first picture on the second row. Then I decided this was too boring; I needed more variety and not just in color, so I started making a variety of sizes.

In the last picture of the mosaic I have a nice little stack of flowers ready to be added to the apron. OK, so I go over board; I am used to that. The apron I used I have had for about 10 years; I purchased it at a craft store called Mac's. I loved that store; too bad they went out of business about 5 years ago. I think the apron came out rather cute -- sort of spring, St.Patrick's Day, Easter and Mother's day all in one.

Looking at these photos gave me another idea. "Oh, NO!!!" you say. Take it easy; it's a good idea I promise, and you can do it if you can find the supplies at a thrift store. Actually, I think they are selling looms like this again. But if you can't find them there is always eBay; that is where I bought the brass one about 7 years ago. Do your search under flower loom, bloom loom, crazy daisy, knit wit, studio twelve looms -- any of these will work to find something that can make these flowers. Either way, the supplies are not hard to find.

Now for the idea: Wouldn't these just be sweet on a sheer little girl's bedroom window? Hey, I have three little girls; too. To bad their windows already have blinds and curtains. But maybe I can still change that. We will see; maybe I'll get some sleep instead.

Also the flowers made on the brass loom are the same size as yo-yos made from a standard size CD; oh yes, the wheels are spinning with ideas there, too.

Update

I noticed that Craftzine linked to this today ( Friday Mar. 16, 2007). They referred to it as a "How to" so I decided real quick I would make a true " How to" if you have this tool and don't know how to use it or if you have seen one and wondered how it worked follow the link below.
Tutorial here.
You can also see these same daisies made with double sided satin here.

Please join flickr group if you have made any of these types of flowers
Crazy Daizies. Get yours at bighugelabs.com/flickr

Wednesday, March 14, 2007

I found the buttons!!!

If you remember, back in November I accidentally dumped all my Mother of Pearl button boxes. Well, I actually did get around to fixing them up real nice and neat with the help of my friend, Dale. When I went to his lace in, he gave me two real nice big boxes I could keep them in.

So, after a little bit of brain storming, I figured the easiest way to keep buttons is the way they come from the store originally, on little cards. Heather had the idea of gluing them down. I don't like the idea for mother of pearl, especially dyed ones, but it's great idea for plastic and Bakelite buttons. The next best thing is sewing, yikes! So I made my own little cards with a real big craft punch. It felt like I sat for days and days on end trying to sort and organize them.

I think the end result came out pretty well; as you can see, in one of the boxes some of the buttons are on strings -- still as they are sorted. I just haven't finished stitching all the buttons to cards yet. The card are set up in two ways: one way is all of one kind of button; the other way is a card with no two buttons the same on it. These are my one-of-kinds that would get lost the way I stored them before.

Also, since then I actually have received more buttons as gifts for Christmas, I have to sit down some day soon and add them to this box. I may need a third box by the time I am done. Those, the Christmas ones, aren't even pictured here. As you can see, not all of the items are buttons, but most are mother of pearl or shell and a few are metal vintage/antique buttons, too. What I think is real neat are the antique buckles.

Tuesday, March 13, 2007

Craftzine


My Shamrock tutorial just got a mention on Craftzine; that just makes my day!!!

I hope everyone has a lovely St. Patrick's day!!!

It has been a great day between this and being one of the winners at whip-ups Whiplash.

Contest Winners for Whip -Up Recycled Announced

My last entry into the Whip-up monthly contest won a prize. For making the Jean Rug I get a craft book. It was fun to make and I get to keep the rug and get a book too. How cool is that!!

start of braided rug
The next round starts today; it is supposed to be a tutorial. So yep, you guessed it, a new tutorial is in the works. It's already in my head, and I have 18 whole days to do it.

Monday, March 12, 2007

400 +

Between these two jars there are over 400 yo-yos. I have made over 300 of these in the last few weeks while sitting in doctors' offices and at home late at night, staying up with my sick daughter. I really don't have a project for these because they are not in the right set of numbers for the table topper, groups of 4 in CD size.

The little ones are made using a mini CD or mini DVR disc as a template. Those are what I made the most of these last two weeks, in fact all of that size, and a few big ones. In the smaller size there are over 250; I lost count after that and didn't feel like re-counting. The real neat thing about the small yo-yos is that most are made from scraps that one of the ladies in my church gave me about two years ago. The reason that is so cool is, she is in her late 80's or early 90's and she told me they were from her mother's scraps, so there is no telling how old some of the fabric in those yo-yo's is. Truly, some are between 50 and 100 years old, if not older. I need to come up with a special project to use them in. There is some of the real old fabric in the bigger yo-yos, too. Also, there is some new fabric in the small yo-yos.

Saturday, March 10, 2007

Tutorial on English Paper Piecing : Grandmother's Flower Garden

English Paper piecing tutorial
Prep work: cut paper templates and fabric

I actually like to buy my templates, mine are die cut, this gives more accuracy to my work and speeds up the process; you can do it either way, though, buy or make. Finished size paper templates are 1/4 inch shorter on each side than the unfinished size template for the piece of fabric.

My papers are 3/4 inch; this is my finished size for the hex block. My fabric pieces are 1 inch to a side. Just a side note, when I buy my pieces I buy two sizes; one for the finished size in a bulk big package and a small package to use as my templates for cutting my fabric.

Ways of cutting fabric

If I am using scraps, I use a pair of scissors to cut my fabric hexagons. If I am purposely using yardage, uncut fabric, I will use a rotary cutter. With this size hexagon I cut my strips to 1 1/2 inches wide. Then I place my template on the strips and cut the six sides. After you have cut one, each time you add the template you will only be cutting five sides because one is already cut.

To get the measurement for whatever size hexagon you are using, you will measure from point to point on the unfinished template piece of fabric. On mine that was 1 1/2 inches; yours will vary if you are using a different size hex than I am.

Basting
  1. Pin paper to wrong side of fabric. I skip this step, but when you are starting out it is a good rule of thumb to do this 'till you get use to it.Next you fold over the right side of the fabric followed by the top side. If left handed, do the opposite (do the left followed by the top).
  2. At this point you can have a knot on your thread, if you so desire. I placed one on mine for the picture, but usually I do not use one; I leave a little tail hanging out. This is a little harder technique when starting, so for beginners I recommend a small knot. Place needle in fabric going right to left and slightly up. Pull needle through and repeat this step by making another stitch in the same spot, aka a back stitch. This will hold the corners in place.
  3. Rotate hex in left hand so the point that you just finished is pointing right. If left handed, rotate left and point last done will be pointing left. Fold down top like you did before. Insert needle from right to left, repeat. Repeat this last section of rotation and insert needle twice then repeat all the way around. If left handed, insert needle from left to right, of course. Finish off on sixth corner; you don't have to do the first one again. Cut thread; you don't need a knot if you leave a tail when you cut the thread. Exception to the rule: if your finished hex size is over 1 1/2 inches, it's good to do the first corner one more time. A lot of tutorials on this technique tell you to stitch through the paper; I don't like to do that as you have to cut all those threads when done. I only stitch through the paper if my finished hex size is bigger than 2 inches (I don't do that size often). If I am doing that size, then I do one stitch in the middle of each side. This is a really tiny stitch see example I posted at a later date than this post. This way when I want to remove the papers all I have to do is make a small snip with scissors (6 times per block) and pull the papers out. This leaves in the corner stitches and the other stitches are pulled to the back. These middle stitches are known as a stabilizing stitch, and I only do them one to a side. More than one stabilizing stitch to a side and you have to pull out threads. It also takes too much time, and I believe it to be a waste of time. Make sure if you are doing your hexagons like mine (you leave your basting stitches in), that you use a basting thread that will not show through your work when finished.
  4. On the last hexagon for a flower or whatever shape you are doing, I finish my hex a little differently. At the end of basting I do the first corner again, but I bring my needle out in the point of the hex. This sets me up for the next step which is assembling the blocks. If you noticed, this block doesn't have a pin in it. Like I said, that is a step I don't do any more, but when I was learning how I did. That is a personal choice.

Assembly
  1. Place two hexagons right sides together. If right handed your starting thread should be on the left; if left handed, on the right. Insert needle grabbing only two or three thread thicknesses on each fabric of each hex. DO NOT GO THROUGH THE PAPER. This is a common mistake beginners make. This makes it hard to remove the papers later. It also makes the papers not able to be used again, and wears out your fingers, too . If you do not stitch into the paper you will have an easy time pulling the papers out at the end, and you will be able to reuse the papers dozens of times, if not more. Make your stitches small and even.There should not be any gaps or openings when unfolded. Side Notes: I use Gutterman quilting thread 100% cotton and a #9 quilters betweens needle to sew mine together. Use what you like and are comfortable with. Also I like to take one extra stitch at the corners to make them a little stronger because this is where all the pressure is when used and might break easier without this extra stitch.
  2. Your thread should be at a corner from the last side you stitched. Repeat the steps in step one of assembly.
  3. Now a few things that come up while you are assembling your blocks together: First there is back tracking. This means your thread is in one spot but you really need it in another that isn't too far away. Instead of cutting your thread and tying a lot of knots, you can back track. It is faster and fewer knots on the back of your work. In this picture my thread is on the lower right of a seam and I need it in the upper left of the same seam. So to get there, I travel over the stitches I have already done. My stitches only go through the fabric on the back of the work, never through the paper and never all the way to the front of the work. They are never more than 1/4 of an inch from each other. They do go in the opposite direction of the other stitches (see the stitches' different slants). Now I am where I want to be at the start of the next spot to stitch, also known as a "Y" seam because it resembles the letter "Y".
  4. Next you have what is known as a "Y" seam. You can see the spot I have yet to stitch in the photo. A "Y" seam is where 3 seams come together. When sewing with a machine this can be intimidating to some people. But when doing hand piecing it is easy to work with. The stitches are taken just as before, with little bits of fabric. The only difference is, this time the pieces just aren't laying face to face. You can make them lay face to face if it is easier for you. To do that you just crease the hex block at the end of the seam you are doing, where my needle started the seam. This is not my preference because it wears out my papers and makes them less usable, and sometimes the paper pops out, too. Continue in whichever technique you prefer until you have your flower made or what ever shape you are making, I am making diamond shapes. When finished stitching the block together, knot and cut thread.
When you have several blocks made, play with the layout, if you did not do that ahead of time. I always do it at the end. That is a personal preference thing. My papers are actually made out of card stock to make them last longer. Yes, you can use normal paper, but it has a lot of drawbacks, it is very flimsy and doesn't hold up well to wear and tear. When I remove the papers ,I just use a pair of tweezers on real small hexagons, 1/4 inch. If the hexagon is larger than 1 inch, then I just pull them out with my hands. Some people like to punch a hole in the middle of the paper, with a standard size hole punch, before basting it. Then to pull out the papers they put a crochet hook in the hole and pop them out that way. I do not do this because it weakens the papers. Once again, a personal preference; do what you like best, even try both.

The papers DO NOT get left in the quilt. Years ago they, pioneers, did leave the paper in when they used the old "Sears and Robuck "catalog pages as their paper templates, and they tied those quilts. They did not quilt that type, it was too hard going through the papers. Leaving the papers in added extra warmth; it also made the quilts rustle. So, if you have a real old quilt that rustles like paper a little when moved around, that is what is probably inside of it. I remove the papers as I go along, sewing the blocks together. If a single hex has all 6 hexagons bordering it sewn to it, I remove its papers, the center hex, that is.

This tutorial was featured in Small Town Living Magazine in Apr/May 2007 issue.

If you have any questions let me know in comments and I will also answer them in the comments area to help everyone else who reads this because they may have the same question. Also click on photos for a bigger image if you can't see what I am talking about. If you would like to see items I have made, or am currently making, with this technique click here.

If you do decide to try this technique, there is a group on flickr that you are welcome to join and post your results there. This is a group about people who like to do hand piece using English paper piecing method or any other type of foundation piecing. Yes machine foundation piecing is welcome in the group, too.
English paper piecing/ foundation piecing. Get yours at bighugelabs.com/flickr

Birthday flowers and wishes

I have never been big on getting cut flowers for my birthday so about four years ago when my kids brought me these mini daffodils I was excited. I got flowers and they didn't have to be killed. Now, every year at my birthday, they have been in full bloom. This year the weather is so weird they have tried to bloom but have missed the target date. I also have one, yep just one crocus in bloom. Mother nature sure has confused these plants this year.

If you have not figured it out yet, today is my birthday. Do I have special plans for the day? Nope! Doing chores and making, if I am lucky, I can finish my English paper piecing tutorial that I took photos for 2 weeks ago, that is if all goes well. Who knows, with my kid still not feeling well and the doctors clueless as to why.

Like anyone else, I have a wish list, too. A silly one, but definately a crafter's one. I don't plan on getting any of these, not right now anyway, this is just wishing for fun. All of these items are actually on the same site. Just so we know, this is a wish list for myself -- things that I hope to buy for myself in the future when I get a chance.

Birthday wish list:

  1. Clover Embroidery hoop stand I already have the other half of this item just need the base.
  2. Quick yo-yo maker large I just think these will be fun to play with even though I already know how to make yo-yos. I think it would be neat to see yo-yos with even gathers. Have some ideas in my head.
  3. Quick yo-yo maker small
  4. "kantan Couture" Bead Embroidery Tool I love tambor work this looks like an easy tool to do it with.
  5. 360 deg turnable hoop 7 inches Hoop for tambor work.

Wednesday, March 07, 2007