[google6a7b7d93c7100df5.html] Sunshine's Creations.Vintage Threads Inc.com

friends and followers

If you like my blog and the free patterns and tutorials and want to say thank you
I have a wish list on ravelry of patterns (click here)
I would like to make.
Thank you in advance for being kind and saying thank you back.

Love Sunshine

Search This Blog

Tuesday, February 19, 2013

Assembly: Coptic Sampler Book

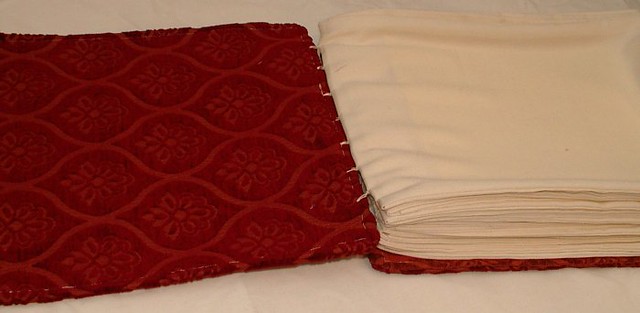
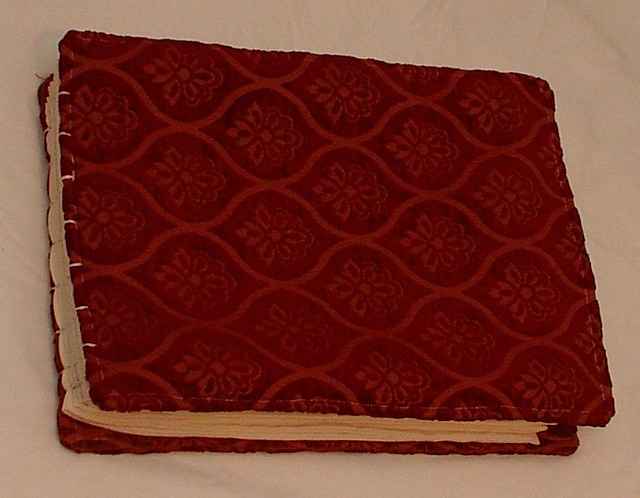
sampler book cover
A very long time ago i showed a sampler book I made I made this tutorial and put it in draft form and forgot it was here.  Looked at all the drafts I had for my blog that I did long ago and realized this one was complete and never poster for the last 5 years.  Not sure how that happened but enjoy this new but old post.


Bookbinding
Supplies for link stitch book (aka coptic book)
  • Finished covers: 
    • wood :plained, sanded smooth, with holes drilled in them
    • davey board :covered in decorative paper
    • fabric : sewn
  • signatures :Pressed and punched pages (pages in a group are known as signatures)
  • Curved or straight needle
  • Bone folder or iron (if it is paper, use a bone folder; if  it is fabric, you can use either a bone folder or iron)
  • Scissors
  • thread for sewing ( has to be strong can be waxed)
  • Teasing needle (or awl)

Picture 1
  • Shows how the first signature is sewn to the cover.
  • To tighten stitches use your needle to pull at the stitches.
  • Always make sure you have enough thread to sew on covers.
  • Never add thread when sewing on the covers, only add on the inside of a signature.


Picture 2
  • If you have been careful not to get your threads twisted, your book should look similar to picture 2.
  • If you have been sewing right to left, instead of left to right, all of the instructions are mirror-opposite.
Picture 3
  • Hold the loop from the kettle stitch hole to keep it from pulling through, and pull on the first stitch (out of the fabric hole) to snug up the slack inside of the signature.
  • See picture 3
Picture 4
  • Then pull on the left side of the loop stitch so that the first stitch pulls up snug.
  • See picture 4

Picture 5 A and 5 B
  • Pull the loop stitch snug by pulling the second stitch up out of the cover hole as in picture 5A or 5B
Picture 6
  • Pull the rest of the stitches snug in the same manner.
  • The loop from the kettle stitch should still be there.
Picture 7
  • When the first gather and the cover have been sewn together, it should look like picture 7.
Picture 8
  • Check between the cover and the first gather .
  • The thread should look like picture 8 and the outside should look like picture 7 with the first stitch and the second stitch lying next to each other.
  • If the stitches are twisted over each other, you should undue them and re-sew.

Picture 9
  • Press the thread into the fabric with the board folder after you sew on each signature.
  • The link stitch is used to sew the signatures together.
  • The basic pattern is shown in picture 9.
  • The links are sewn in the opposite direction of the sewing direction

Picture 10
  • Picture 10 shows how to sew the second signature onto the first one.
  • The link stitches go between the fist signature and the cover.
  • The thread comes out the kettle stitch hole of the second gather and sews through the loop in the kettle stitch hole in the first signature.
  • The tail end of the thread can then be pulled snug, to pull the loop snug, as shown at the left of picture 10.
Picture 11
  • Check again between the cover and the first signature.
  • The link stitch should be only around the bottom of the first and second stitch as shown in picture 11.
  • It should not be sewn through the loop stitch, or any of the threads.
  • When sewing onto cover, it is a good idea to part-way open the cover as you sew the links onto it to avoid sewing through any previous cover attachment stitches.
  • There are fewer problems sewing the rest of the link stitches.
Picture 12
  • Sew on the third signature as shown in picture 12.
  • The link stitches are sewn only around the previous gather.
Picture 13A
  • In picture 13 A it shows the kettle stitch, sewn from either end of the book.
  • After the third signature, a kettle stitch is sewn, and after every signature for the rest of the book.
  • To sew the kettle stitch, pull the thread toward the cover center (A on figure 13 A)
Picture 13B
  • Point the needle between the two previous signatures for example, if you have just finished sewing on the third signature, your needle goes between the first signature and second signature (see right hand side of figure 13A) or, if you have gone on and finished the fourth signature, the needle goes between signature 2 and 3 as in picture 13 B.
  • The needle always points into the book.
  • The needle goes under the previous loop joining the previous signatures and over the thread that is pulled toward the base of the book.
  • Pull your needle straight up.
  • Do not go back under any thread.
  • You should have a loop that is sewn through
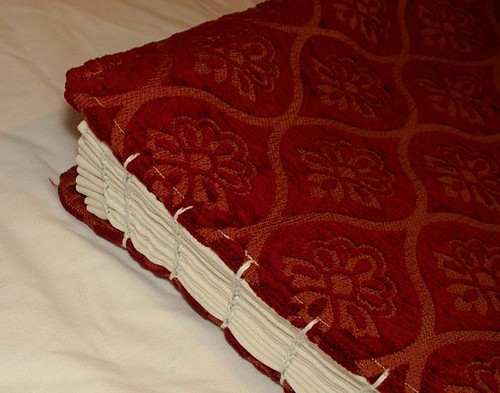
sampler book spine


Picture 14

Picture 15

Picture 16
  • tie off and cut thread


sampler book inside

Saturday, February 16, 2013

Mr laurence's scarf

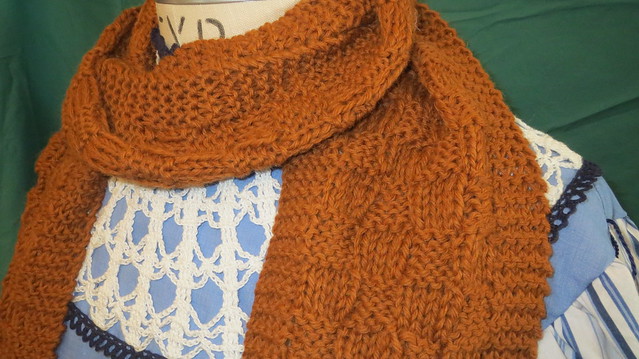
 detail
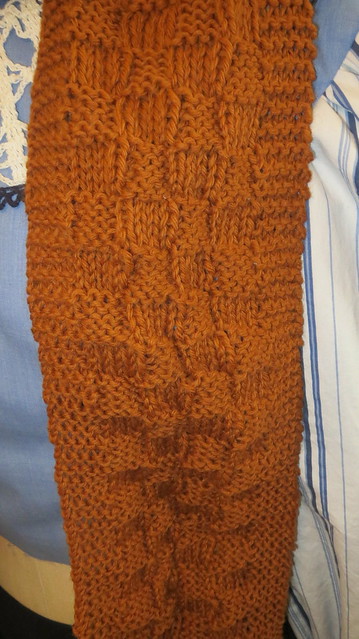
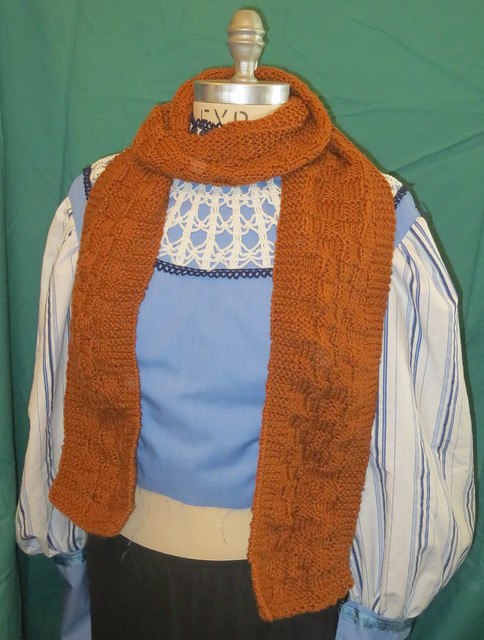
close detailBeen having lots of dental check ups for the family.  So while waiting for each persons turn I worked on this scarf for the play.  The color is copper worsted weight size 8 needles 4 blocks plus boarders wide and 85 blocks plus boarders long.  Unblocked that works out to 6 inches by 6feet 6 inches.   I do not know the blocked size as I have not done that yet to it.

Funny part is I started looking for a woman’s civil war sweater to make for the play for the character Marmie to wear.  Wouldn't you know it I find one and it has the same block pattern i used for the scarf.  Providence I would say looks like I picked the right idea for the scarf other than worsted weight did not exist then oh well I am up for any thing I can do faster with this play and still look correct.  Marmie sweater is a kelly green that will be my new carry around project.  As sewing can only be done at home easily.

Th sweater is not meant to go with the blue dress you see started in the background.  That is one of the dresses that the character Meg will wear.  Amy is to have a similar one.  As she is supposed to remake the hand-me down into her liking.  The crochet collar you see on this dress is antique my Vova bought it for me to use in projects like this.  She actually bought me a few I have yet to use them all. 
 finished mr laurence's scarf

Tuesday, February 12, 2013

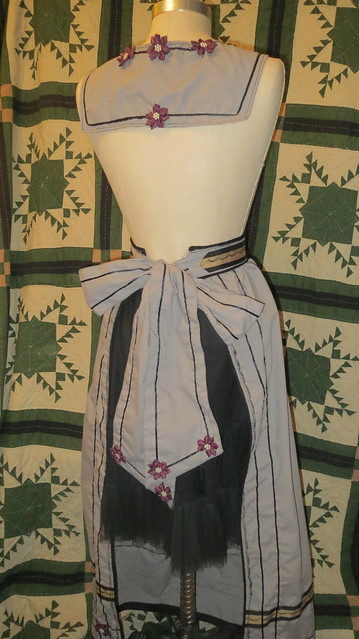
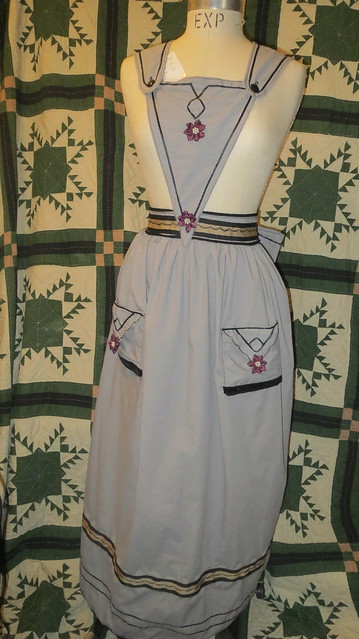
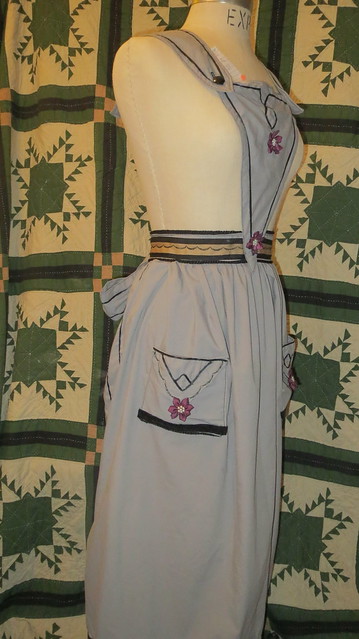
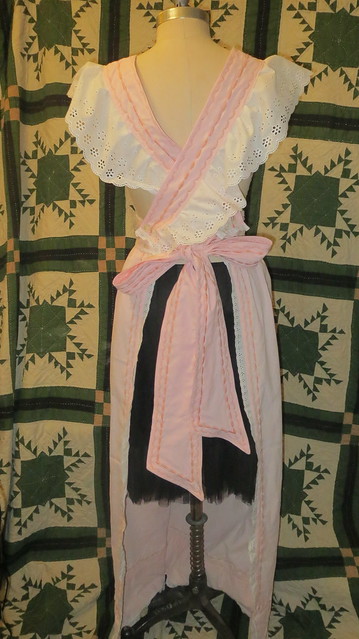
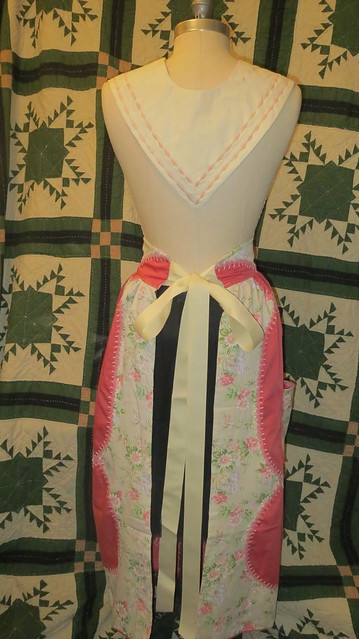
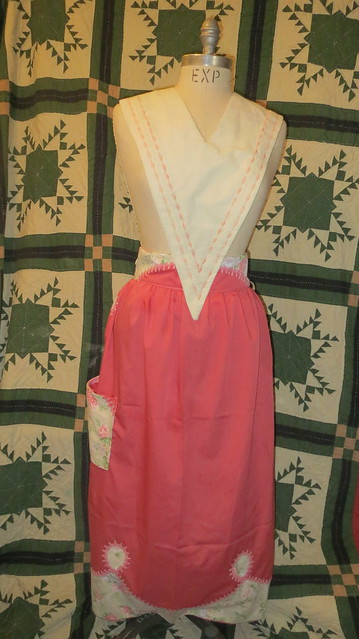
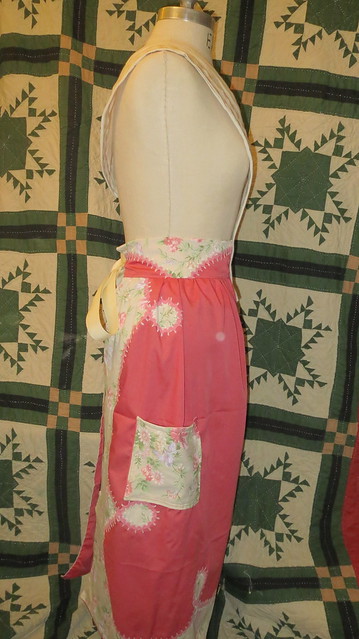
3 aprons for Hanna

back act 1frontA lot of the characters in this play wear aprons. I  think I will be making over nine aprons for the play some will be pinafore like.  The three in this post are for Hanna the servant and family friend.  She is supposed to have four aprons but I have not made the last one yet.  These aprons I am purposely re-purposing old items as the March family and Hanna are not supposed to have money for new things.  So these are made out of old faded bed sheets a few have little holes in them and so on.

The gray apron is the first one the character Hanna will wear.  It is meant to be reminiscent of the military stripes the men wear.   It is made from a gray sheet that had zero embellishments on it.  The ribbon i used at the waist and hem was a piece of gross grain two toned ribbon I saved from a gift someone gave me.  There is velvet ribbon on the pockets same ribbon used for Jo's red dress from Act 1.  The black cord you see is southache braid again.  The buttons on the collar are antique jet buttons and true to period.  The flowers you see are made out of double sided satin ribbon with 7 bead centers.

sideI am giving each apron at least 1 pocket some two so that the actors have places to put props they will use on stage like unlit candles and handkerchiefs and things of that sort.
  Usually in a play you do not put your backside to the audience,.  But just in case that happens I wanted the back to be just as interesting as the front on the aprons sometimes more so.

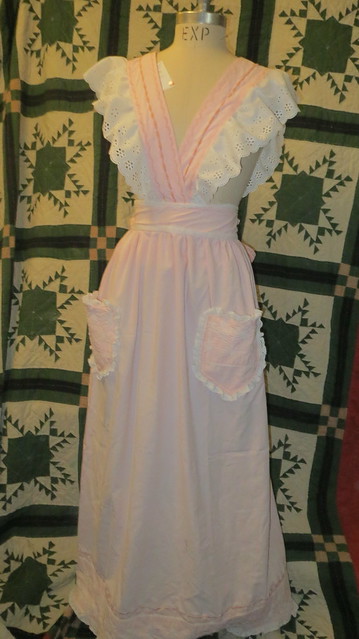
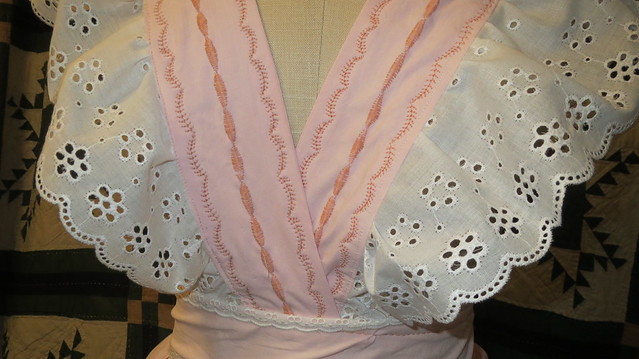
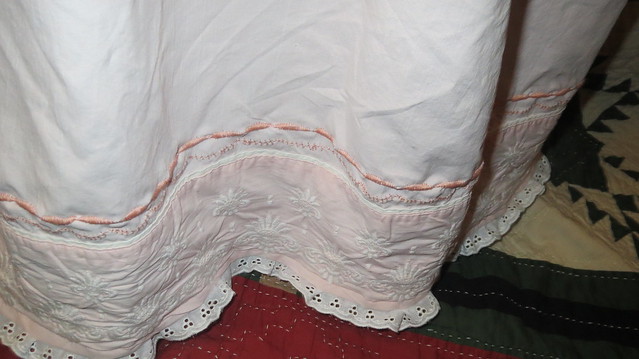
frontThe next apron my children have named the valentine apron.  I guess with that day so close it is on their minds.  To me it is just sickly sweet.  The sheet I made this from already had white embroidery on it.  So I used that on the pockets and hem.  Then I added machine embroidery to the straps and ties to add just a little more I also added it to the hem to pull the top and bottom together more.

The waistband is stiffened with some pellon that I found a large bolt of a few years back while thrift shopping the bolt has over 100yards on it not bad for 5 bucks I don't even think I have used 25 yards of it yet.
back last apron she wearsThe eyelet lace around the straps is the same i used on a pair of pantalets that I have already shown.  The little eyelet lace came from a friend the same one that gave me all the fringe I am am using but it was a different day that she gave me this lace.  I ended up using all I had left except 6 inches worth.  I think this apron may be a little long if it is I will add a growth pleat to the dress to take up a few inches in length.
bibhem


table clothbackfront
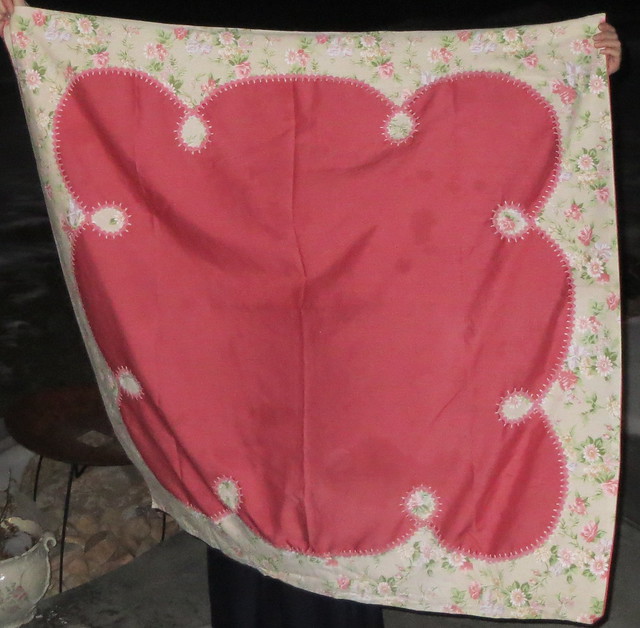
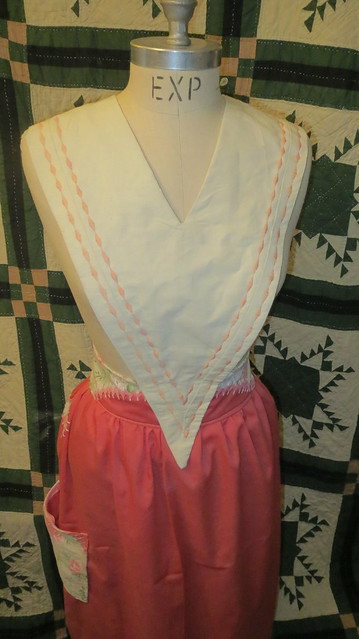
 The Salmon colored one is made from an old table cloth I found yesterday thrift shopping for 2 dollars.  I know it sound strange but I like that it was faded and old and yes hand made ( yes I cut it up).  I think it was originally from the 1940's ish.  It had old stains all over it from where food had been spilled over the years of use.  I washed them up I don't mind stains in fact I prefer them for this but I do not want dirt and other such stuff on them  so the sheets and table cloth got cleaned  and then  set to work on cutting them all apart.

bibsideThe bib for the salmon colored apron was left over from a sample I had to make about a year back for a school concert choir.  We had run out of choir rob collars so I had to draft a pattern and this was the mock up.  The actual collars are red and white.  When I made this collar i thought some day in the future I will use it for an apron bib.  Well that someday was last night.  I added machine embroidery to the color to add some color to it to make it match a little better to the bottom part.  The tie for this is more gross grain ribbon this time cream also saved from a gift I got.  Nothing like costuming an entire play on a shoestring.

Saturday, February 09, 2013

Jo's dress and Aunt March's and Amy's pantalets

front
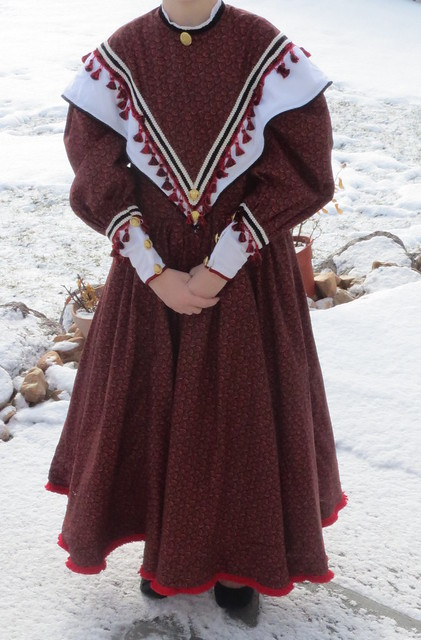
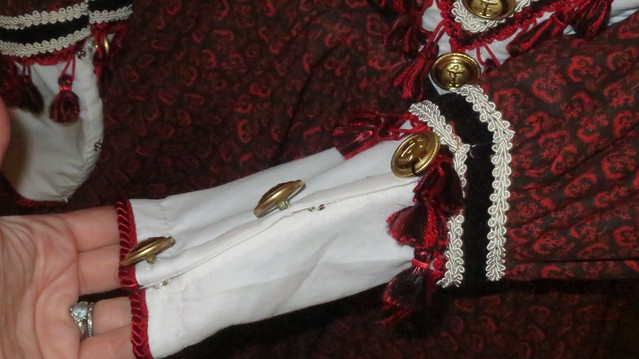
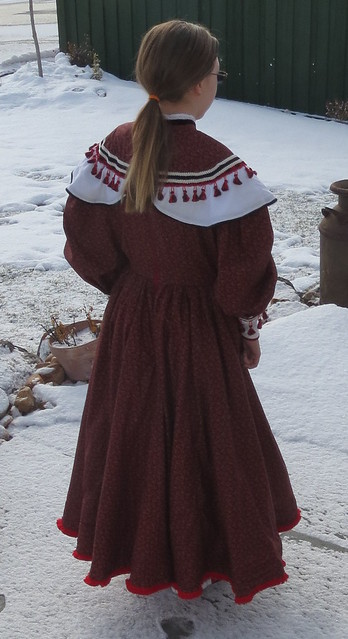
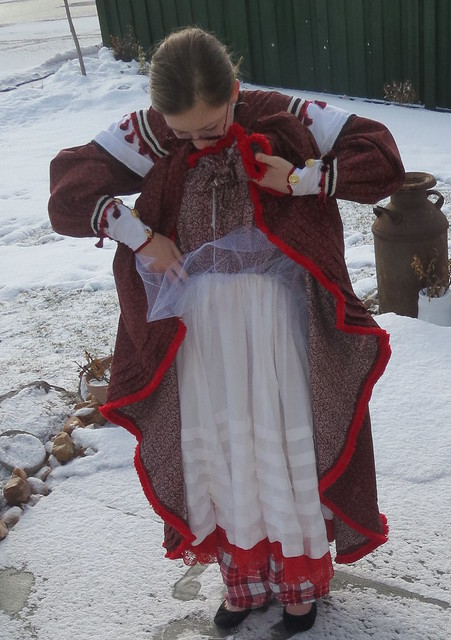
cuffbackI finished a dress for Jo this last week it is the dress she wears in act 1. Since the character Jo wants to be in the military.  I tried to make this have a little bit of a military feel to the dress.

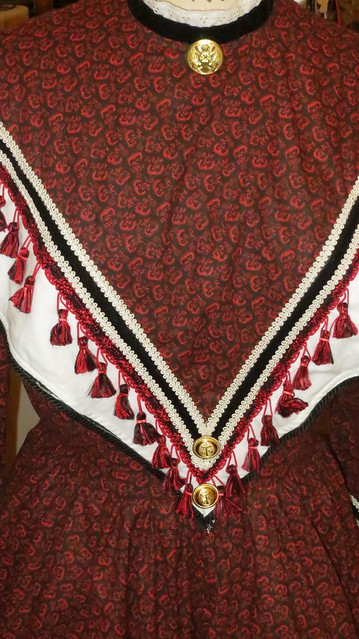
 I used vintage military buttons as a pin at the neck and at the bottom of the collar and on the sleeves.   The buttons come from a great aunt of mine and my Vavo both of which are in heaven.  I am keeping the costumes after the play so I am not worried that I will not have them anymore.  There is only one of the eagle one I used at the collar.  The rest of the buttons all match each other and have anchors on them.

front yoke and collar
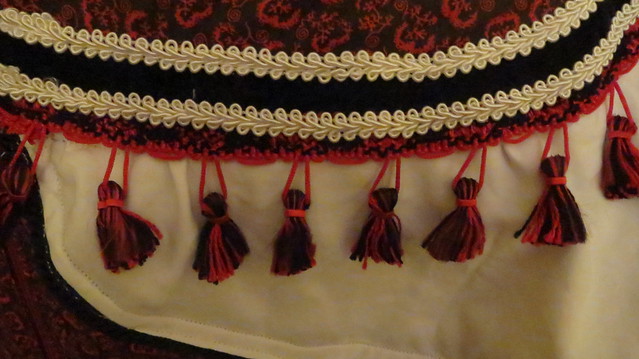
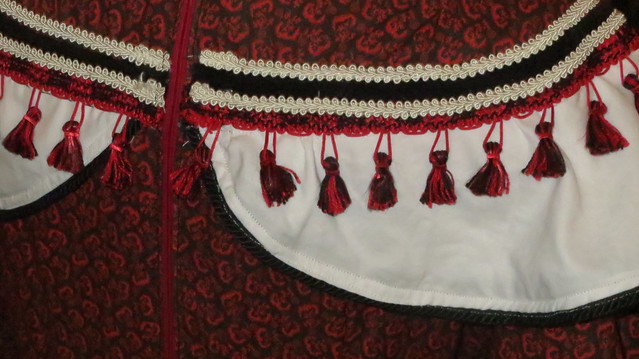
 The fringe on this dress (at the collar and hem) was given to me a few months ago by a dear friend of mine, we have been friends for over 20 years.  She gave me a lot of different fringes and trims so you will be seeing them a lot in this play.   The black you see on the collar is a black velvet ribbon I found thrift shopping a few years back.  The white braid around the black velvet is clearance trim from hobby lobby.  I have this habit of picking up things I think will be useful in the future just I never know when that is in the future.  Some times days or weeks sometimes years.  I also used black upholstery cording on the white collar and red around the sleeves just to give it added touches here and there.  Just because the item is made for furniture does not mean I can not use it in costumes you would be amazed at how many upholstery trims I use and how much upholstery and drapery fabrics I use.

back collar detail
The collar is made of two layers of velvet ribbon back to back with eyelet lace inserted between them. The zipper on the back is hard to see but it is a real dark dark pink almost looks red.  I found 2 backs 3 weeks ago thrift shopping that had about 40 zippers in them not back for about 6 dollars spent.  This is one of those.
fringe on collar
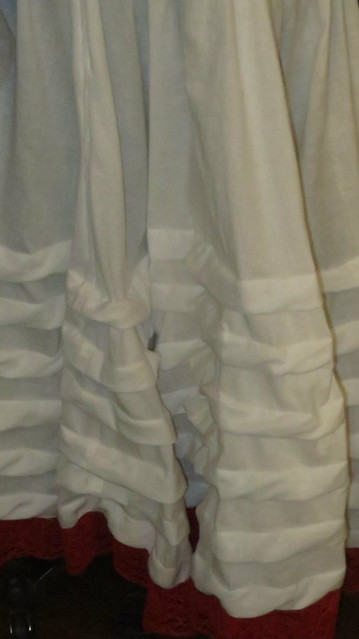
It is hard to see in the photos but there are 4 growth pleats around the bottom of the hem of this dress.  Those pleats took up a total of 12 inches of fabric length to make this the right height for the player.

petticoatThe petticoat you see is made from bleached muslin and also have 7 growth pleats in it.  It also has a red lace trim.  The lace was found the same time when I found the lace that I dyed gray for Aunt Marches cape I found a lot that day at a real good price.   The best way to costume is to go junking I would say you never know what you will find and how it will be used.  The tulle netting you see is to help keep the dress a little puffier at the waist it is also in the sleeves the sleeves and bodice are fully lined so you can not see the netting there but it serves its purpose to keep the sleeves puffier.  (sorry it was cold out so you also see my daughters flannel PJ's not part of the costume.  The picture to the right of my daughter in the petticoat is after being ironed.  The one below is before being ironed big difference in appearance.
petticoat
The daughter wearing the above dress is a little too small for it and my oldest daughter is a little too big so it will look better on the actual person I made it for especially since she has raven black hair and is a very pretty person in general.


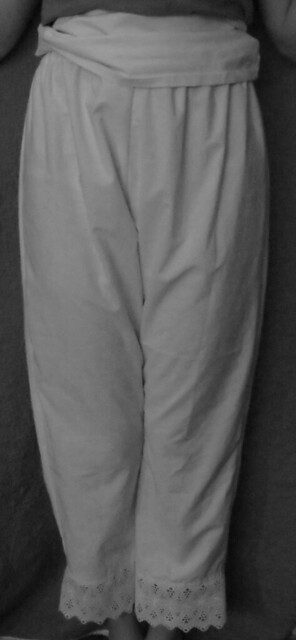
IMG_2372_1 I also finished a set of pantaloons for Aunt March.    This set of pantaloons is made from clean old sheets thus making them real soft to the wearer.  I also used that same sheet on Jo's dress above to make the collar and cuffs.  The lace at the hem of the pantalet is the same lace I used on the collar of the first dress for the Aunt March character.This is the first of 5 pantalets and 2 pantaloons I will need to make for the play.

I have another set of pantalets that I am making for the character Amy in the play.  Since that character likes nicer things hers will be made out of eyelet fabric.  As if she took the time to embroider her under garments because she wanted finer things is the thinking there.  I will update when they are done to this post.

Yes the photo is black and white.  I wanted it to have an older look to it looked to bright in color with a bright orange quilt behind her to hide me sewing table from the picture.  Silly but there you are.

Update say day:

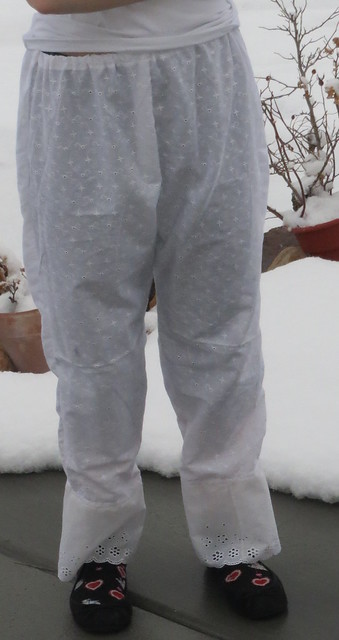
amy''s panteletsThis next set should have been ironed.  These are Amy's pantalets they are made with left over eyelet fabric from my daughters dress.  I only had enough fabric to make one set.  I have little bits left over still which might work for sleeves on a dress.  Because the fabric is a batiste it is rather sheer so my daughter is wearing her cross country shorts under these for the photo.  OK! I  know these look long but my daughter is 4 1/2 inches shorter in the leg than the person that plays Amy in the play and so of course these fit Amy's character not my oldest daughter.  I liker the heavier fabric I used earlier better.  But i thought the character of Amy would have added embroidery and eyelet to her underclothing to make it fancier ie. the use of the eyelet fabric.

Copyright/permissions info

I like to share on this space my ideas and projects.
Please don't take ideas or photo and claim them as your work.
I am always happy to have new links to me.  So if you like something just link back to me and give the source some credit thanks.
Any questions? just ask. I am happy to work with you if you need something
Creative Commons License This work is licensed under a Creative Commons Attribution-Noncommercial-No Derivative Works 3.0 Unported License. 2006-2019 Copyright Vintage Threads Inc. All content and images.

LinkWithin

Related Posts Plugin for WordPress, Blogger...