[google6a7b7d93c7100df5.html] Sunshine's Creations.Vintage Threads Inc.com: MIL's art

friends and followers

If you like my blog and the free patterns and tutorials and want to say thank you
I have a wish list on ravelry of patterns (click here)
I would like to make.
Thank you in advance for being kind and saying thank you back.

Love Sunshine

Search This Blog

Showing posts with label MIL's art. Show all posts

Friday, October 11, 2013

ROSE PETAL BEADS

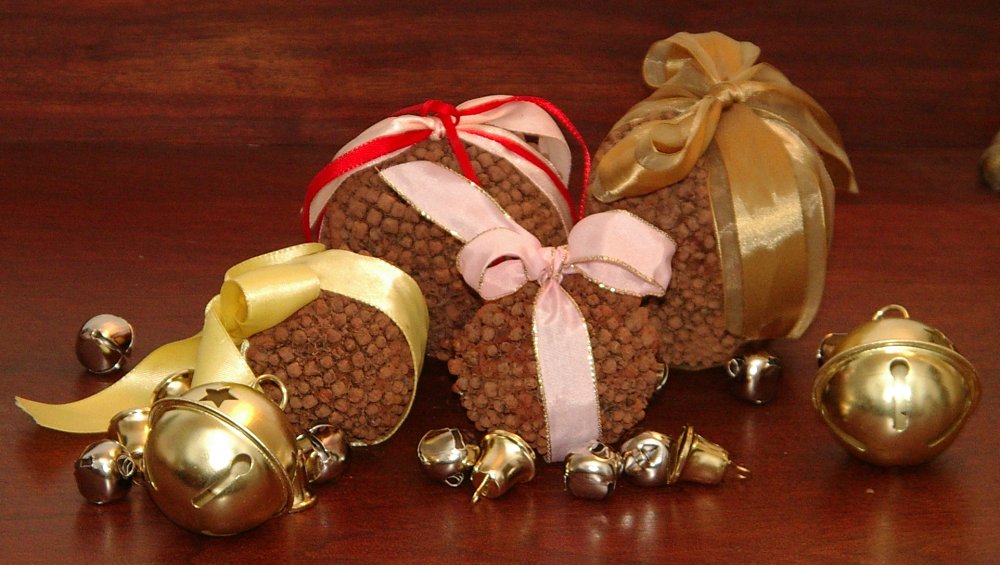
These beads will keep their fragrance for several years and are stronger than you would imagine.  In time with use and wear they will turn a polished red Sienna color.  My mother-in-law had a set of beads like this before she passed that one of my sister- in-laws wanted.  I thought it was an intriguing idea beads for every day use made out of roses never heard of it before except for rosaries.  My middle daughter wanted to make some so here we go with the experiment.  If you try it, it would be nice as a mother's day gift or a way to use up those dead valentine roses or any other rose you are given.  This way you get to keep the gift of the flowers for years to come.
 
supplies
  • water
  • 1 enamel pan with lid
  • 1 lb rose petals red
  • silk thread
  • closer for strand of beads if it is not  long enough to go over the head
  • needle for piercing hole or wire can be used
  • beading needle for stringing
  • newspaper for drying purposes
  • cookie sheet to rest beads on while drying

To make rose petal paste
  1. The heat of your body causes the beads to give off the sent  of the rose petals from which they are made.
  2. In enamel pan place1 lb of rose petals ( usually red is used for this) with just enough water to cover petals.
  3. Simmer for one hour but do not boil.Cover  pan and let mixture stand over night.
    1. Repeat this step three more times. ( 4 days total)
  4. By the fourth day ,the petals and water should have become a smooth paste consistency.
To  form beads:
  1. Take a small amount of paste and roll it between your palms, try and form balls that are about 1/4 inch in diameter
  2. Pierce each ball with a needle or wire to form bead for stringing.
    1. let the beads dry on newspaper in a warm area like above fridge somewhere warm but dry. 
  3.     Thread the beads onto silk thread for your necklace.

Saturday, October 25, 2008

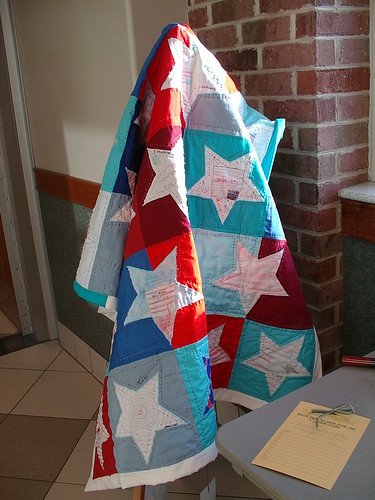
Quilt All done

on display at silent auction

So, this is a post I was going to do yesterday but ran out of time and energy (I was awake for about 41 hours straight to get this done in time). Deadline for sign up items into the auction was Tuesday, deadline to have them turned into school was Friday. I got up Thursday at 5 am, quilted all day and all night, didn't go to bed. Mother-in-law and daughter stayed up late quilting with me. My mother-in-law is just so great; she stayed 'till 3 in the morning helping me get this done for the auction. My daughter, who is 11, stayed up an hour past her bed time so she could quilt one block to help out. I put the binding on the quilt at 6:45 Friday morning. Still no sleep: still more quilting to do, but not around the edges, so the binding went on because that would be hard to do at work. Went to work, quilted at lunch time, and finished quilting.

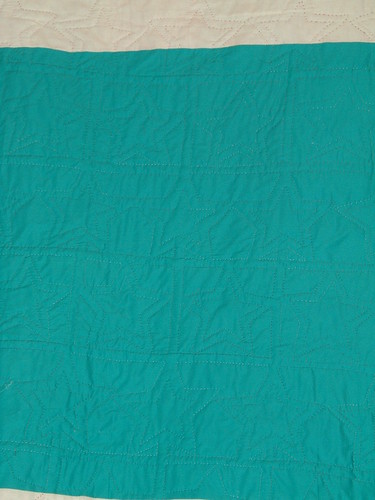
close up of quilting
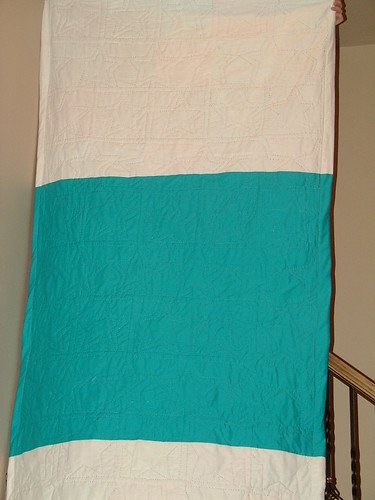
back with quilting
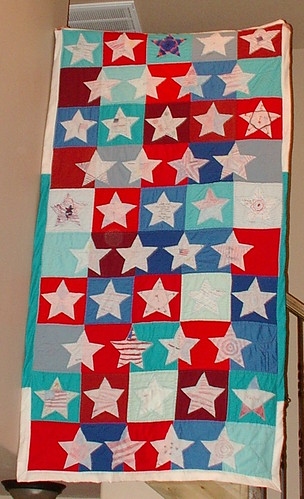
all done and quilted

Turned it in to the auction. Went to the fall harvest festival, stayed till about 9 p.m., got home around 10 and crashed. (There is more to this story than I am posting, but it would take way to long to post). Long story short, people don't understand the pricing of hand work. So I paid for my own quilt and brought it back home. I will enjoy it on my foyer wall and think of the wonderful 4th Grade children I taught, and my lovely mother-in-law, and my beautiful daughters for all their help in making such a wonderful memory for me (daughters: one helped quilt and another help cut, the last one watched and didn't touch) . From the start of the quilt to finish of the quilting, it was 7 days total; I don't usually make a quilt quite that fast. Thanks, everyone!

on display at silent auction
Now that the quilt is going to live at our house, I will sew on a hanging sleeve and, at a leisurely pace, I will add more quilting to it before it goes on the wall. There just wasn't enough time to put all the quilting I wanted to do into the quilt, so it will get a few more rows of echo quilting and call it good.

Wednesday, October 01, 2008

Please help my Mother-in-law

My mother-in-law sent me this email and wanted help, so I am asking any of my readers to help her; thanks in advance.

Do you know of a bulletin board online where I can put in a request to buy a couple of Swedish Weave pattern books that are out of print? I would like to buy the "More Monk's Cloth Afghans" and the Baby Afghans pattern books by Marilyn T. Magly, printed by the American School of Needlework. I wrote their website, and they replied that those books are out of print and won't be re-issued, so I need to get them used, but don't know a bulletin board where I can post such a request.
Let me know if you have any ideas.
Thanks,
MOM

Monday, October 15, 2007

Swedish Weave Part 2

close up Swedish weave blanket
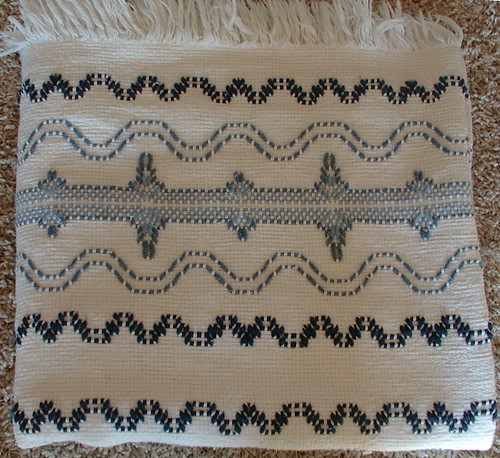
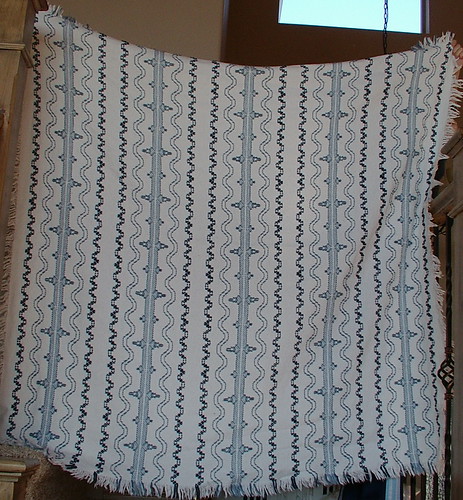
A long time back I showed the two Swedish weave blankets my Mother-in-law made for my oldest and youngest daughters. Over the summer she gave one to my middle daughter for her 8th birthday. I just realized I have never shown it. She sleeps with it every night so it may not be the cleanest in this photo, but we love it and she, my daughter, defiatly does. Some day I plan on making one for myself, but it hasn't happened yet. Incase you have never seen this type of weaving, you buy Monks cloth and weave into the weave of the cloth forming patterns with yarn. It is very similar to huck weaving, but that is done on a smaller weave for table cloths and things of that sort.
Swedish weave blanket

Saturday, February 10, 2007

Swedish weave

These two blankets are made in the Swedish Weave technique. I did not make these; my Mother-in-law did. We took a class together to learn how to make these. I started one long ago that I have never finished. She wants to make one for each grand kid. She is playing "get caught up" at the moment. She is the mom of nine kids, so you can guess that there are a lot of grand kids already, and lots more coming all the time. These two blankets are my oldest daughter's and my littlest daughter's. The middle one is still waiting for hers because there are so many grand kids. The reason the oldest and the youngest have them and not that the middle one, wasn't that she was skipped because that didn't happen. The youngest was born right about the time we learned how to do this type of embroidery/weaving. So she got either the first or the second, one can't remember now. Now, mom is going back starting with the oldest grand kids and working her way down the list with new grand kids thrown into the mix as well. Because, if she goes the other way, the older kids keep growing and she has to make bigger blankets to cover them. This way, the blankets all stay about the same size and she gets caught up right as the next kid grows into that size of blanket; makes sense. The top right one belongs to my oldest daughter; the bottom right one belongs to my youngest daughter. My SILs pick the patterns for their kids blankets which is fine you can make sure they are all different that way. I find it more fun to just let my MIL pick what ever yarn and pattern she wants that way she can have more fun making it. Also it lets me know that it was more from her heart something she likes.

Tuesday, January 02, 2007

Valentine's from MIL

These two Valentine's my MIL made a few years back. I wish I had written the date on them; oh well. They are real simple and cute. I will explain how to make one. The pictures should be good enough with out diagrams to make it.

Supplies
  • red and white double sided satin ribbon thin
  • 1 stick of cinnamon broken into 3 pieces
  • 3 small wood hearts
  • 1 large wood heart
  • drill
  • glue
  • red paint and brush
how to make
  1. Drill four holes in large heart; one at top center and three across the bottom (see picture).
  2. Paint all four hearts red; let dry.
  3. Glue small hearts to three strands of ribbon; let dry.
  4. Tie cinnamon to bottom of ribbons.
  5. Pass ribbon through bottom holes on large heart and glue in place; let dry.
  6. Make loop of ribbon for top of large heart, pass through hole and tie.
Hang and enjoy or give as a Valentine
DO NOT USE THIS PATTERN TO MAKE THINGS TO SELL FOR PERSONAL USE ONLY!!!!

Saturday, December 30, 2006

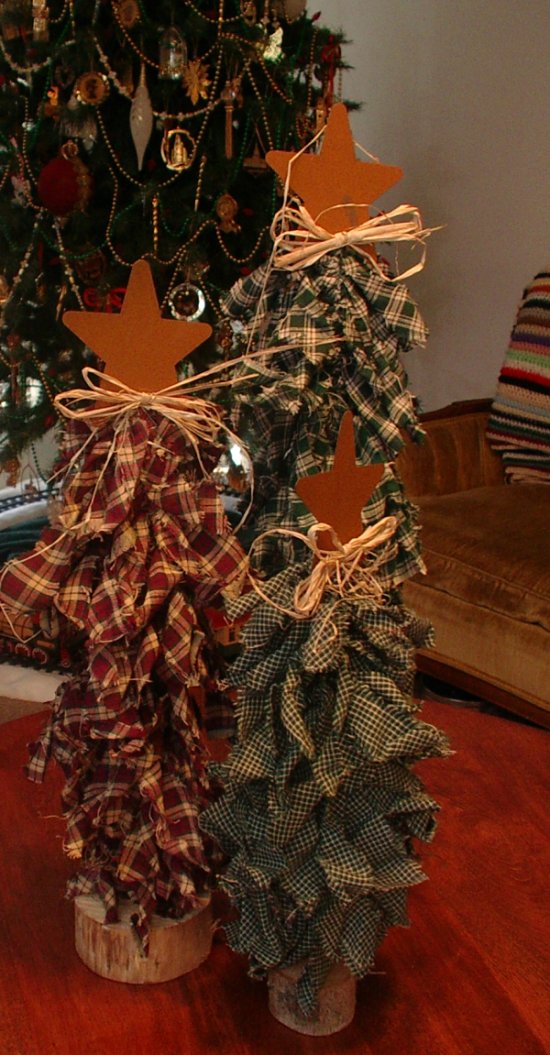
we three trees

About four or five years back, my MIL was making these trees as gifts for her kids for Christmas.


I was living with her at the time. No joke; she is a great lady and living with her proved it more to me.

Any way, these are made out of dowels to desired length, and torn home spun fabric in Christmas colors, a rusty tin star, raffia, and a piece of branch that has been cut on a band saw and drilled in the middle to accommodate dowel. I can't find the original instructions or I would post them. The strips of fabric are just tied around the dowel and they get shorter and shorter as they approach the star. I think they came out real cute and would be cute in other colors and fabric too. The neat thing about homespun is that it has no right or wrong side to the fabric, so it does work a little better for this project.

It is trendy right now to have a stripey blanket. I know it is on about five other blogs, just can't remember where. Well you can see ours on the sofa in the back by the big Christmas tree. I made that one about three years ago for my husband's birthday present.

Hi! I saw that Sunshine needed this pattern, so here it is:

The Three Trees

Each tree requires 1/2 yard of fabric. For three trees, you should have three different plaids that go well together. The fabric should be printed on both sides; homespun works best. The trees look best if the fabric is torn, not cut, into strips.

Dowels are approximately 7/16 inches in diameter and measure approximately 19 1/2 inches, 16 1/2 inches, and 13 1/2 inches in length. All three should be able to be cut from a single 40-inch dowel.

  1. Tear the fabric into strips according to the directions below.
  2. Start with the longest strip for a tree and tie it to the bottom of the dowel with one single knot. Continue until all the strips have been tied to the the tree -- the longest strips at the bottom, the medium strips in the middle, and the shortest strips at the top.
  3. Push all the knots on the tree closely together.
  4. Put a little wood glue into each tree base, and then insert the dowel.
  5. Tie a few strands of raffia at the top of the tree.
  6. Finish by gluing the metal star (available at craft stores or WalMart) in place.

Medium and Small Trees

Tear thirteen (13) strips, lengthwise, from your fabric. Each strip should be approximately 1 1/4 inches wide. Lay six (6) of the strips side-by-side and cut in three (3) 12-inch lengths. (Note that there is a short area of wastage with this set of strips. If you are doing multiple sets of trees, this wastage can be combined to form usable lengths of ties.) Lay five (5) strips side-by-side and cut in one (1) 12-inch length and three (3) 10-inch lengths. Lay the final two (2) strips side-by-side and cut in one (1) 10-inch length, and four (4) 8-inch lengths.

You should end up with
  • 23 12" strips
  • 17 10" strips
  • 8 8" strips
  • 45 total strips
Note that the lengths do not have to be exact, but it helps to be relatively correct.

Large Tree

Tear thirteen (13) strips lengthwise from your fabric. Each strip should be approximately 1 1/4 inches wide. Lay seven (7) strips side-by-side and cut in three (3) 14-inch lengths. Lay six (6) strips side by side and cut in two (2) 12-inch lengths and two (2) 9-inch lengths.

You should end up with

  • 21 14" strips
  • 12 12" strips
  • 12 9" strips
  • 45 total strips

Again, these lengths do not have to be exact, but it helps.

If you are doing multiple set of the trees, you may end up with more fabric, or extra strips; GREAT! (Or, you may want to use a bit more fabric and just cut some extra strips.) The more strips you can get from your fabric, the more full your trees will be. However, be aware that narrower strips than 1 1/4 inches are too small and don't look very nice on the finished project.

I received this pattern from a leader when I made a set of three trees at a Church women's homemaking activity. The set of the trees, accompanied by the book "The Legend of the Three Trees," retold by Angela Elwell Hunt, were given as a gift to each of my children for the Christmas of 2002.

A wonderful Christmas and a joyous New Year to you and yours.

Pattern Posted by Myrna

( Up date: if you don't know who Myrna is, it is my Mom-in-law aka MIL; but I just call her Mom. I am not a great speller or grammar-type person, but she is. So she was kind and agreed to check over my stuff from time to time and fix mistakes. Here, she was kind enough to give you the pattern I couldn't find. Thanks MOM)

Please click on the first photo to see how cute these really are.


Copyright/permissions info

I like to share on this space my ideas and projects.
Please don't take ideas or photo and claim them as your work.
I am always happy to have new links to me.  So if you like something just link back to me and give the source some credit thanks.
Any questions? just ask. I am happy to work with you if you need something
Creative Commons License This work is licensed under a Creative Commons Attribution-Noncommercial-No Derivative Works 3.0 Unported License. 2006-2019 Copyright Vintage Threads Inc. All content and images.

LinkWithin

Related Posts Plugin for WordPress, Blogger...