[google6a7b7d93c7100df5.html] Sunshine's Creations.Vintage Threads Inc.com: tutorials

friends and followers

If you like my blog and the free patterns and tutorials and want to say thank you
I have a wish list on ravelry of patterns (click here)
I would like to make.
Thank you in advance for being kind and saying thank you back.

Love Sunshine

Search This Blog

Showing posts with label tutorials. Show all posts

Saturday, February 21, 2015

Valance to folk shirt how to

valance

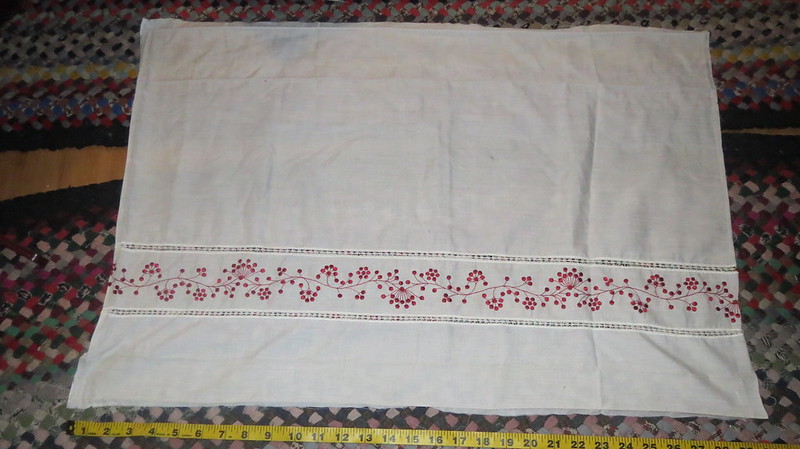
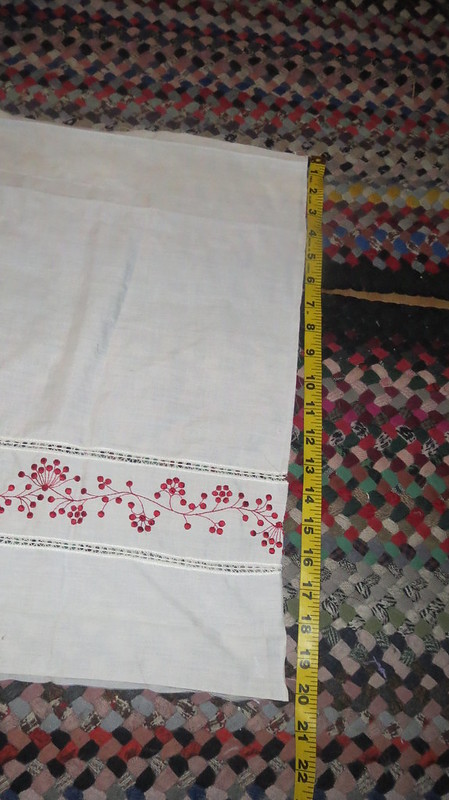
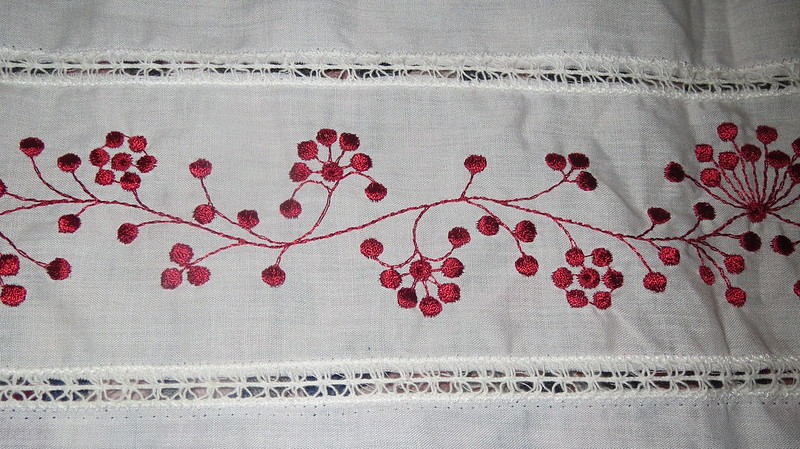
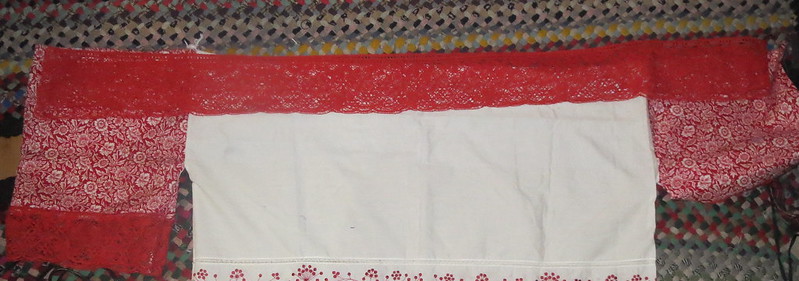
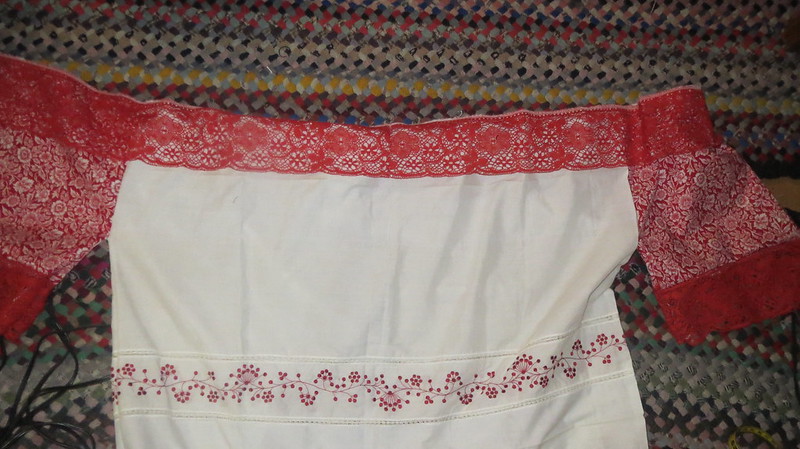
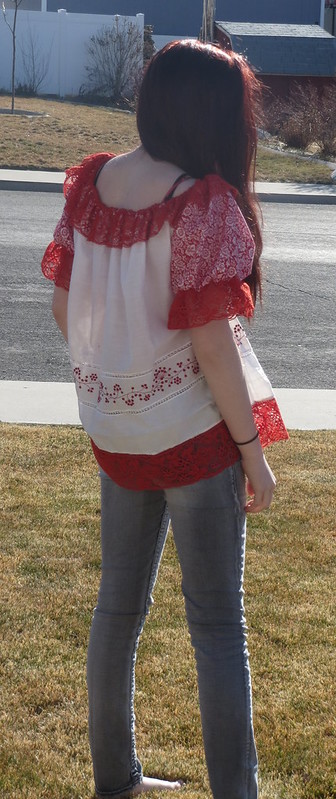
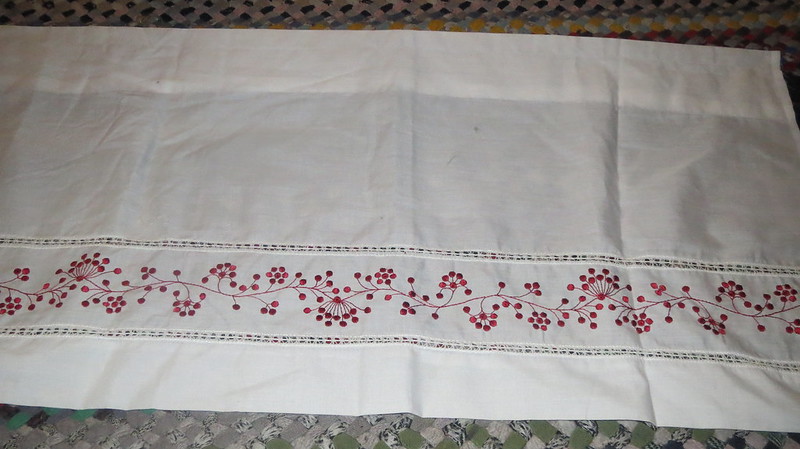
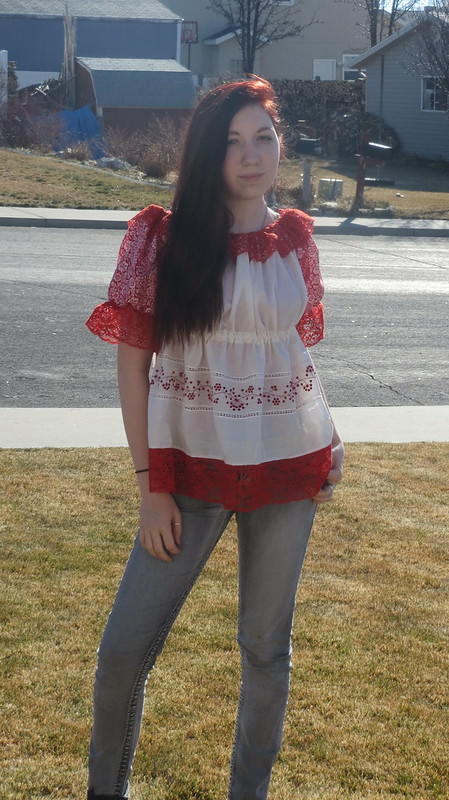
frontSo as I said yesterday in the update my middle daughter got excited to go through my thrift shop stash of fabric.  I like to buy curtains and such that have pretty details to use as accents on costumes.  She found this single valance that was 14 inches by 56 inches.  Since there is a dance tonight with a red white and pink theme Valentine's I would guess yep you can guess it she wanted it made.  I told her she wanted a shirt she had to help dismantle in this case we are dismantling more than we did for the other one as it is going to need the seem allowances in the valance for the length and width of the shirt.
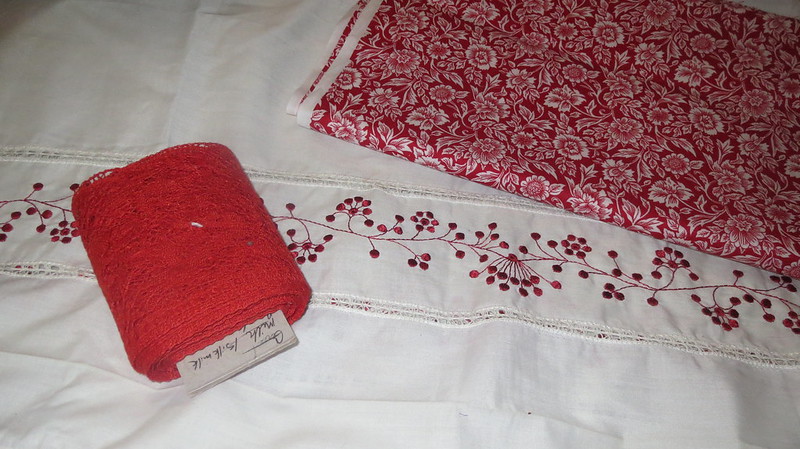
fabric and lace choices to go with valance

Warning this post is photo heavy
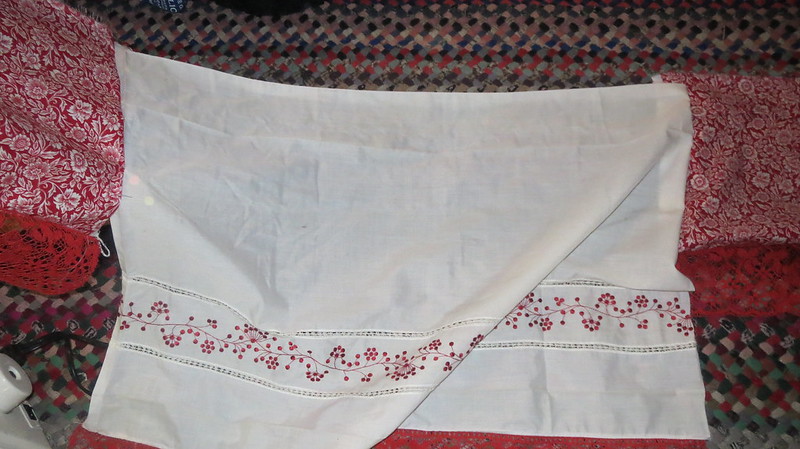
unpicked valance
length of case after opeinng seems
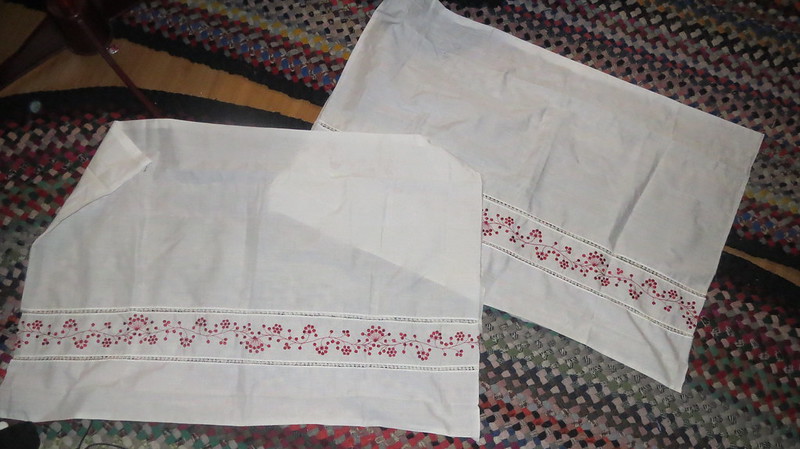
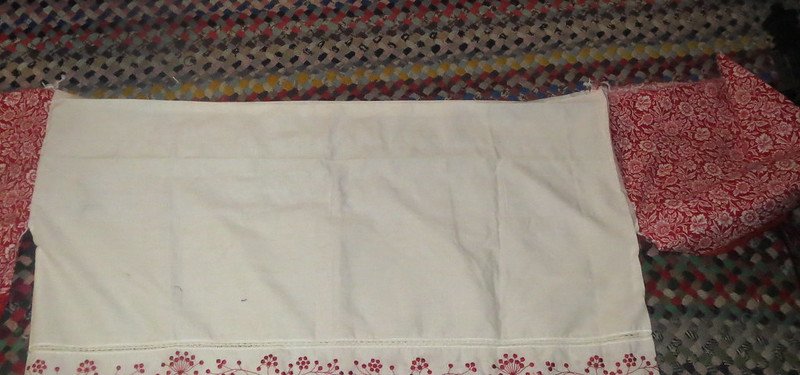
After ripping out all the seams and cutting it in half she now has two pieces of fabric that are 20 by 29.5 inches.  As you can see a lot of fabric in the seams to make the curtain rod slot and hem.  She gained 6 inches for the length of her blouse.  We could have cut nice little angles  for the arms in the fabric you are welcome too but I like having the extra fabric in there to make it more billowy.
cut in half
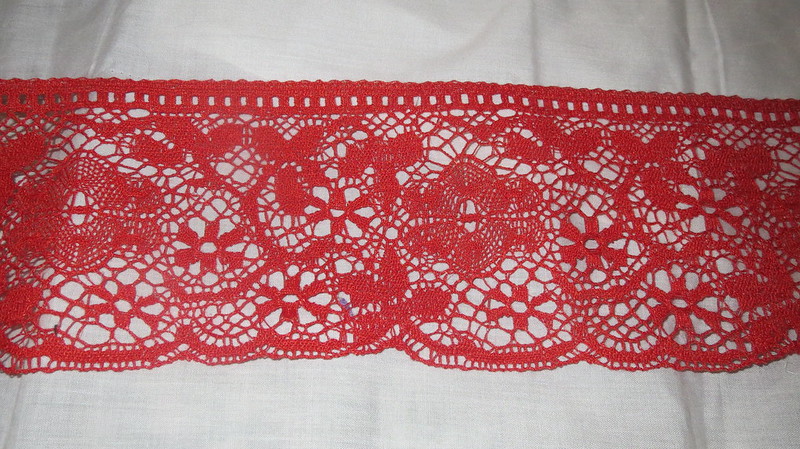
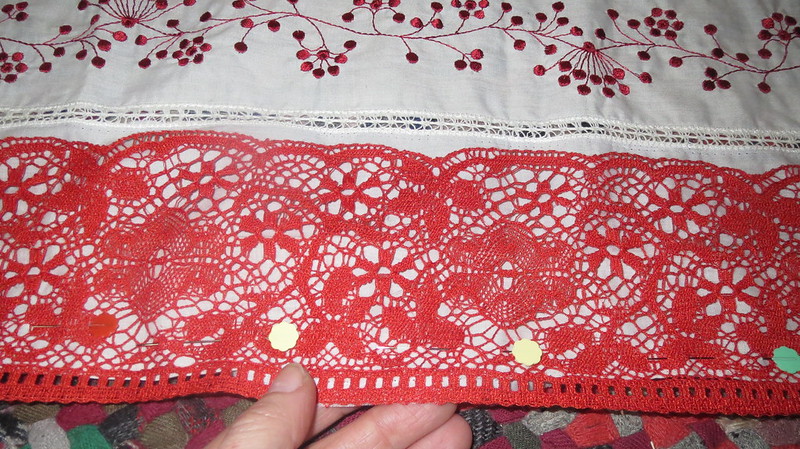
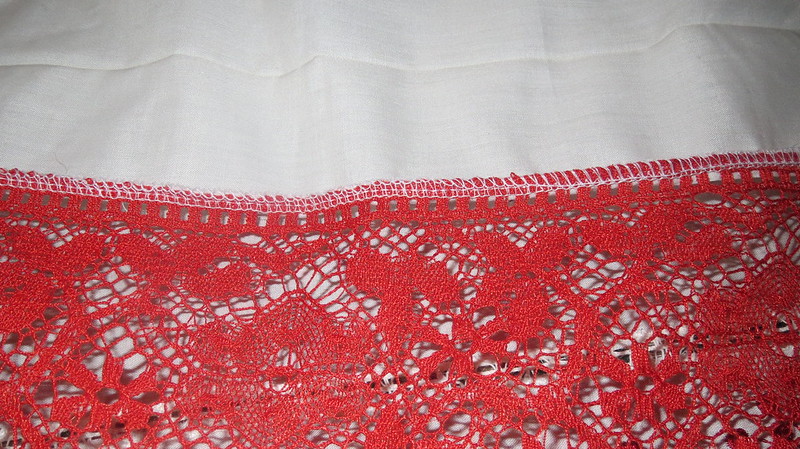
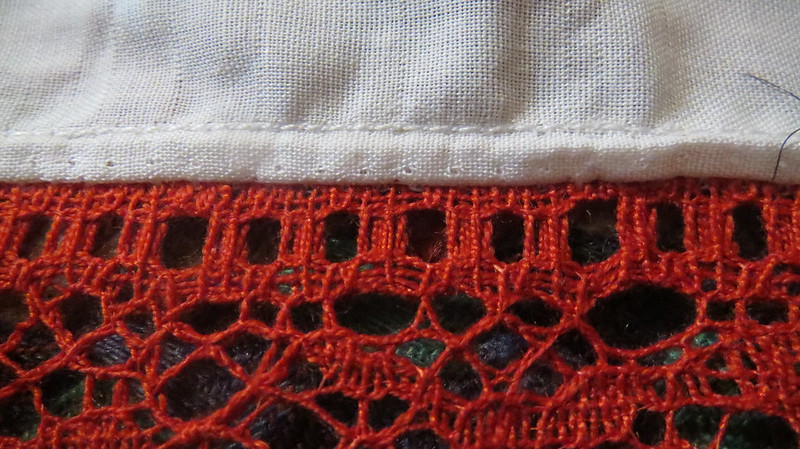
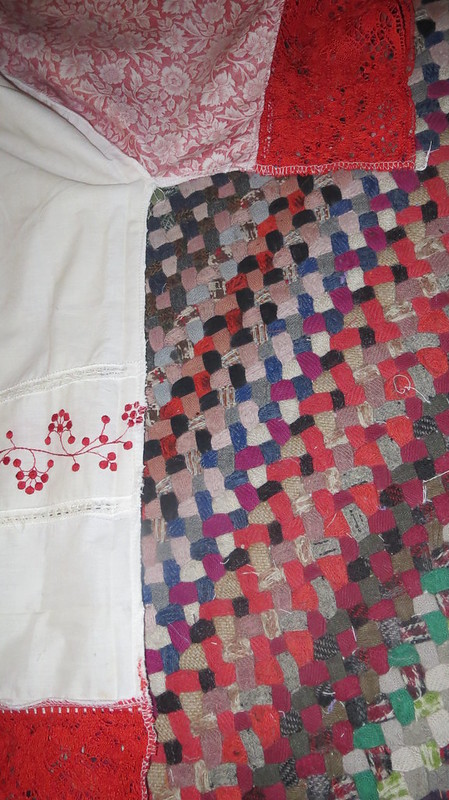
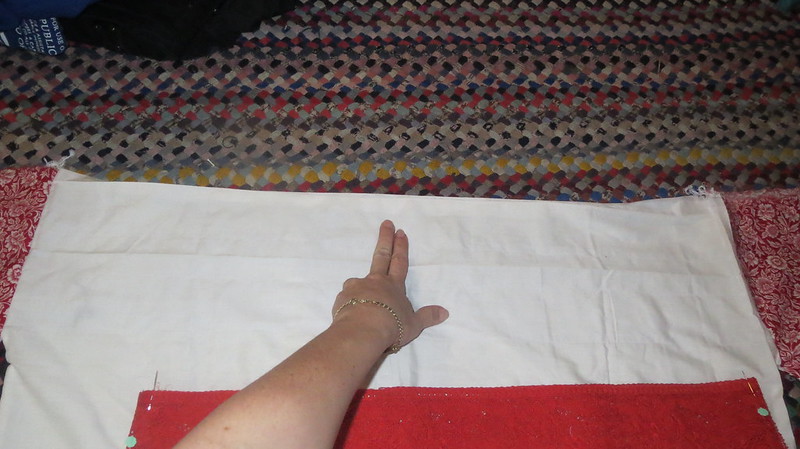
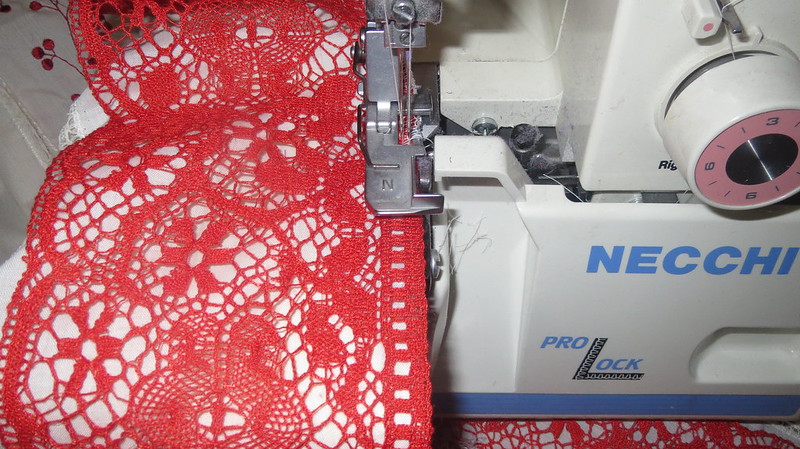
Because I have some ( a tiny bit) of red 100% cotton vintage lace I decided to add that to the two pieces of the valance to make it even a little longer I pinned then surged in place thus finishing the raw edges and makes for a nice seem to flip to the back that I can top stitch over to hold down.
lace choosendetail of valanceadding lace to hemsergedback side
front you can see old holes from wher eunpicked those will wash out

This is where we have to change a lot from the other item as this is only truly enough fabric the front and back of the blouse (for teen/adult size for a baby/toddler I would have cut differently and would have had enough to make a summer dress.  The joys of children growing up the things you learn you can use at one point and not another.

Wish we had found two valances but we didn't.  So we had to find something else for the sleeves
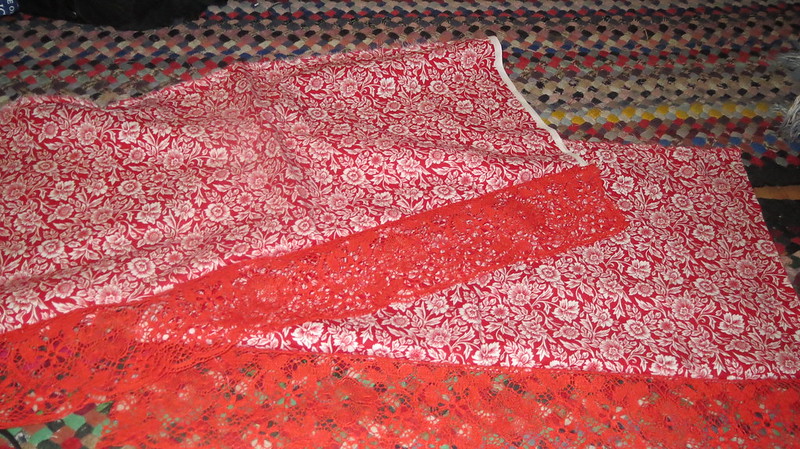
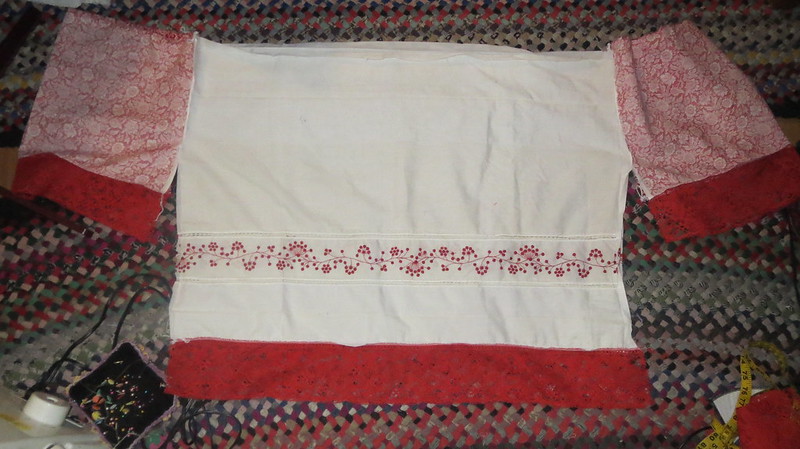
sleeves with lace
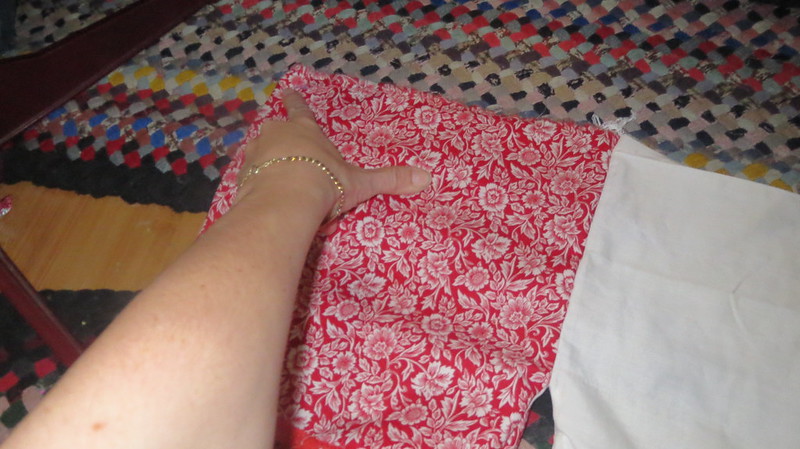
I was trying to keep the flower look of the valance embroidery when I picked the lace with flower details same is true for the fabric for the sleeves. I picked red and white fabric with flower details.
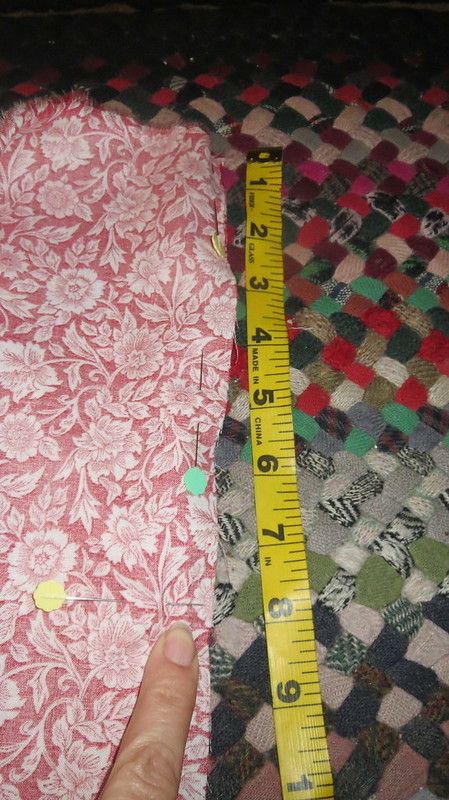
leave 8 inch opening
I cut a slip 11.5 inches wide by the width of the fabric 44 inches.  Then on the length I  sewed more lace.  Then cut the whole thing in half so I have two pieces that are 11 by 22  I did not worry about removing the salvage as I know it will get cut off when I serge that seam but you are welcome to cut it off.
sleev placement with bodyIMG_3178


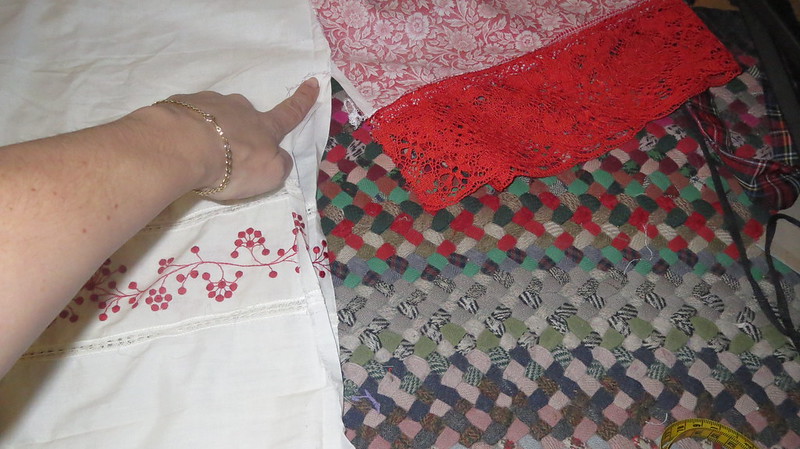
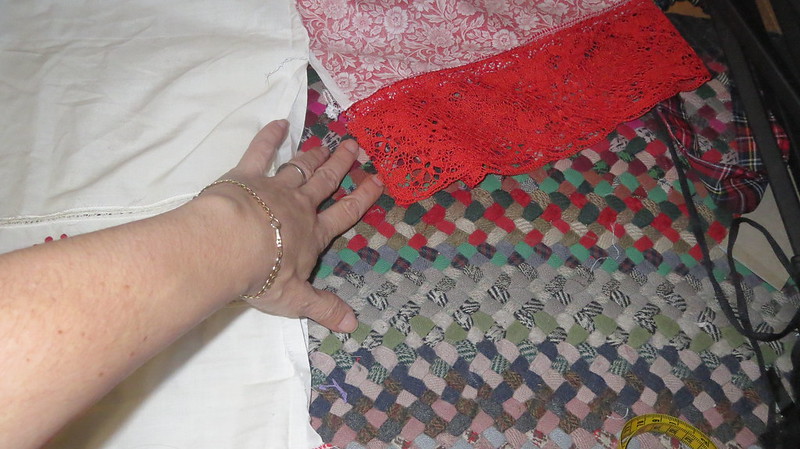
Pin in place on the front and back of the blouse sew 8 inches down leaving the ends open see photos.  Then sew up side seams making sure to match up lace edges under arm point and lace edges again.
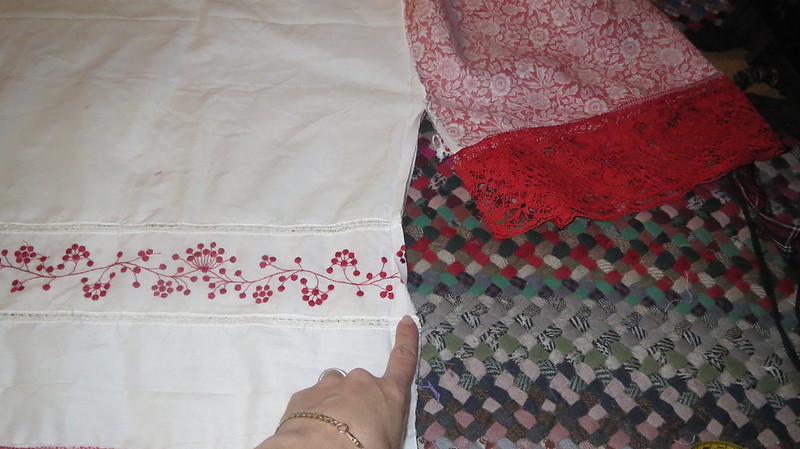
serge here matching details of edgings and such match her eand turnmatch lace and end
IMG_3183serged
I had a tiny bit of lace left about 3 inches shorter than the width of the neck but since the item is going to be gathered any way.  I just pinned it so that the fabric and the lace where each divided into four equal sections.
 placement of pins center sleevesplacement of pins centere back/front

Then when sewing held the lace firm so that the feed dogs could pull in the excess fabric and make them fit together.
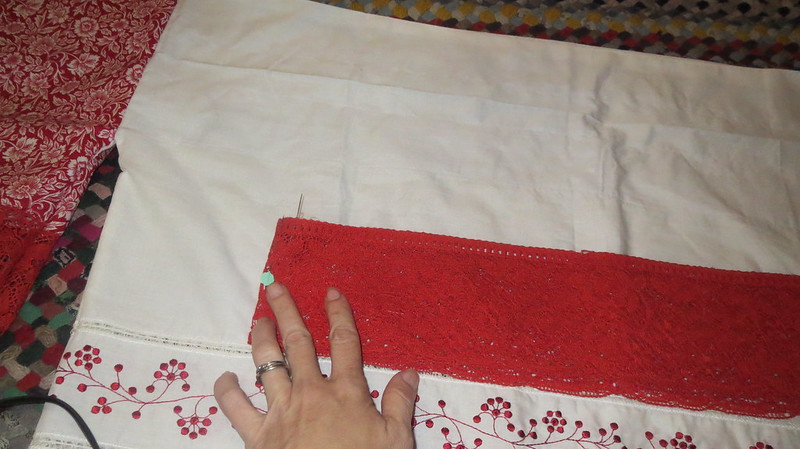
fold lace in fourth and use pins to mark
lace ready to attach
 neck lace attached
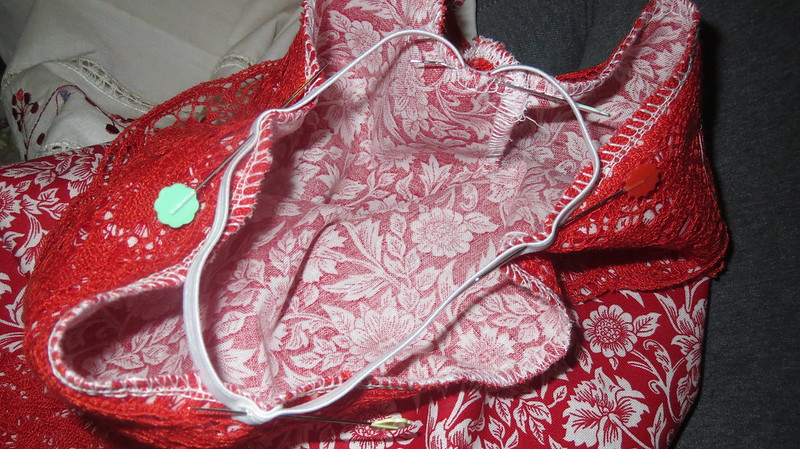
Next I cut two pieces of elastic 11 inches long the diameter of my bicep did the same to the sleeve as I did the lace.  Divided both sleeves and elastic into four equal parts and pined in place.  Then when sewing used feed dogs to pull in and stretched the elastic to make it all fit and gather nicely.
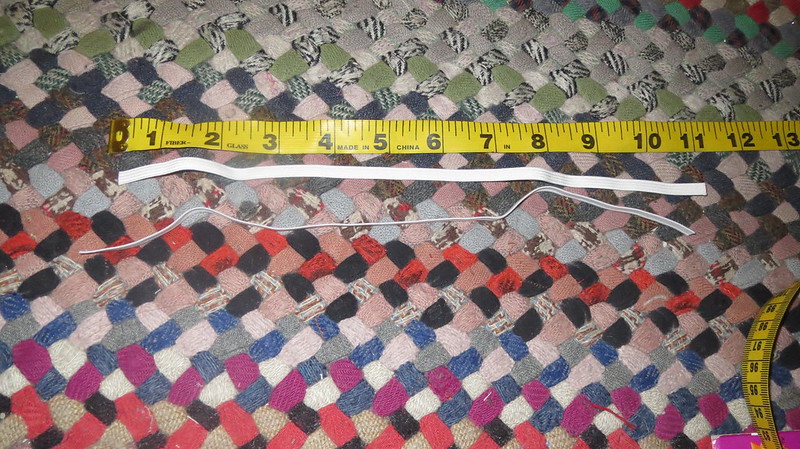
elastic for sleevespinne doin place
I went back to the neck area  folded over 3/4 of an inch of fabric an made a casing sewed it and laced in 24 inches of small elastic sewed ends together and shut opening.
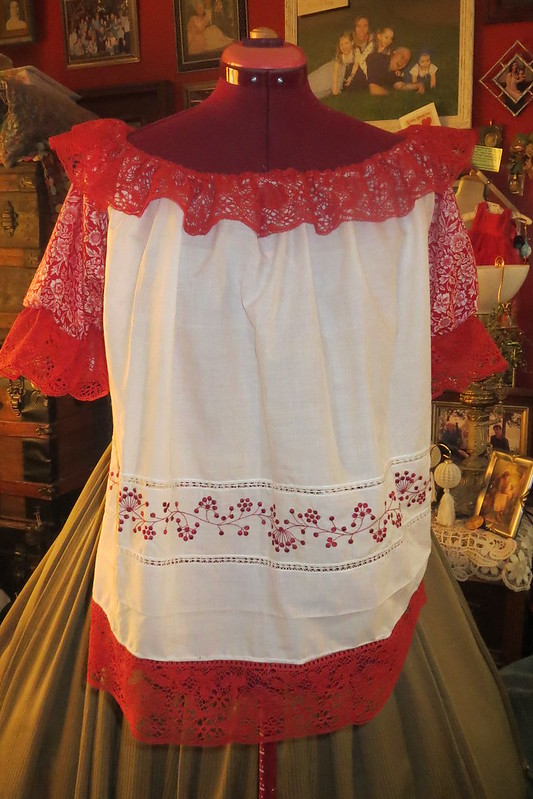
 front before i added elastic to sheer it
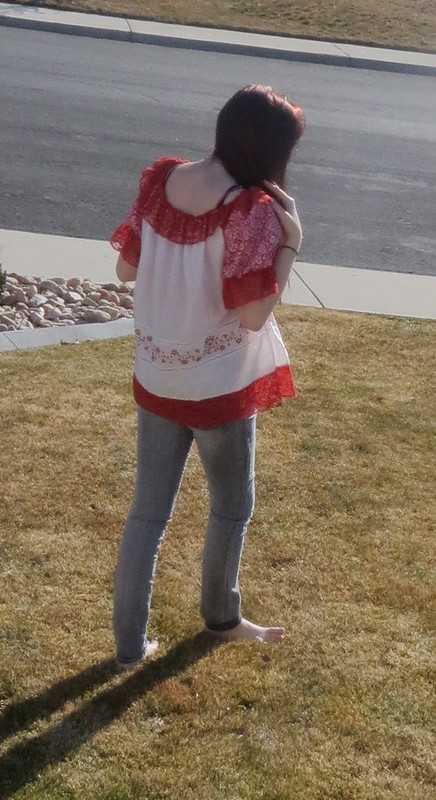
backbackI put it on my dress form and decided  I wanted am empire waist so I sewed twill tape under the bust to make a casing and added elastic.   I like it much better that way.  Still not fond of the back yet but I am all finished or so I thought.
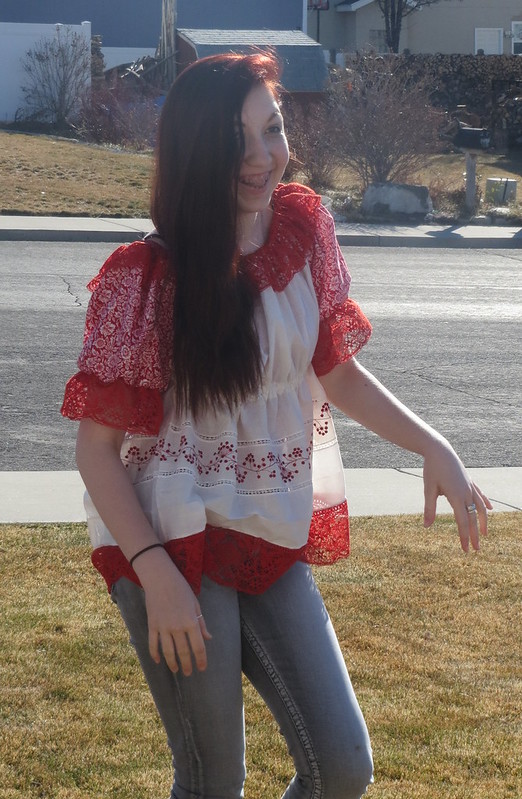
being sillyAfter my daughter tried it on she decided she wanted the back pleated I said I was done with it and she would have to do that her self.  So she placed it on the dress form and went to work changing the back to something she liked more.

Overall she likes the hang of the purple one more but the details on the red and white one the best.  I have not taken a photo of the new back pleats she added.  When she is done ironing it I will post that too as an

update to this post.
Here are the other photos of what my daughter did to the back of the blouse.  My littlest daughter wanted this shirt too.  Since my middle daughter already had the purple one after she added her mods to it she gave it to her younger sister such nice kids to share.


Friday, February 20, 2015

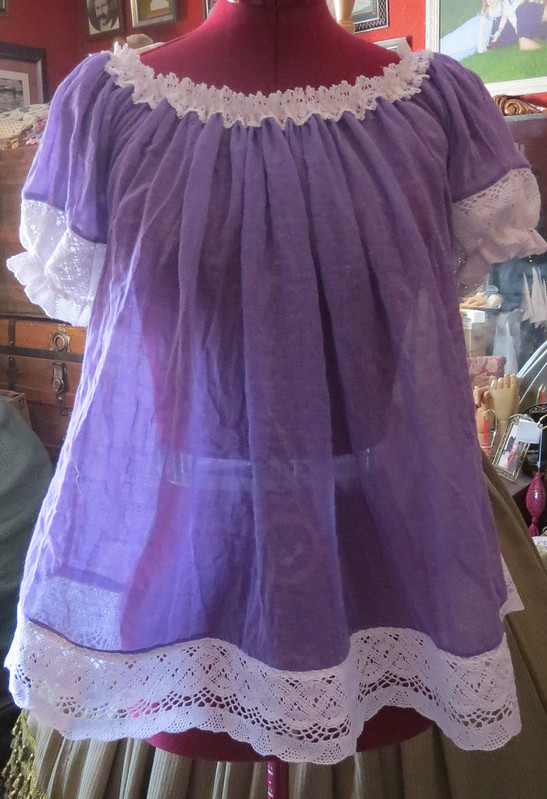
Re-purposing a purple skirt into a folk shirt (instructions added)

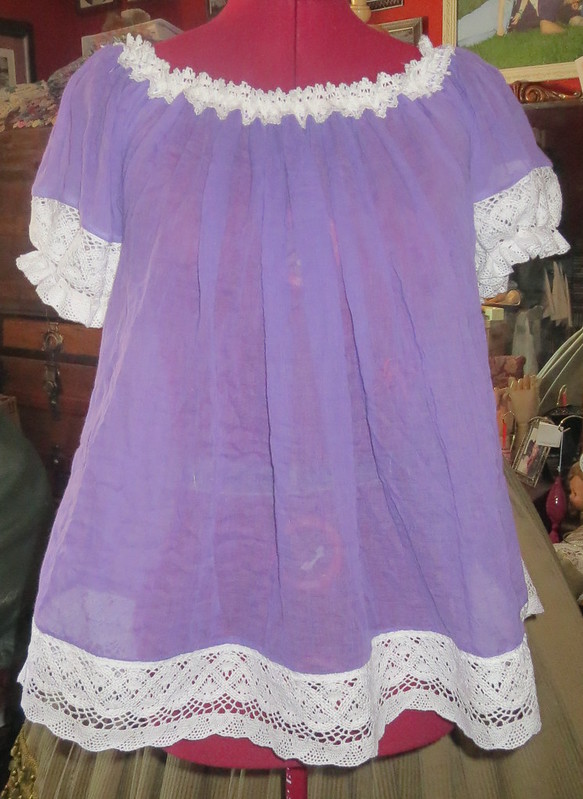
new blouse 
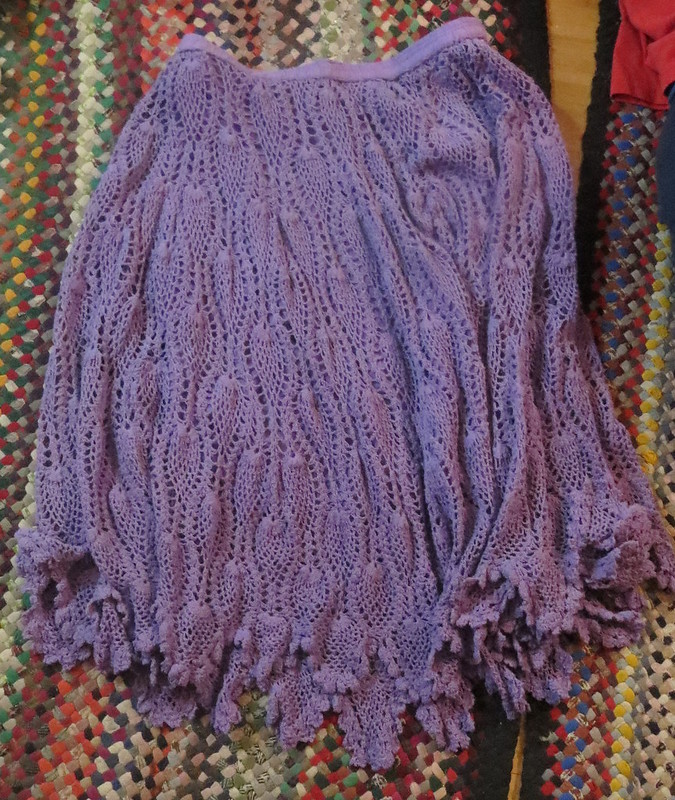
 sleevesLast night my  friend JoDee  stopped by and gave me a crocheted purple skirt.
original skirt
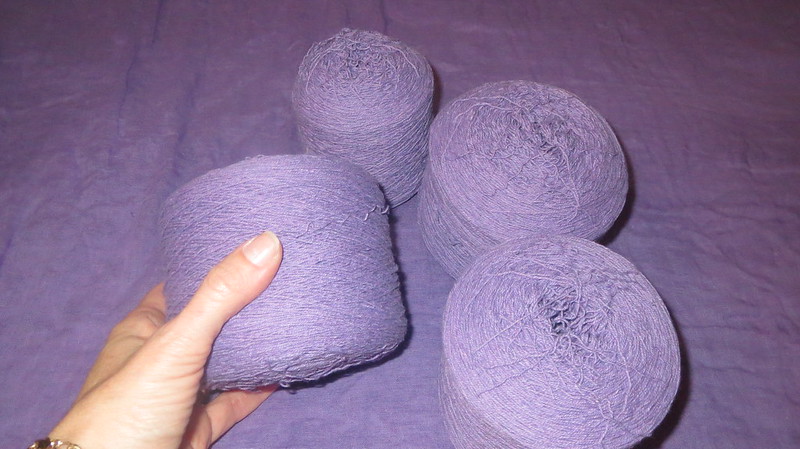
I like the color and I like crochet but for some reason I did not like the two together in this item but her statement when she gave it to me made me happy.  She said she was going to take it to the thrift store unless I wanted it because she knew I liked to remake things.  So my kids and I frogged the skirt and got 4 large balls of lace weight ( size 0) yarn I will use for knitting.
 thread / yarn from skirt

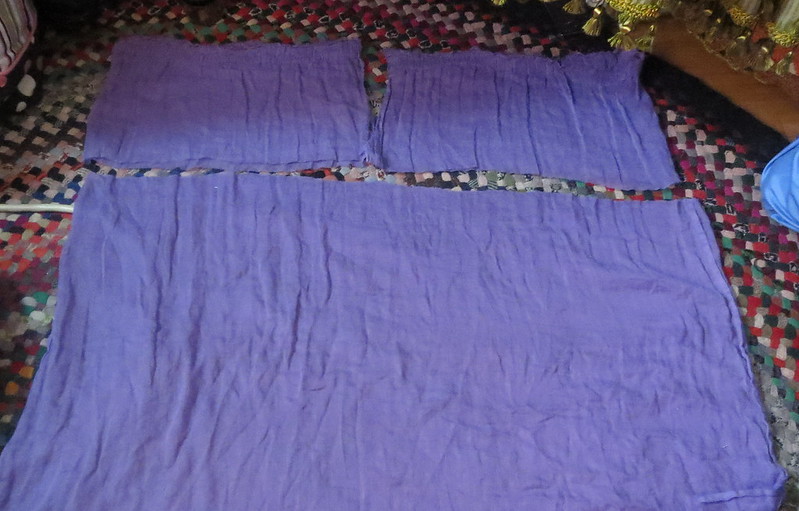
Then I cut up the gauze slip that was part of the skirt.  You can see it in the back of the photo of the balls of yarn before cutting and below after I cut it up.


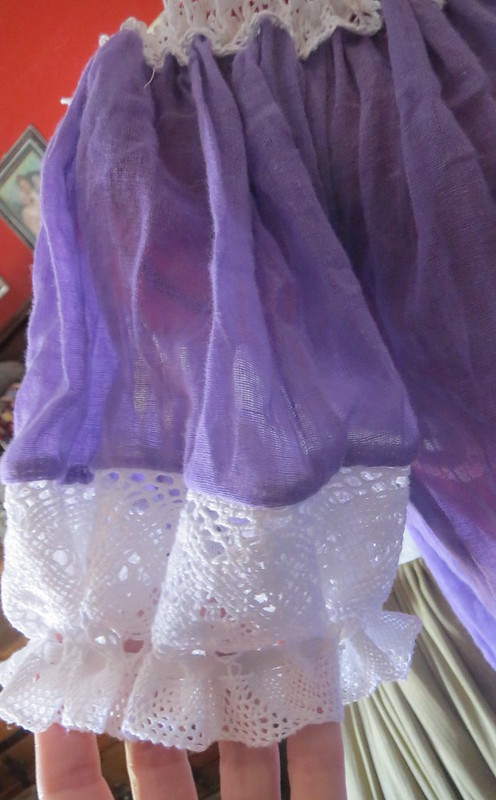
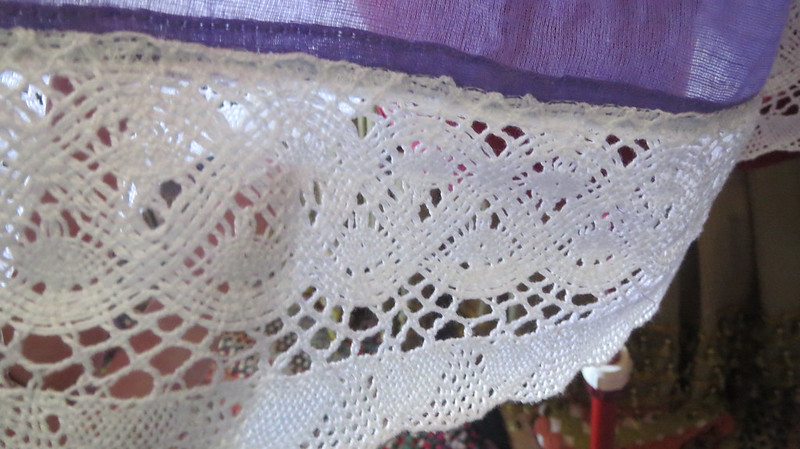
Made two sleeves and a bodice.  Added two different lace pieces to the blouse.
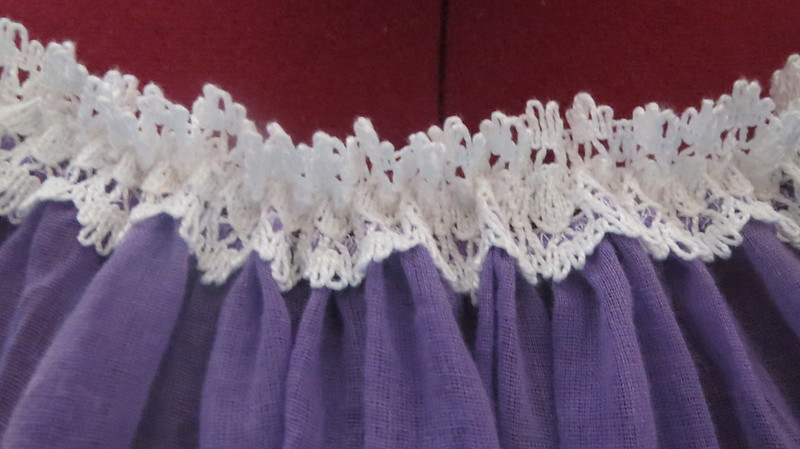
neckline of blouse
 The neckline I used all of that piece of lace  (which another friend had given me) and the hem and sleeves I still have a tiny bit of that one left which was actually removed from another item that was re-purposed long ago.
hem of blouse
I also added elastic to the neck and sleeves.  Now I think it is a pretty cute little summer top of course in my family something will have to be worn under it but I like it all the same or I may put it in the shop for sale it is a small adult size like a teenager who would wear about a 1 to a size 7 top.  If interested let me know and I will add it to the shop before my kids claim it. Has sort of has a Central to South American feel to it now.  If I owned a machine that could do fancy embroidery I would have embroidered a pretty folk design on the blouse.  But since I do not and can not afford one guess that will not be happening but I like it all the same anyway.

quickly what I did
    gauze slip cut to make shirt
  1. cut  a strip 7 inches long by the width of the skirt ( now two pieces of fabric. Leaving the already finished hem at the bottom of the skirt for hem of shirt ( was not sure if I was adding lace to the hem at this point)
  2. cut that in half   see photo ( now 3 pieces of fabric)
  3. cut open the side seams of the large piece of fabric just 7 inches down leave rest already sewn
  4. added very wide lace to both small rectangles for sleeves
  5. added lace to hem of blouse decided I wanted a longer shirt
  6. sew up seam for under arm seam leaving 7 inches open at the top of seam for insetting
  7. set in both sleeves to large piece where you cut the 7 inch slit
  8. I serged the neckline you do not have to but with such thin fabric i thought it best to give it strength
  9.  added lace on top of neck line 
  10. I used my elastic zip zag stitch on my machine and zig zagged a 30 inch piece of elastic to the back side of the neckline divided the elastic into 4 sections and divided them evenly around neck pinning center front and back and center sleeve ( stretch elastic while sewing in place gathers evenly this way all the way around)
  11. took a piece of elastic laid it around my bicep cut to exact measurement of arm
  12. wove into lace edge of sleeve sewed two ends together overlapped 1/2 inch sewed under the arm at seam to make it hide repeat for other sleeve 
  13. all done took me about 15 mins from start to finish no pattern needed if you have more or less fabric it will either be fuller or less full either way still works great
new blouse from slip of skirt

Update: my middle daughter claimed it now she has gone through some of my thrift fabric stash and found a valance she wants me to make into another she loves folk style shirts and they always cost so much.  So to her this was like magic now she can have lots of her favorite style shirt.   I will post the Valance one tomorrow.  All my thrift finds now may be in danger of my daughter claiming them.

Wednesday, December 31, 2014

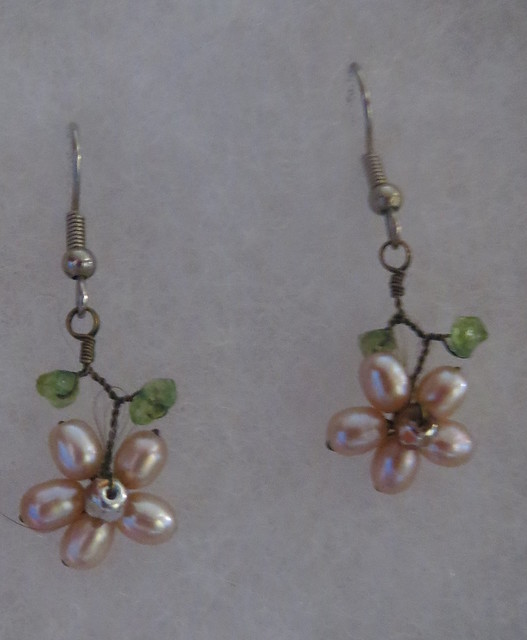
Supplies for French beaded earrings

pearl earringsAbout one year ago I got a gift from my husband.  He got me a set of handmade French beaded earrings and a matching necklace.  On one of our dates we went to a MOA (Museum of Art)  while there we stopped by the gift shop. I had him take photos of them in the gift shop of the museum so I could make them when I got home.  Yes we asked first if it was OK to take the photos so I could make some and do this tutorial.  To my surprise four days latter he gave them to me as a gift great guy there.  I still wanted to make some and figured as I did it I could also make a tutorial so others could make them too.  As you can see from resent posts I have made lots of French wire bead work as have my children.  But it was real special to have a set I did not make.
Sorry noticed after I posted I have a piece of hair tangled in it might have to retake this photo.

So if you would like to make a set for yourself below are the supplies and instructions and tutorial will follow in a few days.

supplies for the earrings
  1. 10 oval fresh water pearls with hole going length size 4-5 mm
  2. 2 Swarovski crystals for the center of the flower  size 4 mm bi-cone 
  3. 4 rock chip beads about the same size as the other beads
  4. 2 French wire earrings
  5. size 22-24 gauge wire just small wire smaller is better match color to your French wire


and of course usual wire tools

Watch for tutorial in the next few days this way you have time to hit the after Christmas / New Years sales and get the supplies.

Tuesday, October 02, 2012

Spinning milkweed fluff...Happy birthday Vova

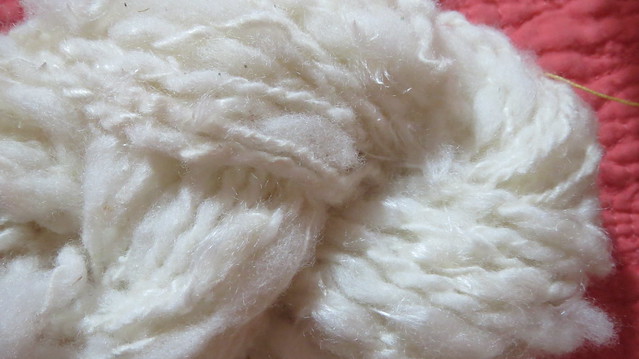
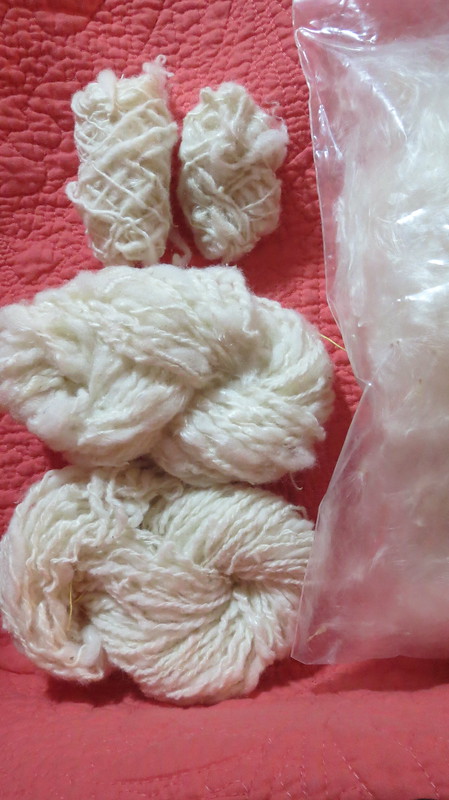
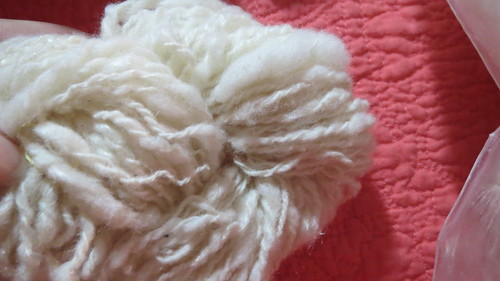
yarn 2/3 milkweed 1/3 wool

I was told you could spin milkweed fluff so since I have milkweed in my yard and we are tarring out out yard currently I thought I would collect the fluff and give it a go.  The milkweed in my yard is not an accident.  My grandmother vova sent me seeds, my older sister sent me seed, and my middle daughter collected seeds.  Thus three spots in my yard had plants each from a different person.  My children and I collected the seed pods Saturday and removed the seeds from the fluff pretty simple just time consuming we collected about 14 pods.  Milkweed is poisonous.

How to do this read on if you want to and do it.  Do not blame me for any reactions you do this  at your own risk.

How to

  1. collect seed pods
    1. I had a reaction see red warning below
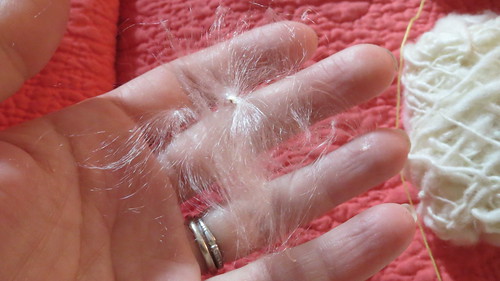
  2. remove seeds from fluff 
    1.  do this where there is no air current as the fluff will get every where.  We did it outside on the porch with fresh air but no breeze that day
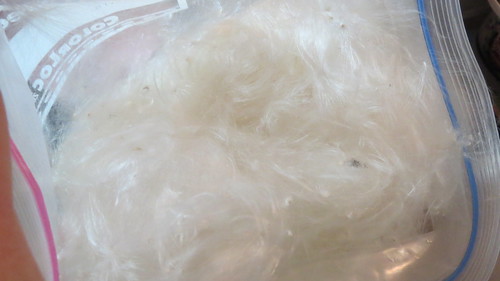
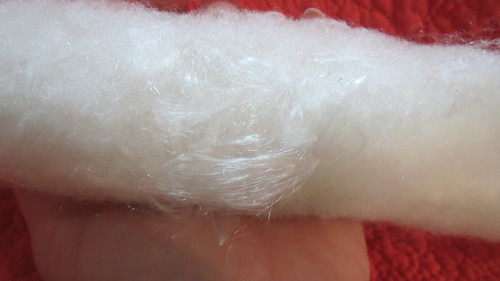
    2. milkweed fluff
    3. milkweed fluff
  3. store fluff in bag or cardboard box till use otherwise it will fly away
  4. card it: card about 1/3 wool to 2/3 fluff
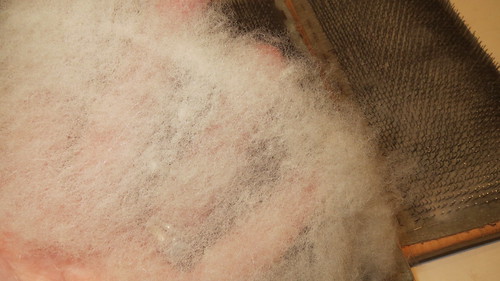
    1. add wool to carder first card up, then add fluff and card that transfer wool/fluff at least once then add a tinny bit more wool and card again and form a roll ready for spinning 
    2. wool milk weed roll ready to spin
    3. this makes my mouth itch as the fluff flies around and little bits rest on me remember poisonous stuff I had reactions to it see below
  5.  I used a drop spindle to spin mine to a single ply then used a drop spindle again to make it into a double ply yarn.  
    1. fluff, single ply, double ply  
    2. Fluff right in above photo, single ply top left, double ply hanks bottom left
    3. reaction again on mouth from fluff flying see below
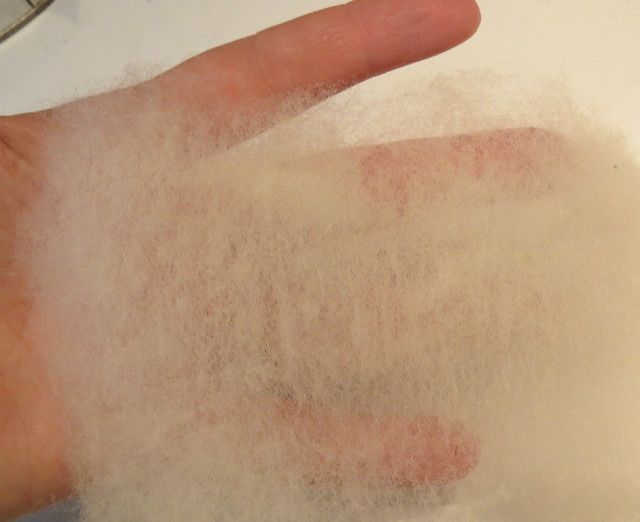
When it was done it feels like angora and spins easily.  Real soft has a sort of sheen to it where ever you see the milkweed sort of like hints of spun silk or spun rayon.
Now  what does one do with something that is poisonous hmm... do not want it on baby items and the like.   Maybe a wool hat or just leave as yarn as look what I did not sure I want to do it again type of thing.

I have been told you can also spin dandelion fluff but I don't have those in my yard.  Also how long would it take to get rid of all those seeds yikes so little.  But at least that stuff would not be poisonous.

Some benefits of milkweed during WW2 it was collected for life preserver vest 2 bags full = i jacket which would float for 100 hours before the water would make it sink pretty impressive.  Also if you have warts the milk if put on the wart will kill off the wart.

When I was a child we would collect milkweed and caterpillars and watch them change into chrysalis and then into monarch butterflies happy memories of my Vova on this her birthday. So I did this in honor of her and all those happy memories.

Warning : Milkweed is highly  poisonous to the point of death if you get about an ounce of it in you.

Ask me how I know yeah I got mild milkweed poisoning while doing this project.  Makes your mouth and throat burn and makes you want to exasperate whats in your tummy (my nice way of putting that).  But if you get too much in you, it can kill you so be careful.  Also makes my lips itch when spinning and carding it, as the fluff flies in the air and little bits land on you.   Mine was a mild case of poisoning as I had gotten some milk on my arms from the plant and had not realized it and when I do yard work I wipe my mouth with my forearm not my hands and yes that is where the milk weed had spilled and dried as I could not see it.  But just that small trace made my mouth burn and throat burn and made me toss my cookies and my lips itch so be careful if you try this  I am not recommending that you do though because of this.  Now none of my children had issues that helped me remove the seeds from the fluff.  So I maybe more sensitive, who knows be very careful and you try at your own risk I do not recommend it
yarn 2/3 milkweed 1/3 wool

Monday, September 24, 2012

Spinning class...and how to clean a fleece

card and wool i carded
As you are aware if you follow this blog I am learning to spin wool.  The first week we learned drop spindle, and homework was to spin all the roving we were given as part of our class fee,  We had two types of wool for  assignment one shorter haired than the other.  OK I was the only one that actual spun all of both rovings I was given.  I never understand why people pay good money for a class then do not do the homework.  So I will go through the steps I did to make the lovely carded wool you see above.

Week two was using a spinning wheel.  I seem to be an over achiever in the course of the class I had spun about 4 times as much as every one else and was drafting pretty good.  Might have to do with the amount of homework we did or did not do the previous week on this. We had to leave what we spun on the spinning wheel and I forgot to take my camera will have to get a picture of it before next class so you can see it. Our homework was to clean a fleece, well 1/6 of a fleece as it was divided evenly amongst all in the class.   I forgot to get a picture of it before I started to clean it.   Um mm.... lets just say I have smelled nicer things.  After removing dung tags and big pieces of grass the soaking, washing, rinsing, and drying began.


This was my instructions as to what I was supposed to do.  Lets hope I get it correct as I am doing this while I am typing this post.  Meaning when the wool soaks I add to this post and take photos.
  1. fleece should be picked through before washing to open up the tips.  Discard second cuts and extremely soiled pieces
    1. yeah ewww...
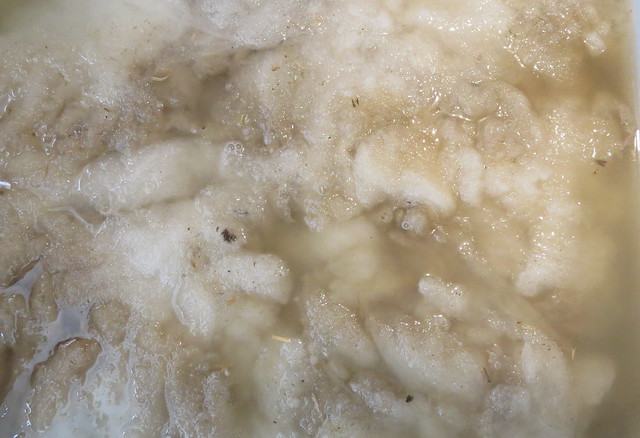
  2. Soak... Fill sink or tub with hot water ( as hot as your hands can stand),  add fleece and let it soak for 10-15 mins, drain and gently squeeze out the excess water
    1. pre soak
    2. Yes I wore gloves as who wants to put their hands in poopy sheep water. 
    3. I goofed I did 20 mins got distracted by working on a project for the sound of music but that should not really matter in the long run.
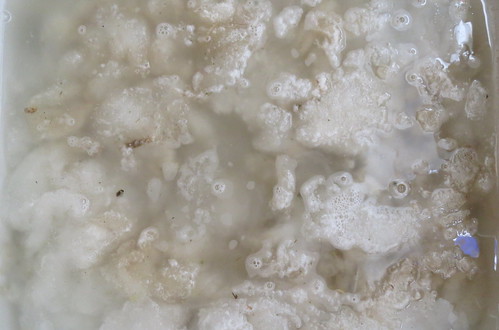
  3. Wash... Fill sink or tub again with hot water, squirt in clear or white liquid dish soap until the water feels a bit slimy -  do not make bubbles, add fleece and gently push down into the water, leave it to soak for 10-15 minuets, drain and gently squeeze out excess water
    1.  washing ( soaking in water and soap)
    2. Did not have clear or white dish soap I had dawn so yes I improvised again I tend to do that.  Should not hurt anything just adds a little color to the water don't think the wool will pickup this bit of color.
    3. I goofed again let it sit for 20 mins because I was typing this stuff on the blog but should not hurt any thing either.
  4. Rinse... fill sink or tub again with hot water, add fleece and let it soak for 5 - 10 minutes , drain and gently squeeze out excess water.  You may have to rinse the fleece more than once to remove the soap.  Once the fleece is clean and the water is clear, drain and gently squeeze out the excess water.
    1. I ended up rinsing   5 times she said 2 or 3 would do it but I think I needed more so i did more still can feel the lanolin in the wool so it will be fine.
    2. it still looks dirty to me at this point but she said it would so I will go forward with the drying
  5. Dry... The clean wool can be put in a mesh laundry bag and run through the spin cycle in the washing machine - make sure there is no water coming from the machine during the cycle - or it can be rolled up in a towel to soak up the excess moisture.   The wool should then be spread out to dry and fluffed or turned over every couple of hours.
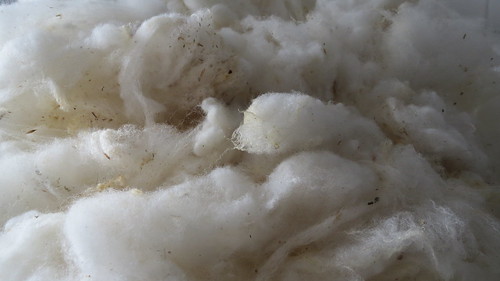
    1.  wool clean?  drying
    2. I did not put mine through the spin cycle but I have sweater rack in the bathroom for drying wool swetaers on so I set it there and set a hair dryer on a stand to have the air circulate better and dried it that way.   
      1. See you can still see there is still stuff in it but suppossidly this is considered clean.   Hmmm... clean to whom
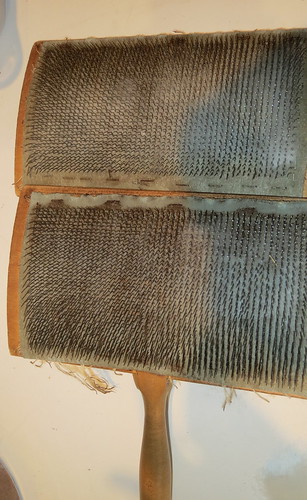
cardersTeachers note:Remember that felting is caused by changes in temperature and agitation be careful.

Mine did not felt so I guess I did OK on that part.

The teacher has not taught us to card wool yet.  But I was taught by my friend Juanita few years back during "Colonial Days".  She and I were both demonstrating fiber arts there next to one another one of the things she was demonstrating was how to card wool.

Since I had never done it before I was not sure how clean it had to be to me this looks pretty dirty still.  So once I had some wool sort of clean. I decided to card a hand full.  It is amazing how much of the grasses and dirt comes out in the carding of the wool.  The teacher said it would she also said some would come out in the spinning process too hope so as there is a tiny bit left in it but nothing that I have not seen in store bought wool so it should be fine.

Below  is a photo of the little bit I did.  Amazing that something that was so dirty looks clean and usable now to spin yarn.  I am having fun learning new skills.  Hopefully I will be able to get a spinning wheel at the end of all this too.  The top photo is also this same wool that I carded.
wool i carded

Copyright/permissions info

I like to share on this space my ideas and projects.
Please don't take ideas or photo and claim them as your work.
I am always happy to have new links to me.  So if you like something just link back to me and give the source some credit thanks.
Any questions? just ask. I am happy to work with you if you need something
Creative Commons License This work is licensed under a Creative Commons Attribution-Noncommercial-No Derivative Works 3.0 Unported License. 2006-2019 Copyright Vintage Threads Inc. All content and images.

LinkWithin

Related Posts Plugin for WordPress, Blogger...