Where do you want to go
friends and followers
If you like my blog and the free patterns and tutorials and want to say thank you
I have a wish list on ravelry of patterns (click here)
I would like to make. Thank you in advance for being kind and saying thank you back.
Love Sunshine
I have a wish list on ravelry of patterns (click here)
I would like to make. Thank you in advance for being kind and saying thank you back.
Love Sunshine
Search This Blog
Thursday, November 22, 2012
Monday, November 19, 2012
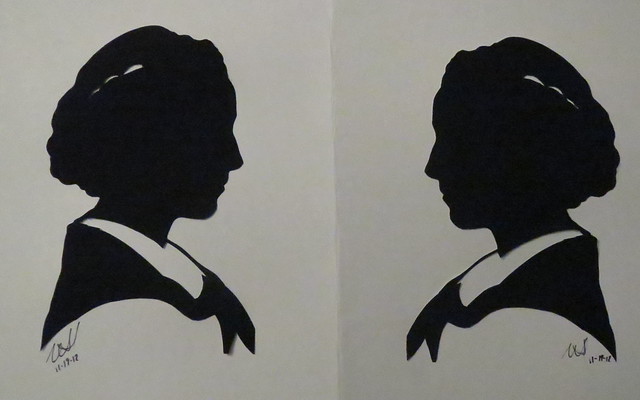
New Silhouette of my oldest daughter
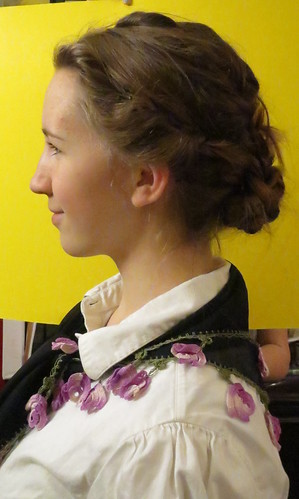
My daughter had a choir performance over the weekend that had her group singing with Vocal point. I did her hair for it and thought it looked good in profile. Good enough that I wanted to do a new silhouette of her it had been 10 years since I did the last one so it is about time I do all of my children again.
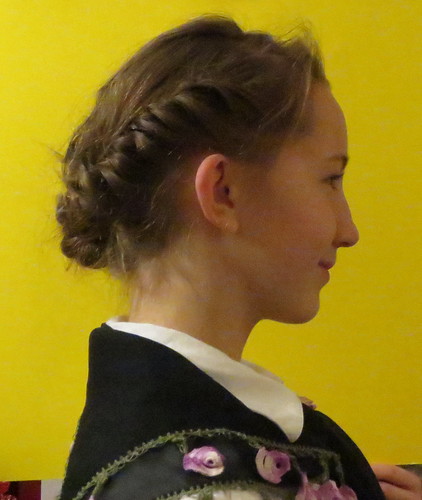 She has her hair up in a French twist that turns into a a braid that is then formed into a bun. She had to wear a white shirt for the performance with a scarf. As you can see I stream lined the scarf so as not to have to cut all the roses but I was real tempted to cut them just not sure it would look good in the finished piece.
In this silhouette she reminds me so much of my grandmother it almost makes me cry. I took two photos so you could see what she actually looked like and what the silhouette looks like. I took the two photos after the performance so her hair was rumpled by this time.
Saturday, November 17, 2012
The dance
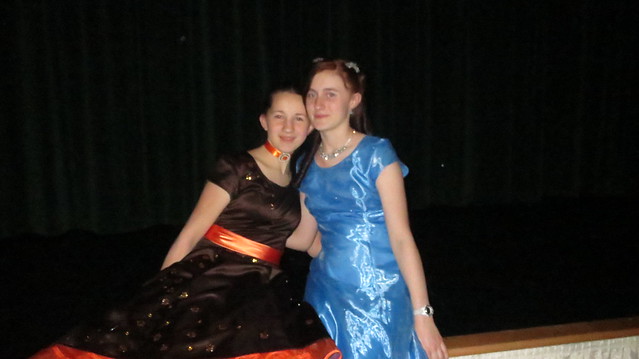
So this is how it came out in the end. Headpiece, crinoline, sequins on dress, cumber bun, and last a satin choker collar with vintage pin on it as a necklace with a snap closure in the back. My daughter and one of her best friends is in blue. She got lots of compliments on her dress and I think she had fun so all is good in the end.
Wednesday, November 14, 2012
Belt Fall Harvest Dress
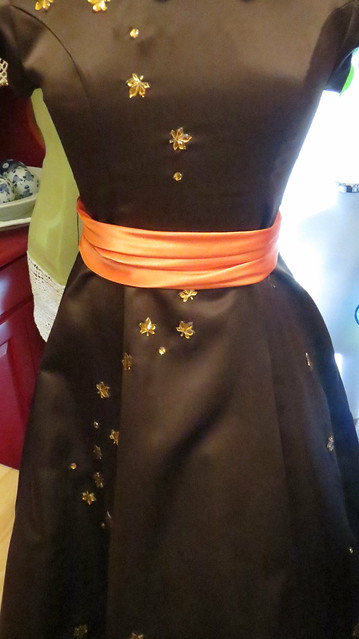
So as I said I wanted a belt for the dress I was modifying for my daughter to wear to the fall harvest formal. I decided on a cumber-bun belt that was in a pattern I have from the 1950's Simplicity 2089.
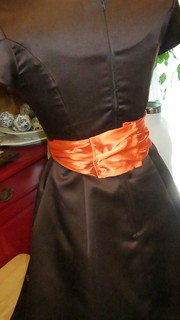 I had a size 13 pattern which is a 25 inch waist in the 1950's my daughter has a 26
inch waist plus we wanted a little growing room as the dress has a
bigger waist than that too. Since my daughter is just a little bit bigger than that pattern I added an extra panel at the center back where the snaps are located to lengthen it. All the belt truly is, is a very large rectangle with soft pleats that is cut on the bias thus it can stretch and fit the couture of the body better. Did not need a pattern to make it but always nice to have one so I do not have to figure it out all the time. Belt looks twisted in the top photo but the wrinkles will lay flat I just did not play with them before the photo. Also this belt took about 10 mins to make from start to finish. Made out of bright orange poly satin, seam binding, and 4 real large snaps.
I had a size 13 pattern which is a 25 inch waist in the 1950's my daughter has a 26
inch waist plus we wanted a little growing room as the dress has a
bigger waist than that too. Since my daughter is just a little bit bigger than that pattern I added an extra panel at the center back where the snaps are located to lengthen it. All the belt truly is, is a very large rectangle with soft pleats that is cut on the bias thus it can stretch and fit the couture of the body better. Did not need a pattern to make it but always nice to have one so I do not have to figure it out all the time. Belt looks twisted in the top photo but the wrinkles will lay flat I just did not play with them before the photo. Also this belt took about 10 mins to make from start to finish. Made out of bright orange poly satin, seam binding, and 4 real large snaps.Monday, November 05, 2012
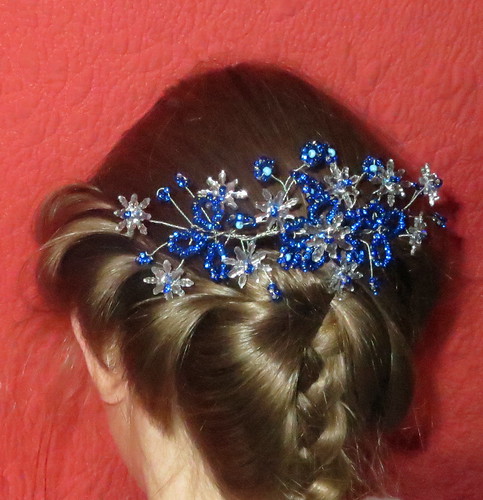
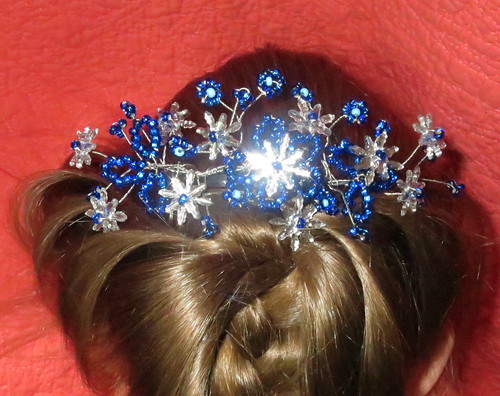
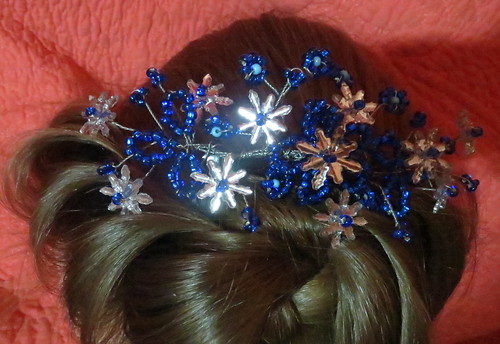
Jack Frost / Winter Queen French Beading
Still playing with beads and sequins. I think this one will be lovely for winter and can still be worn for Shakespeare week with a blue costume we have.
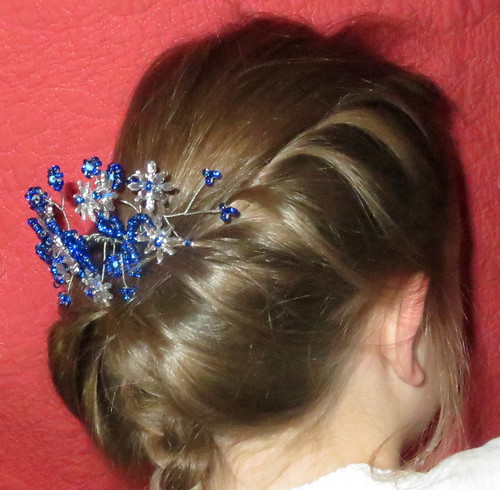
This one is much lighter in weight than the rose even lighter than the fall harvest one. My daughter was enjoying wearing these on Sunday she wore the rose most of the day then she wore the winter one most of the night. Then actually stay in her hair real well and did not get tangled which I was worried about.
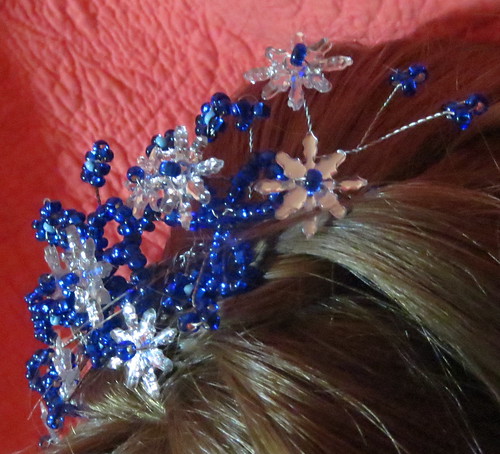

This one is much lighter in weight than the rose even lighter than the fall harvest one. My daughter was enjoying wearing these on Sunday she wore the rose most of the day then she wore the winter one most of the night. Then actually stay in her hair real well and did not get tangled which I was worried about.

Saturday, November 03, 2012
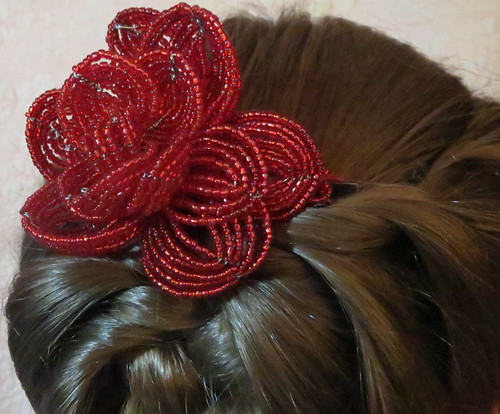
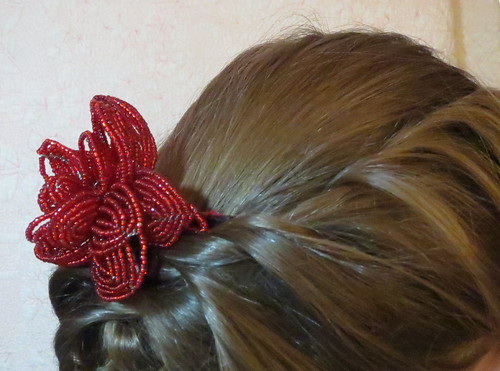
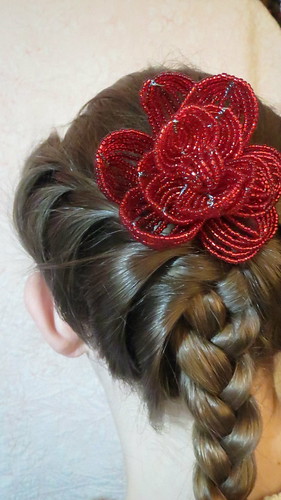
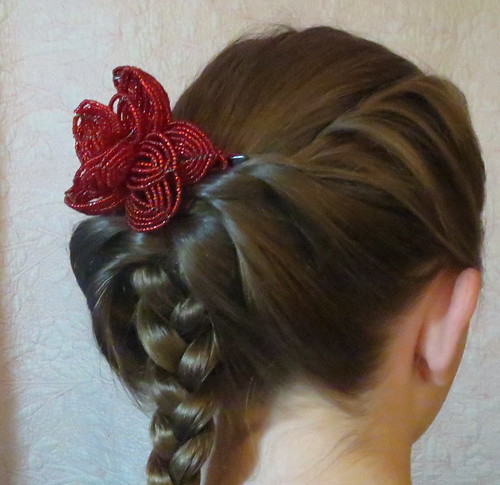
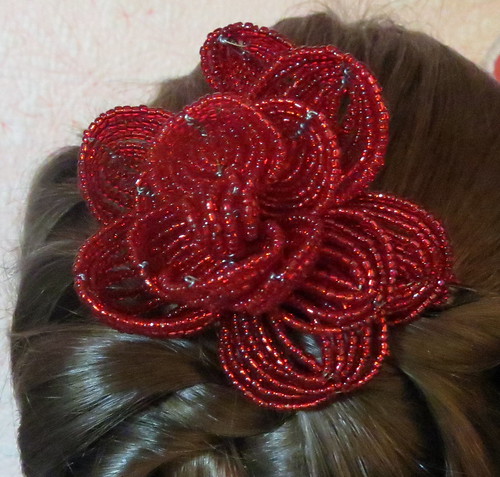
French beaded Red Rose hair ornament
Encase you have been curious to what this technique is called that I have sort of been doing French beaded flowers for the last two posts The reason I say sort of is that I have never read any instructions on it just seen pictures and a few examples in real life and am going from the ideas I figured out from what I saw.
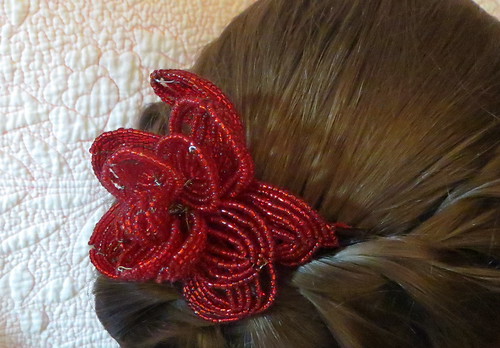 I will probably play with this technique more and get some books on the subject just to make sure I am doing it correctly. If not oh well i still like what I made. The beads are some that I found while thrift shopping one day and they were already strung onto a long wire how convenient was that. This is sew to the hair comb then glued to it just encase you are curious. Yes this is a heavy hair piece with all those beads but if you have a good tight French braid or twist it will nest into the hair quiet well and be secure. This is in my youngest daughters hair. I was wondering what am I going to do when all my children are grown I will not have live mannequins anymore.
Update sad day: My oldest daughter lost this the very first time she wore it in public ( we think outside a friends house in the gutter) I am sad and her sisters are mad at her becasue they wanted to wear it. So much for so many hours of work. Some times I just love my blog on days like this as I can still have pictures of what I made even when it is gone for good.
Second update November 26: The neighbor that we visited has it and we got it back today. Fun story with it. My daughter lost it. The neighbor of our friend found it. Our friends daughter went to return something they borrowed when the neighbor asked if it was hers. She said no she had never seen it before. The neighbor gave it to her since they had no daughters when she got home and was excited to show her parents she was told they knew who it belonged to and it had to go back. She was sad but gave it back to us. So as a thank you I will make her something for her hair because it bites to be given something you find out you can not keep. It was still in mint shape impressive since I am almost certain it fell in the gutter but maybe it landed on the grass next to the curb.
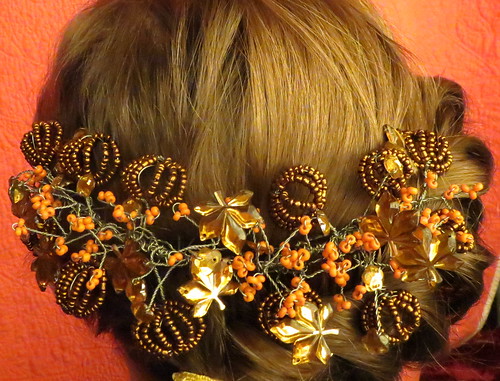
Fall Harvest headpieace
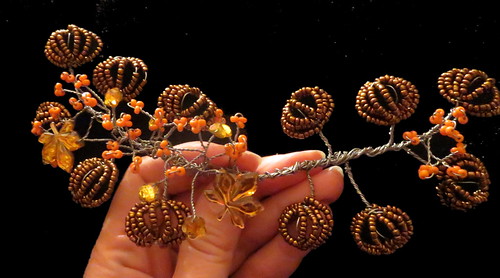
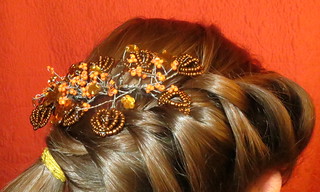
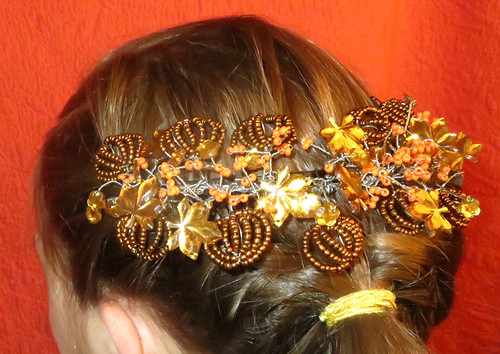
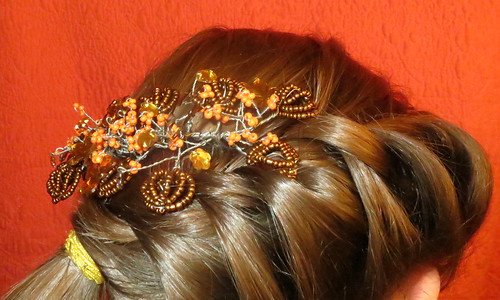
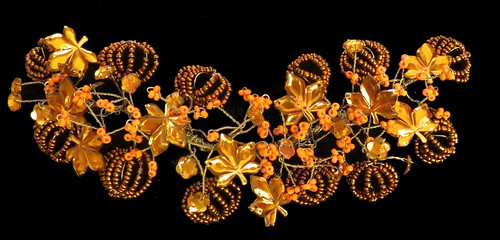
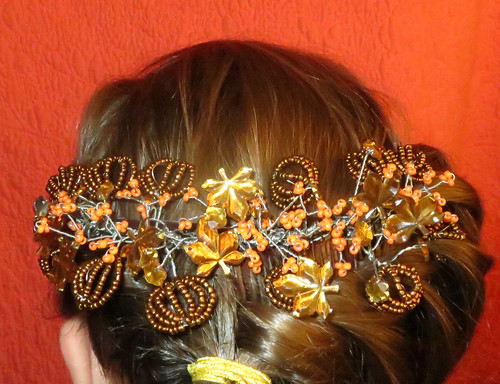
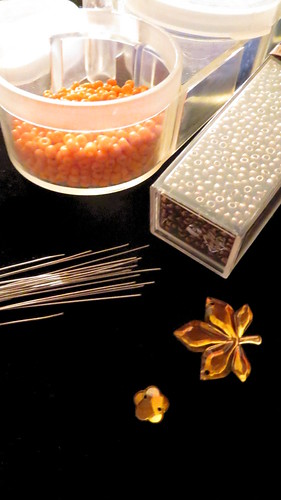 So I got out some floral wire beads and sequins and set to work. First I made all the large pumkinesque shapes and wrapped them all together. Then I made the orange berries and attached them to 1 side then the other. Lastly I made the clusters of sequins and attached them. I attached a few sequins early to see if I would like them in the finished product. Finally all this was sewn onto two hair comes for placement followed by E6000 to make sure it stayed in place.
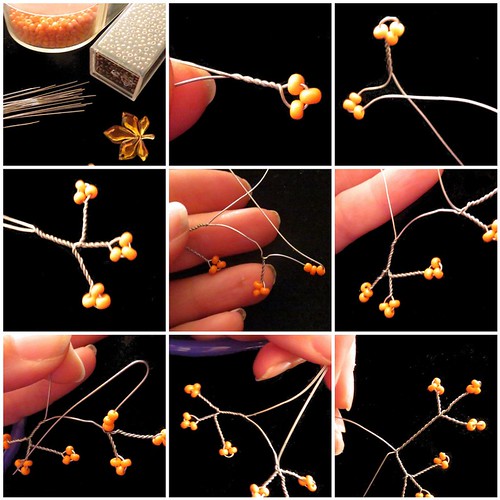 I have a few photos of what I did but this really is not a tutorial on how to do this but if you know anything about wire-work and beads you could do this easy enough. I might make a tutorial later of how to assemble the pieces of this. But I am not sure on that yet time may not allow for that. Sorry I did not take any photos while doing the pumpkinesque shapes as I was making them while sitting at piano lessons with my children.
You can see more photos of this project in my beadwork set on flickr.
For a first try not to bad next time I will make the wire match better I wish the wire had been copper or brass in this case. I think the children will enjoy wearing this for Shakespeare week but first it was made to match the dress I am working on and will be worn to a fall harvest homecoming dance. Maybe it will be worn at Thanksgiving too.
I am thinking of doing another with snowflakes for winter.
Friday, November 02, 2012
Fall Harvest Ball dress
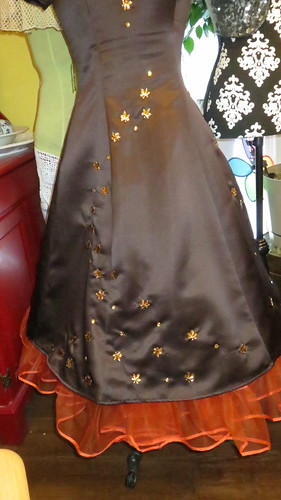
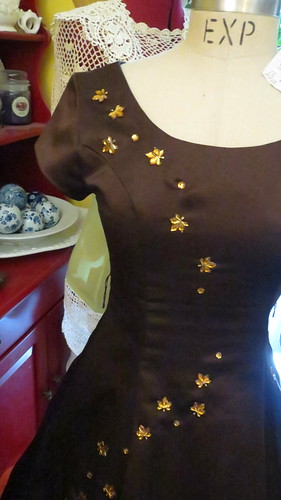
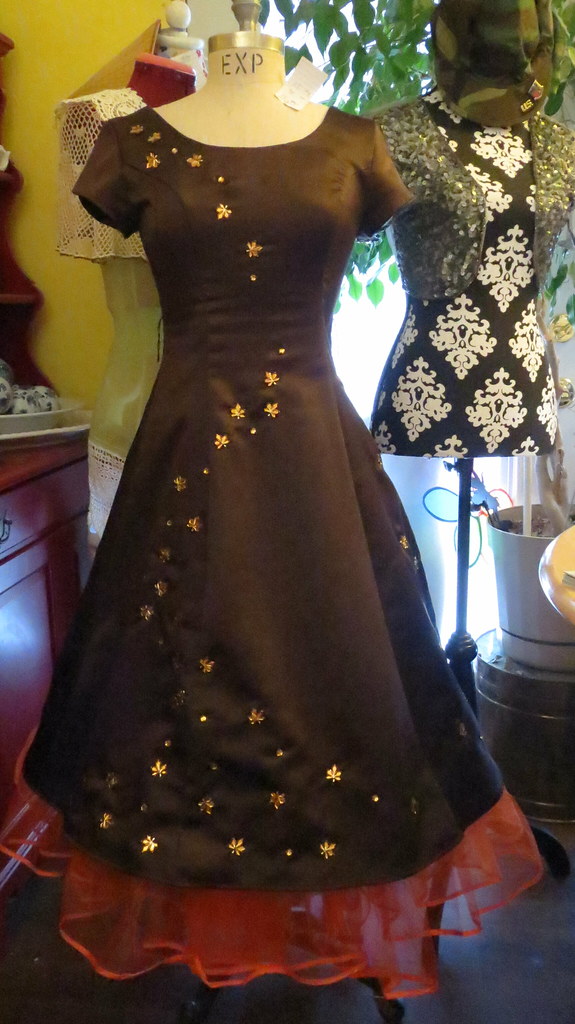
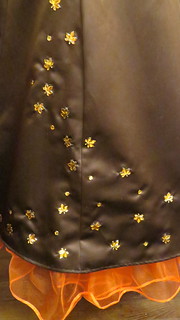 I have sewn on to it lots and lots of leaves and little circle burnt umber sequins. The leaves are supposed to look like they are swirling and falling into a
big pile of leaves at the hem I hope I achieved my goal and that is
doesn't just look sort of weird to people.I still have yet to steam the dress from having sewn on the sequins most of these wrinkles will go away at that time.
 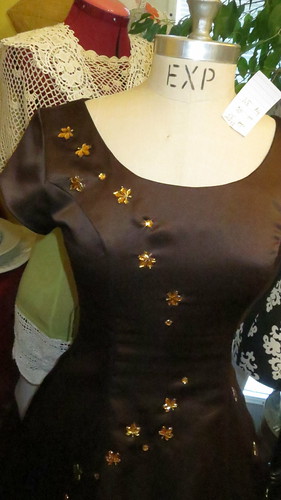 I plan on making an orange satin sash to go around the waist that ties in the back of the dress with a large bow and either has pleats or gathers in the front. So if you were wondering why the gap in the sequins at the waist that is the reason why there is going to be a belt there that I have yet to even buy the fabric for.
Wish me luck on finding something that will match so to speak either the orange crinoline or the burnt umber sequins. We do like the look of the crinoline peeking out the bottom of the dress that is not a mistake.
The brown dress was an $8.00 thrift shop find that I am revamping.
I also think I will be making a choker to go with this dress with a few of the leaves on it as well.
Subscribe to:
Comments (Atom)
Copyright/permissions info
I like to share on this space my ideas and projects.
Please don't take ideas or photo and claim them as your work.
I am always happy to have new links to me. So if you like something just link back to me and give the source some credit thanks.
Any questions? just ask. I am happy to work with you if you need something
 This work is licensed under a Creative Commons Attribution-Noncommercial-No Derivative Works 3.0 Unported License.
2006-2019
Copyright Vintage Threads Inc.
All content and images.


