[google6a7b7d93c7100df5.html] Sunshine's Creations.Vintage Threads Inc.com: repair work

friends and followers

If you like my blog and the free patterns and tutorials and want to say thank you
I have a wish list on ravelry of patterns (click here)
I would like to make.
Thank you in advance for being kind and saying thank you back.

Love Sunshine

Search This Blog

Showing posts with label repair work. Show all posts

Wednesday, February 04, 2015

2 dresses 2 hours reworked (1800th post)

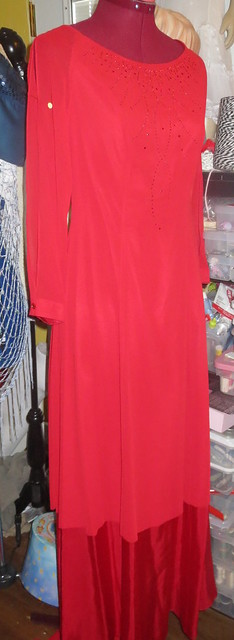
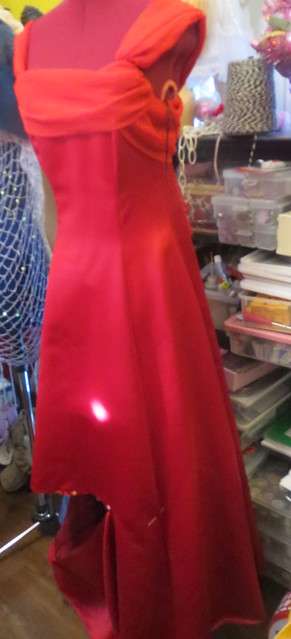
during rework hem half cut offrework in progressA friend of the family got asked to a sweetheart dance and had these two dresses but wanted them to be a little different in style.  So I reworked them for her now she can pick which one she likes we like the one that has the black crinoline.

I forgot to take photos of the before but I have some during the rework.  I have done this a lot as of late I did four dresses for my daughter last week but never thought to take before photos so I figured it was no good showing the after photos.
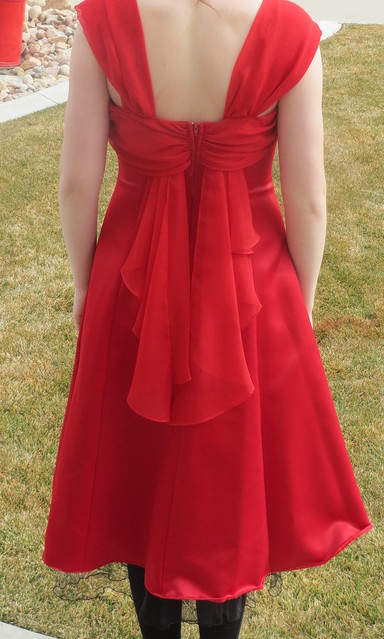
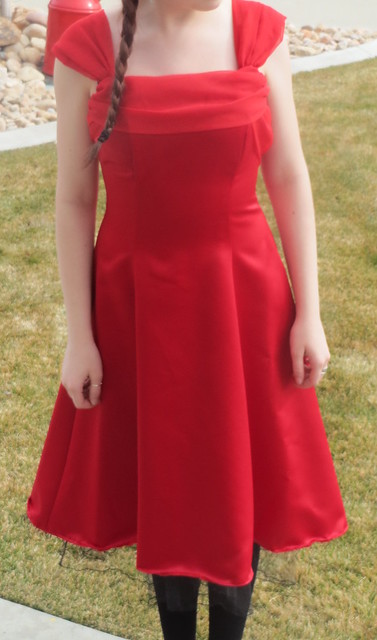
back after reworkedfront after reworkedIn the first photos that is not a stain or a bleach mark on the dress it is just like shinning through my kitchen window into my sewing area.  bad thing about red dresses real hard for me to take photos of red or black dresses.  Never comes out right for me.   This is dress that we like the end result the most.  If you notice in these photos of the dress in the process of having the hem cut off you can see a black crinoline under skirt to give the dress form.  We decided that would be a cute detail to leave a little longer and have as an accent to the dress.  Hard to see it in the finished photos because of the grass but that part looks real cute in real life.  This is my middle daughter modeling the dress for the photo just because she was the person I had a round who could do it.  I have since ironed the hem forgot to before the photo.  Me and my brain are not always on the same wavelength at times.  the dress originally had spaghetti straps but it had these two sashes that hung down that the girl who is going to wear the dress had pinned over the shoulders to make wide shoulder straps so I also sewed those in place.  There is  a similar set on the back of the dress that still hang down.
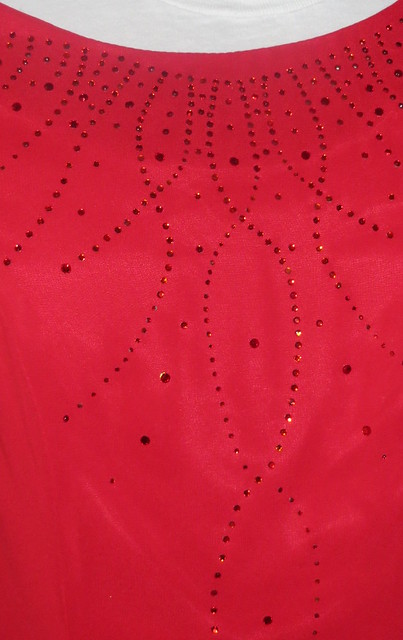
detail of dress

top hem cut off during reworktop hem cut off already during rework
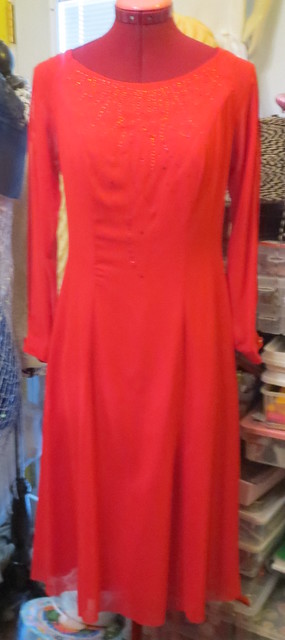
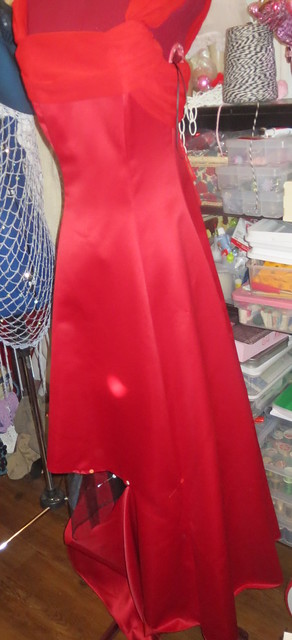
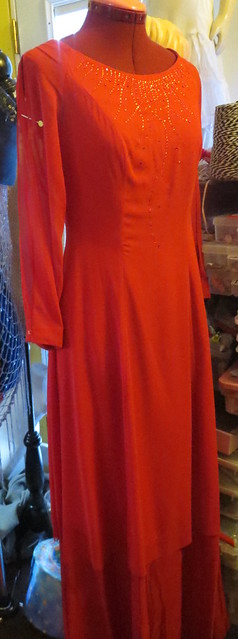
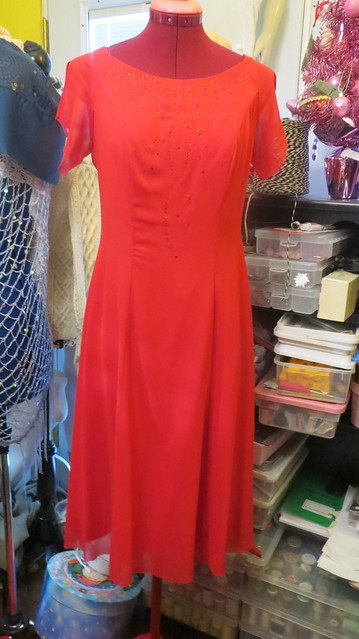
The second dress had a major change from what it looked like in the beginning.  Once again I forgot to take pictures of the before so here you see the hem half cut off already.  With this one we cut the outer layer longer than the under layer exactly opposite of the first one.  Here you see the outer layer already cut off.  You can see in these photos where I have a pin in the shoulder where I plan on cutting off the long sleeves and make flutter sleeves instead.  The sleeves look sort of old lady like the way they were on the original dress.
rework

hem gone during reworkI think the dress is a big improvement with just the hem cut off.  But I was not stopping at this point as it looks sort of 1960's at this point.  Then I cut off the sleeves.  Made a world of difference to the look of the dress.  Sorry for the shelves that is where I keep my sewing supplies.
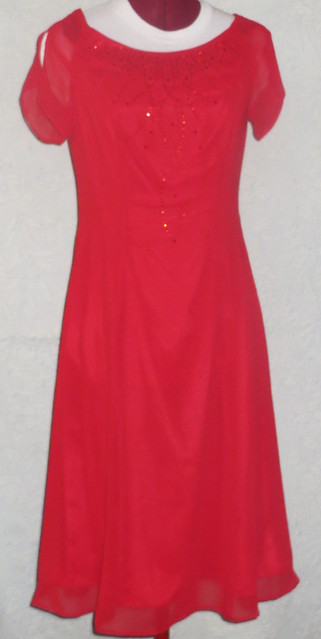
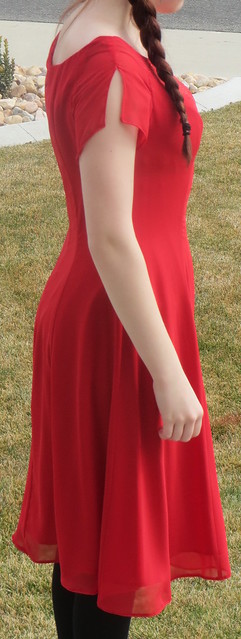
sleeves goneside after reworkHere the hems and sleeves are all re sewn and pretty much done. How just to put a live person in the dress so you can actually see what it looks like on a human.   Now that they are both done she can pick which one she likes better to wear.  The second one reminds me more of a Sunday dress. From start to finish this took me a total of two hours for both dresses.


Saturday, January 17, 2015

knitting and a formal and Les Misérables

IMG_2829 
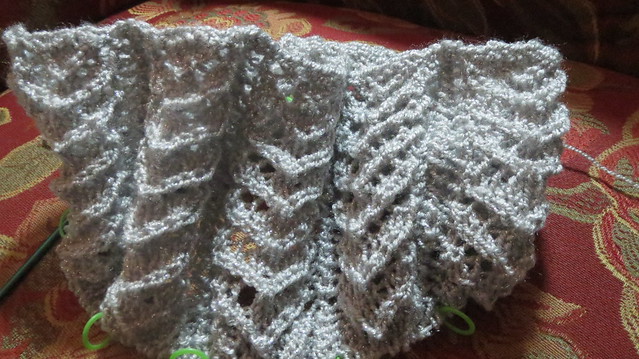
We had a church game night last night and my whole family went.  I am some what an anti-social person I like being in big groups but I like to be by myself and just people watch.  So I went but I took a new knitting project with me to work on I started the project right before I went.  Meaning I cast it on and did two rows.

The pattern is Victorian Neck Cozy by Wendy Johnson it is a free pattern so if you like it you can make it too.
 
I am using glamor size 2 yarn.  If I did this again I would go down two sizes in knitting needle for the neck area as this yarn is real stretchy and end sup too loose I think but I am fine with slouchy collars so I will not be frogging this.  It is hard to tell in the photo but this yarn has a metallic fiber in it and has sparkle.
IMG_2830
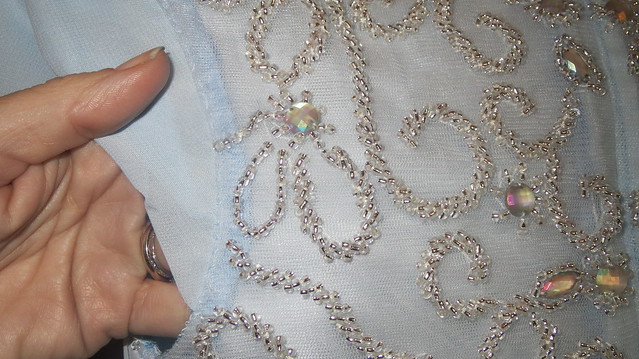
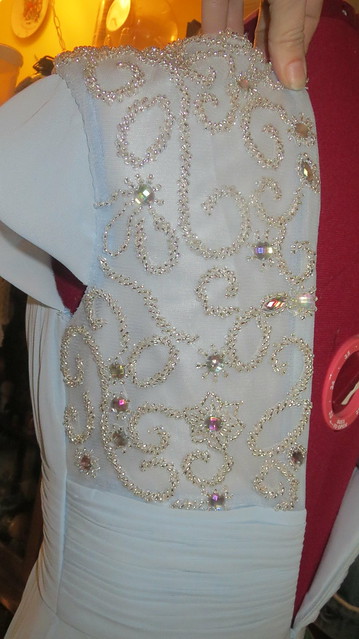
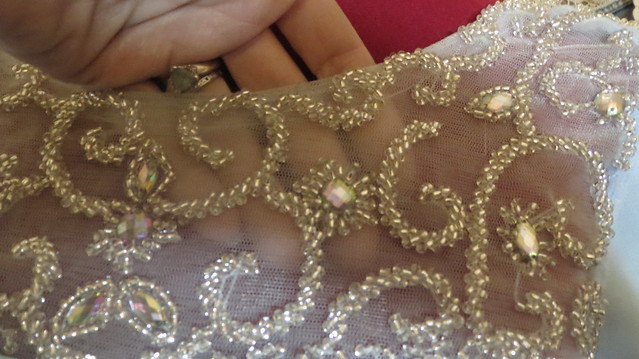
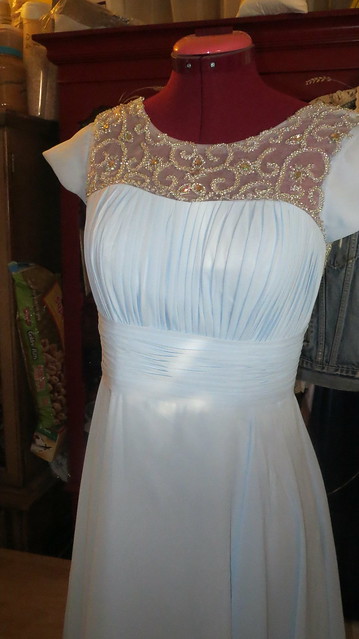
I have not posted much in the last few days as I was doing a sort of repair project for a customer.  Taking a formal she bought on the Internet from China with no sleeves and a see through back and a long train.  I cut the train off  made sleeves and lined the back.  You can see in the photos where the front is see through above the bust area the entire back was that way and no sleeves.   
IMG_2831

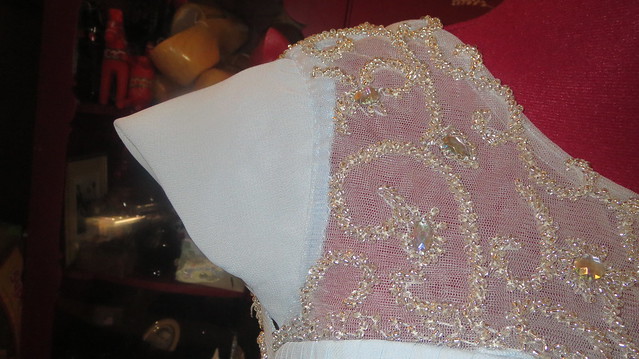
So the process of cutting off the train made it easier for the girl to wear and not have her hem destroyed plus it gave me fabric that matched the dress to make the cap sleeves and to make the liner for the back of the dress.   For got to take a picture of the before.  But here are some afters that do show the sleeves and the see through area in the front.
IMG_2832
After liner put in top back
IMG_2836
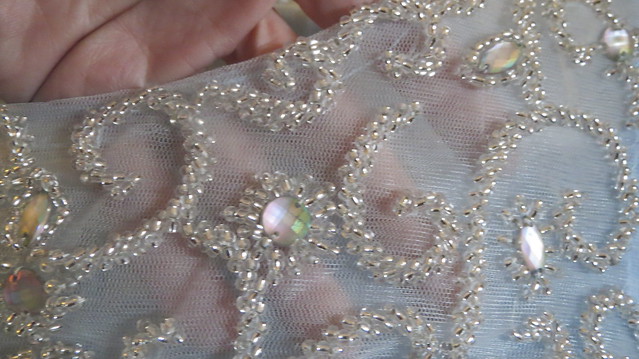
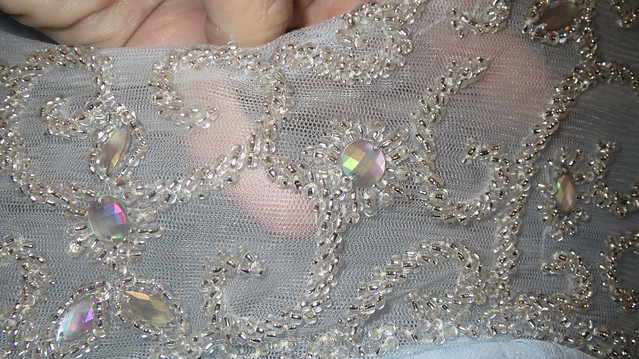
IMG_2839The dress is too small to fit my dress form thus the reason I do not have it zipped up but you can still see the area that I filled in with a liner.  Because if the bead work I ended up having to hand sew the liner and the sleeves to the dress and I did two rolled hems by hand on the sheer over lay and the liner of the skirt.
IMG_2834
front with sleeve and you can see how see through the back would have been by how see through the front is.
IMG_2835Now just to deliver it to the customer so her daughter can either wear it to preference or prom.

I ended up redoing the sleeves to make them more of a flutter sleeve and a little looser.   They   looked better the second go round.

On a real happy note I get to make three jackets ( frock coats) for Les Misérables for a local professional theater  "The Hale Center Theater in Orem".  I am so excited to do this you can not believe it.  They are the design of the head costumer so I will not show photos of as I go as it is her concept.  But after the show is in production I will show them.  What I am excited most about is two are for Jean Val Jean and one is for Marius.  I figured I would be doing people that are not main characters but this makes me excited and nervous all at the same time.

Monday, January 05, 2015

Navajo Plying

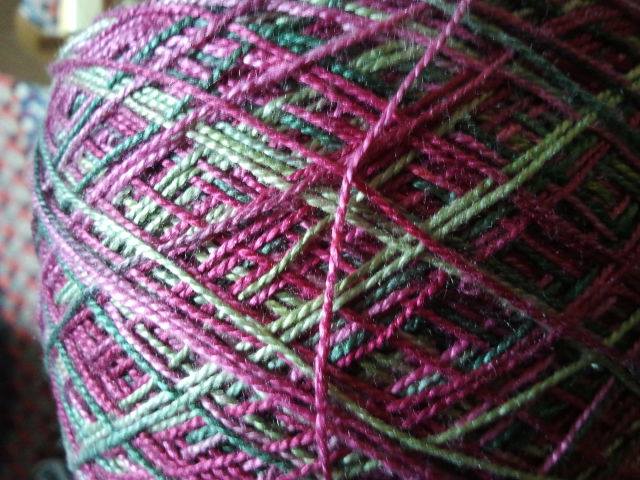
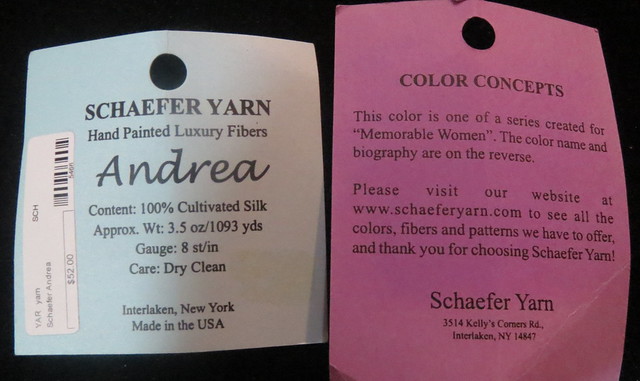
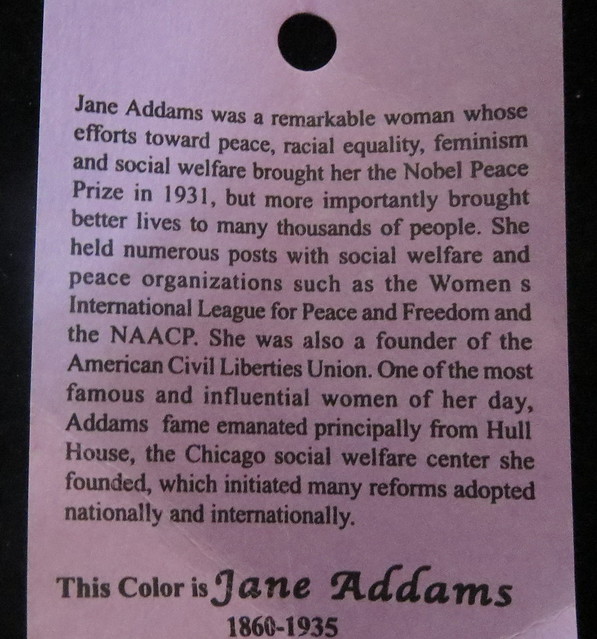
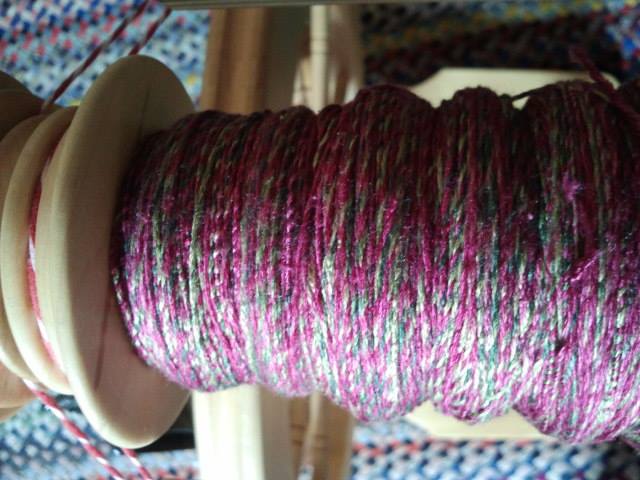
10637739_10204473845948195_1079466428_nMy friend Maven asked me to re-spin some silk for her.  The yarn was a lace weight and she wanted it a little thicker so she could use it.  It is more a sock or sport weight now. The first photo is how the yarn came to me.  The second and third photo is what the yarn is and dye lot encase someone likes it you can look for it.
IMG_2771
IMG_2772 
If you want to see what it looked like after it was respun please go to the read-more area of this post
The 4th and 5th photos are of it re-spun with a Navajo ply technique one on the spinning wheel and the other off after it was wet and hung to get out kinks and then put back into hanks for shipping.
10653894_10204473846668213_100119750_n
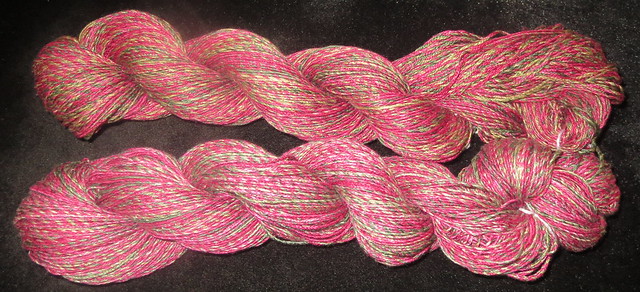
This type of plying which makes a spun yarn three times thicker than before it was re-plied.  It also make a more tweed like look to the yarn.  Below if the finished product back in hanks to be shipped to my friend today in New York.  Bad lighting on the photo below I will try and take another photo before I ship the yarn and update this post.
IMG_2770

Tuesday, October 28, 2014

white homecoming dress

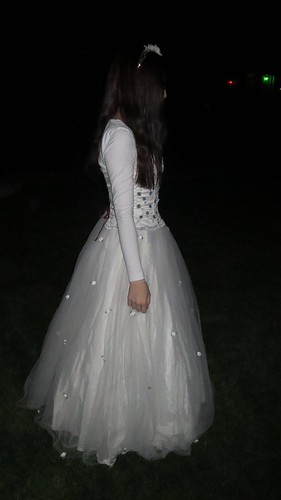
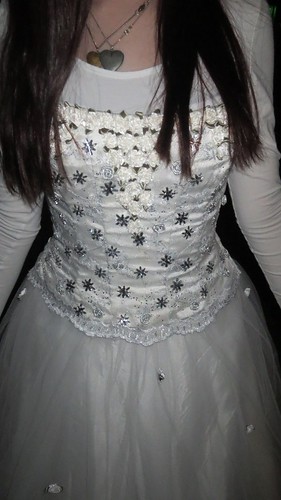
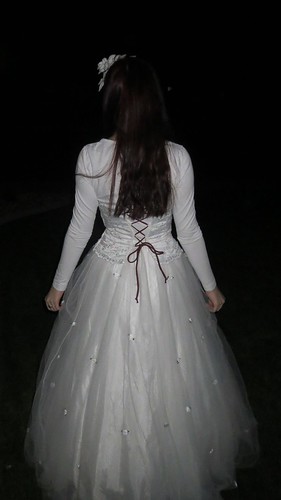
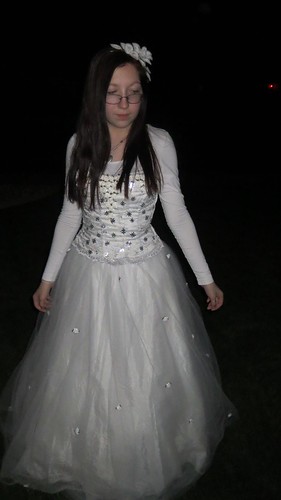
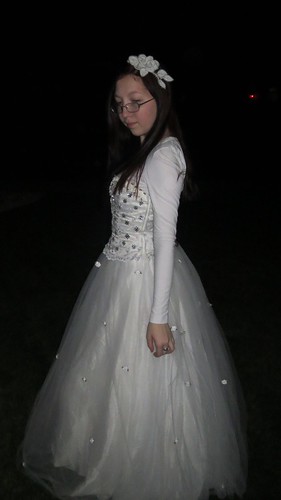
right sidecorsetSorry I forgot to take before pictures.  This was a dress my middle daughter got the summer of 2013.  It was donated to a church close swap.  What is a clothes swap you ask.  It is where you take your gently used clothes that you have out grown and trade with other people for sizes you fit into anything left over is donated to local thrift stores.  This dress was there ( actually is is a skirt and corset).  I took the embellishments off of it which had been six red roses and a few (about 30) red seed beads.  Thus leaving the dress almost totally white except for the red tie on the back.  I then repaired the damage to the dress and started to sew on white roses with green accent leaves and silver roses I also sewed on white sequin snowflakes. So the dress cost nothing except thread, flowers and sequins. It still retains the original red tie on the back may change that to white not sure as it does not bother me.

on a side note we also just used this dress in the play the wizard of Oz as the snow that fell on the poppies.  We had a ballerina dance across the stage with white disco lights going to represent snow.

back

front
We were given a wedding slip the summer of 2014 which happens to work well with this outfit length wise.  It too needed to be repaired where it had separated from its elastic.  So yet another part I did not have to pay for except for thread.
side
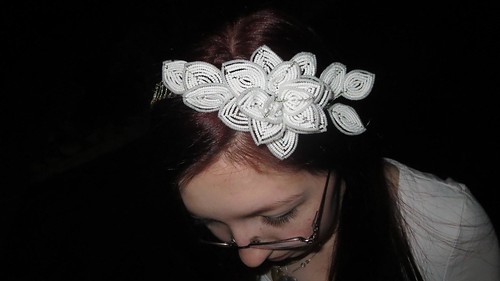
The head piece I made about a year ago just never posted on my blog.  when I got finished with the dress my daughter ran to my room to grab it from my dresser.  She was excited to add all the pieces together.  She also added the white shirt for modesty purposes.
Her hair  will be fancier for the dance but it is still a few weeks away so this was just her trying it on to see how it fit.
french beaded head piece

Friday, January 11, 2013

knitted sleeves for Levi Jacket

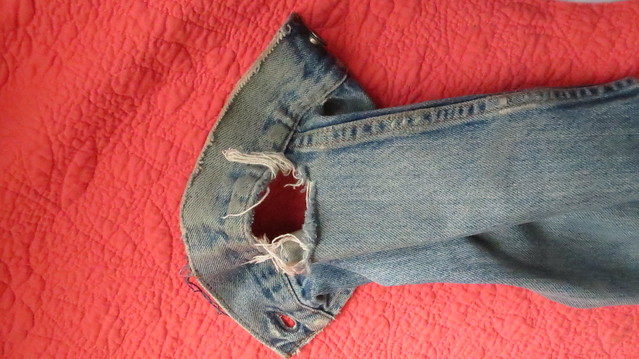
That jacket that I have been reworking for a while. ( posts : one, two and three ).  So now I am at again.  The sleeves are getting a little too thready.
hole in sleeve
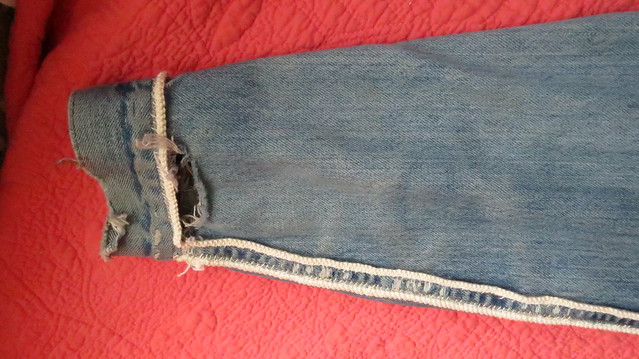
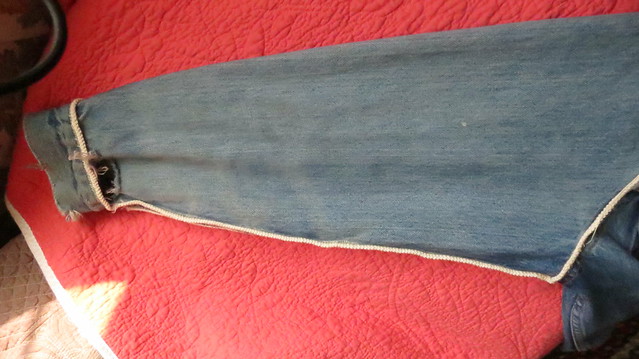
First I lined all the areas I want to knit in with Romanian cord just so I have something to attach the knitted piece too.I have four panels of the jacket I want to rework but I am starting with one of two smaller sections first.
 adding cordingcording all added
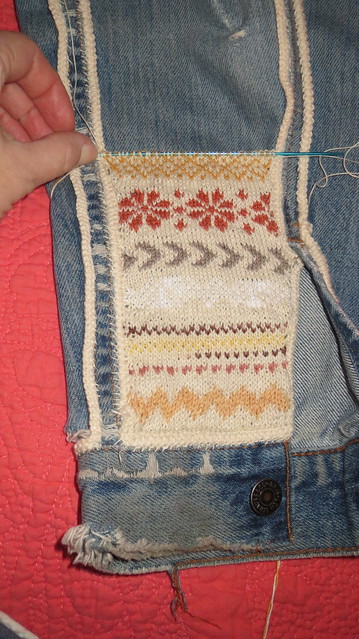
 I am knitting with size 0000 double pointed knitting needle and size 10 crochet knit thread.  Some of the thread is way old and boil-fast some is new and mercerized.  I am just playing with different fair isle patterns with this but using the same color through out for the background color.   I am not changing colors within a pattern as I think that will get to busy after a while, but some of the threads are variegated so they do a little changing on their own.  I am also not trying to add a lot of color just sort of staying in the earth tones. I have not made much progress on this yet but I thought you would like to see the starting point of it all.  But as you can see that one hole right next to the cuff is gone with just this much knitting.   I am planning on leaving the Levi material behind the material for added strength to the knitting and for more warmth as well.
start of fair isle knitting

Saturday, December 15, 2012

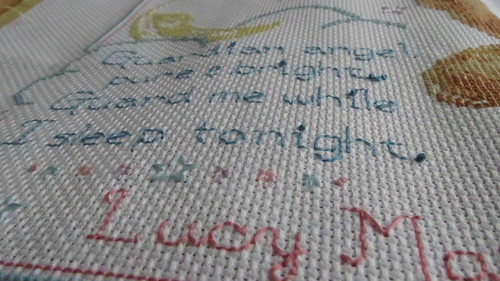
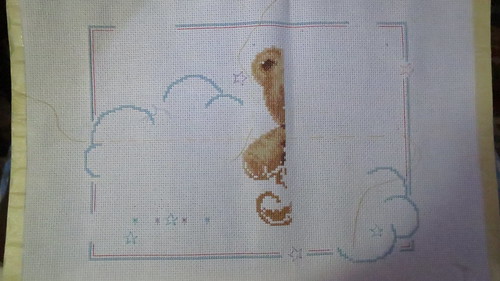
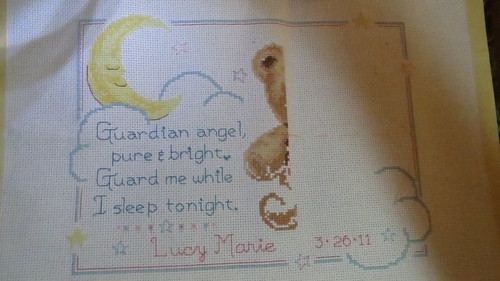
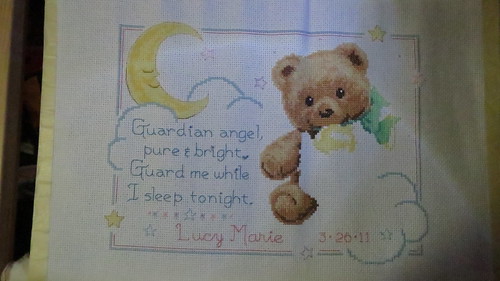
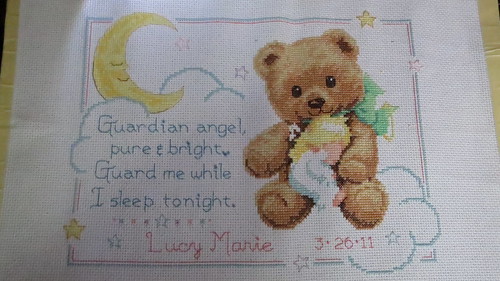
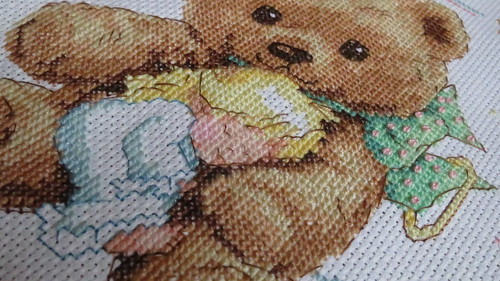
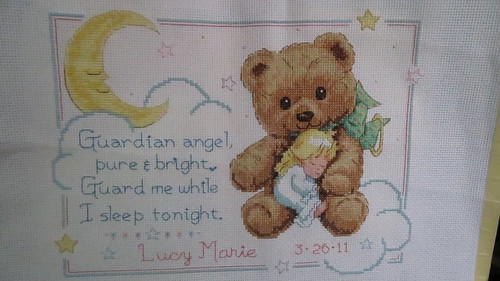
Guardian Angel ...cross stitch

detail of letters
Been busy trying to get a cross stitch done for a customer.   She always starts a cross stitch but then get behind on it so I end up doing them.   This one was not the norm as usually she makes one mistake and Ii find it and it is easy to fix and go forward. 
This one had so many mistakes before it got to me I had to frog what she had and start from scratch.  So all the work you see in this is mine although it did come to me originally with a 1 inch by about 1 1/2 inch area done.  But since I removed all that and started again... well you get the idea.  Those that follow my blog know I am not fond of doing cross stitch for contract work but this lady usually gives me tips and since I have done stuff for her in the past kind of hard to say no.  So  I just do it these days.  Of course when she picked this up she had another one for me to do.  The new one has more stitching than most so it will be twice the price of the usual ones she brings me.  Below you see the progress of the work I did none of hers is in these photos misplaced my camera for a bit so I missed that part of the process.
in progressmoon
bow on bearangel started
The angel in the original pattern had short hair and wings.  She did not want the angel with wings so I did not do that part.  Also since it was a baby girl I gave the angel long hair to fill in the area that should have had wings.
upclose angel
This is what it looked like when all finished
finished

Tuesday, July 10, 2012

Pink pearl cotton glove repair

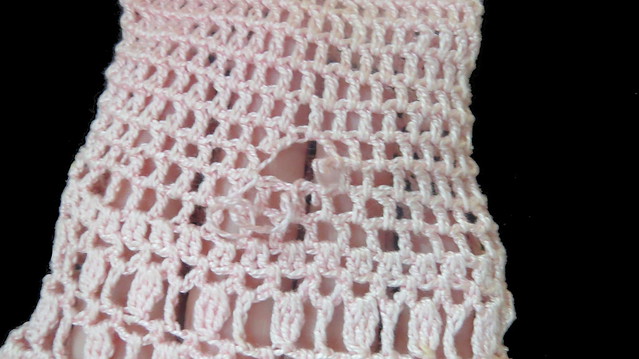
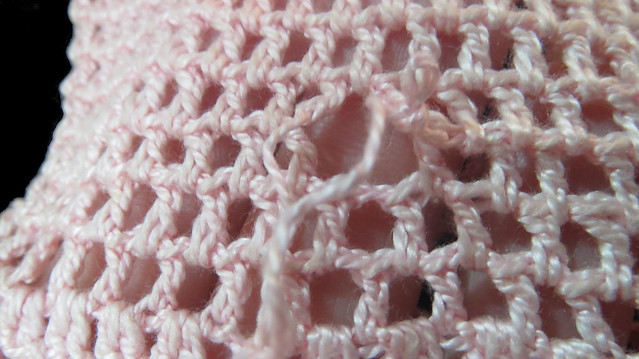
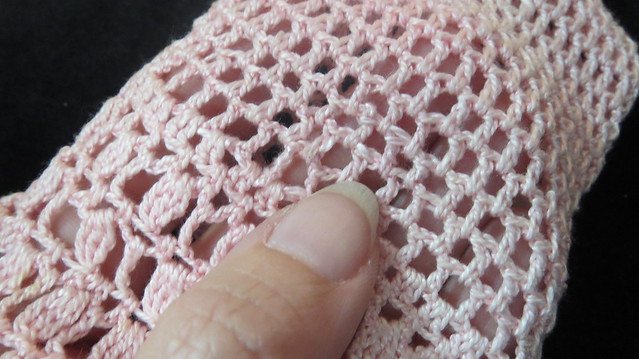
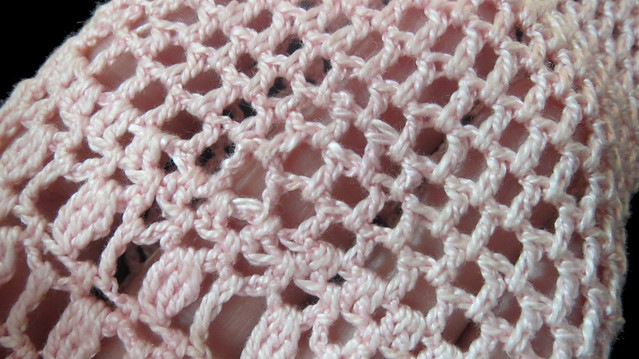
 This gloved all the way from the other side of the United States to my home for me to repair it.  It is not what i would actually call a hole even though you can see one.  When I inspected it, it is actually  a runner like you get in stockings , and knitting but this is crochet.  Most people do not know you can get them in crochet too.  But in crochet it is a dropped yo.  So when the person who created this many years ago was making the double crochet she actually missed the loop and it was left hanging sort of tight connected by the pressure of the other stitches around it but in time with wear and washing it worked its way free and started to run.
hole
hole
drop stitch hole
I had to re-crochet the missing part and add a small piece of vintage pearl cotton in a similar color and hold that dropped stitch.  Weaver in the two new  tails and it was finished.  Usually you would have had four tails for a hole the two original tails and two from the new crochet.  But in this type of repair the thread is totally enact no break so you just have the two new tails holding that dropped loop.

Below is the finished repair the first photo I am pointing at it in the next see if you can see it.
i am pointing to where the hole was can you find where the hole was
Click on bottom photo to be taken to flickr where there will be a note and a box telling you where the repair is if you think you found this will tell you.  If you guessed correctly let me know or if you guessed wrong.  I mean i did give you a large hint with the picture right above it should have been easy to find.  I am trying to figure out how invisible this repair is.  I can see it but I do not know if others can.  My clue is my stitches are a tinny bit shorter they had to be as one stitch had to be created that was never there thus the runner that engulfed a few mesh blocks.  So I had to make everything a little shorter to get enough thread to make that stitch after a washing the stitches will expand and loosen so then I should not even be able to see it any more.

Saturday, July 07, 2012

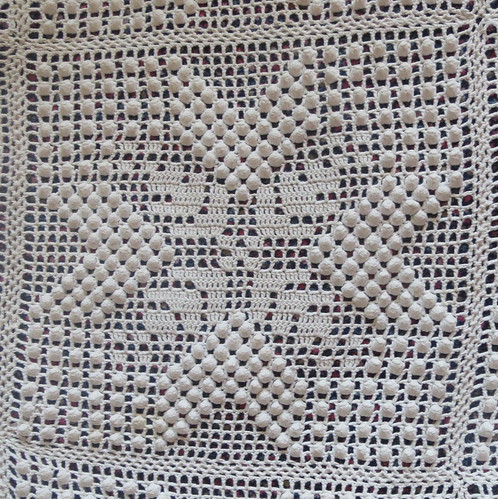
Popcorn stitch afghan repair work


good block
I lady came by on the 5th to show me three afghans she needed cleaned and repaired.  This is the first one I am working on and probably the worse one in dirt.  Three tub fulls of water to get this one to come mostly clean.  Looked light tan when I got it.  Looks light ecru now.  This is why I highly recommend cleaning before repair or the repair will look nothing like the afghan after it is cleaned.
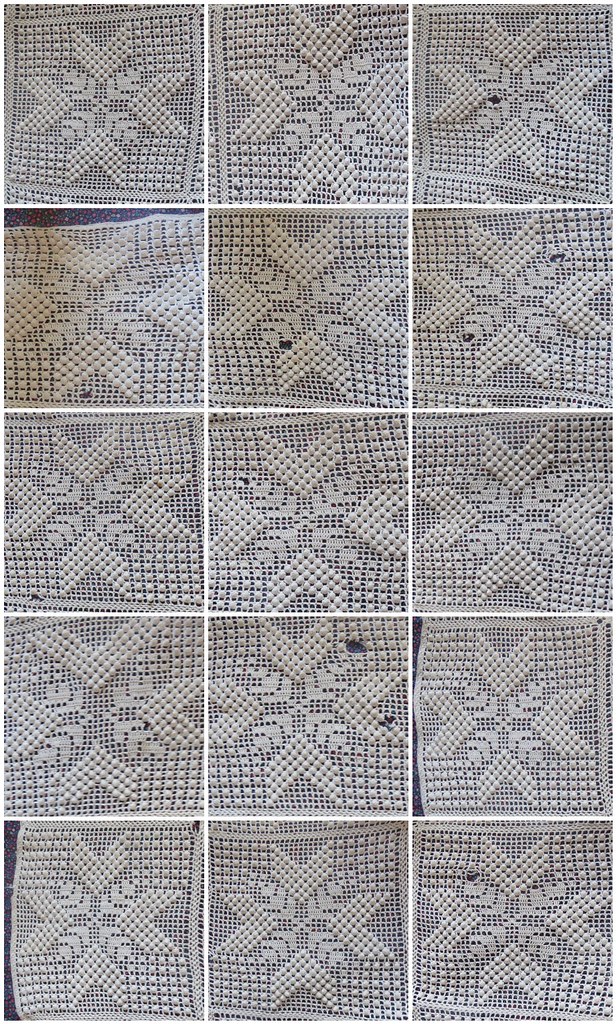
This is an afghan but the lady kept calling it a table cloth that happens almost every time people just do not know what they own.  For starters anything with popcorn, bobble or puff stitch is either a afghan or a decorative table cloth not one you place food on as the plates will not lay flat and you will get more spilling of food on the cloth.  That is the case with this item so many food stains it is beyond belief most came out those that did not are tons lighter now.  Too bad they had been left in the afghan so long they have caused permanent damage.  The top photo is what the blocks are supposed to look like with out holes.  The rest are all the blocks that are in need of repair with 1 or more holes in them.  The original maker used the long chain method when constructing these blocks which is  perfectly fine way of doing things except you usually count the first row of blocks and stop where needed to and cut off the excess chain.  Nope she just made as many blocks as she had chain and fixed it on the second row with out cutting the excess chains off.  So on the back of most of these blocks is the excess blocks sort of weird to look at but since that is how the original maker wanted it that will stay that way.  I will post photos of that at a later date to show you what I mean.  Since I have to make a sample block of this to get gauge correct look for this pattern in the near future for free on my blog.  The first photo below has no holes and is what the blocks will look like after repair the rest are in need of some sort of repair.  The afghan is 7 squares by 8 square so 56 blocks with 14 needing repair work.
repair work under reconstruction

Copyright/permissions info

I like to share on this space my ideas and projects.
Please don't take ideas or photo and claim them as your work.
I am always happy to have new links to me.  So if you like something just link back to me and give the source some credit thanks.
Any questions? just ask. I am happy to work with you if you need something
Creative Commons License This work is licensed under a Creative Commons Attribution-Noncommercial-No Derivative Works 3.0 Unported License. 2006-2019 Copyright Vintage Threads Inc. All content and images.

LinkWithin

Related Posts Plugin for WordPress, Blogger...