[google6a7b7d93c7100df5.html] Sunshine's Creations.Vintage Threads Inc.com: holiday:mothersday

friends and followers

If you like my blog and the free patterns and tutorials and want to say thank you
I have a wish list on ravelry of patterns (click here)
I would like to make.
Thank you in advance for being kind and saying thank you back.

Love Sunshine

Search This Blog

Showing posts with label holiday:mothersday. Show all posts

Friday, October 11, 2013

ROSE PETAL BEADS

These beads will keep their fragrance for several years and are stronger than you would imagine.  In time with use and wear they will turn a polished red Sienna color.  My mother-in-law had a set of beads like this before she passed that one of my sister- in-laws wanted.  I thought it was an intriguing idea beads for every day use made out of roses never heard of it before except for rosaries.  My middle daughter wanted to make some so here we go with the experiment.  If you try it, it would be nice as a mother's day gift or a way to use up those dead valentine roses or any other rose you are given.  This way you get to keep the gift of the flowers for years to come.
 
supplies
  • water
  • 1 enamel pan with lid
  • 1 lb rose petals red
  • silk thread
  • closer for strand of beads if it is not  long enough to go over the head
  • needle for piercing hole or wire can be used
  • beading needle for stringing
  • newspaper for drying purposes
  • cookie sheet to rest beads on while drying

To make rose petal paste
  1. The heat of your body causes the beads to give off the sent  of the rose petals from which they are made.
  2. In enamel pan place1 lb of rose petals ( usually red is used for this) with just enough water to cover petals.
  3. Simmer for one hour but do not boil.Cover  pan and let mixture stand over night.
    1. Repeat this step three more times. ( 4 days total)
  4. By the fourth day ,the petals and water should have become a smooth paste consistency.
To  form beads:
  1. Take a small amount of paste and roll it between your palms, try and form balls that are about 1/4 inch in diameter
  2. Pierce each ball with a needle or wire to form bead for stringing.
    1. let the beads dry on newspaper in a warm area like above fridge somewhere warm but dry. 
  3.     Thread the beads onto silk thread for your necklace.

Friday, January 11, 2013

Chocolate Strawberries...mmmm

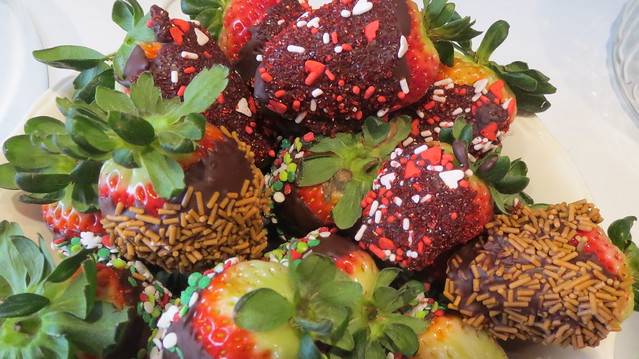
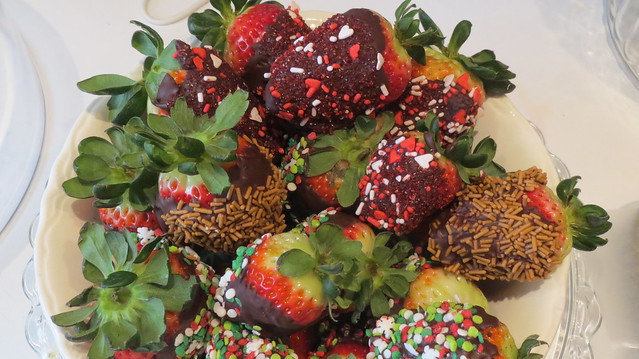
chocolate strawberries

My middle daughter wanted to make chocolate strawberries today.  We had just  bought fresh strawberries yesterday for cereal so much for that thought.
Now we have 50 + treats in the fridge.  Here is where the recipe came from if you want to make some too.  Good for valentines or mother's day or any day you have fresh strawberries.  The tan colored sprinkles are caramel flavor.
homemade chocolate strawberries

Friday, January 29, 2010

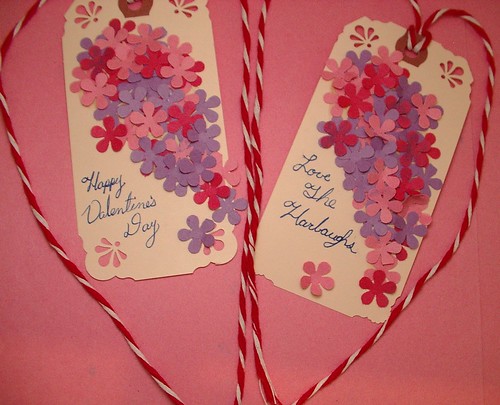
How to:Lilac Gift Tag

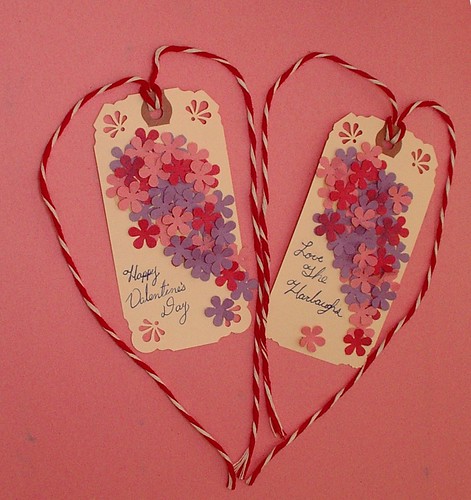
all done
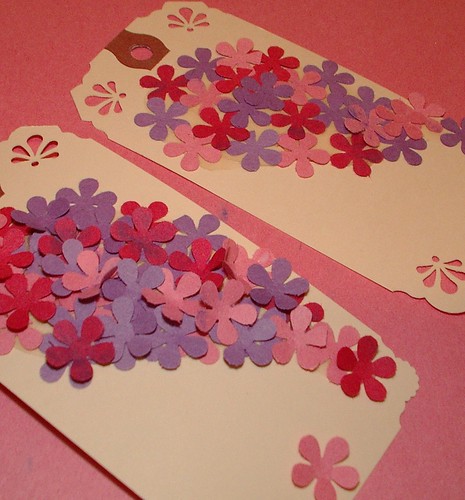
Playing with the kids coming up with holiday ideas for their Valentine's Day Parties at school, that of course are not on Valentine's Day because it lands on Sunday. I decided to make gift tags to add to the teachers gifts. Looking around the house this is what I found. These would be cute for Mother's day, or Easter too.

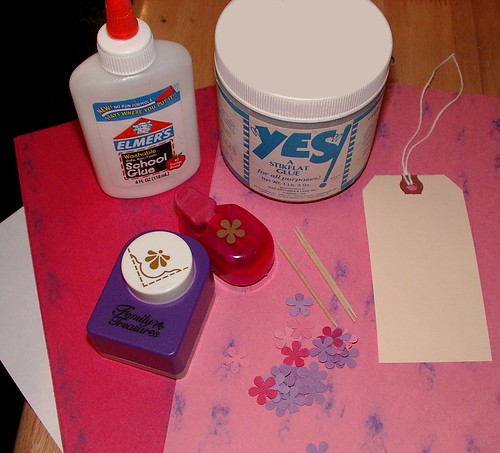
Supplies
IMGP0059
  • glue ( I had YES paste (17 years old and still works amazing) and Elmer's glue kicking around use what ever you like or have)
  • toothpicks to use with white glue
  • corner punches
  • flower punch
  • shipping tags
  • decorative string or yarn (not pictured)
  • construction paper in colors desired 3 to 5 colors (we used3: solid lavender, variegated pink, variegated red)
  1. Punch tons of flowers out of construction paper we placed them in a zip lock bag and shook to mix them
  2. Remove string from tag ( you can replace it later with same string or decorative yarn, string)
  3. add decorative punches to the corners of tag (our tags had been notched already I wish they had not been would have been prettier)
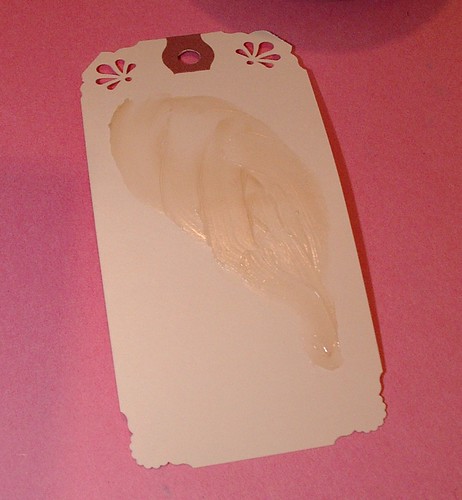
  4. add glue to tag in a paisley or tear drop like shape
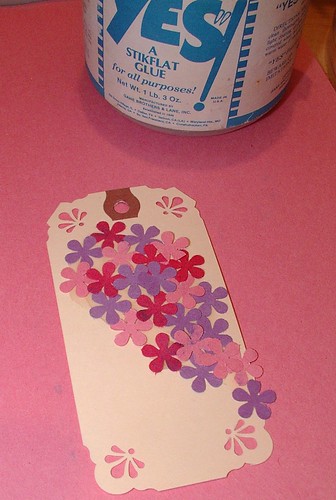
  5. add flat flowers to tag
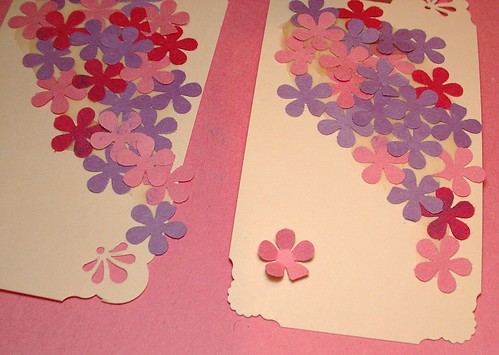
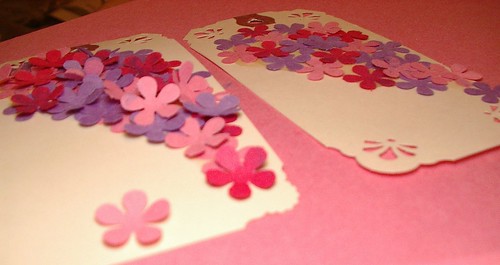
  6. bend petals of flowers up and place a drop of glue on back of center of flower and place in desired location on tag continue to do this till as full as you like (the photos are showing one with them added and one that doesn't have bent flowers yet)(the very first one only shows one bent flower on the right picture)side by sideraised detail
  7. replace string or add new one
  8. write in space left on tag your desired message
done

Tuesday, May 22, 2007

Late Mother's Day swap items

Group #1
  1. sunshine: knitted and crocheted washcloths and an angel coin
  2. Mikki: handmade bookmarks; she ran out of time or she would have embroidered everyone one
  3. celebrate 2727: soap and either bath salt or body spray (hasn't come yet)
  4. Candismom: travel kleenex holder
  5. Buttercup: flower candles, magnetic dominoes, chop sticks (she lives in Japan)
  6. ktknits: knitted headband
  7. cinnamongirl: rag doll
  8. kathie: decorative little screen door and handkerchief
  9. mommom: wood box full of chocolate
  10. suzyhomemaker: quilted picture frames
Group #2
  1. sunshine: crochet and knitted wash cloths and an angel coin
  2. levisgrammy: hanging pillows
  3. willowtreecreek: java cozy
  4. herbquilter:soap and salve
  5. tina michelle: handmade rose pin
  6. naomi michelle: handmade tomato
  7. knewslady: Scented candles
  8. firemama: variety of items -- wall plaques, sachets, apron, pin cushions, hand-decorated ink pens with flowers, receipe box...
  9. smoothiejuice:handmade Japanese-style stab binding books
  10. beckels: 2 pails and tea

Monday, May 14, 2007

A Touch of Flowers

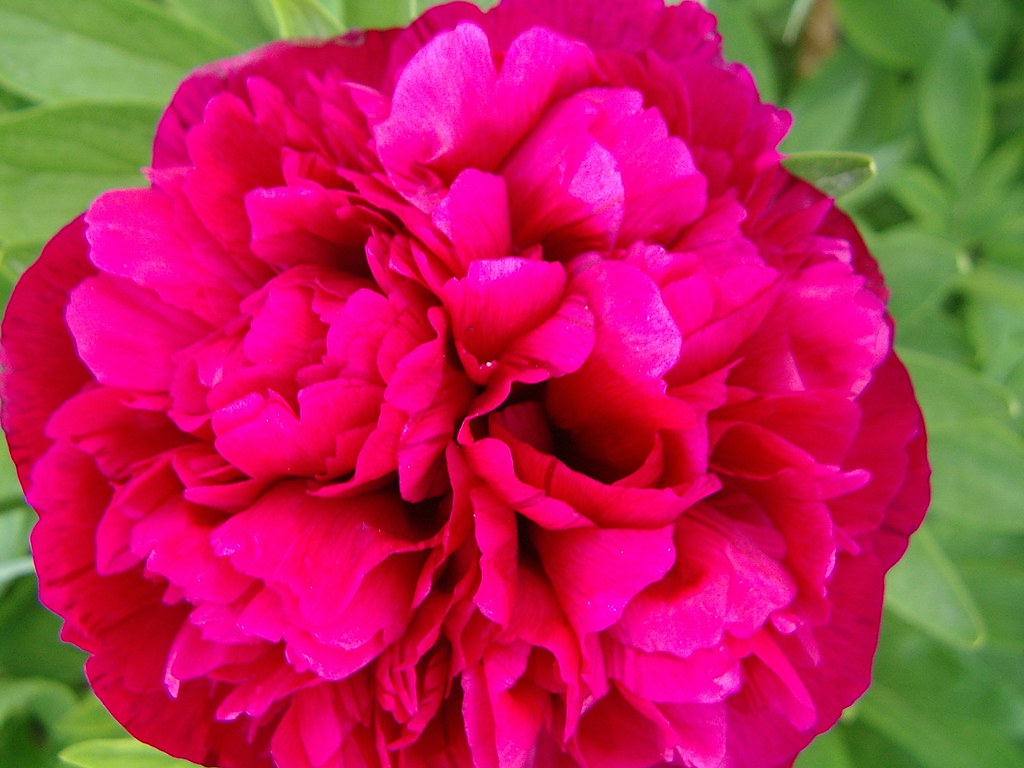
Peony

My peony is in bloom; I just love the bright color.

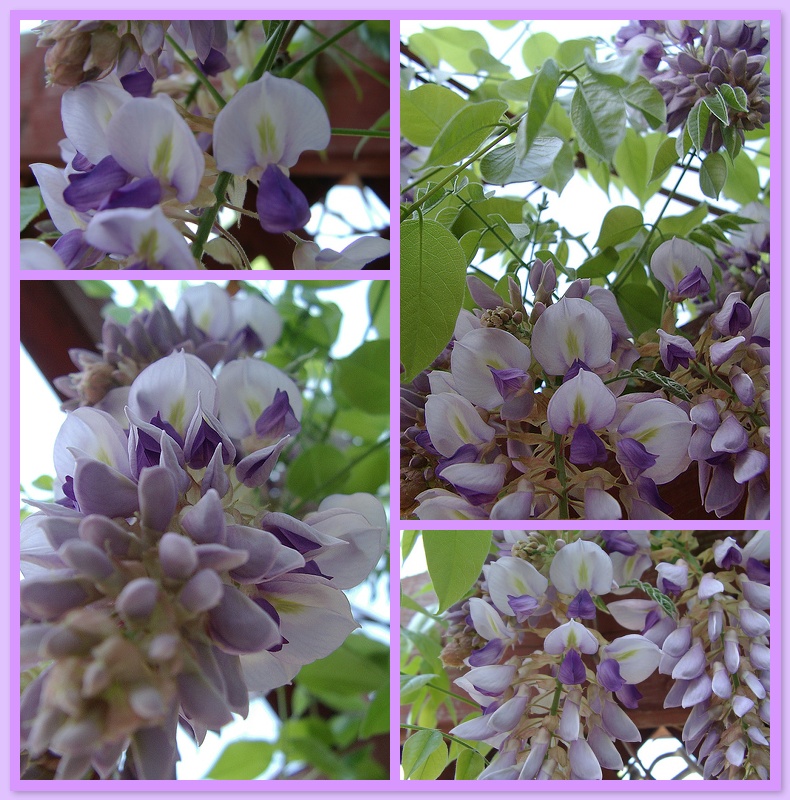
Wisteria

This is the first year my wisteria has actually bloomed well. Last fall I got one bloom and was happy to have it. The year before that, nothing, and the year before that I planted them. So this is the first time I get to be real excited about them. I have another wisteria plant on my porch but it blooms later in the season. I am hoping I get to enjoy it this year, too, because I have never seen a bloom on that plant.

It was so nice to see all these flowers on Mother's Day, especially since I was home with a sick kid and not able to visit my mother-in-law or my husband's grandmother. My children and husband got me a lovely little rose bush.

Friday, May 04, 2007

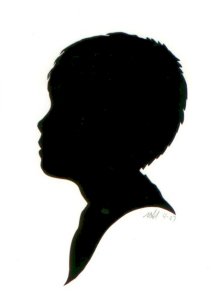
Hand Cut Silhouettes

I just wanted to show a silhouette that I cut recently. The silhouettes fit in a 5 x 7 frame for size reference. I am very pleased with the results, as the photo was not good. I hope the person getting it likes it, too.

These make great Mother's Day or Father's day gifts.
silhouette

Monday, April 16, 2007

Trying to get caught up on a few things

Penny over at Penny Sanford Porcelains sent me the loveliest brooch/charm I have seen made out of Porcelain. She makes these herself. She gave this to me as an award titled "The Happy Penny Award". I think it is very sweet. I love that she is doing hand work because I do tons of that. Penny does sell these; if you are interested, follow links to her site.When we went to my in-laws for a late Easter egg hunt, my mother-in-law gave me a birthday present. I think it is so cool; I just wish I had a little bit of time to sit down and play with it. Life is so busy at the current time. I really love this item; I discovered the other day that in Japan they sell a larger and smaller version of this and also heart and flower ones, too. I just can't figure out how to order them yet.I was in a fat-quarter swap at MJF forum with nine other women. The fat quarter I sent in is the third from left; it is a vintage fabric my Vavo purchased. It's always fun to see the variety you get in a swap -- thanks, ladies!Suzy homemaker who is also at MJF sent me this lovely Easter card with a fat quarter of fabric. I am going to have so much fun with fabric in the near future. I love this fabric; it is so soft and delicate looking. Would be lovely as a Mother's Day item. Hmm... I might think on that one a little.I have a few more items to show and say thank you for; I just didn't have time to photograph them all, so you will probably see them later. A box and envelope of fabric from levisgrammy at MJF. Also a box from This Vintage Chica with real cute items in it.
Updated 12:33 p.m.
This is the box and envelope of fabric from levisgrammy at MJF.This stuff below are the items from "This Vintage Chica" and an apron from her, too. I still need to send her fabric and yarn for the exchange; sorry I'm so long in doing this. I just love roosters; aren't those just the cutest plates. The white sheer item is a curtain that I may make into an apron later after I get a chance to try and remove the stain. I knew about the stain before she sent it. I think it will still work out lovely.This is one of those times when I wish I had a mannequin or dress form or something to drape clothes on; this is real cute and the lighting didn't do it justice nor did laying it on the floor. It is a vintage apron, but the colors are still popular today. I would love to make a quilt someday in this color scheme. This is about three shades of pink and three shades of chocolate; it's hard to see in this photo -- bad lighting. But super super cute!!

Thursday, March 15, 2007

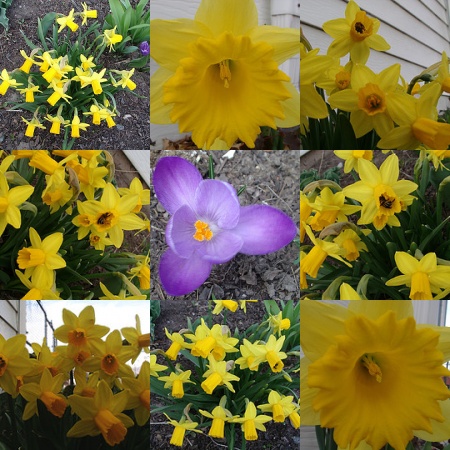
Crazy with flowers

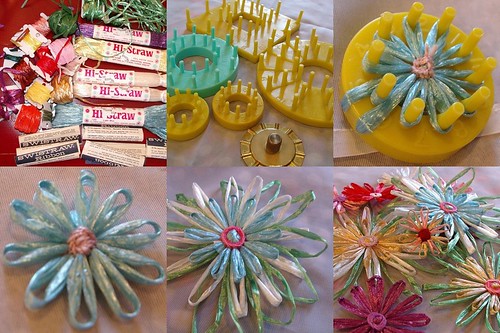
My flowers decided to bloom after all, just a few days late, but that is all fine with me. I went out to take pictures, and there was a little bee in one on the flowers. So I have little bee bum in half my pictures. Oh, well!! At least the flowers are happy about it. I guess that is all that really matters on that one.I got inspired by the flowers to make some flowers of my own. Look at the mosaic picture; the stuff in the top left photo is called Hi-Straw and Swistraw. My supply is from the 40's through mid 1960's. They are made out of Viscose Rayon so they can be washed just like clothes. I just love thrift stores!I got this idea around 4 am this morning. "Why" you ask, "was I up at that time.?" Well, my kids woke me because of their fevers. After I took care of them, I couldn't go back to sleep. Yep!! I started making flowers on my looms. The looms are on the top row, middle picture. They are from the same time period as the straw and were actually meant to be used with it. In addition, you can use ribbon and yarn with the looms, too. I think they would work well with wire work like beadders use; pretty much any thing you can wrap around them without breaking the pegs.
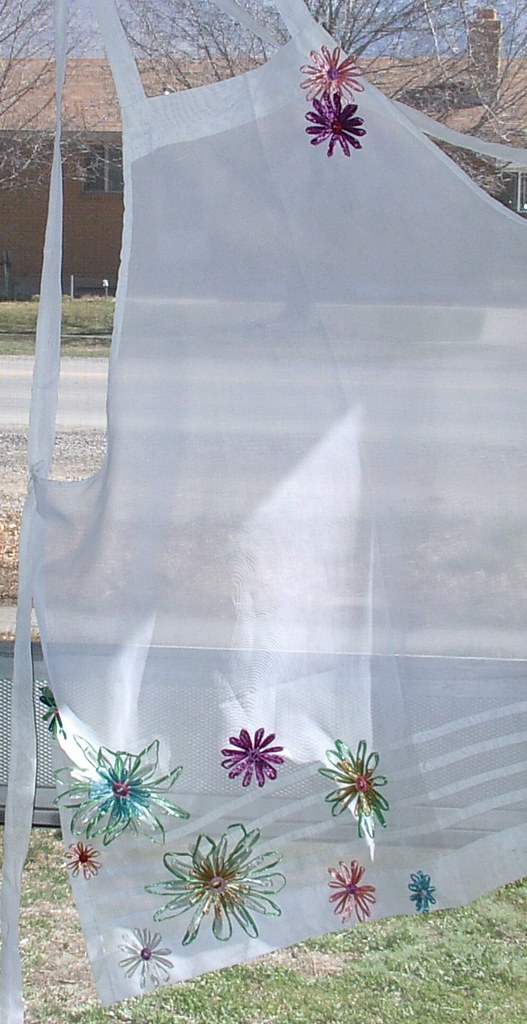
The next picture shows the smallest loom with a flower almost completed on it after having been woven on the loom and embroidered with pearl cotton to form the center. This is considered a type of weaving, just not very complicated weaving.

That same blue flower is show again in the first picture on the second row. Then I decided this was too boring; I needed more variety and not just in color, so I started making a variety of sizes.

In the last picture of the mosaic I have a nice little stack of flowers ready to be added to the apron. OK, so I go over board; I am used to that. The apron I used I have had for about 10 years; I purchased it at a craft store called Mac's. I loved that store; too bad they went out of business about 5 years ago. I think the apron came out rather cute -- sort of spring, St.Patrick's Day, Easter and Mother's day all in one.
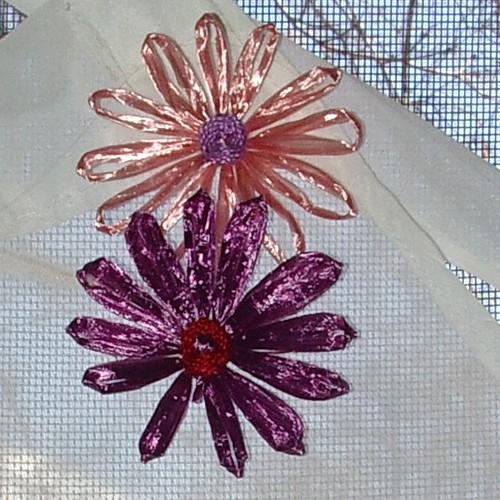
Looking at these photos gave me another idea. "Oh, NO!!!" you say. Take it easy; it's a good idea I promise, and you can do it if you can find the supplies at a thrift store. Actually, I think they are selling looms like this again. But if you can't find them there is always eBay; that is where I bought the brass one about 7 years ago. Do your search under flower loom, bloom loom, crazy daisy, knit wit, studio twelve looms -- any of these will work to find something that can make these flowers. Either way, the supplies are not hard to find.

Now for the idea: Wouldn't these just be sweet on a sheer little girl's bedroom window? Hey, I have three little girls; too. To bad their windows already have blinds and curtains. But maybe I can still change that. We will see; maybe I'll get some sleep instead.

Also the flowers made on the brass loom are the same size as yo-yos made from a standard size CD; oh yes, the wheels are spinning with ideas there, too.

Update

I noticed that Craftzine linked to this today ( Friday Mar. 16, 2007). They referred to it as a "How to" so I decided real quick I would make a true " How to" if you have this tool and don't know how to use it or if you have seen one and wondered how it worked follow the link below.
Tutorial here.
You can also see these same daisies made with double sided satin here.

Please join flickr group if you have made any of these types of flowers
Crazy Daizies. Get yours at bighugelabs.com/flickr

Copyright/permissions info

I like to share on this space my ideas and projects.
Please don't take ideas or photo and claim them as your work.
I am always happy to have new links to me.  So if you like something just link back to me and give the source some credit thanks.
Any questions? just ask. I am happy to work with you if you need something
Creative Commons License This work is licensed under a Creative Commons Attribution-Noncommercial-No Derivative Works 3.0 Unported License. 2006-2019 Copyright Vintage Threads Inc. All content and images.

LinkWithin

Related Posts Plugin for WordPress, Blogger...