Where do you want to go
friends and followers
If you like my blog and the free patterns and tutorials and want to say thank you
I have a wish list on ravelry of patterns (click here)
I would like to make. Thank you in advance for being kind and saying thank you back.
Love Sunshine
I have a wish list on ravelry of patterns (click here)
I would like to make. Thank you in advance for being kind and saying thank you back.
Love Sunshine
Search This Blog
Tuesday, August 31, 2010
Back to school...
We had our first day of school this week. That is why you have not see me in a little bit. Trying to get all the last detail things done and soccer also started. Which keeps us a little busy as well with three daughters on three different teams and coaching them and the games. There are other things that have pulled me away from the blog for a little bit too maybe I will explain at a later date on that. Bear with me I will be back at this soon. Thanks for your patients and understanding I have a few more heirloom tutorials photographed and just need to prepare the text part of the post hopefully soon.
Wednesday, August 25, 2010
Free embroidery pattern
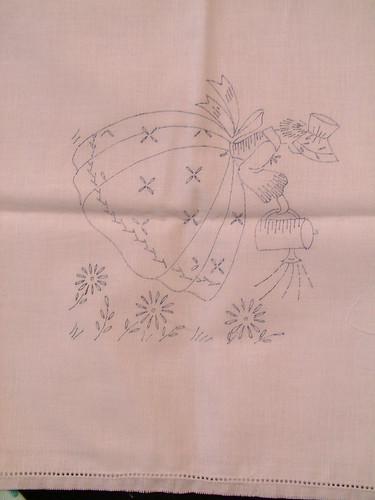
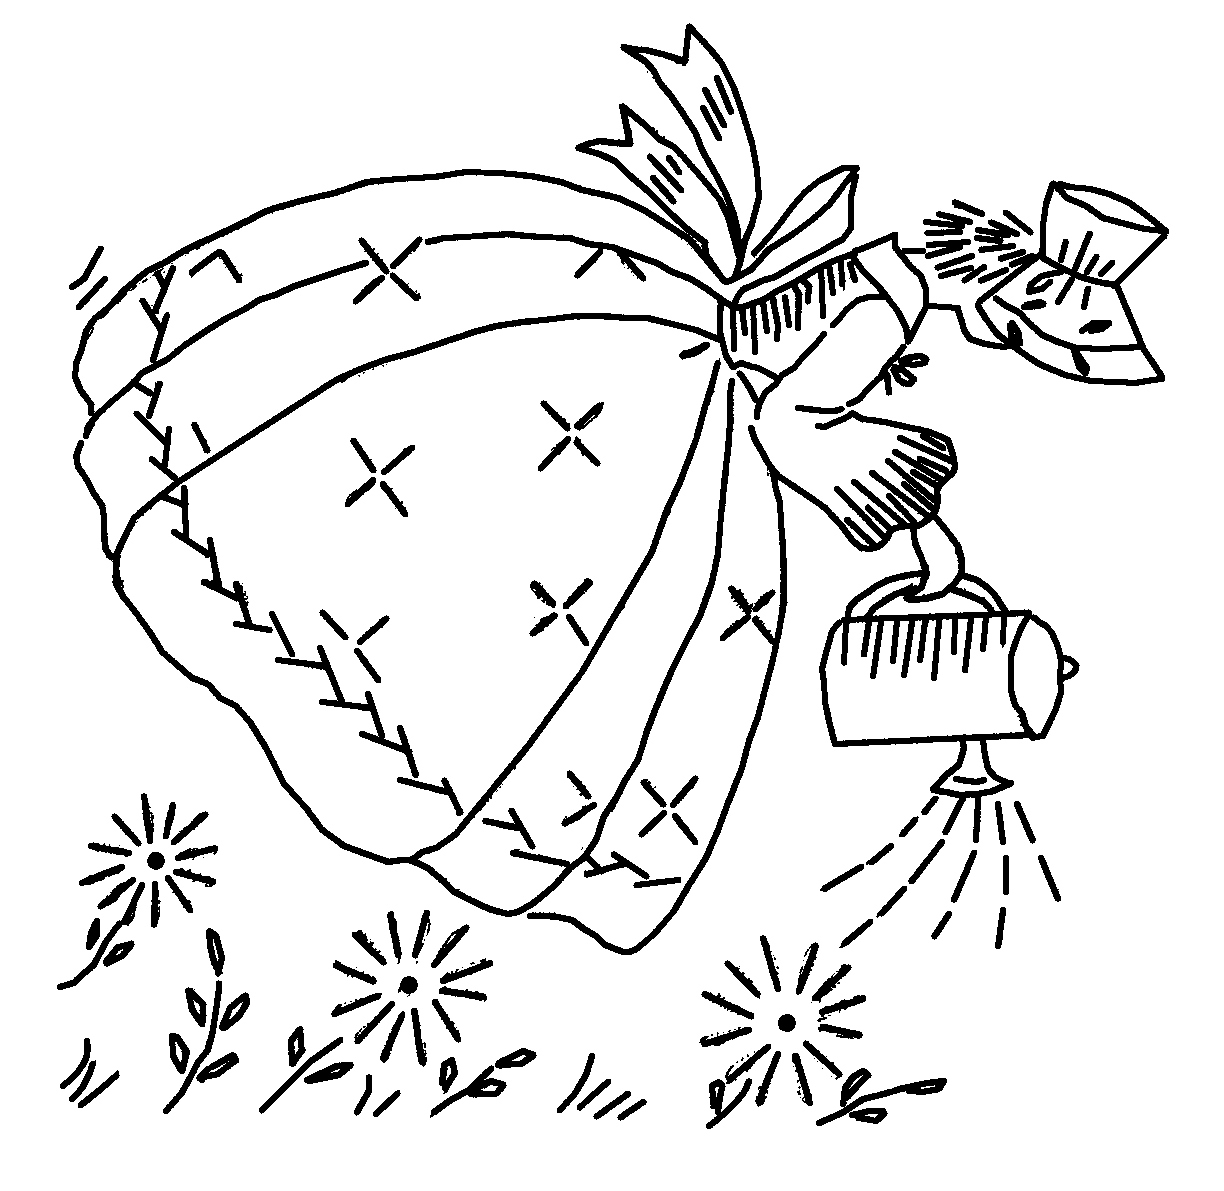
While on vacation I took some photos of some of linens Grandma Ernst had they are not in my possession these linens I just took photos because I liked them. this piece was not finished so I thought others would like a copy of the embroidery for their own use. If she seems a little tilted well that is because she is meant to be placed in a corner the linen in question had her I think in either 3 or 4 corners I can't remember which.
Here is my original photo it was dark and hard to see it well
Here is one cleaned up a little for your use
Here is my original photo it was dark and hard to see it well
Here is one cleaned up a little for your use

If you do make one please post a comment with a link so I can see your finished piece thanks. Right click on image and select view image to see just the image to save and print.
Monday, August 23, 2010
Bolero progress while on vacation
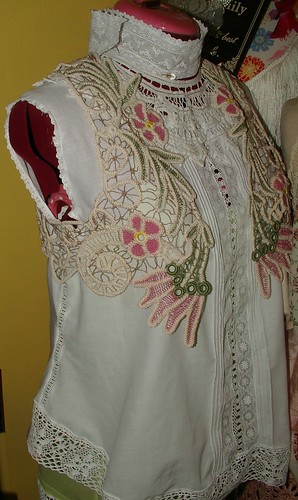
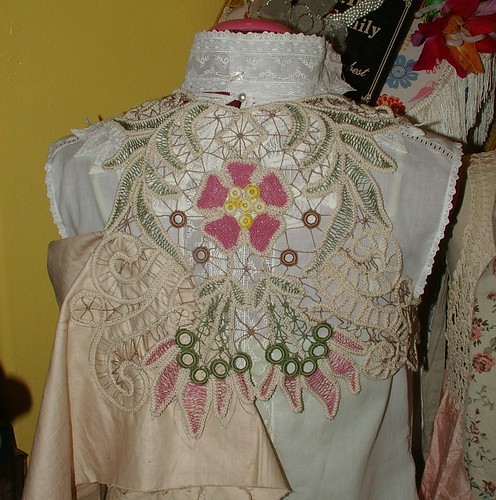
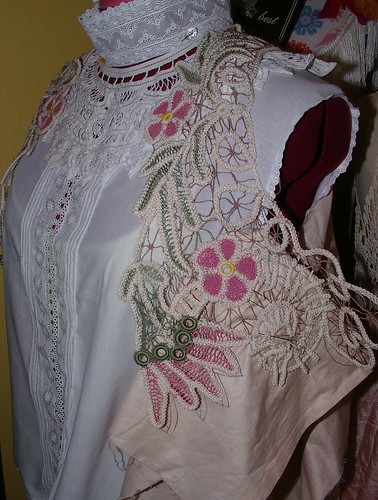
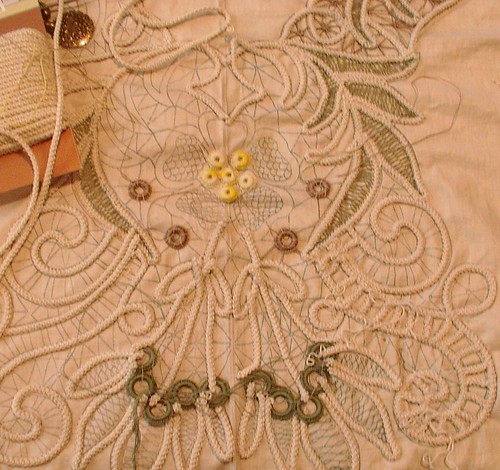
Here is the progress I made at granddaddy's house and in the four hour drive home from there. You can also see a little bit of the progress I have made on the heirloom blouse. I am thinking about putting a battenberg yoke on it (that use to be a collar) to make it a little fancier in the yoke area still thinking on that part of things and you can see the type of collar I am putting on the blouse. Also you may have noticed I have added lace around the hem of the blouse. Just so it is clear these two items would not be worn together on me they are just both on the mannequin at the same time to test things out.
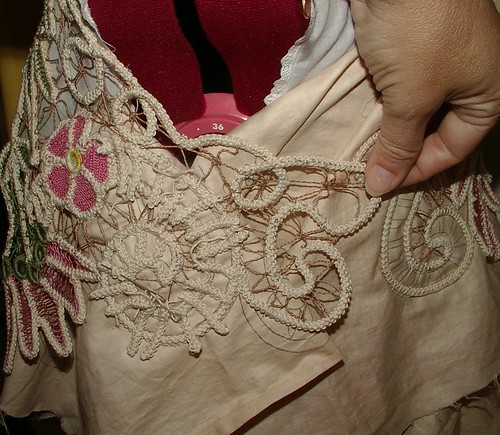
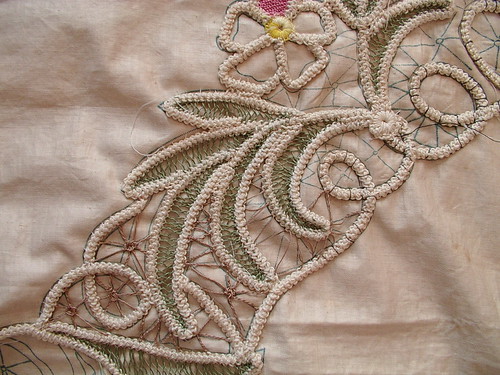
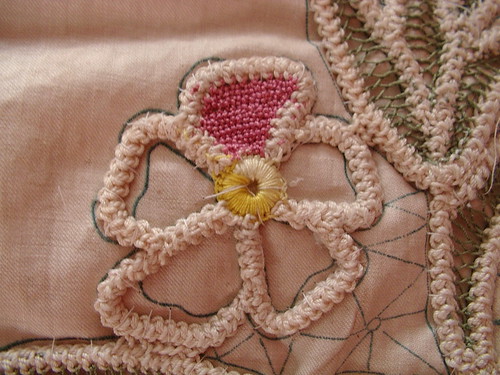
To place the bolero on the dress-form easily it is actually inside out because it is still attached to the pattern. The pink fabric you see is a pattern that is over 100 years old. You can see where it is still attached to the pattern which is where I am still working on it. This has close to two hundred hours of time in it already. That of course is the cord making too. This is why I don't mind giving my children the supplies to make one well because the expense isn't in the thread it took to make it but in the time involved and the skill needed to make the filling stitches and cord and baste to the pattern. In their case I would do the tracing of the pattern too as I wouldn't let them use the original it wouldn't survive the abuse of children working on it. But a new copy on muslin would. I just don't think they have that type of patients yet.
To place the bolero on the dress-form easily it is actually inside out because it is still attached to the pattern. The pink fabric you see is a pattern that is over 100 years old. You can see where it is still attached to the pattern which is where I am still working on it. This has close to two hundred hours of time in it already. That of course is the cord making too. This is why I don't mind giving my children the supplies to make one well because the expense isn't in the thread it took to make it but in the time involved and the skill needed to make the filling stitches and cord and baste to the pattern. In their case I would do the tracing of the pattern too as I wouldn't let them use the original it wouldn't survive the abuse of children working on it. But a new copy on muslin would. I just don't think they have that type of patients yet.
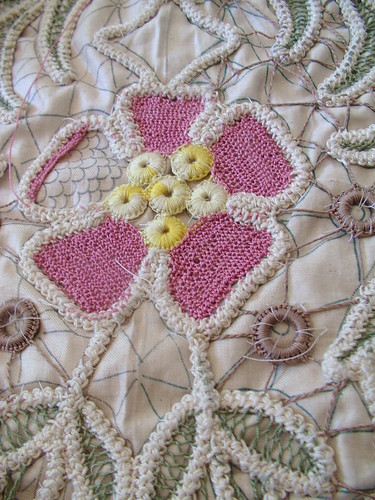
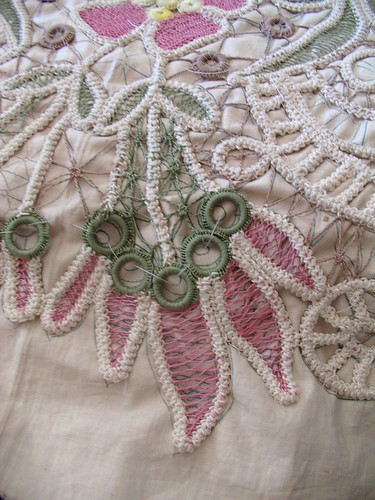
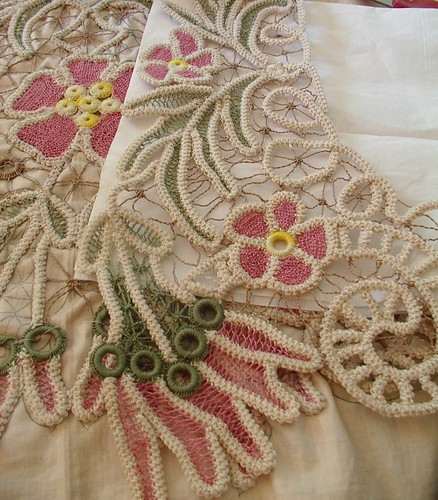
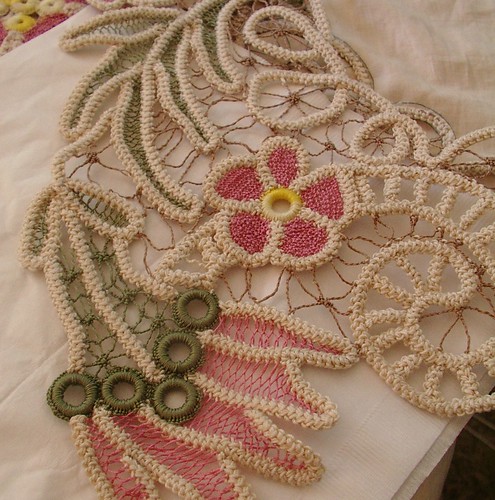
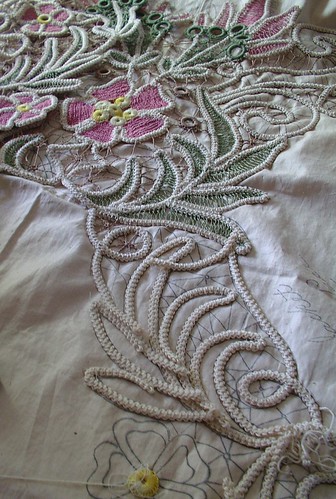
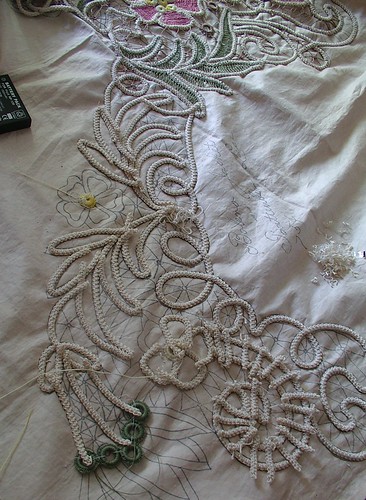
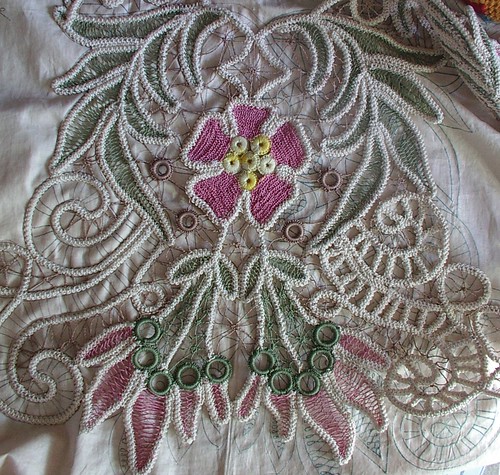
Bolero Romanian Point progress
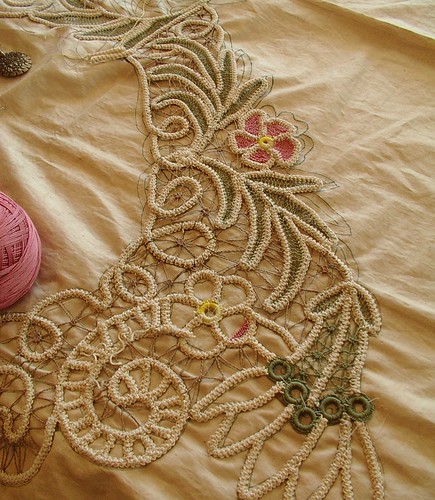
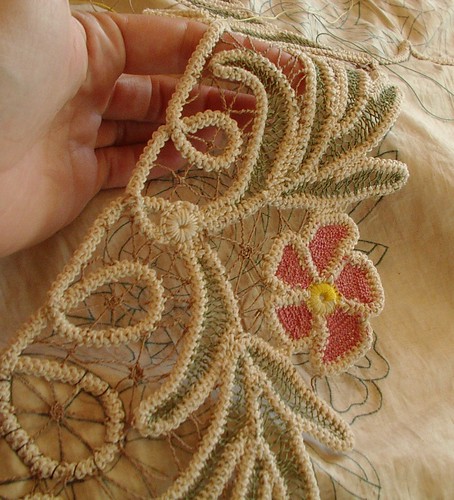
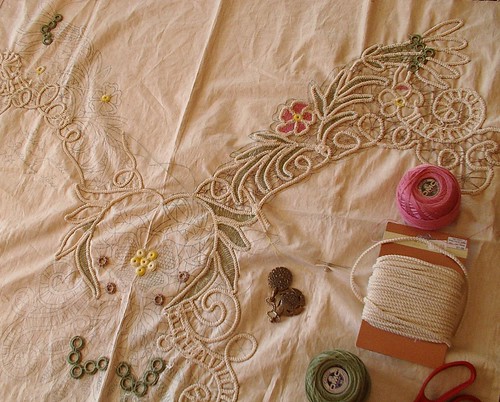
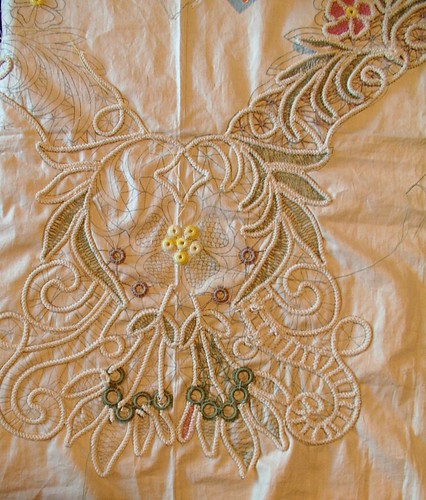
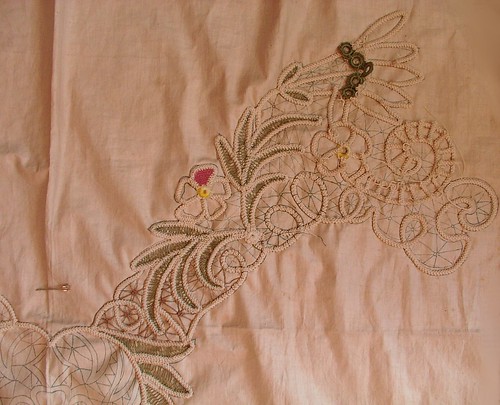
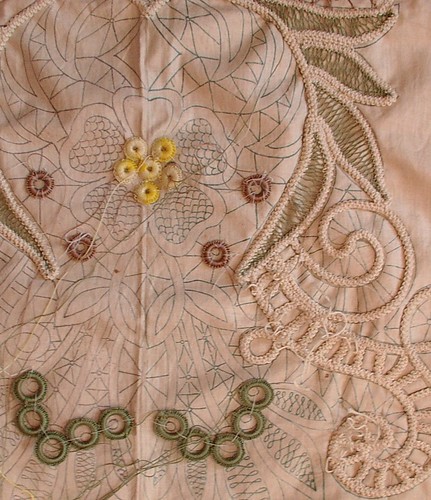
I went on vacation for a few days and took this as my work-on-in-the-car-project. It is now about 90 percent done and looks like it may fit me. Although my middle daughter is still claiming it to be hers. I was happy to let her learn to make the cord with my help, which she did for about 5 inches of cord. I was going to copy the pattern for her use. But after the 5 inches of cord she decided she didn't want to make yards and yards of cord. She decided she would just have mine. I have explained that isn't an option but well she is a kid and thinks she knows best. My oldest wants to give the cord a try to so she can have one. I don't think she will get much farther either but she is welcome to try. I offered both all the supplies they need and my help but I don't they have the patients yet. I can't remember if I told you that the thread that made the cord is vintage/antique and the threads making the filling stitches are discontinued if not now I have. The cord is made out of bedspread weight thread and the filing stitches are size 30 thread. While on vacation I showed this to my almost 96 year old grandmother she said I was crazy to make so many little knots, there are not actually knots in it just filling stitches but she calls them knots. But on the same vain it is quiet beautiful to her. She loves teasing me always says I am crazy but that the items are worth the effort.
Thease photos are oldest to newest.
While visiting my sister this was my progress
While I was at my grandmother's home this was my progress
I worked on it more at my husbands grandfather's house but didn't take photos of where I am now. I have finished all the pink, green, and brown areas. I have a few cream scrolls to finish then I am done with it.
HS1010: Some patterns I want to keep track of
#9395: Ladies' Tucked Waist: Circa 1915
#405 Two Tucked Waists.
404 Edwardian Gibson Tuck Blouse.
#4830: Ladies' One-Piece Kitchen Apron: Circa 1910
#5462: Skirts: 1910 - 1913
Saturday, August 21, 2010
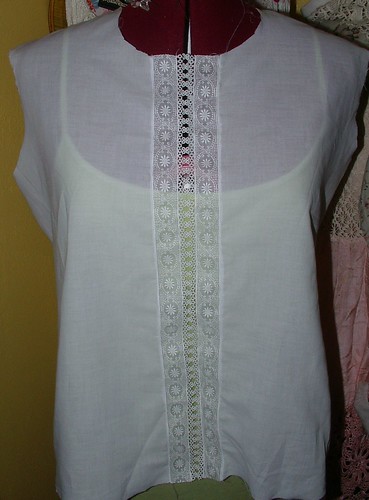
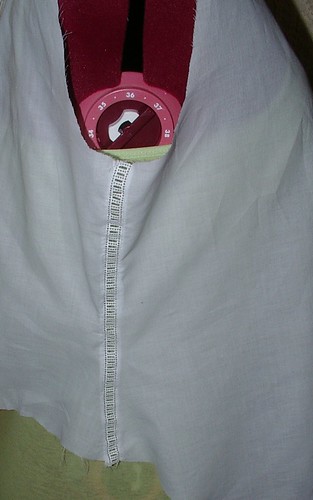
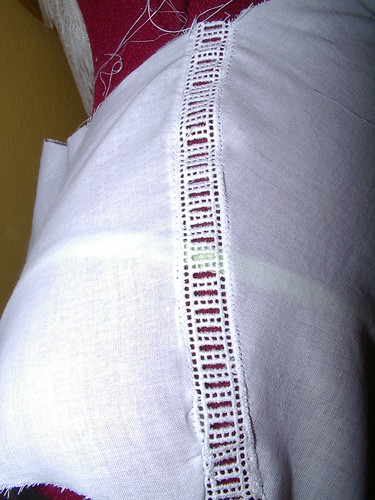
Heirloom Sewing blouse in progress
I wanted an under blouse to wear under shirts that are too low in the neck line. I give this a high collar toonot sure yet. This is the shirt that I mentioned in the Irish crochet top post. I printed out the patterns and for me it was my size sort of. Meaning if I didn't need seams it would fit.
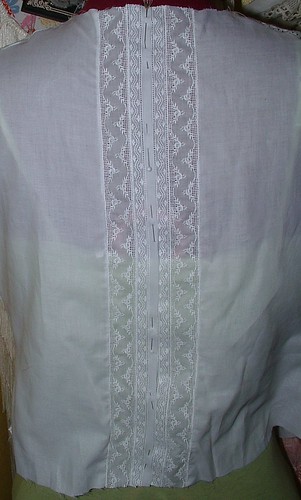
So I cut it to the exact size as the pattern then added entredeux to the seams to add some to the wide and I split open the front and added swiss embroidery insertion and machine made tatting to make the front a little wider and I added two bands of swiss embroideries to the back. I am debating if I want to add ribbon to the entredeux beading at the shoulder and sides and if I want to add it to the tatted beading in the front too.
Still need to add the neck and the button bands to the back and swiss edging to the arm holes. Since this is to be worn under other clothes I am not putting sleeves on it also the pattern didn't have sleeves for the same reasons to why I don't need them. that is why I will use a swiss edging to finish the sleeve areas.
I am still debating if I want some pin tucks near the center back and front at the waist line to bring that part in as this is a Gibson girl style blouse which means it has a lot of fullness around the waist that was supposed to be gathered and let be puffy. Which may be annoying to me to wear it under something else if I do it that way. that is also why the shirt is longer in the front to accommodate the puffeyness meant to be there. The back is way shorter than the front.
Thursday, August 19, 2010
Boondoggle
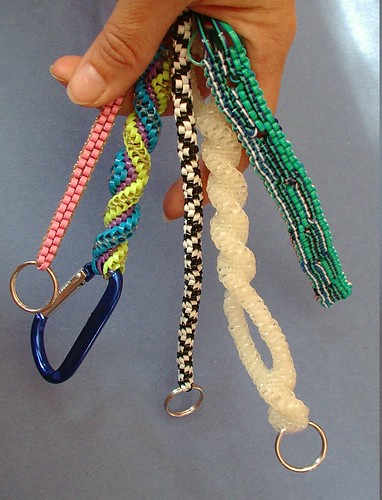
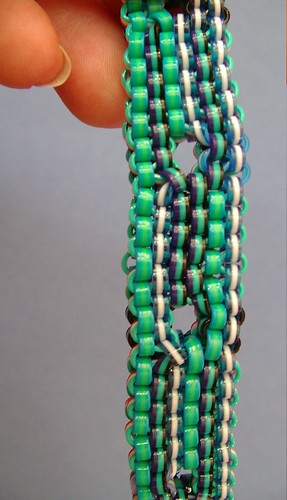
My children have been playing with boondoggling as of late. This is what they have come up with so far. I never really played with this as a kid I think I made one that was square like my youngest daughters and I don't think I ever even finished it. They just came back from camp and the youngest two learned how to do this there. The oldest already knew how from teaching herself with scubidous, a tube cord, where boondoggling has flat cords but it is still the same thing. This is a type of weaving. I think the patterns are pretty neat on some of these. They are still working on these the only two they considered done are the black/white one and the glow in the dark one. I assume there has to be a way to make the ends look more finished but I know nothing about this type of thing so theya re on their own on this one.
names for the same thing Scoubidous, boongoggle and lanyard
Youngest daughters
Middle daughters
Oldest daughters
Tuesday, August 17, 2010
HS101: Mock rolled hem by hand
Supplies
- Needle (size 10 crewel needle)
- thread to match fabric this is a regular weight 100% cotton sewing thread
- fabric
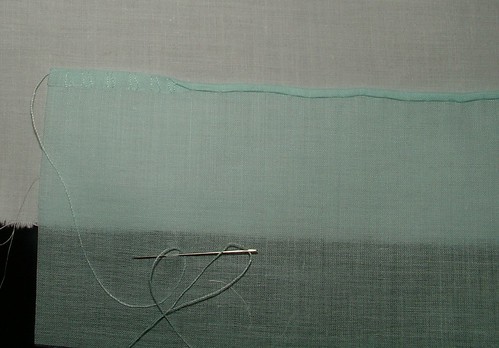
- Clean up edge by trimming off all ravels
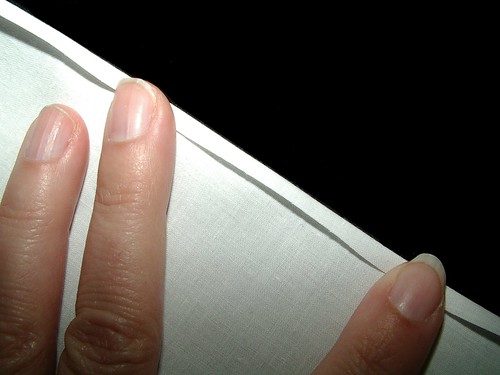
- turn the raw edge to the wrong side (1/8 inch) (actual hem will be about 1/2 of this width that was pressed)
- Attach thread into the fabric fold (securing it well ie a knot)
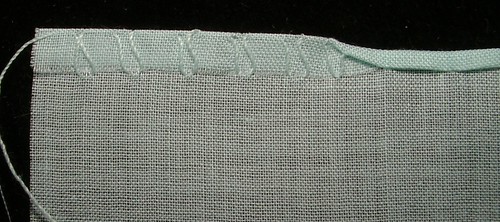
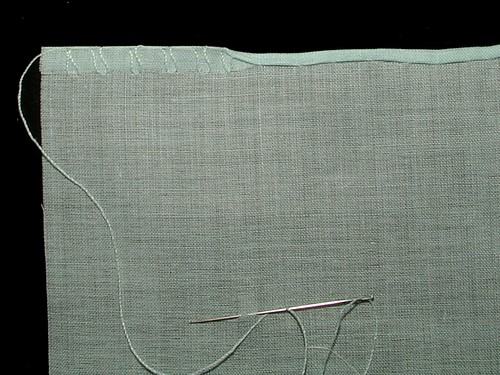
- Make tiny stitch into the garment just below the raw edge. Go straight up and go into the fold travel for about 1/4 of an inch. * repeat this up and down motion in stitching. You should have a series of parallel lines (threads) see photo
- when you have made several of these make sure needle is in the fold in the top and pull the thread to close the opening. This will form a tiny rolled hem.
Monday, August 16, 2010
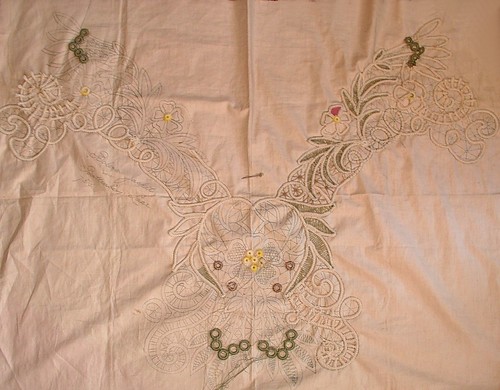
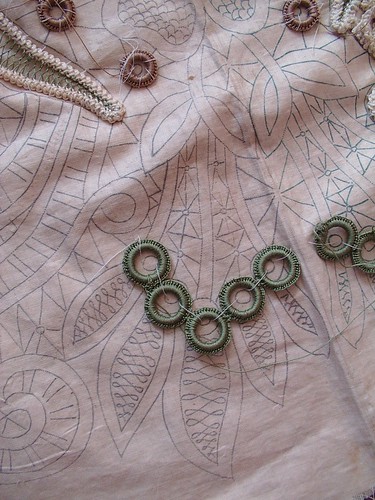
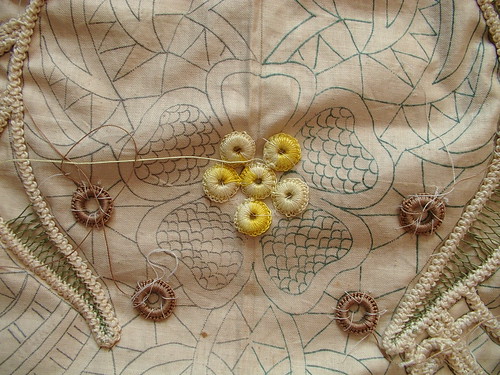
Progress on Romanian Bolero in color
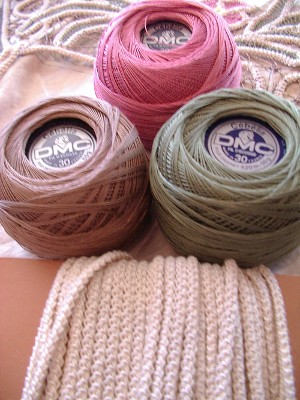
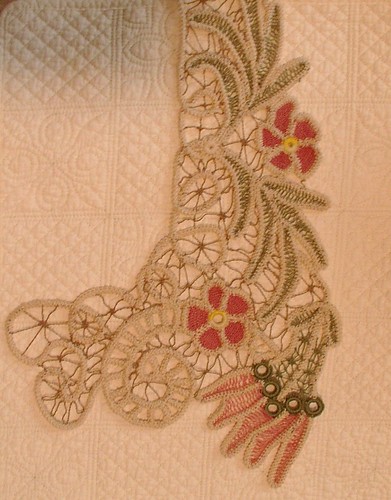
I decided to fill with color. I have done that some in the past but have not shown to much on here. The cord is size 10 boil-fast antique 100% cotton thread, The filling threads are size 30 some are antique, the yellow, and some are new but discontinued colors by DMC the brown, pink and green. I still want to make another one of these in this pattern maybe a few more in solid colors like all white, or all black. I am not real sure the size of this I am hoping it will fit me looks like it is real close to my size might be a tad small. I hope not. If it is I will either sell it or have my oldest daughter wear it and I will make a copy of the pattern and blow it up so I can make another in my size. I am pleased so far with the progress on this.
Subscribe to:
Comments (Atom)
Copyright/permissions info
I like to share on this space my ideas and projects.
Please don't take ideas or photo and claim them as your work.
I am always happy to have new links to me. So if you like something just link back to me and give the source some credit thanks.
Any questions? just ask. I am happy to work with you if you need something
 This work is licensed under a Creative Commons Attribution-Noncommercial-No Derivative Works 3.0 Unported License.
2006-2019
Copyright Vintage Threads Inc.
All content and images.


