[google6a7b7d93c7100df5.html] Sunshine's Creations.Vintage Threads Inc.com: July 2007

friends and followers

If you like my blog and the free patterns and tutorials and want to say thank you
I have a wish list on ravelry of patterns (click here)
I would like to make.
Thank you in advance for being kind and saying thank you back.

Love Sunshine

Search This Blog

Tuesday, July 31, 2007

Mini Aprons

These are aprons For a Mini Apron swap over at MJF. I think I was supposed to make 15 or 16 don't ask me how 17 showed up; that just sort of happened. I used vintage seam binding for the apron ties. I also used antique tatting, some antique crochet and a little new crochet on antique tatting.

Antique tatting with crochet (the crochet part I did), vintage bias tape

Antique tatting, reversible

Crochet lace (I made the lace)

Antique tatting, vintage bias tape

Antique tatting, vintage bias tape

Antique tatting, vintage bias tape

Antique tatting, vintage bias tape

Antique tatting with crochet (the crochet part I did), vintage bias tape

Antique tatting, vintage bias tape

Antique tatting, vintage bias tape

Antique crochet, vintage bias tape

Antique tatting, vintage bias tape

Antique tatting, reversible, vintage bias tape.

My sewing machine was acting weird (I think I need to service it), so my stitches are not exactly the way I want them to be; very annoying.

Friday, July 27, 2007

Explore Photos as of July 27, 2007

Wednesday, July 25, 2007

Block of the Month Tutorial For Aug

Aug  block of the month / tutorial follow link

So the block of the month on flicker is under way we have our first block which will be for the month of August. You can join the group at any time but 
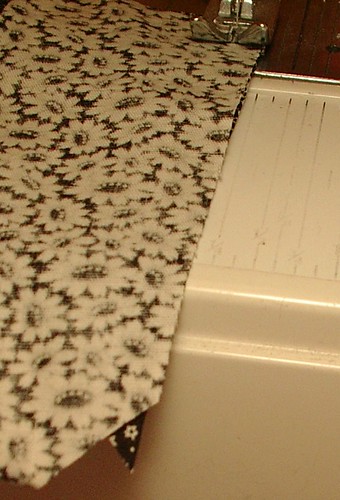
sign ups for the swaps are always the 1-5 of each month. Sorry it is a rainy dark day so my photos are not the best but will work. Below are the basic rules and layout of the group.

RULES

If you sign up in an individual month's block exchange you will be required to make 1 quilt block, it must be 10-1/2" x 10-1/2", and send to your partner for that month.

I will suggest a block to make but you can always choose your own, any style or color.
Then, when you have enough blocks, you can make a quilt and post the photos on the photo pool.

TIME LINE

1st of every month I will post a photo of the suggested block (please note you do not have to make this block, it is only an idea). You may make any type of block you choose as long as it is the right size and agreed color of your partner.

1 - 5 of the month sign ups post on thread also flickr mail me please.

5- 10 contact partner to see if there is a color theme or not and to get mailing address.

5 - 20 of the month make your block.

20 - 30 of the month, post/mail out to your partner.

Post your blocks in the pool before you mail to your partner.

Now that you know that, on to the block:

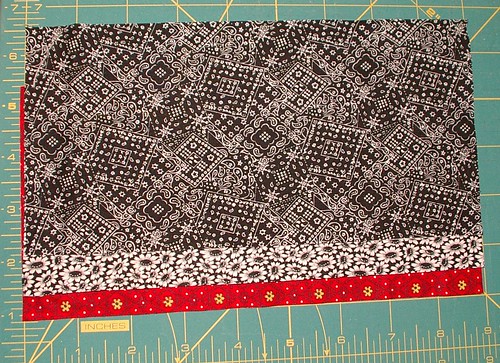
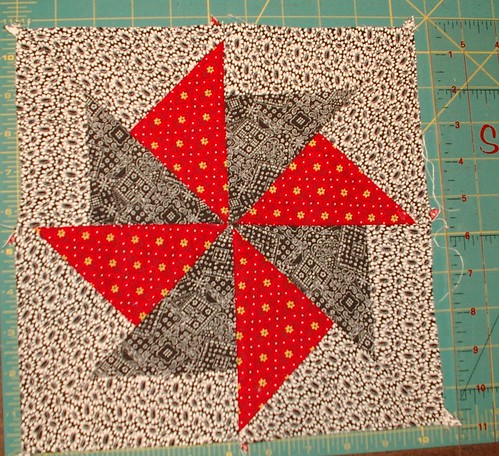
Aug 2007 Tutorial for Pinwheel
finished size 10 inches unfinished size 10 1/2 inches

Supplies:
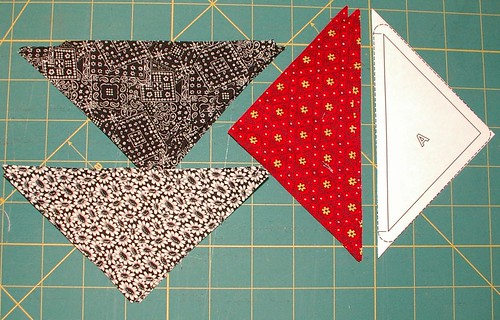
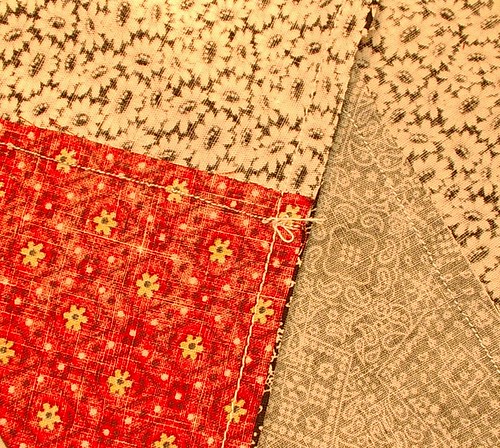
  • Minimum 3 different fabrics (1 is the background, the other 2 colors make up the pinwheel if you want a scrappy look you can have as many colors as there are pieces to the block)
  • A way to sew the block, either a sewing machine and supplies for it, or needle and thread for hand sewing
  • Scissors or rotary cutter and mat
  • Iron
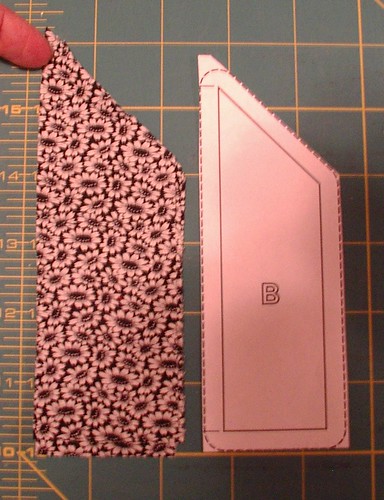
  • Here is the pattern: PDF file, plain SVG file and Inkscape SVG file. I cut mine using measurement, but you can download these files and use templates if you are more comfortable.
Directions:
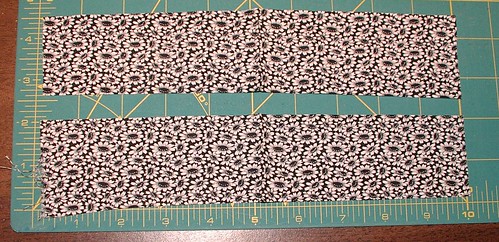
  1. Cut three stripes of fabric 4 1/2 inches by 9 inches; set aside 'till step 5.
  2. Cut one piece of fabric 4 inches by 10 inches.
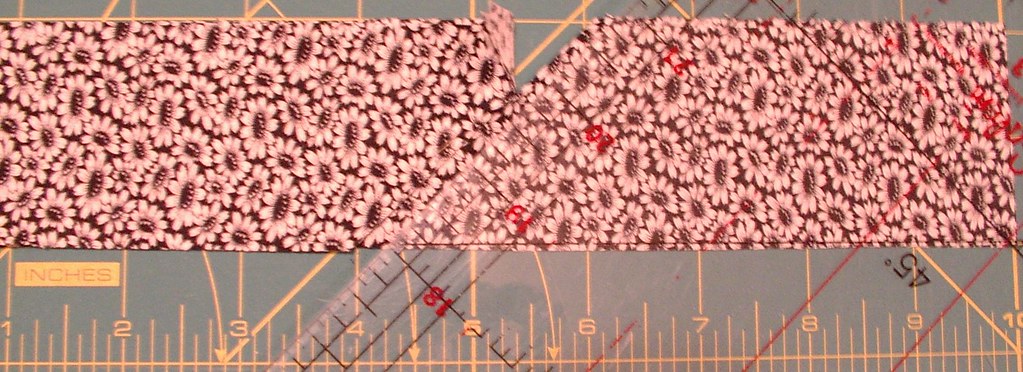
  3. Cut in half so you have 2 pieces of fabric that are 2 inches by 10 inches.
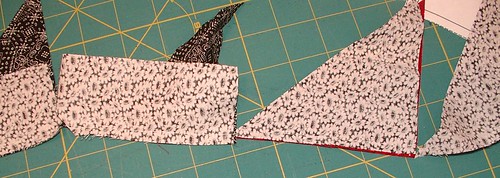
  4. Stack neatly and cut at an angle so one side is 4 inches and the other is 6 inches. You will now have 4 pieces of fabric (before making this last cut, make sure you have the angle facing the right way for the block) set aside.
  5. Stack all 3 pieces neatly (from step 1) and cut in half, so now you have 2 squares that are 4 1/2 by 4 1/2.
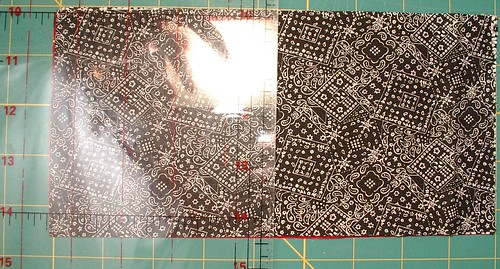
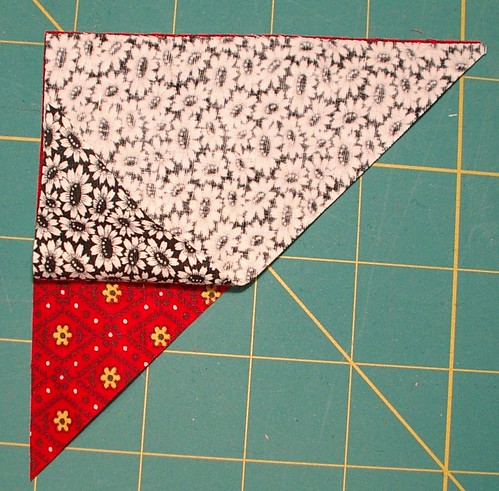
  6. Stack squares neatly and cut from corner to corner and set aside.
  7. You now have 12 triangles and 4 edge pieces for a total of 16 pieces.
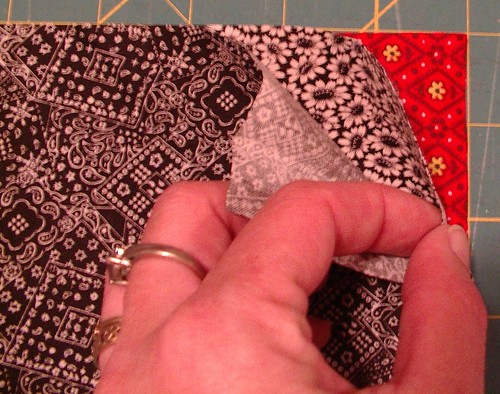
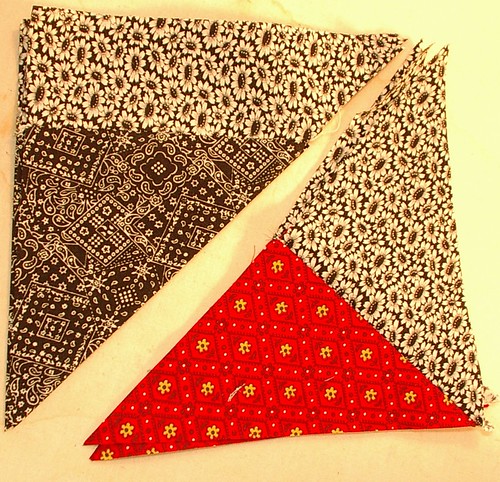
  8. Match up first seam for all blocks, short side of edge with short side of triangle, and then two short side of triangle. To help with this, lay out the block as if done and flip the pieces over on top of the piece they will be sewn to and make two neat stacks.
  9. Take to machine and sew. Use the chaining method when sewing; that means, do not cut threads between blocks. This is faster, neater, and easier to manage; use a 1/4 inch seam allowance. Continue in this manner of chain stitching through the triangles and the triangle with boarder pieces.
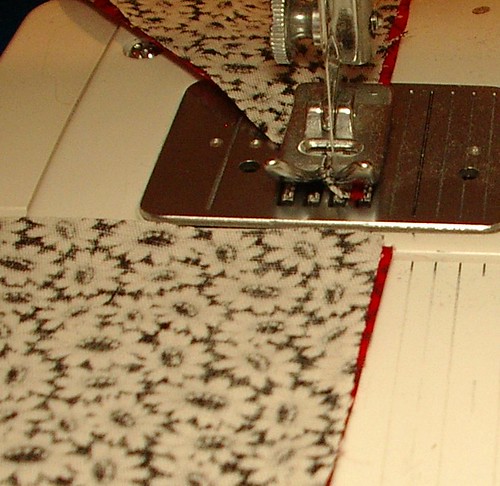
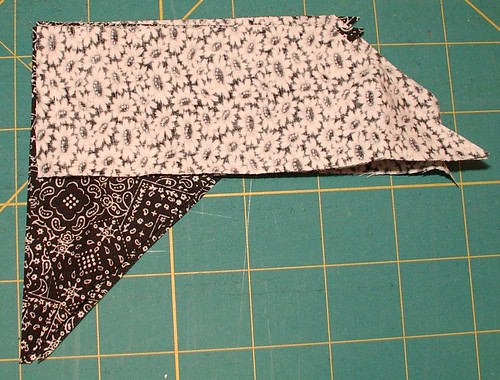
  10. When sewing the triangle to boarder, note the little dog ears at the end where the two blocks cross; your stitches should go right through that intersection. If done correctly there will be a smooth edge when flipped and pressed.
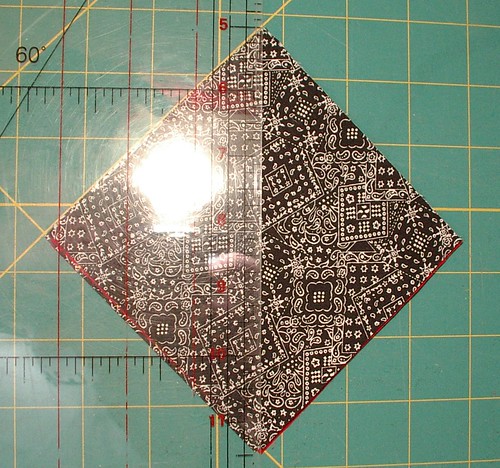
  11. Cut apart blocks and press seam to one side.
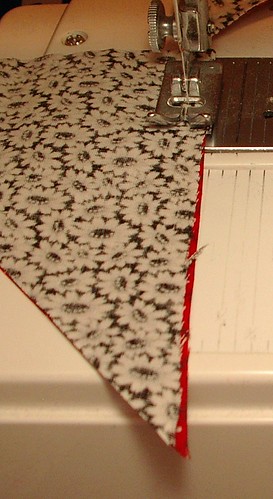
  12. Match next set of seams for blocks; lay right sides together and sew in chain method again.
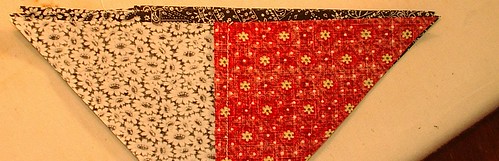
  13. Press seams to one side and match up next seam and chain stitch again; continue in this fashion 'till done with the block.
DO NOT USE THIS PATTERN TO MAKE THINGS TO SELL FOR PERSONAL USE ONLY!!!!

This is supposed to be summer

kitchen windowsummer rain

I grew up in a desert area in California. I have yet to get used to the high deserts of Utah. When we have a down fall like this in the middle of July, I get so confused. It's lovely to watch, but isn't this the wrong time of year? The house is so dark for summer at 3:00 in the afternoon it feels like winter or fall. These are actually color photos; that is how dark it is today. I have a party planned for Saturday in this wave pool of a porch. Please don't let it rain on that day because I was going to put three tables on the porch for people to sit and eat at with a canopy over it. It won't work this way, and the only other place to put everyone is in the walk-out basement of the house. It's not a bad area -- it is nice and roomy, spacious with lots of light and unfinished, yikes!

Tuesday, July 24, 2007

#8 of the 25 motif challenge started

close up of number 8 in 25 motif tatting challenge
This is number #8 in my quest to complete the 25 motif challenge. This pattern came from a circa 1900 salesman tatting sampler that I have hanging in my front room. You can see a corner of it in this post. I will make this as long as the thread will let me; I only have the one ball, so not too long. This is size 80 vintage variegated yellow tatting thread that was given to me as a gift.

number 8 in 25 motif tatting challenge

The pattern is
R= 4, picot,4, picot, 2, picot,4,picot, 4, close ring make joins on 1st and 4th picot of rings
ch= 5, picot, 5

For those of you who are lace makers, yes, this doily has a coronation cord edging.

I wanted to make 25 edgings, but that may change now to bugs. My daughter, as most of you know, wants a butterfly bedroom. So the idea came to me of the curtain and now a new idea has come for a wall decoration. She is a little girl who likes bugs but doesn't want to kill them, so I am thinking I will tat, crochet, needle lace what ever I can think of to make some lace bugs for her. Then we will put a pin in them and place them in a shadow box just as you would a real dead bug collection. But in this case she gets to name the bugs and nothing dead is on her walls. If any tatters or lacers want to help me and make a bug or two for her room, we would happily put your name below that bug as the creator of it. If not, then it will just be our own bugs.

the Mad Tatter. Get yours at bighugelabs.com/flickr
DO NOT USE THIS PATTERN TO MAKE THINGS TO SELL FOR PERSONAL USE ONLY!!!!

Saturday, July 21, 2007

4th of July Block Swap at MJF

4th of july block swap
These are not in a quilt, yet, but I wanted to set them in a mosaic so that I could kind of see a future quilt. These are all 8 1/2 inches square and match, which works real well with the signature blocks I have been doing, so I may add them all together to make one quilt. I don't have an actual block in this swap because I was moving at the time, and the hostess of the swap was kind to me and told me not to worry about it, that she would cover it because I was packing and unpacking my home during the time this was supposed to happen. When I signed up for the swap I didn't know I was going to move a few weeks later. I was moving over a few days' span, so no time to make a block. I figured when she offered she wouldn't send me any blocks; I was good with that because she was doing all the work and I wasn't doing any, other than my packing work. So when I got these, I was surprised becauseI didn't expect them. I plan on making 12 blocks and just sending them to the swap mama in the next two weeks to say "Thank You" and to cover the blocks she made in my place.

Copyright/permissions info

I like to share on this space my ideas and projects.
Please don't take ideas or photo and claim them as your work.
I am always happy to have new links to me.  So if you like something just link back to me and give the source some credit thanks.
Any questions? just ask. I am happy to work with you if you need something
Creative Commons License This work is licensed under a Creative Commons Attribution-Noncommercial-No Derivative Works 3.0 Unported License. 2006-2019 Copyright Vintage Threads Inc. All content and images.

LinkWithin

Related Posts Plugin for WordPress, Blogger...