Where do you want to go
friends and followers
If you like my blog and the free patterns and tutorials and want to say thank you
I have a wish list on ravelry of patterns (click here)
I would like to make. Thank you in advance for being kind and saying thank you back.
Love Sunshine
I have a wish list on ravelry of patterns (click here)
I would like to make. Thank you in advance for being kind and saying thank you back.
Love Sunshine
Search This Blog
Friday, October 31, 2008
Wanted old Mary Engelbreit magazines
especially the real old ones; happy to send handmade crochet lace yardage for each one.
* If you send me one, I will send one lace (over 2 yards); if you send two magazines I will send two different colors of hand-made crochet laces (might be the same pattern or different) and so on, but they have to be the mags on this list that I don't have in order fo you to get the lace,
*Or, I can pay for the shipping on them,
whichever you prefer, lace or money.
They are published by-monthly (each edition is two months) so the end of the year, December, and the start of the next year, January, are in the same mag issue.
If you are interested in doing a trade, my email is on the right side bar where it reads "my email" right below the map and right above the popular pages list.
Looking for:
1998
- feb/mar
- apr/may
- june/july
- aug/sep
- dec/jan 99
- apr/may
- june/july
- aug/ sep
- oct/nov
- feb/ mar
- apr/may
- june/july
- dec/jan 01
- oct/nov
- dec/jan 04
- jun/july
- oct/nov
- dec/jan 06
Day 34 of an apron a day....
This is the last apron unless we find more; you never know at this point. This one is nothing fancy, but it was full of love (my mother-in-law now owns it because it is her children represented on it). My husband's family made it in 1980 (oh, that was an easy one to date for once). Not all of his family is represented on this apron because they had not all been born yet. Like I said, nothing fancy just a bar-b-que apron, but lots of love from little kids for their Grandmother.
Photo taken by my mother-in-law
Happy Halloween
Thursday, October 30, 2008
Day 33 of an apron a day....
I decided to post two aprons of GGH today because they are so similar. These two are purchased, one made from toweling. They look to be from the 60's to 70's from the patterns on the towels and the colors.
Wednesday, October 29, 2008
Some flowers from today
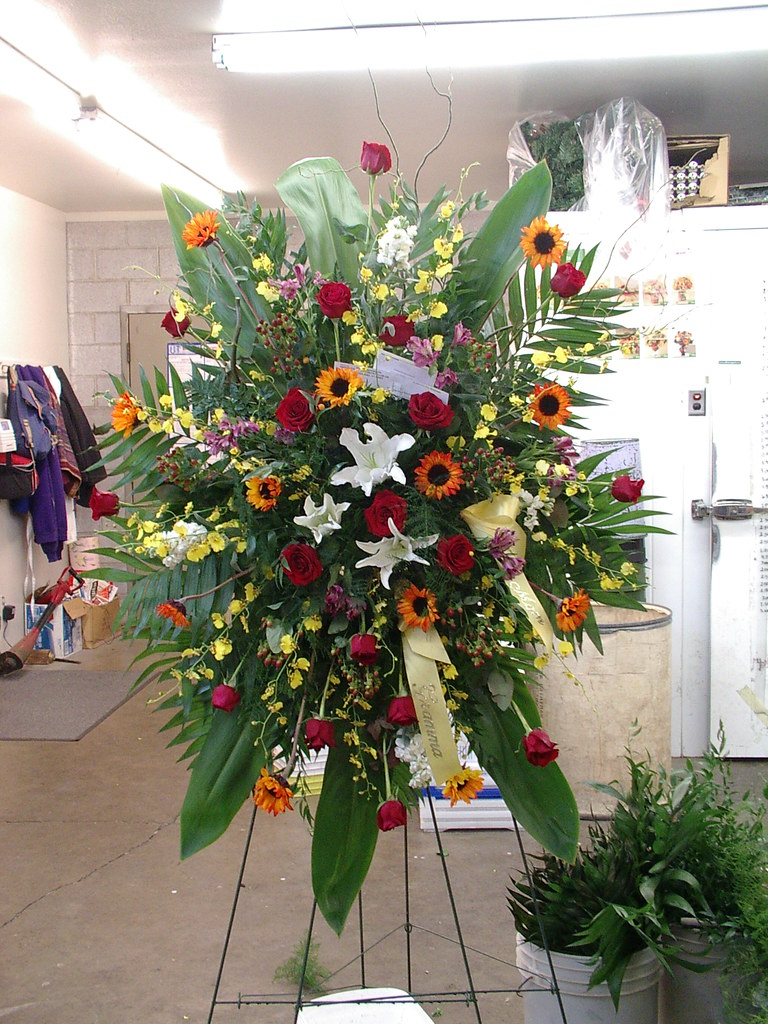
Today I had a few funerals to make. I made other things too, just didn't take photos of them.
Wreaths:
(yellow one is for a man, the other is for a woman)
Easel for a man:
Wreaths:
(yellow one is for a man, the other is for a woman)
Easel for a man:
Day 32 of an apron a day....
This, I think, is the third true smock apron in the collection; yesterday was the second, and the first was posted in July. This type of apron is slipped on by pulling your arms forward and then it is tied in back with nothing going over the head, so nothing pulls on your neck. It has two pockets and is made up of 7 pieces of fabric, not counting bindings. This is a very practical apron because it covers most of your upper clothing. Just not a very fun style to look at, but that is easily changed with fabric choices and embellishments. This apron has seen a lot of use.
This apron style was popular from the 30 - 60's. But this is more than likely the 40's.
I was a substitute teacher yesterday for the Second Grade class I used to teach. It was real fun to see the children again and get to say bye-bye to them this time. I also had them write their names on an apron for me to keep. Sad 4 students were absent so I didn't get their names. May not be a pretty start to an apron to any body but me, but I love it. I used a pattern I drafted off of one of GGH aprons minus the flaps and pocket. Still have to add the waistband and ties to it; will probably do that this weekend.
Tuesday, October 28, 2008
Day 31 of an apron a day....
We found more of GGH aprons, so I will continue with the apron-a-day where I left off, so we are on Day 31. This is your basic utilitarian apron, I assume more modern as it has a Velcro closure, maybe 1970-early 1980's. The fabric looks old as does the trim. So I am not sure of the dating of this one. It has two pockets for a total of three pieces of fabric, edgings and Velcro.
The bottom photo was taken by my mother-in-law when she found the apron at her home. I have since borrowed it to make a pattern and to add it to the other aprons so they are all together.
Finishing GGH aprons
There are a few of GGH 's aprons that have never been completed. Before the family goes through them, I am finishing the undone ones so there are more to pick from and so those that don't sew will not get something they cannot use. The first one to be completed is this hostess apron, seen before like this first picture below; the only thing sewn was the pocket on one of the flaps (sorry to say, it wasn't sewn well either, but because that was GGH's work I left it that way).
We found the original bias tape that she had used on the pocket in her sewing stuff, so it was used to complete the project. It now looks like this. Because the lower photo was taken at 11 p.m., the upper photo is true to color, not the one below.
Monday, October 27, 2008
picot clover lace
Finished this; made about 5 yards of lace. Doesn't look like much all rolled up, but the pattern is here if you are interested.
Note to self ... and floral
Sorry I am actually just posting this so I can keep track of this site. There are a few tools on this page I want and can't afford at the moment. You're welcome to look if you like sewing tools.
Also, here is some floral work I have done recently for your viewing pleasure.
The easel, in case you are wondering, was a $400.00 piece, and the other was $80.00 of orchids. Both fun to make.
Saturday, October 25, 2008
Quilt All done
So, this is a post I was going to do yesterday but ran out of time and energy (I was awake for about 41 hours straight to get this done in time). Deadline for sign up items into the auction was Tuesday, deadline to have them turned into school was Friday. I got up Thursday at 5 am, quilted all day and all night, didn't go to bed. Mother-in-law and daughter stayed up late quilting with me. My mother-in-law is just so great; she stayed 'till 3 in the morning helping me get this done for the auction. My daughter, who is 11, stayed up an hour past her bed time so she could quilt one block to help out. I put the binding on the quilt at 6:45 Friday morning. Still no sleep: still more quilting to do, but not around the edges, so the binding went on because that would be hard to do at work. Went to work, quilted at lunch time, and finished quilting.
Turned it in to the auction. Went to the fall harvest festival, stayed till about 9 p.m., got home around 10 and crashed. (There is more to this story than I am posting, but it would take way to long to post). Long story short, people don't understand the pricing of hand work. So I paid for my own quilt and brought it back home. I will enjoy it on my foyer wall and think of the wonderful 4th Grade children I taught, and my lovely mother-in-law, and my beautiful daughters for all their help in making such a wonderful memory for me (daughters: one helped quilt and another help cut, the last one watched and didn't touch) . From the start of the quilt to finish of the quilting, it was 7 days total; I don't usually make a quilt quite that fast. Thanks, everyone!
Now that the quilt is going to live at our house, I will sew on a hanging sleeve and, at a leisurely pace, I will add more quilting to it before it goes on the wall. There just wasn't enough time to put all the quilting I wanted to do into the quilt, so it will get a few more rows of echo quilting and call it good.
Monday, October 20, 2008
Revisiting the felt ornament
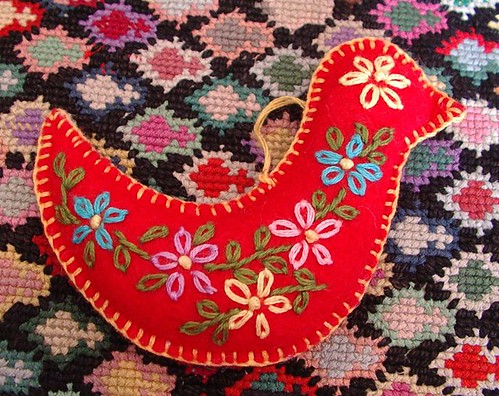
A few years back I posted this tutorial. It always seems to be popular this time of year, so I will bring it back up for people to see and use again.
Sunday, October 19, 2008
Three thimbles...Not normal
It is not normal for me to post on Sunday. But my oldest daughter took this picture while I was quilting, and I thought I would share it. I thought it was a good photo.
I think I am the only person I know who quilts with two, three, and four thimbles on one hand at a time; here I am wearing three. Sometimes when wearing three I have one or two on the other hand as well, but not today. My favorite is the leather one on my thumb; I have had it for about 15 1/2 years. Side note: my husband bought it for me (while we were engaged) when I was making his wedding gift. Yes, it was a quilt and I had lost my thimble; this is what he found. I wish I had about 4 more of them, but I have never found another like it. If anyone has one they don't want, I will gladly trade you some hand-made crochet lace, made by me, for it. It is adjustable (thus it fits every finger), and my fingers don't get sweaty in it. The stitches are purposely uneven in this quilt because I want it to look like the 4th Graders drawings: rough around the edges, so to speak. I don't know if other people think it works that way, but it does for me. I usually quilt with a quilters between needle; this is definitely not that. This is massive on purpose to hold the size of the thread and to cause my stitches to be more uneven because I usually have very regular stitches. This forces me to be a little more sporadic. I decided to do a mixture of quilting and tying. I am using size 20 omega crochet thread in a variegated red to white thread.
The reason I say a mixture is, this is definitely not quilting thread or small stitched, but it isn't truly tying a quilt, either. It is a toss up between the two.
(Bottom of quilt looking up: this has a cotton bat, I was afraid to bring any more wool into my home right now.)
Saturday, October 18, 2008
Progress on auction quilt for 4th grade
The stars are now on the quilt. I have the quilting or tying left to do, I haven't decided which yet, and the binding. Sorry, it was about 7 pm when I took this photo, and the lighting was bad; I will take a better photo later. Still have two days left of the fall break to get this done. I hope I can do it. Each star has a drawing on it; it's hard to see in the bad lighting.
Friday, October 17, 2008
A quilt in a weekend
This is one of the projects I was doing with the 4th Grade art class. They cut out Betsy Ross stars (5 pointed stars) by folding and, with one snip of the scissors, you have a five pointed star. Pretty cool technique. After that they drew on their paper stars. Then, after they had their designs figured out on paper, I handed them fabric stars that I cut using the same technique. They transferred their images and returned them to me. Now I have 'till Tuesday to turn them into a quilt.
The top is pieced, 50 squares for 50 states in the Union. This is meant to be a sofa quilt, long and skinny so that you can pull it over you while laying on the sofa, but not have it drag on the ground. This will be for the kids' Fall Harvest Party at school; they have an auction every year to raise money for field trips and playground equipment. So, I explained to the kids, not only are they helping to raise money for their school and get neat things to play on, they are also selling their art like other artists do.
There are 45 stars spread evenly over the top; all but 12 are now sewn on.
I have to finish sewing on the 12, quilt or tie and bind it still by Tuesday. I will let you know how it goes. The kids are on fall break from school; I only had yesterday off of work (at the flower shop), so I tried to get as much done in one day as possible. I think I did pretty well.
Thursday, October 16, 2008
Watercolor
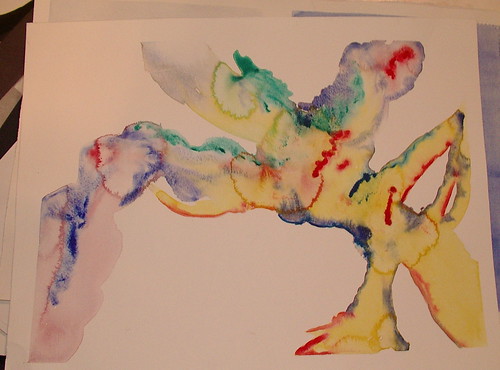
These are a few watercolor studies and practice examples. Meaning they are not meant to look like things, just learning how the materials worked and flowed. There are a few with images near the bottom of this post.
Color wheel:
With imagery studies:
Color wheel:
With imagery studies:
Subscribe to:
Posts (Atom)
Copyright/permissions info
I like to share on this space my ideas and projects.
Please don't take ideas or photo and claim them as your work.
I am always happy to have new links to me. So if you like something just link back to me and give the source some credit thanks.
Any questions? just ask. I am happy to work with you if you need something