

Supplies:
- Fabric for back ground and for color swatches
- Scissors and/or rotary cutter and mat ( I like olfa mats and cutters, but use what you like)
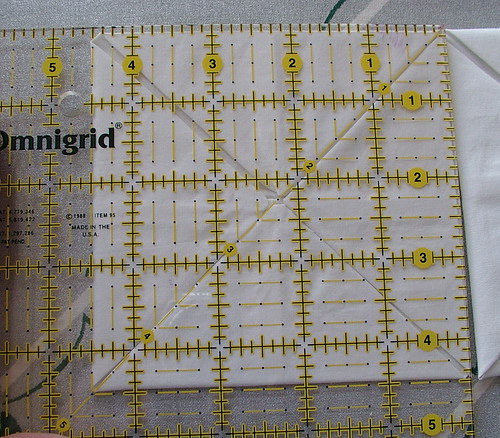
- Square ruler (9 1/2 inch square and a 2 1/2 inch square) and long ruler if using rotary system ( I like omnigrid for these items, but use what you like)
- Sewing machine and supplies for it and/or needle and thread
- Iron and ironing board
- Glass head pins (so you don't melt the heads when ironing)
How To:
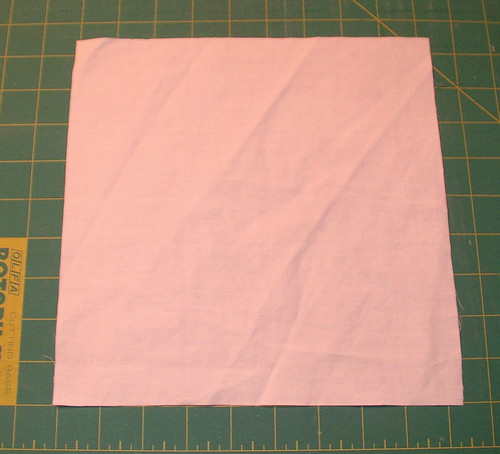
- Cut starting background block; mine are 9 1/2 inches square. I have an 9 1/2 by 9 1/2 omni grid ruler that is those exact measurements, so it's easy to cut a 9 1/2 inch wide strip out of yardage then use my square to cut the blocks. I cut them four thicknesses at one time. Cut all you need for the quilt so you if this takes you years to complete you do not run out of the same dye lot of fabric. If you keep all your seams accurate, your finished block is 4 1/2 inches and four together are 9 inches square. I am telling you this to help you figure out how many blocks you need to cut. For square layout, divide finished size of quilt by 4 1/2; for on-point layout, divide finished measurements by 6 for how many blocks you will need.
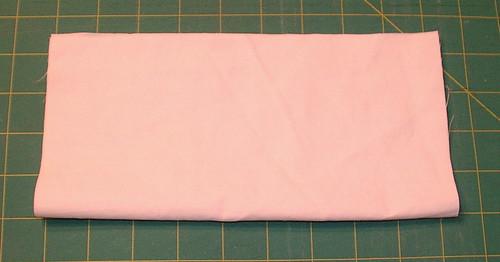
- Fold in half
and sew both ends with a 1/4 inch seam allowance; this can be done on machine or by hand.
I do this in assembly-line style; that way I do all of one side then all of the other.
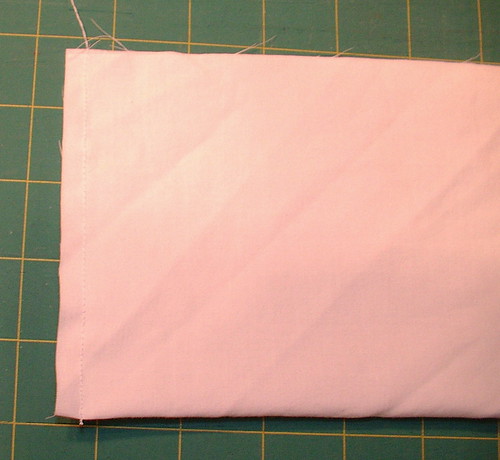
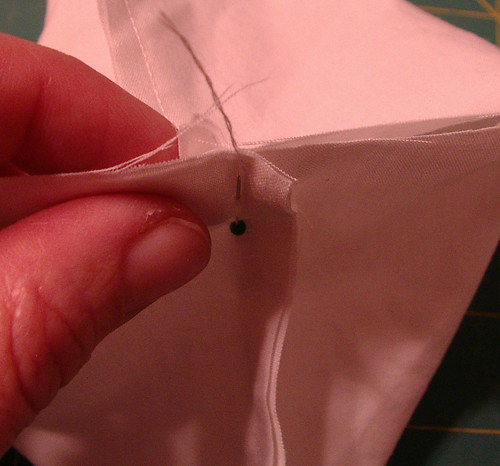
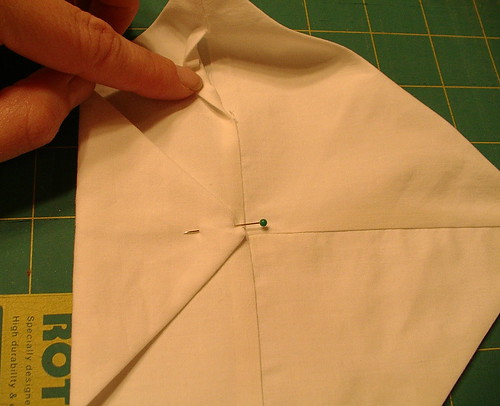
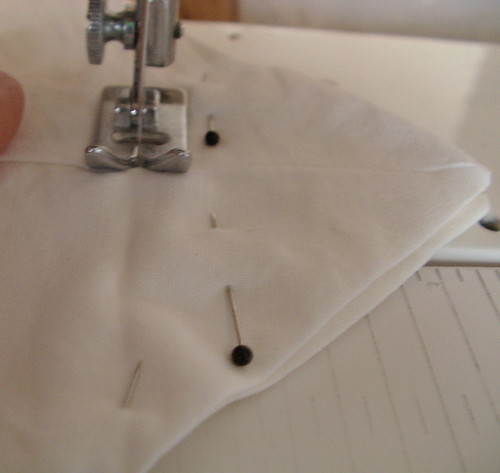
- Open,
match center seams, and pin .
Sew this seam leaving about 1 to 1 1/2 inch opening for turning; this will not need to be sewn closed in the future because it will be hidden under another fold of fabric.
I do this is assembly line fashion, also.
Just pick up the needle and slide it over the spot to be left open, then go on with a long chain of blocks. This step can be done by hand, too; just place a knot at the start and stop of the stitching, two per block. No long chain system in hand piecing.
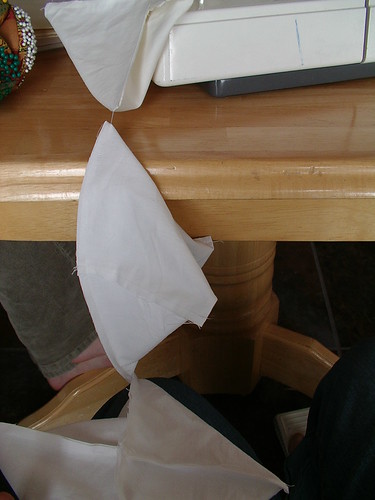
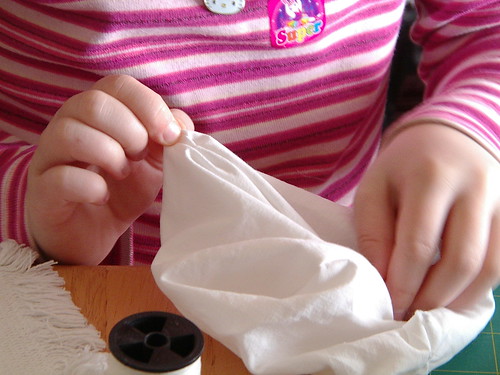
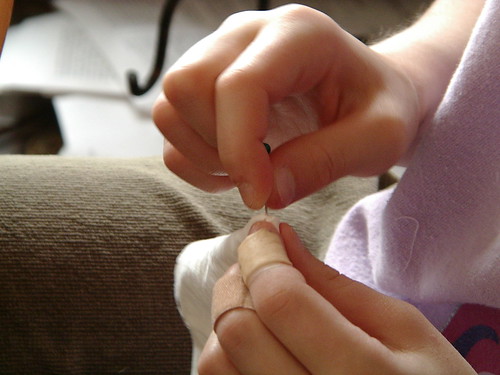
- Turn right side out by pulling entire block through the opening left; as you can tell, I have my children helping with this part (a 7- and 9-year-old turned most of my blocks. I did a few as well as my 11-year-old; it is a family thing here).
Nnow all seams are inside the block; it is fine to leave the opening open.
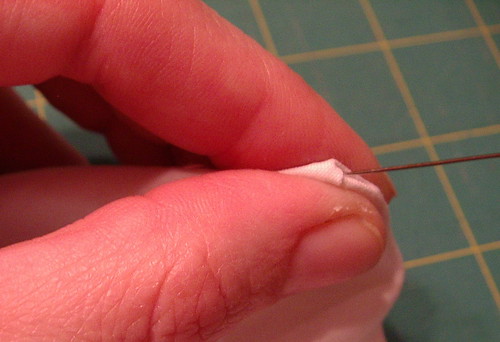
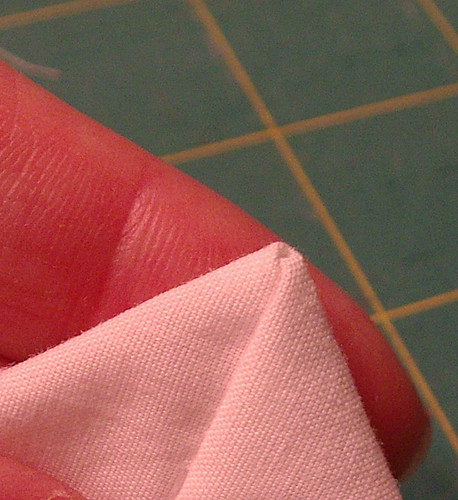
Pull out corners to a nice point.
This is where having children is good; pass this part on to them to do this step. My 11-year-old and I did this part with the needle. I thought it might hurt the 7-year-old.
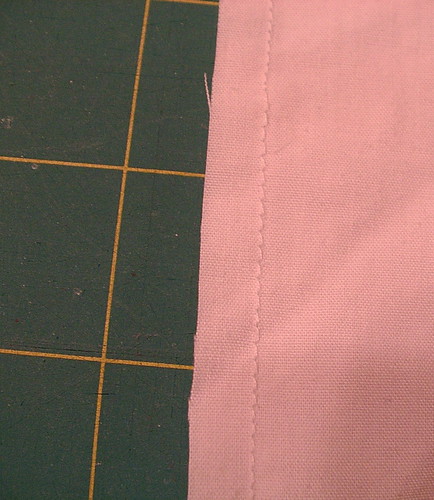
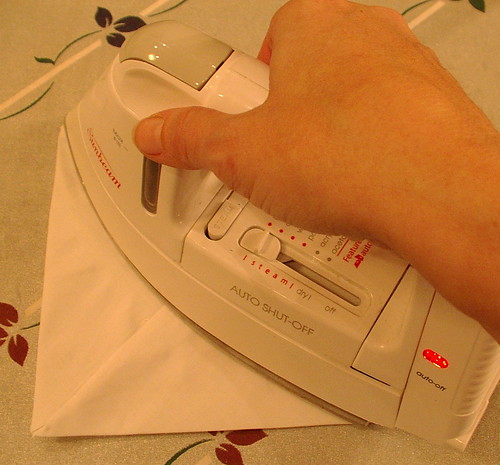
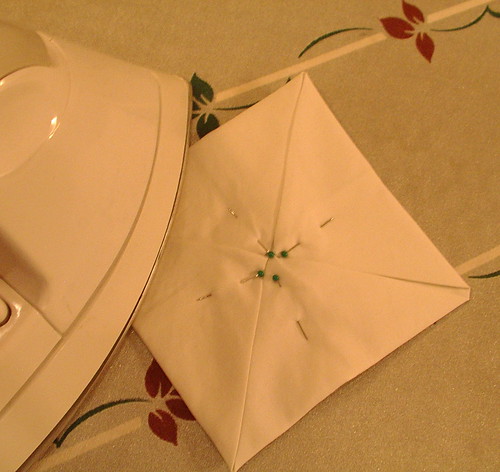
- Press blocks flat. You may not be able to tell in the photo, but I am using steam setting on my iron to do this faster.
As you notice, I said press (not iron) because pressing is an up-and-down motion and fabric doesn't move; ironing is a side-to-side motion that moves the fabric and can make your blocks crooked. Do all blocks in assembly line; it is faster.
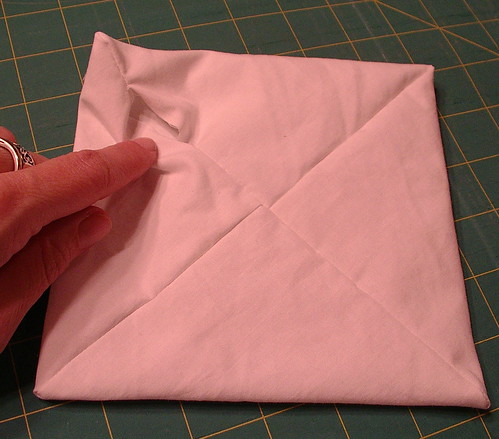
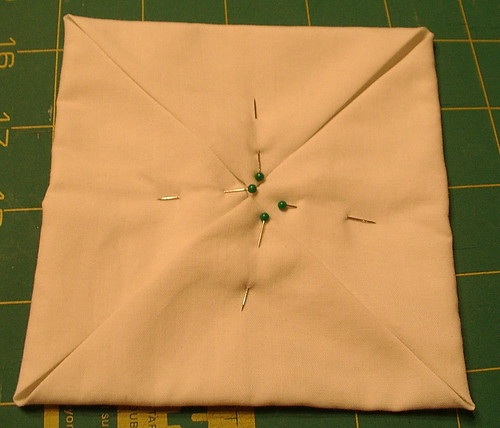
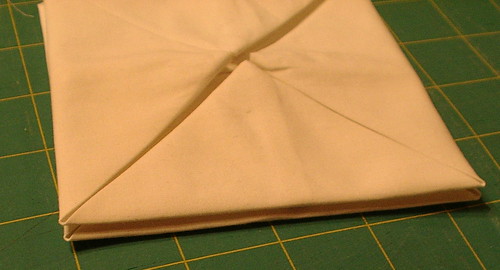
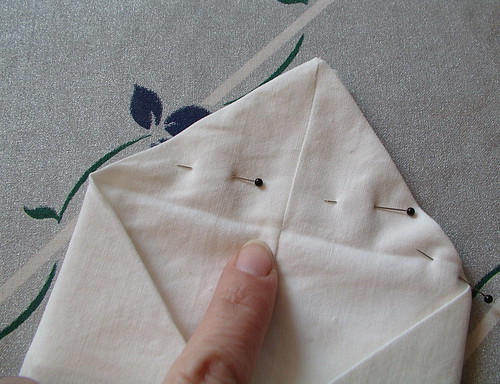
- Fold points to middle and pin. Notice my opening is still there and will be concealed as soon as I fold that flap down.
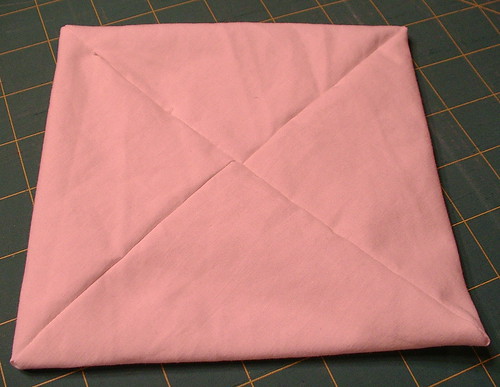
and press blocks flat. Once again I am using a steam setting. You can skip this step of pinning if you want to stand at the iron and fold the corners down and iron instantly. This will save the time of pinning, but you have to be extra careful not to burn your fingers, especially if you are using steam. Either way works, just a personal preference thing.
Do blocks in assembly line; it is faster.
Check your blocks after pressing; they should measure 4 1/2 inches square if you have done everything correctly to this point.
If you make sure you have all of these done before assembling, assembly goes faster.
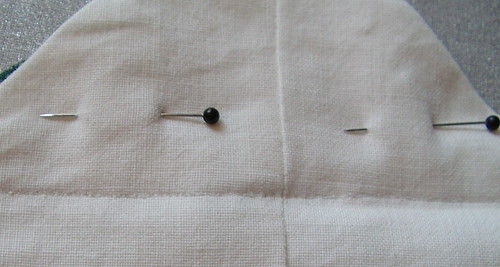
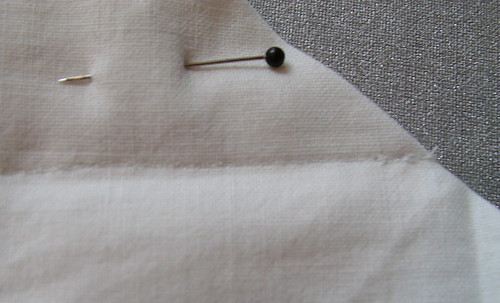
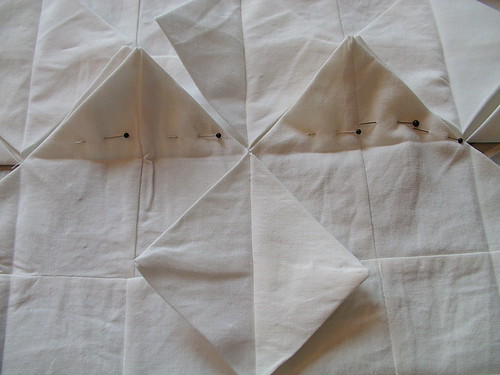
- Now that you have everything nice and pressed,
match up two blocks
and match points.
Pin these two points together (pointing at fold which is also the sewing line).
Sew in pairs; I use a tiny stitch and I back stitch at the beginning and end of a row
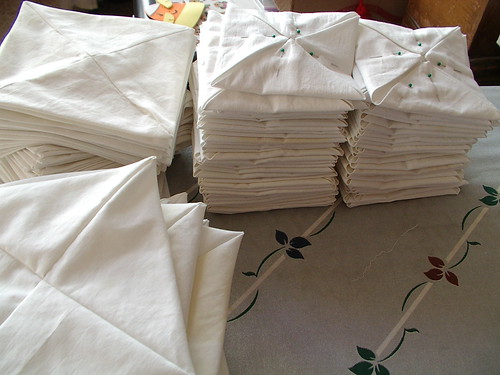
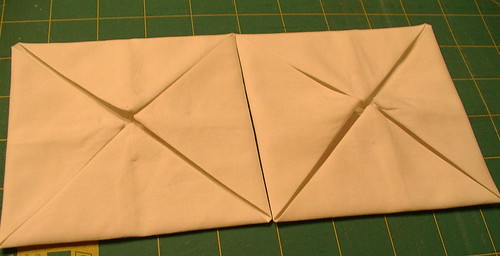
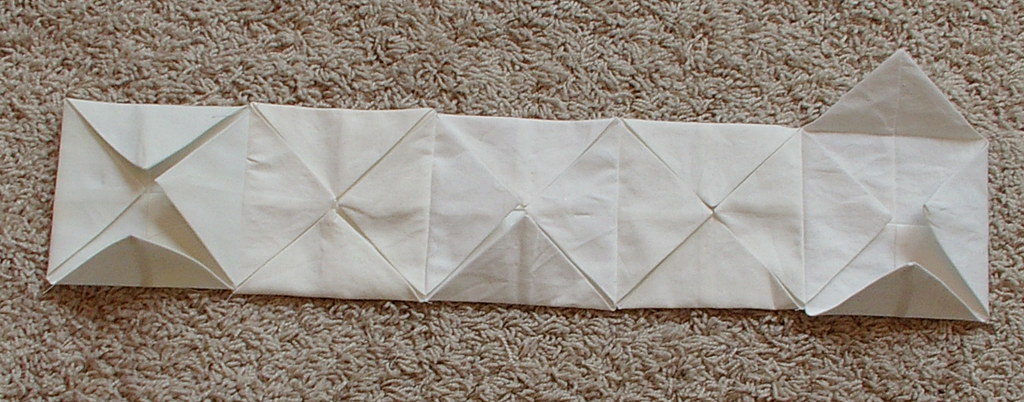
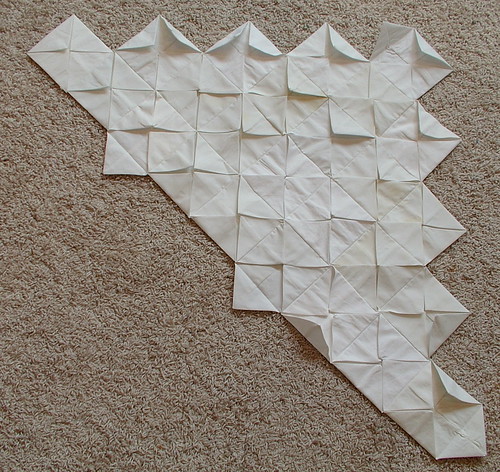
then sew in strips.
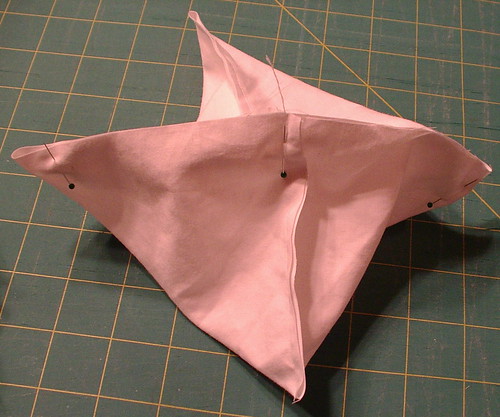
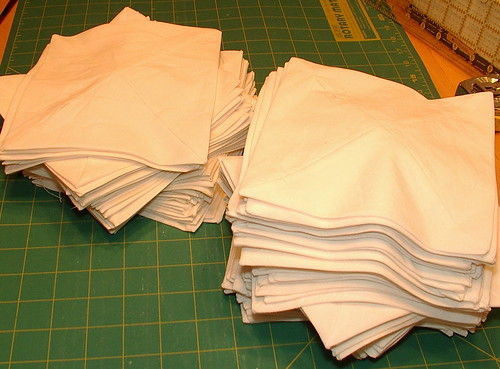
For on-point (this picture shows six strips all laid out):
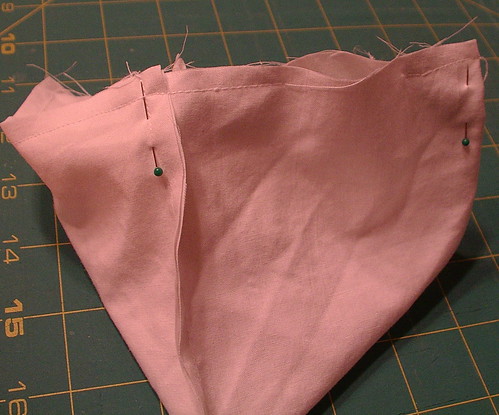
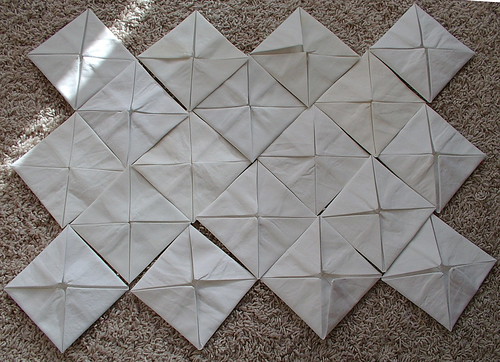
If doing block/square layout, sew in sets of four to form squares:
(This picture shows four sets of four.)


DO NOT USE THIS PATTERN TO MAKE THINGS TO SELL FOR PERSONAL USE ONLY!!!!
Part 2 I have posted the words just not the images since I can not access the quilt at the moment


Thank you for posting this!!!! Once I get my sewing machine fixed, I want to try these blocks!!
ReplyDeleteCan not wait for the 2nd part of tutorial!!!
Always wanted to make a CW quilt, your tutorial makes me want to get started right away. Will be checking in for part 2 and with luck start with a small wall hanging. Thank you for taking the time to create these tutorials, I love your blog. . . Lovie
ReplyDeleteWow, this is so different from the tutorial I was following before. All of the first steps (that you did with sewing) were done with ironing. I think it took me at least 20 mintues of ironing per block, and I have a deep hatred of ironing! Which is why I only got a few blocks done & was very unlikely to pick it up again.
ReplyDeleteThis will also give me more chances to toss things in a bag and do a little work here & there, something you can't really do with an ironing board!
I am working on a cathedral window quilt using navy for the background. I am doing it all by hand and have found that pressing the initial seams open helps to make the points nicer and for the block to lay nicer.
ReplyDeleteI made a pillow top of these once...using an old sheet; what a headache that was! I made another one using muslin...SO much easier. I'm looking forward to seeing yours done.
ReplyDeleteThis is very cool - I've often wondered how these blocks were done. I some something at the fabric store that I think was a variation, called "mexican star". It was very pretty.
ReplyDeleteI stumbled on your blog today and was reading your Cathedral window tutorial. It's the BEST I have seen so far. Fabulous instructions with step-by-step pics of what you are talking about and what the fabric should look like as you go along. I couldn't find part 2 of the tutorial and was wondering maybe if you hadn't posted it yet.
ReplyDeleteLooking forward to seeing how to finish this wonderful block. Thanks for all your hard work puttting the tutorial together.
Sincerely,
Cheryl
I hope to post part two in January some time life is busy at the moment I am a florist and the holidays centerpieces and now getting ready for Valentines is consuming most of my time.
ReplyDeleteI hope there is a tutorial part 2 and that I just need help finding it. Have you created it yet? Part one is FABULOUS.
ReplyDeleteYou are brilliant!!! I've been looking for a way to do a cathedral windows quilt without having to press a quarter inch seam around the fabric first. Turning the square inside out completely eliminates that! I love your assembly line idea, too. I enjoy putting in the colors the most, so I can't wait to see your tutorial on that. Good luck with the move!
ReplyDeleteI'm so desperate to see part 2 of this tutorial! You explain things so well. I've always wanted to make this but had NO idea how.
ReplyDeleteBut we need the rest! :)
I understand I would like to finish it but my stuff to make this is still in a storage pod and I still have not moved plus there are other things happening in my life that I have not posted about as they are to personal which have delayed thing it will happen. Just a few things in my life have to be in order to get the stuff out of storage sorry for the delay I wish it was not this way sorry
ReplyDeleteWhat a great tutorial! I was looking at pictures of cathedral window quilts thinking "Gorgeous, but I could NEVER make that!" but your tutorial certainly makes it look possible. Can't wait for part 2. Can I use your intro picture on my blog (with a link to your tutorial)?
ReplyDeleteposted my answer to your question on your blog
ReplyDeleteWow! Wonderful tutorial. Looking forward to part 2.
ReplyDeleteI have viewed so many wayt to do this pattern and yours is the first and only one I actually understood.. Looking forward to part two... Wendi
ReplyDeleteI look forward to when life gets normal for you so you can post part 2. As others have said, your instructions are the only ones that make any sense. Thank you for part 1.
ReplyDeleteAs well as everyone else, looking forward to part 2. I'm googling tutorials on this type of quilt as I want to get into quilting and this looks like the easiest non-quilted quilt!
ReplyDeleteAlso your tutorial style is very easy to follow and very clear for a beginner - which we appreciate!
lreally enjoyed your tutorial. hope you have been able to do 2nd. i couldn't find it but understand life sometimes gets in the way. thanks
ReplyDeleteI think this is the best tutorial I've seen for this block. Thank you so much for posting it!
ReplyDelete