[google6a7b7d93c7100df5.html] Sunshine's Creations.Vintage Threads Inc.com: November 2006

friends and followers

If you like my blog and the free patterns and tutorials and want to say thank you
I have a wish list on ravelry of patterns (click here)
I would like to make.
Thank you in advance for being kind and saying thank you back.

Love Sunshine

Search This Blog

Thursday, November 30, 2006

Updated:The Mrs. Snowman felt ornament


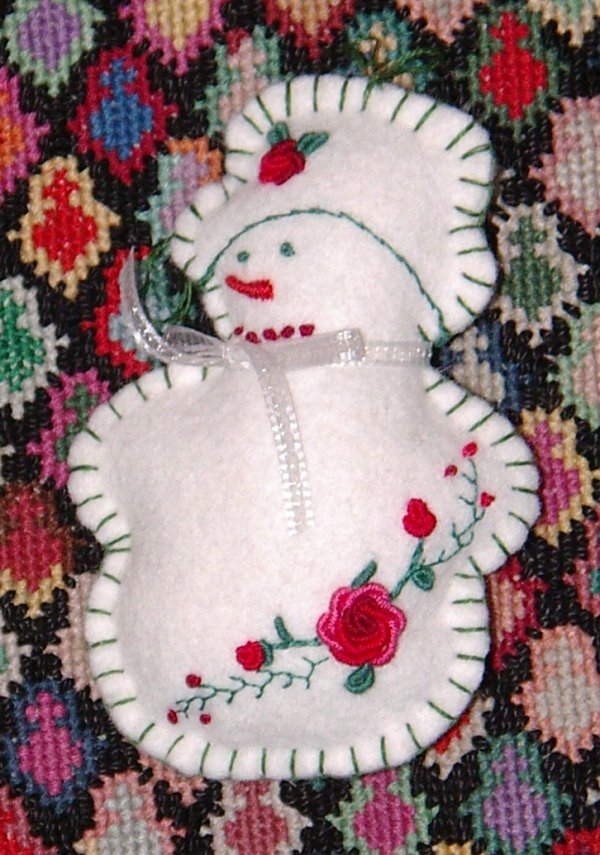
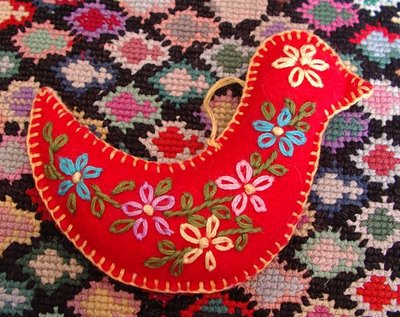
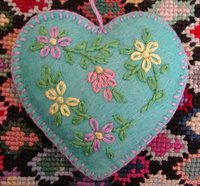
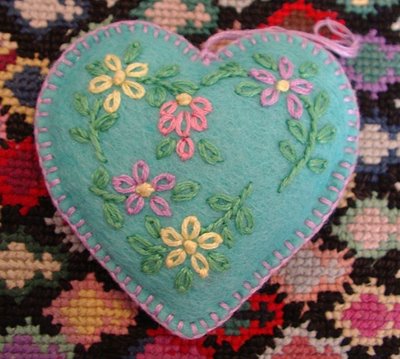
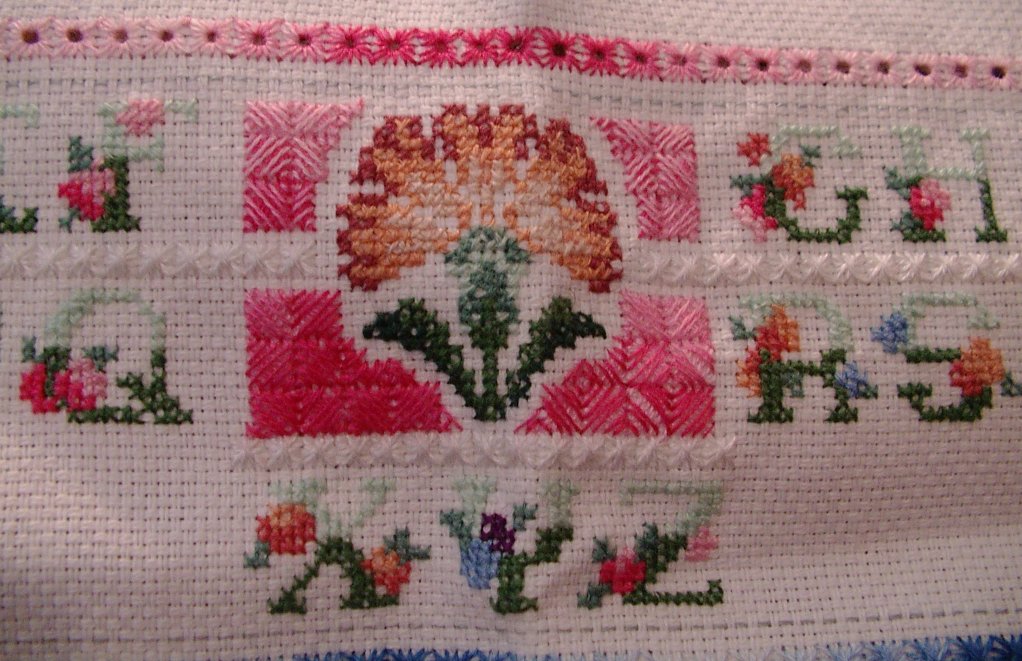
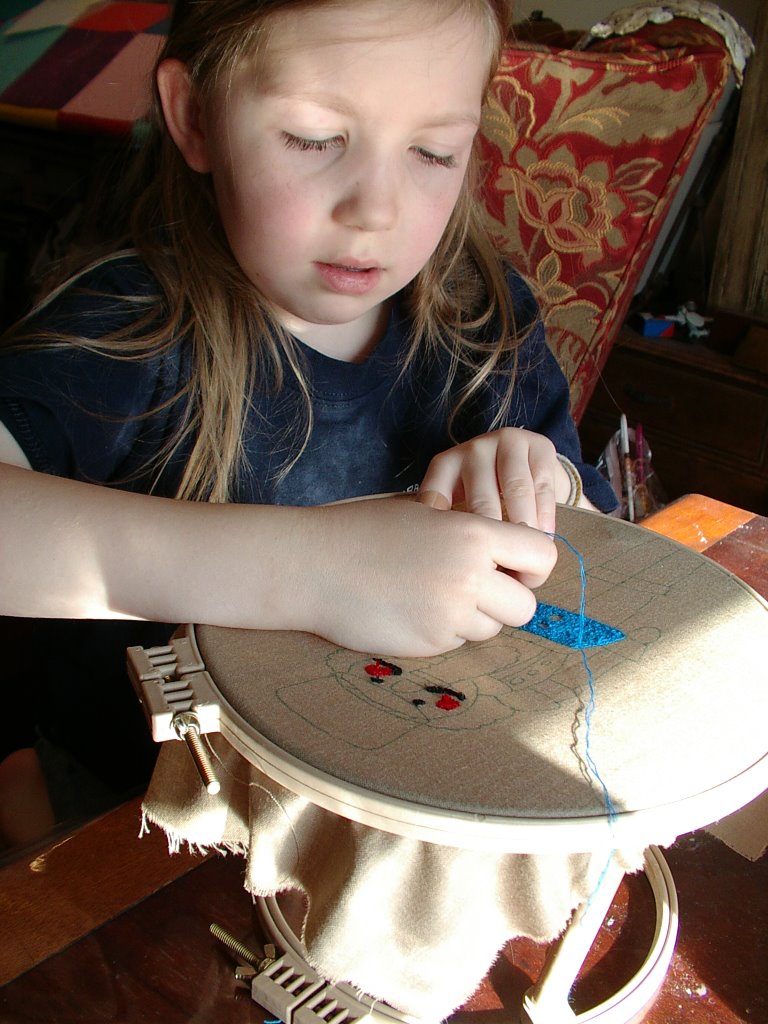
During my meetings yesterday I was embroidering some of the ornaments from the tutorial I did last Saturday.

I was working on the other ten little snow people. My middle daughter thinks these look like girls and the others look like boys.

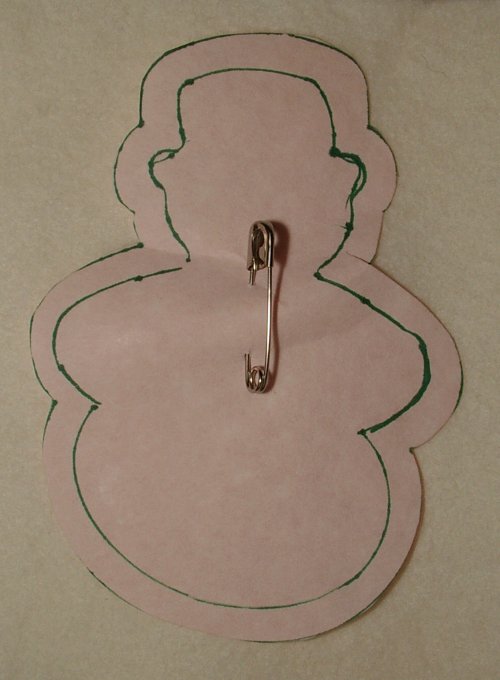
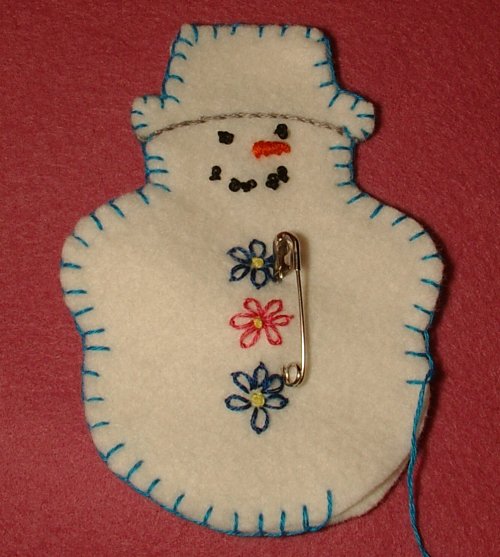
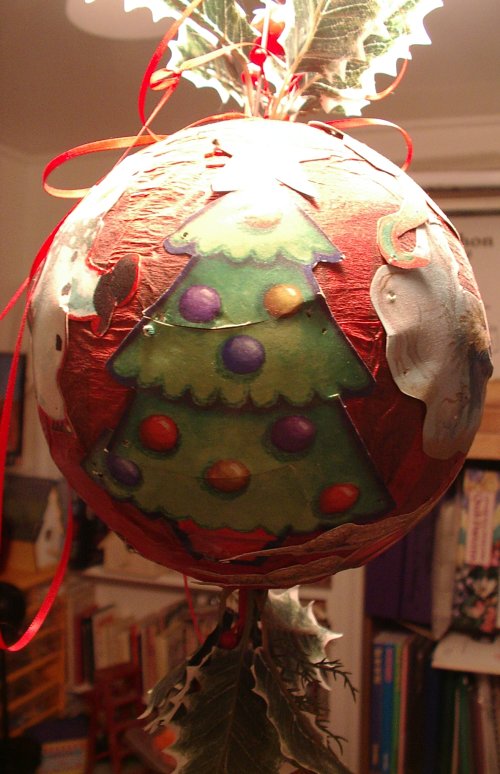
There is only one ornament that has made it all the way to the completed stage. 
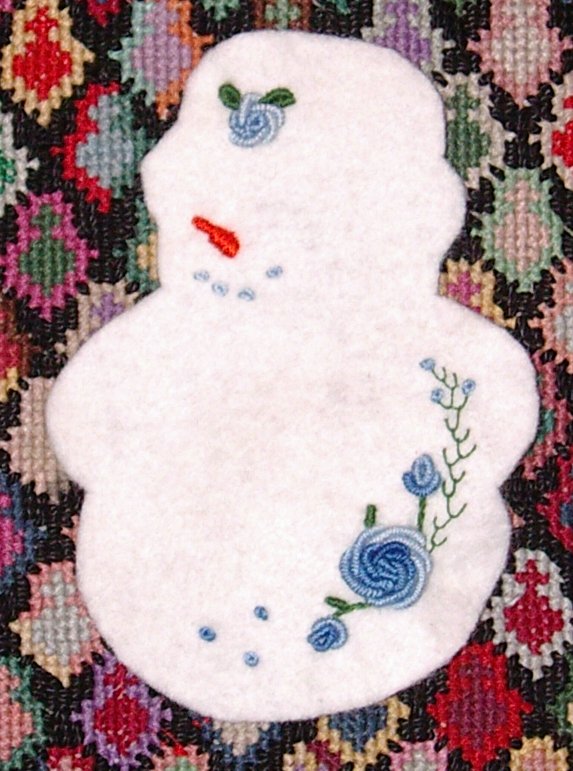
I was working with two main color themes: white, reds, and greens, sort of a Christmas one; the other is white, blues, and greens, sort of a wintry idea.

Let me know which color scheme you like better thus far or which seems to be working better. I know I haven't finished them, but the idea is there.

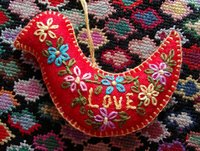
Update: I finished the rest of the troop today.

They actually have embroidery on the back too. Since these are for the ornament swap at cake and pie I thought I would leave that part hidden so there is some sort of surprise. These will all be mailed off tomorrow to their respective homes. I just hope the one on the UK and the one in Australia make it in time.

Wednesday, November 29, 2006

Smocking

This is a piece of a bodice I am working on for a child's dress.
The bodice is smocked and has bullion embroidery, too. The skirt has bullion roses all over it.

Centerpiece Pattern in Baby Irish Crochet from 1912

This pattern is from needlecraft November 1912 page 30.
This pattern was originally drafted by Mrs. E. W. Walker. I am not changing it from the original text so if it looks funny it is the way patterns were written about 100 years ago.

Make a chain of 8 stitches, join.

Tuesday, November 28, 2006

Showing the Latest style Touches


This is from the November 1912 edition of the Needlecraft magazine.

These were sewing patterns you could buy and make for yourself. WOW!!!!! How long would it take to make those ensembles? Look at these outfits they are so precious. I wish woman still wore hats like this. I think they are un-practical but oh, so lovely. Even the dresses are "to die for" as the saying goes. You can just see people taking their daily strolls down tree lined streets in these clothes. I don't think I could live like that on a daily basis, but it would be fun to dress that way for a day or two.

Monday, November 27, 2006

Russian Needle Punch Nut Cracker

We have progress on my seven-year-old daughter's art project.
I think she is doing pretty well and getting a lot done. To see what she has done so far go here. Front on right side of text back on left side. If you look closely at the pictures, you will see the needle is left in the work when my daughter is not working on it. The gold-looking tool top left in left photo.

thumpity thump thump thumpity thump thump...

A small army of snow men are invading my house. These are the first ten out of twenty snowmen I am making today. These are still only half made.
Update: done and in the mail to my swap mates at MJF

Saturday, November 25, 2006

how to make an embroidered felt ornament

This is good for any holiday or can be used as a gift tag for weddings, baby showers, and birthdays etc...supplies
  1. felt
  2. cookie cutters in desired shapes
  3. embroidery needles
  4. embroidery floss
  5. scissors for both paper and fabric
  6. permanent marker fine tip or pencil
  7. stuffing
  8. 1 safety pin
  9. a piece of paper
How to make
  1. Trace cookie cutter on paper to make template. Trace the inside and out side to see which you like better.
  2. Cut out the line that you like best for template.
  3. Pin template to fabric; this way you are sure not to leave ink marks on fabric.
  4. Cut two pieces of fabric per ornament
  5. Embroider both pieces of fabric. Use two or three strands of embroidery floss. See picture under #7.
  6. Put wrong sides together place one safety pin in middle to hold while sewing. See picture under #7.
  7. Use a blanket stitch to stitch edges together, stop about one inch from ending remove safety pin and stuff ornament. Finish closing.
  8. Finish with a piece of embroidery floss as a hanger.
I have made a few others since this tutorial.


If you make your own I would like to see them. If you make some send me a link and I will look at them if we get enough I will start a flicker group.

Update:
I have opened a flicker group to post them all please feel free to join.

Felt Ornaments:
This group is about the fun of making and sharing felt ornaments and other felt items.
Felt ornaments. Get yours at bighugelabs.com/flickr

Please look on the side bar there are many more holiday tutorials listed there.
DO NOT USE THIS PATTERN TO MAKE THINGS TO SELL FOR PERSONAL USE ONLY!!!!

Friday, November 24, 2006

Another wip for Friday November 24

This is a row-of-the-month type of quilt. Each month you are supposed to make a new row for the quilt. the current row is paper pieced houses, trees, and things in a neighborhood. If you look at the pictures closer you will see a small sheep and a tractor, too.When done, this will fit a double-pillow-top king-size bed.

Wip Friday November 24

The start of a cross-stitch sampler.

There is no pattern for this that you can buy commercially. As I think of things that I think might look nice, they are added into my work. I have no idea when it will be done. Hopefully in this life time.

Tis the season to make a kissing ball

This is a kissing ball; you are supposed to hang mistletoe from it .
My Vavo made these two. We have a lot of them that she has made over the years; they are simple to make. Her way of making them has simplified over the years to what is in these pictures. However, the instructions I am going to post are for the way she made them when I was little, with a paraffin wax coating on them.

Supplies:
  • 1 Styrofoam ball in desired size
  • Crepe paper or Tissue paper for desired back group color (crepe paper works best as it forms more than it tears)
  • scissors (to cut tissue and Christmas cards)
  • Old Christmas card lots (cut out the images and words you want to use ) my Vavo calls this making paper dolls
  • white glue
  • Non-rusting straight pins (nickel plated; you can use steel ones but they tend to put rust marks on your piece)
  • 2 paint brushes (ones that you don't care about; one will be used to paint on glue, the other for the paraffin wax)
  • 2 hangers (a piece of metal with a looped end and a pointed end; most craft or hardware stores will have this item)
  • ribbon
  • mistletoe (real or silk; silk lasts longer)
  • Old pot to melt wax or a old double boiler that you don't care about. Vova used a washed out tin can in a water bath. Fill the tin with paraffin wax and melt; if you do this, have pliers to use as a handle for the tin can. Very hot! Be careful; do not spill this on you.
How to make it:

  1. Collect cards and cut them out saving any part of the images or words you want to use on the kissing balls.
  2. Next, use straight pins to lay tissue all around ball and glue in place with paint brush. The pins are only there to hold it in place while gluing. Let dry over night. When the glue is all dry remove the pins. This step can also be done using wall paper paste and wall paper the ball -- sort of decoupage.
  3. Soak pieces of cards in glue to soften and make pliable. Lay images and words on ball; pin in place 'till dry. Let dry over night. Remove pins.
  4. Melt paraffin wax. Paint over entire ball. If you do this over wax paper you will have easy clean up. Form some way of letting this hang to dry. There will be drips in the wax; that is part of the charm. You can also add glitter to the wax while it is hot and paint that on. It adds a little shine to the finished ball. Let ball cool.
  5. After ball is completely cooled and hard, dip hangers in glue insert one at North pole and one at south pole. Let dry over night.
  6. Tie ribbons in North pole and south pole with lots of loops through eye of hanger.
  7. Poke through layer and insert mistletoe or holly at top of ball at north pole and do the same to the south pole.
Hang and enjoy -- let the kissing begin!
Just an FYI the balls pictured were made by my Vavo and are past Christmas gifts to me and my family.

Here is a photo full of kissing balls that my grandmother made for 2008 christmas ( I added this photo in January 2009
tree with kissing balls made by Vavo
DO NOT USE THIS PATTERN TO MAKE THINGS TO SELL FOR PERSONAL USE ONLY!!!!

Russian Needle punch table top stand

This is the hoop my daughter is using for her Russian needle punch.

This is known as a table top hoop. It is actually two hoops in one, depending how big your work is. One hoop forms the base for the other and visa verse. She is punching this even as I type. I will take photos later to show her progress.


Update
She is working on it.
Look at the concentration on that face! I am not even sure she knew I was there till I took the photo. She is actually getting a lot done on it today. The bandages on her hand are from playing, not working on the embroidery. When working on Russian Needle punch you actually work from the wrong side of the piece. So in these photos you are actually seeing the back side of the piece. It looks different on the front; you just have to know what you will get in the end if you do sculpting.

Thursday, November 23, 2006

Nut Cracker in Russian Needlepunch

My daughter is starting her second project using this technique.

This will be for an art show at school in about a month. The last one she did won the last art contest she entered. The current project is for an un-jurored show, so it doesn't all have to be her own original designs. She won't be drafting her own pattern this time.

Since Christmas is around the corner she wanted to do a Nut Cracker. The first three steps of this project are done: fabric picked (wool gabardine), image decided upon, image transferred to fabric using a light table and a green permanent market. The punch work begins tomorrow. I think this time when I am teaching her I will have her play with different fibers, maybe wool for the hair and gold metallic thread for buttons and things like that, but she will have to decide as it is her project. Maybe she will work with playing with depth of the thread loop lengths for added texture. I will just let her see her options in supplies and techniques and she can go from there.

Happy Thanksgiving


For those of us in the United States, it is Thanksgiving today.

A day when family and friends get together an say "Thanks" for all the blessings of the year. It is a common practice to eat turkey on this day. So if you are feeling a little stuffed like this little turkey, I think you ate too much. Have a lovely day!

The item in the back of the picture, in case you are curious, is a salesman tatting sampler c. 1900. A salesman would go to all the local tatters in the area and get samples of their work. Once collected, they (the lace samples) would be attached to fabric and the prices written on it for easy reference. Then the salesman would go from mercantile to mercantile selling his/her wares. After collecting the orders, he would go back to the lacers and tell them what to make. Once items were made the lace pieces would be collected for distribution. There are not too many of these around. The person who had this did not know what it was and gave it to me with the battenburg piano top runner pattern for free. Quite the free bonus. We had it framed; it is quiet lovely.

tatted edging

This is an edging that I created over eight years ago.

The sample was made 8 years ago when I was learning how to tat, and it has a few mistakes in it. I think it will still give you the idea of what it looks like. My tension is much better now, and the rings would look more uniform now, as well.

Key
= means future join
- means picot

+ means current join
ds = double stitches
j = join
p= picot
capital letter means ring
lower case letter means chain
the number refer to the number of dc stitches.
Here is a sample I just tatted the aqua one.

Modern Pattern Version
A. 4=4=4
a. 6-2-6=4
B. 4+4=4
b. 4
C. 5+5-5=5
D. 5+5-2-2-5=5
E. 5+5-5=5
c. 4
F. 4+4=4
d. 4+6-2-6
repeat to desired length
for easier reading, if you are not used to the method above, use the pattern below

Traditional short hand pattern
*Ring A : 4ds, p, 4 ds, p, 4 ds, close ring
chain a: 6ds, p, 2ds, p, 6 ds, p, 4ds
Ring B: 4 ds, p ( join to last p of last ring), 4ds, p, 4 ds, close ring
chain b: 4ds
Ring C: 5ds, p (join last picot of last ring), 5ds, p, 5ds, p, 5ds, close ring
Ring D: 5 ds, p (join last picot of last ring), 5ds, p, 2ds, p, 2ds, p, 5ds, p, 5ds, close ring
Ring E: 5ds, p (join last picot of last ring), 5ds, p, 5ds, p, 5ds, close ring
chain c: 4ds
Ring F: 4 ds, p ( join to last p of last ring), 4ds, p, 4 ds, close ring
chain d: 4ds, p ( join to last p of last ring), 6ds, p, 2 ds, p, 6ds *
repeat from * to * to desired length
DO NOT USE THIS PATTERN TO MAKE THINGS TO SELL FOR PERSONAL USE ONLY!!!!

Wednesday, November 22, 2006

Clover Leaf tatted edging from 1917

In the book, Novelty Tatting and Maltese Crochet, Book No. 6 Price 10 cents published in 1917 by Novelty Art Studios Chicago, Illinois, this edging pattern is known as No. 17.

Key
pi = picot
ds = double stitch
clover = in this case a 3 leaf configuration

Do not detach thread from ball. * Make a clover leaf of 3 rings thus: 7 pi separated by 3ds; close to form ring; 3 ds join to last pi of ring; 3 ds; finish ring as before; close ; make 3rd ring same as preceding ones; join in like manner; turn. With ball thread ch ( 3 ds; 1 pi) 4 times; join to 4th pi of center ring; ( 3ds: 1 pi) 4 times; 3 ds. With ball thread ch 4 ds; repeat from*

I did not edit this pattern for modern terms and style. It appears as it would have been written when first published.

Monday, November 20, 2006

Irish Crochet Baby Bonnet Pattern Circa 1900


Click on this photo above to make it easier to read if you want to work from the original old pattern. This is all the information that was originally given to make the cap. You will see as you go through this post I am trying to give much more information so that even a novice can make it.

Irish Rose Baby Bonnet
Size 100 thread & Size 14 hook

Key
ch = chain
dc = double crochet
tr = treble crochet
x = times
p = picot
sp = space
* = start and end of repeat
sl st = slip stitch


Friday, November 17, 2006

Etsy items

Etsy is still having problems with their new version, so the items I would have posted today I am not able to load there.

So, hopefully, I will be able to load next Friday and just do all the items at once. I accept pay pal there now, as well.

Copyright/permissions info

I like to share on this space my ideas and projects.
Please don't take ideas or photo and claim them as your work.
I am always happy to have new links to me.  So if you like something just link back to me and give the source some credit thanks.
Any questions? just ask. I am happy to work with you if you need something
Creative Commons License This work is licensed under a Creative Commons Attribution-Noncommercial-No Derivative Works 3.0 Unported License. 2006-2019 Copyright Vintage Threads Inc. All content and images.

LinkWithin

Related Posts Plugin for WordPress, Blogger...