
Showing posts with label free patterns quilts. Show all posts
Showing posts with label free patterns quilts. Show all posts
Monday, December 08, 2008
Free Antique pattern library on Internet
Here is the link to a page full of lovely old old patterns in crochet, tatting, and knitting and other things as well. There are thousands of patterns available through this link.


Saturday, April 05, 2008
Old sweaters/ Conference Saturday project

- First, salvage all the buttons; lots of good MOP (mother of pearl) buttons on these sweaters to be saved, and a few cool beads. After you pillage the buttons and such, what next?
- Cut as many 9 1/2 inch squares as you can, save short sleeves (I have another project for them in mind) and the large scraps (same project).
- Cut white 100% cotton fabric squares, also 9 1/2 inches square. (I have not done this step, yet). I plan to back with cotton fabric to help prevent the wavy look I have seen on other such afghans. Don't know if this will work, but I will give it a try. I plan on using 1/2 inch seam allowance. Bigger than normal, but I am hoping this will help with some raveling that may happen.
- When all are sewn together with a bat and a back, I want to tie the front to the back with crow feet quilting. A sort of quick quilting-tie with an embroidery look.
- Bind edges; I am thinking old silk from same pile of clothes to get rid of, or old-fashioned satin blanket binding. There are also jeans in this stack to add to my jean braided rug.
Tuesday, November 20, 2007
Part 1: How to Make a yoyo Advent Calender
 This is the start of a continuing tutorial. This will show you how to make the wall hanging part of the calendar. Then, each day I will post how to make one or more ornaments to hang on the tree 'till I have 25. This way you can make it, too. (Above photo is after star, prior to buttons)
Supplies:
Green fabrics (you can use 1 or lots of green fabrics, I choose solid for the tree and variety for the ground) 42 green yoyos tree, 25 green yoyos ground = total 67 green yoyos
- White fabrics (you can use 1 or lots of white fabrics) ( I used recycled 100% cotton, from my husband's outgrown Sunday shirts, 2 of them) 86 white yoyos
- Red fabrics (you can use 1 or lots of red fabrics, I used lots of varieties) 67 red yoyos
- Brown fabric enough for 1 yoyo
- Yellow fabric enough for 1 yoyo for star (I used the small clover flower maker to make my star)
- Standard cd to use as template
- Thread
- Needle
- Scissors
- Thimble (if you use one)
- Pencil, optional (for tracing around cd; I don't do this, but some might)
- Optional small clover flower maker to use in making the star. You can also just buy a star at a store and sew it on instead of making one.
 2- 4 cabone rings ( or other type of ring to use as a hanger)
 Dowel or other straight item for strength when hanging
- Bias tape
- 67 buttons (I used mother-of-pearl, but you can use whatever you want)


Order of events:
- Make round yoyos and yoyo star
- Lay them out in the pattern (shown below in this post)
- Stitch together in six format, not the 4
- Add star at top of tree
- Stitch a button on every green yoyo
- Stitch on cabone rings (or other hanger item) on back of wall hanging on top row of yoyos; covered by bias tape
 Stitch dowel (or other straight item) to top back of quilt to help prevent sagging from weight; covered by bias tape


- 11 red
- 1 red 8 white 1 red
- 1 red 4 white 1 green 4 white 1 red
- 1 red 3 white 2 green 3 white 1 red
- 1 red 3 white 3 green 3 white 1 red
- 1 red 3 white 2 green 3 white 1 red
- 1 red 3 white 3 green 3 white 1 red
- 1 red 2 white 4 green 2 white 1 red
- 1 red 3 white 3 green 3 white 1 red
- 1 red 2 white 4 green 2 white 1 red
- 1 red 2 white 5 green 2 white 1 red
- 1 red 2 white 4 green 2 white 1 red
- 1 red 2 white 5 green 2 white 1 red
- 1 red 1 white 6 green 1 white 1 red
- 1 red 4 white 1 brown 4 white 1 red
- 1 red 2 white 4 red 2 white 1 red
- 1 red 3 white 3 red 3 white 1 red
- 1 red 8 green 1 red
- 1 red 9 green 1 red
- 1 red 8 green 1 red
- 11 red
Add front embellishments like the star and buttons now. The buttons are for holding the ornaments on the tree. They are also to hold the ornaments on the bottom ground area 'till they are moved up. There are more buttons on the tree than on the ground so you can have more of a choice where to place them.

Stitch two to four cabone rings (or other hanging devises -- I used metal belt loops because that is what I had on hand) on top row for hanging purposes. Use four if you don't use a dowel for strength and to keep quilt from sagging. Once stitched on, cover stitches with bias tape, too, just like the dowel.
Here is the link to make all the ornaments to add to this advent calendar.
DO NOT USE THIS PATTERN TO MAKE THINGS TO SELL FOR PERSONAL USE ONLY!!!!
Wednesday, November 07, 2007
November BOM

Supplies:
3 fabrics cut in 1 1/2 inch wide stripes
sewing machine and sewing supplies ie: scissors, rotary cutter, mat....
clear quilter's ruler for truing up
Go to it!
First two pieces are 1 1/2 inches square. From there, it is follow picture and sew and cut till done. This is a more follow-the-picture type of thing and true up as needed. Be careful, there shouldn't be a need for truing up and you have no tolerance for it either. I like to use a scant 1/4 inch seam; that gives me just a little fudge room. Just so we know, the block is square: a nice 10 1/2 by 10 1/2, but I didn't take the photos from dead-on; the lighting issue and kids-under-feet issue. First block is just the three fabrics cut in 1 1/2 inch wide strips; the rest are sewing order.
Side note: the last two photos are of the same finished block (oops), and they are rotated wrong, too. This is what I get for doing this when I am sleepy, too.

update:
I figured out why I have two of the same block at the bottom of this between picture 1 and 2 on row three. There should have been two more photos; I haven't a clue where they went, the photos that is. But I think everyone can still follow well enough to make the block and life goes on. You see those two last blocks were supposed to be in the construction layout just at the top or bottom of this post. Sorry folks!
DO NOT USE THIS PATTERN TO MAKE THINGS TO SELL FOR PERSONAL USE ONLY!!!!
Tuesday, November 06, 2007
October BOM

Steps:
1. 3 fabrics cut into 13 inch squares stacked on top of each other.
 2. First two cuts
 3. Third and fourth cuts (none of these cuts are measured; they are random in width)
 4. Fifth and sixth cut
 5. Seventh and eighth cut
 6. Take top center piece and place on bottom of stack
 7. Take bottom pieces of middle row and place on top of stack
 8. Take middle pieces to machine and keep them lined up in order so you don't forget orientation
 9. Iron pieces and take back to original layout and make sure you have layout correct
 10. Repeat step 8 and 9. Do not true up at this time; do trim ears at this time
 11. Repeat step 8 and 9. Do trim off ears at this time; do not true up
 12. Take back to original block and make sure you have directions correct. Repeat step 11; cut off ears and true up now

 2 more finished blocks, plus the one at the start of this post.

DO NOT USE THIS PATTERN TO MAKE THINGS TO SELL FOR PERSONAL USE ONLY!!!!
Wednesday, July 25, 2007
Block of the Month Tutorial For Aug

RULES
I will suggest a block to make but you can always choose your own, any style or color.
Then, when you have enough blocks, you can make a quilt and post the photos on the photo pool.
TIME LINE
1 - 5 of the month sign ups post on thread also flickr mail me please.
5- 10 contact partner to see if there is a color theme or not and to get mailing address.
5 - 20 of the month make your block.
20 - 30 of the month, post/mail out to your partner.
Post your blocks in the pool before you mail to your partner.
Now that you know that, on to the block:
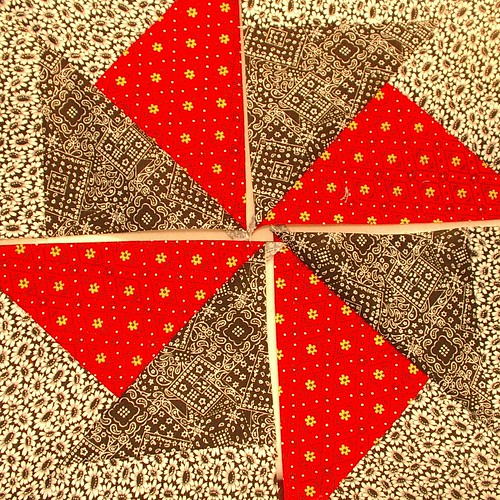
Aug 2007 Tutorial for Pinwheel
finished size 10 inches unfinished size 10 1/2 inches
finished size 10 inches unfinished size 10 1/2 inches
Supplies:
- Minimum 3 different fabrics (1 is the background, the other 2 colors make up the pinwheel if you want a scrappy look you can have as many colors as there are pieces to the block)
- A way to sew the block, either a sewing machine and supplies for it, or needle and thread for hand sewing
- Scissors or rotary cutter and mat
- Iron
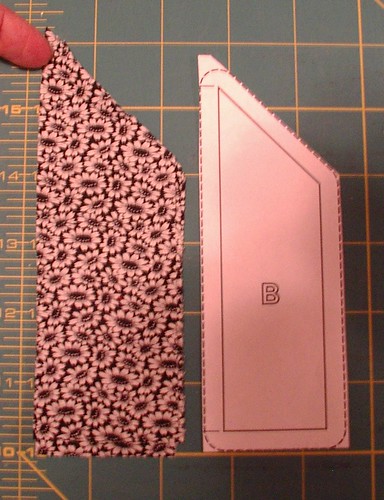
- Here is the pattern: PDF file, plain SVG file and Inkscape SVG file. I cut mine using measurement, but you can download these files and use templates if you are more comfortable.
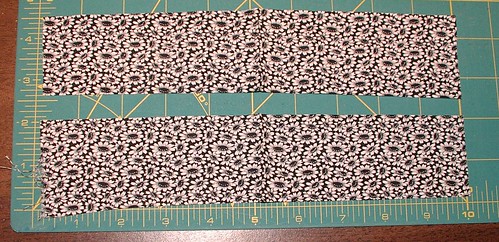
- Cut three stripes of fabric 4 1/2 inches by 9 inches; set aside 'till step 5.
- Cut one piece of fabric 4 inches by 10 inches.
- Cut in half so you have 2 pieces of fabric that are 2 inches by 10 inches.
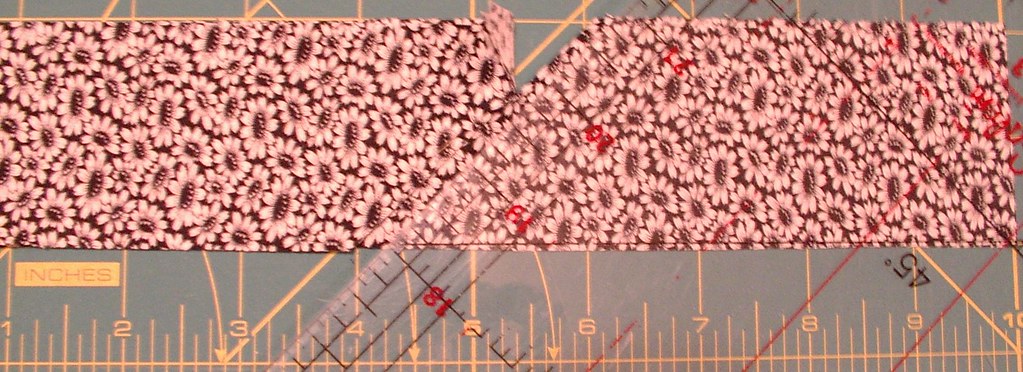
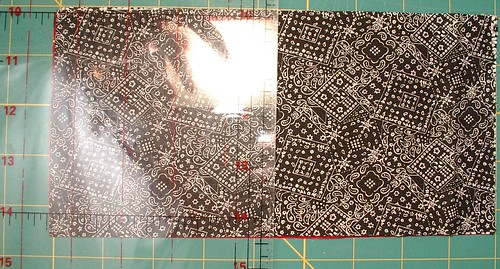
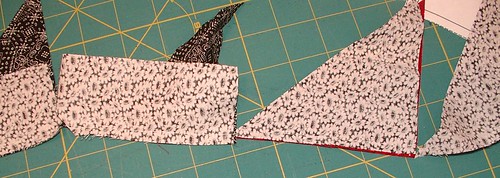
- Stack neatly and cut at an angle so one side is 4 inches and the other is 6 inches. You will now have 4 pieces of fabric (before making this last cut, make sure you have the angle facing the right way for the block) set aside.
- Stack all 3 pieces neatly (from step 1) and cut in half, so now you have 2 squares that are 4 1/2 by 4 1/2.
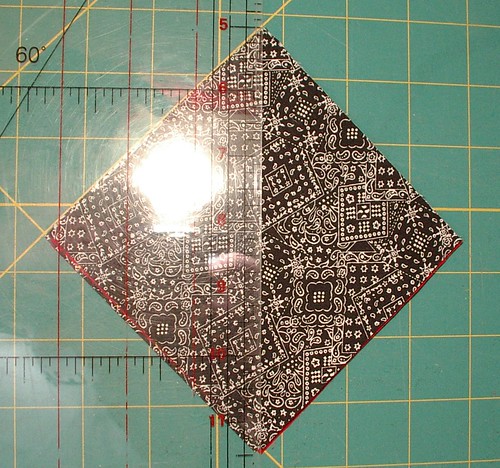
- Stack squares neatly and cut from corner to corner and set aside.
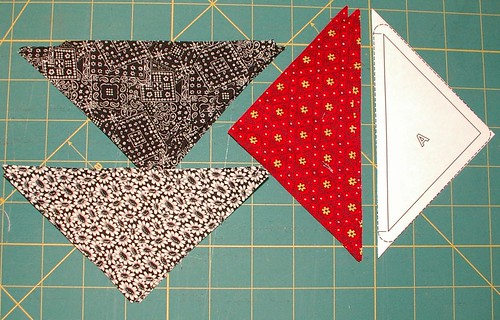
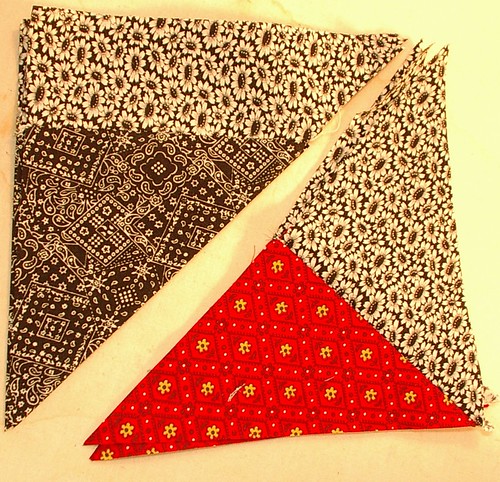
- You now have 12 triangles and 4 edge pieces for a total of 16 pieces.
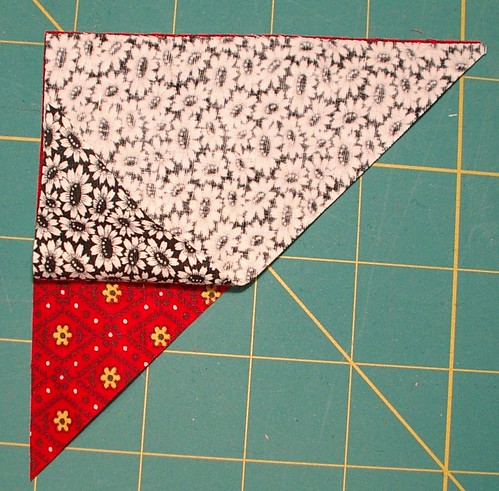
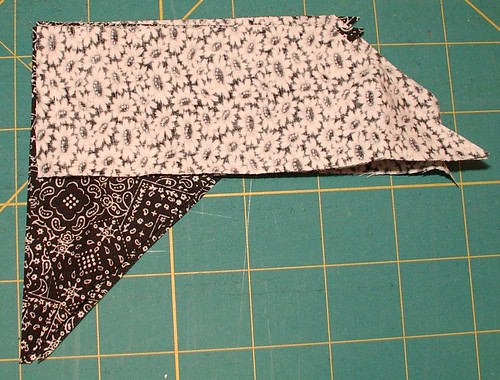
- Match up first seam for all blocks, short side of edge with short side of triangle, and then two short side of triangle. To help with this, lay out the block as if done and flip the pieces over on top of the piece they will be sewn to and make two neat stacks.
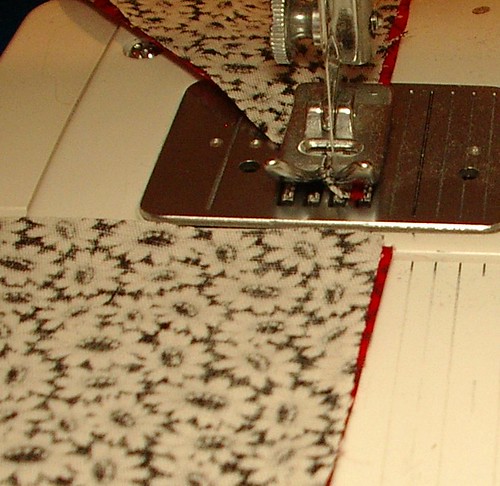
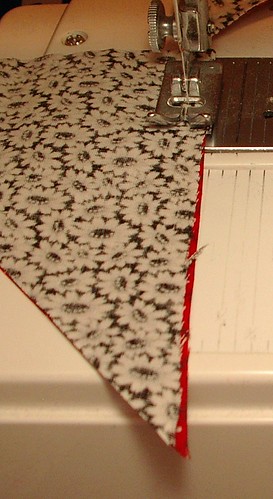
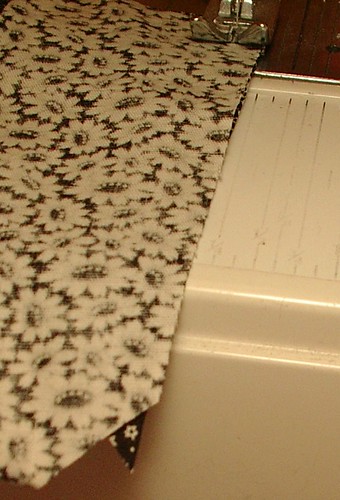
- Take to machine and sew. Use the chaining method when sewing; that means, do not cut threads between blocks. This is faster, neater, and easier to manage; use a 1/4 inch seam allowance. Continue in this manner of chain stitching through the triangles and the triangle with boarder pieces.
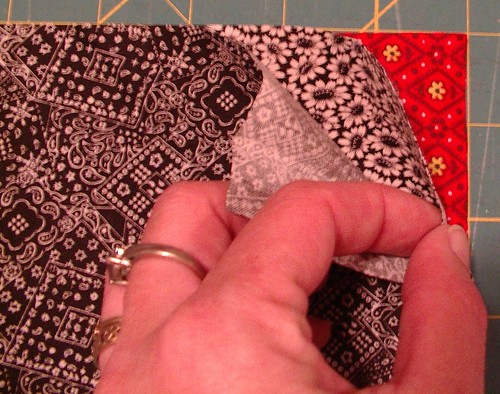
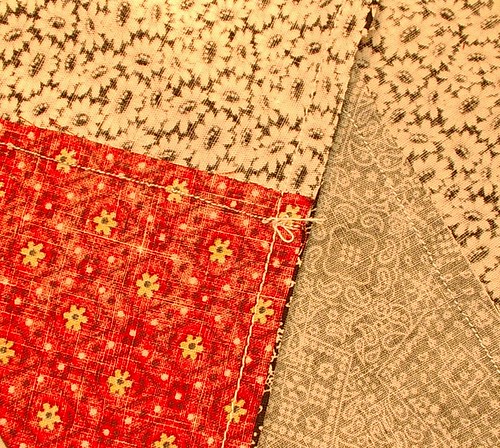
- When sewing the triangle to boarder, note the little dog ears at the end where the two blocks cross; your stitches should go right through that intersection. If done correctly there will be a smooth edge when flipped and pressed.
- Cut apart blocks and press seam to one side.
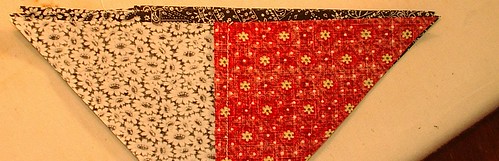
- Match next set of seams for blocks; lay right sides together and sew in chain method again.
- Press seams to one side and match up next seam and chain stitch again; continue in this fashion 'till done with the block.





Subscribe to:
Posts (Atom)
Copyright/permissions info
I like to share on this space my ideas and projects.
Please don't take ideas or photo and claim them as your work.
I am always happy to have new links to me. So if you like something just link back to me and give the source some credit thanks.
Any questions? just ask. I am happy to work with you if you need something
 This work is licensed under a Creative Commons Attribution-Noncommercial-No Derivative Works 3.0 Unported License.
2006-2019
Copyright Vintage Threads Inc.
All content and images.
This work is licensed under a Creative Commons Attribution-Noncommercial-No Derivative Works 3.0 Unported License.
2006-2019
Copyright Vintage Threads Inc.
All content and images.
LinkWithin
