

Version 1:
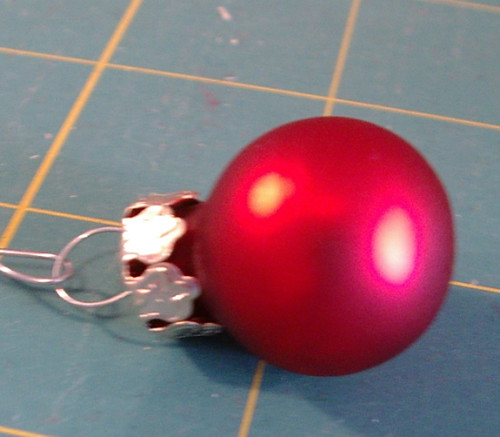
- small glass ornament
- crochet hook
- pearl cotton size 5 embroidery thread
- needle
- scissors
- small glass ornament
- glue
- glitter
- embroidery thread for hanger
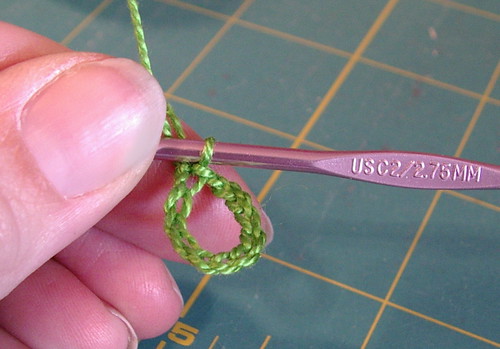
- Crochet a chain long enough to go over cap of ornament and sit around the neck of ornament to form ring (mine was 10).
- Single crochet in joining chain *chain 5 skip next ch sc in next around* last one is a chain 3 with a half-double crochet in top of first single crochet.
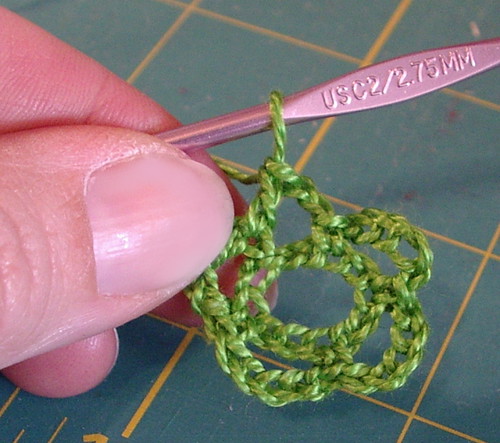
- Next round, sc in ch5 space,* ch 5. sc in next ch5 space* around end the same as step two continue in this manner 'till one row from end of ornament. (Mine was two rows of chains and 1 row of dc.)
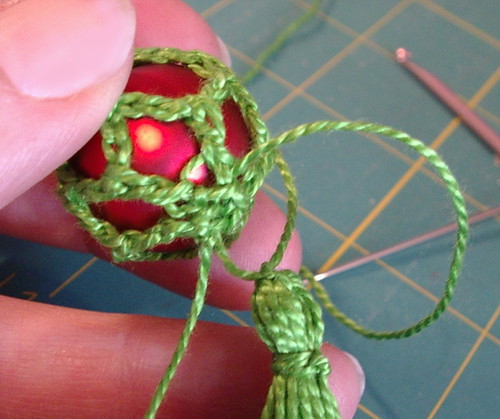
- Last row, ch three (counts as first dc) dc in every ch5 space once join with slip stitch to top of chain 3. Knot and leave a long tail when you cut so you can weave it into the tassel.
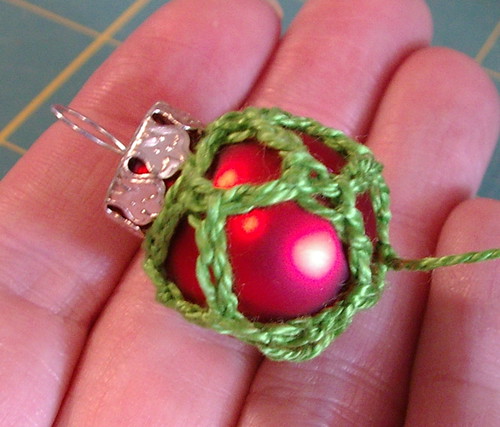
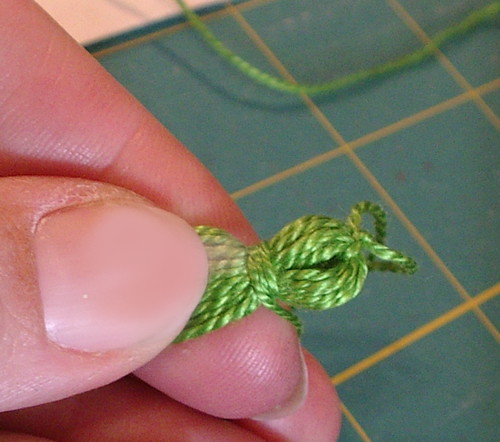
- Make a tassel.
- Tie tassel to bottom of ornament; weave all ends (three of them go through the tassel and add to the fringe).
- Add hanger; done.


- Add hanger to ornament and hang it on something to make it easy to dry and handle.
- Put little drops of glue on ornament.
- Sprinkle with glitter; let dry while hanging free.
- Done.

I will post another ornament later tonight especially for knitters (hint hint).
DO NOT USE THIS PATTERN TO MAKE THINGS TO SELL FOR PERSONAL USE ONLY!!!!


This is very clever. I like how you're creating things in miniature.
ReplyDeleteHi! ¡I love your ornaments! ¡Thanks for the tutorial!
ReplyDeleteKissies
This is wonderful. I could do this while waiting at the office.
ReplyDeleteThanks
These are really beautiful - miniature elegance!
ReplyDeleteThese are just the cutest. LOVE your blog and all the creations!!!!
ReplyDeleteThanks so much for the tutorial! Merry Christmas!!!
Very pretty!
ReplyDeleteAdorable yet again!!
ReplyDelete