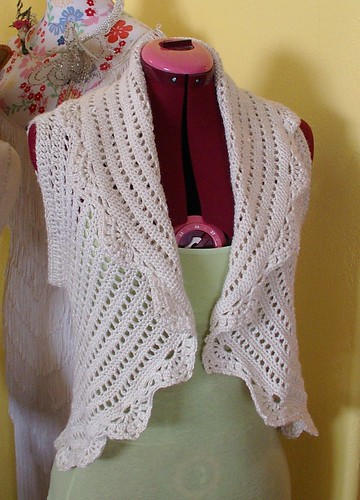
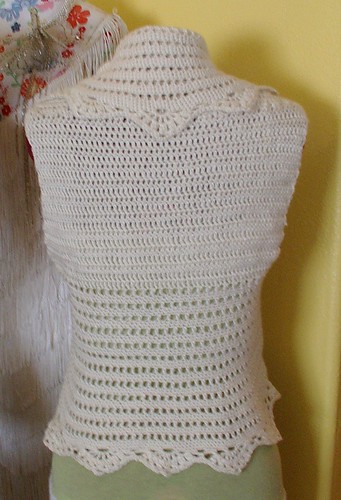
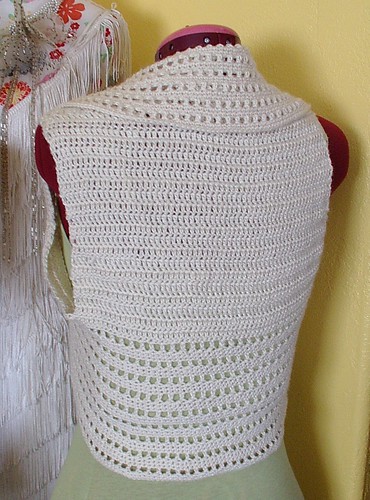
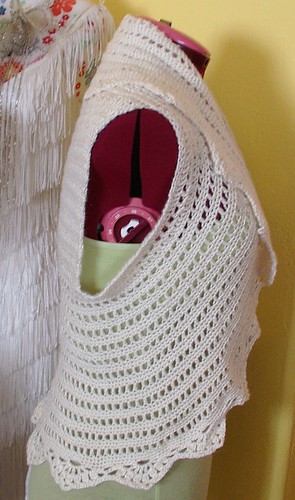
 I have the body part of this jacket done. I made it longer which means I probably can't make another out of the yarn I have sort of sad feeling about that. But I would not have worn this where it hit on my body so it is good and I am happy with where this is at currently. The lace is all done for the body area. Just two sleeves left to make on this plus the lace that goes around the sleeves maybe one more day and this will be done. I have only been working on it for a few days so it is a pretty easy project. It does have mistakes in the pattern so if you go to make this go to crochet's home page for errata or the ravelry one to find the errata for it. i did not know a bout the errata till after I had already worked through the area with the issue so since I knew I was going to modify the pattern for more length any way I just did my mods sooner as apposed to later.
Where do you want to go
▼
Wednesday, March 30, 2011
Cream Bolero Progress
 I have the body part of this jacket done. I made it longer which means I probably can't make another out of the yarn I have sort of sad feeling about that. But I would not have worn this where it hit on my body so it is good and I am happy with where this is at currently. The lace is all done for the body area. Just two sleeves left to make on this plus the lace that goes around the sleeves maybe one more day and this will be done. I have only been working on it for a few days so it is a pretty easy project. It does have mistakes in the pattern so if you go to make this go to crochet's home page for errata or the ravelry one to find the errata for it. i did not know a bout the errata till after I had already worked through the area with the issue so since I knew I was going to modify the pattern for more length any way I just did my mods sooner as apposed to later.
Tuesday, March 29, 2011
WIP Cream jacket
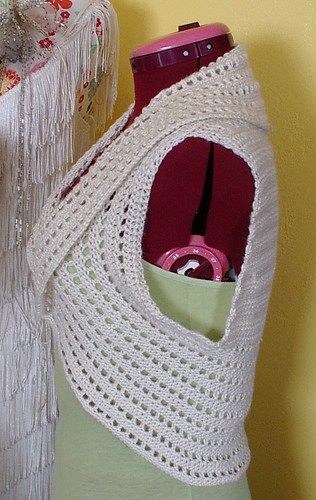
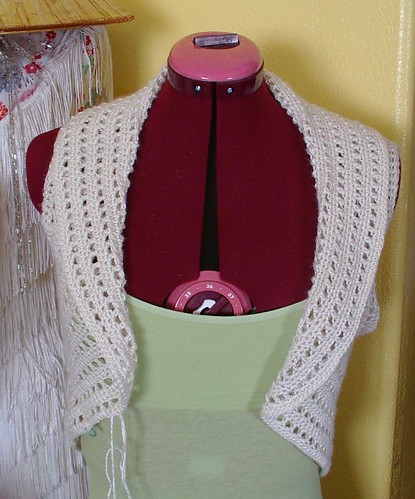 Here is one of my wips (works in progress). It is a cream silk opera jacket the pattern is in the current "Crochet" magazine. If you want to see the image from the magazine go here but it won't be the pattern just the image.
I got this silk yarn thrifting 4 balls of it for a total of 3 dollars for all of them not each. Not a bad price at all for 100% silk yarn that is super soft to the touch. (Update: I decided to look on line and found the exact same yarn for 160.00 that would include shipping a very good find indeed)
The pattern called for 500 grams of the requested cotton yarn. I didn't want to go buy anything for this and I only had only 450 grams of this well I guessed it would work and I could just shorten the sleeves if need be. I guess I will not have to worry about that though. So far I have used 1 ball and about 10 yards of the next and I am already half way done. So I am guessing that cotton yarn is way heavier than silk. Meaning per gram I have more yardage than the cotton did. Sso I will have more yardage and less weight a nice spring jacket which is just what I wanted. Also I will still have the left over silk yarn to play with.
In the pattern this is the point where I am supposed to add the lace edge but I want mine to be more closed in the front and longer in the back so I am going to modify the pattern. As long as the outer edge is divisible by 18 ( which is what the lace edging uses) I can make it longer and that is an easy thing to do.
I am thinking if I have enough yarn left over I might try making one similar to this but knitted since knitting lake less yarn than crochet I am thinking it may just work. The pattern only comes in crochet but how hard can it be really to make it knitted. I already know how the crochet one was constructed so it should be easy peasy watch I will be wrong ;o).
Monday, March 28, 2011
gloves to bow
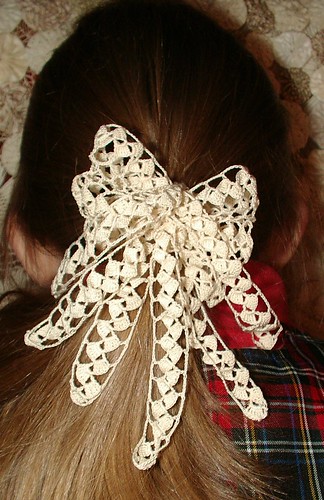
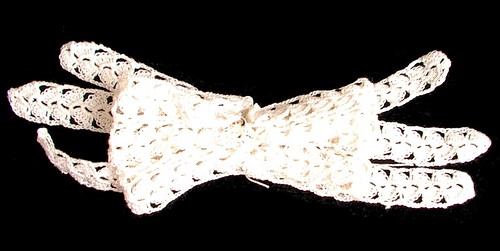
I started to make a pair of lace gloves Sunday made out of size 40 thread and a size 14 steel crochet hook. It just kept not being right but I kept working at it thinking it is my imagination It is a pattern I have not done before so I just don't know where it is going yet right. Once I got the front of 3 fingers done on both hands. I just kept looking at them thinking these still look a little big and even if it has a mesh that goes around the back of the fingers that will pull them tighter and shorter it is still not going to be right. So debating if I wanted to frog 8 hours of work and start over well I decided I would start over. I couldn't bring myself to frog what I had done to much time with such small thread. So then I debated on putting it in my sampler book as just an oh well learning experience sort of memory. Then I was playing with it and decided that it would make an OK bow for my kids hair. So I got out an elastic for the hair and stated crocheting it too it and pulling the back of the hands parts in and left the finger parts dangling for ribbon tails for the bow. This is probably the most expensive hair item I have ever made on accident. I have made things much more elaborate for the hair that I meant to make and so it was expected. But when I thought I was making me new fine lace gloves for Easter and I end up with a little girls hair bow something just seems missing.
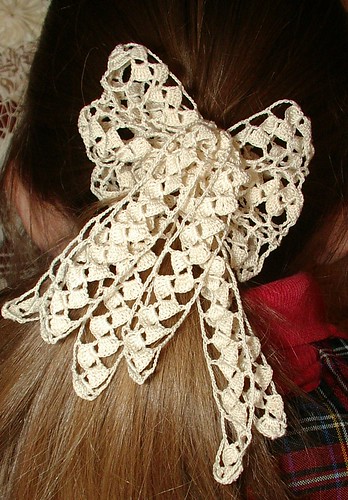 I will go back to making those gloves again. But probably not till Saturday or Sunday when I sit down to watch the LDS General conference meetings with my family. In the end I get happy children as they get a new item to wear that mom made so all is good with hugs and kisses from three little girls who get something new. Wish I had taken a picture of it before I turned it into the bow so you could see from where to where it went. When I make the next set I will stop at the point that I was at and post what these looked like before it became a bow. Images from Beetlejuice keep going through my head now. If you have seen the movie you might know why.
update:
here are the photos of what the fingers of the glove looked like before becoming the hair bow.
Thursday, March 24, 2011
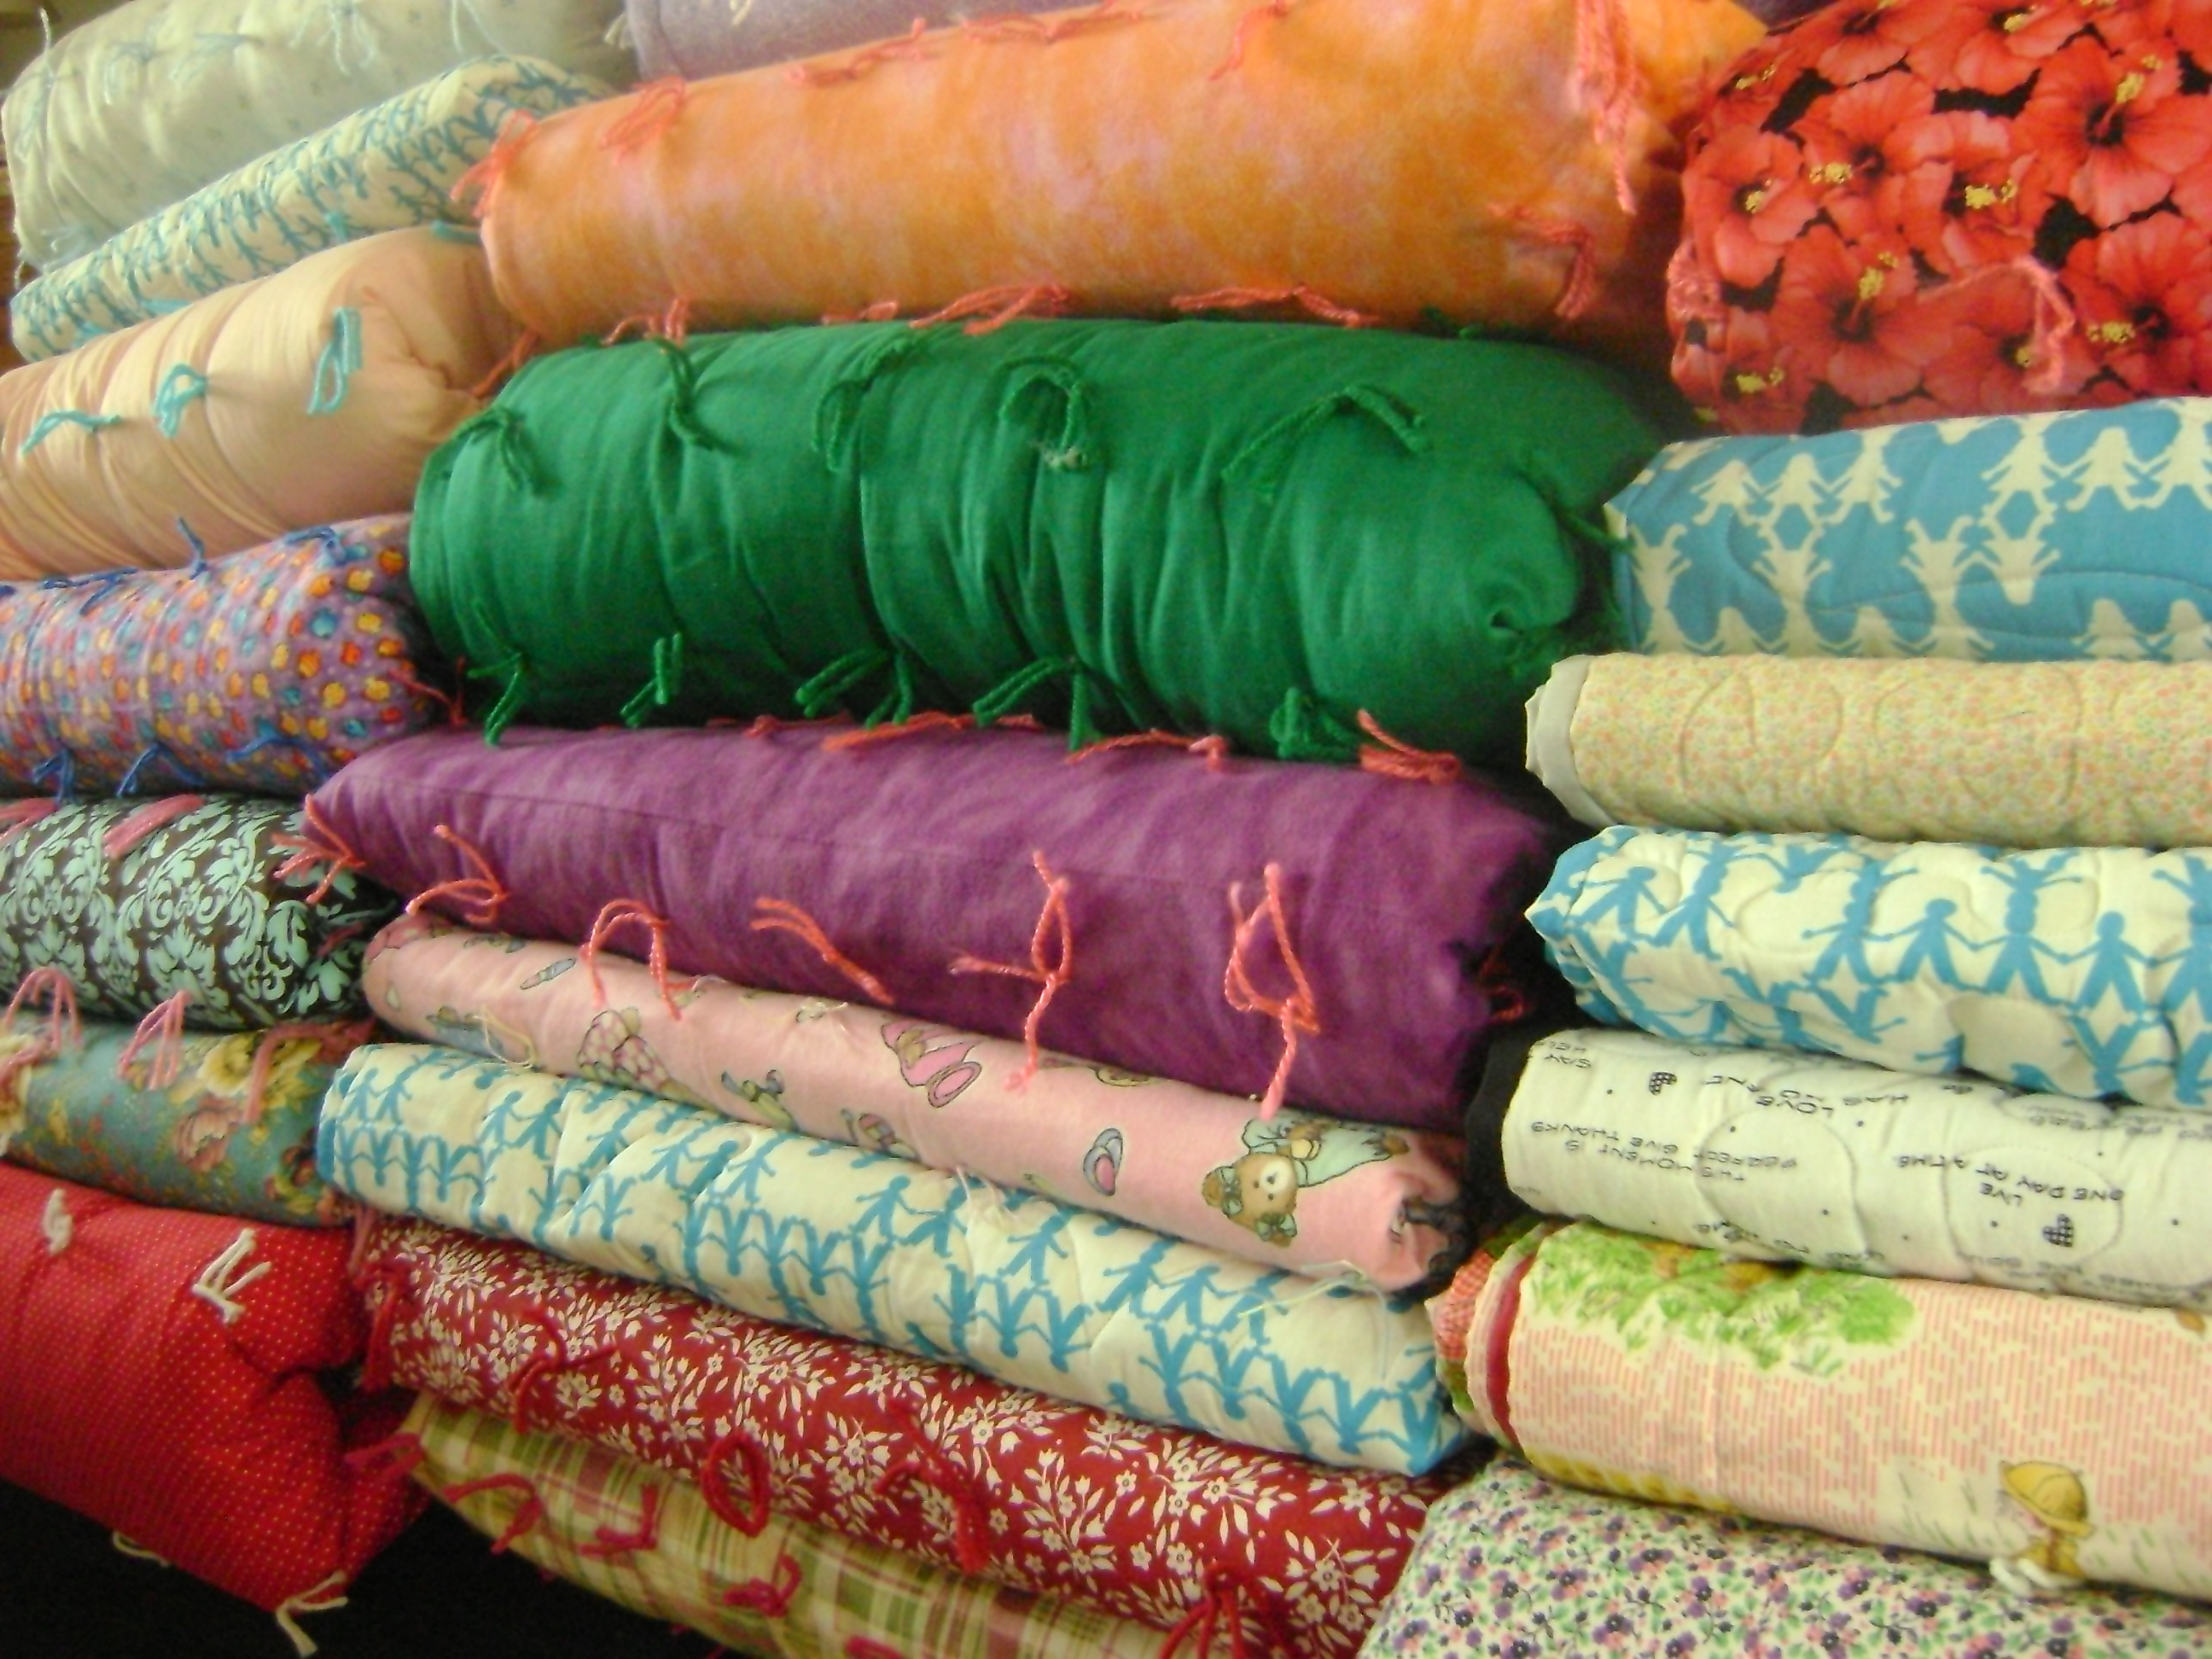
Update Japan quilts
 Go to the link below to get all the news on how this went. When everything is done quilts and kits and binding I think the count was 78 quilts for Japan. Thanks ladies and a few gentlemen for helping.
http://www.aprilrosenthal.com/2011/03/23/quilts-for-japan-the-recap/#comment-520
If you still want to help and didn't get a chance go here there is still time and you don't have to live near me to do it either.
http://www.quiltersnewsletter.com/blogs/insideqn/2011/03/18/call-for-quilts-for-japan/
These photos are from other bloggers that had been there that day. My photos did not come out well.
My little niece helping out with the white flower head band and April's Mom at the machine (April is the one that coordinated this event) and my middle daughter the orange blurr. Photos from the blog of Tea Rose Home not my photos.
I straightened the quilts up so we could all get a good photo for our blogs well mine didn't come out so these are from Gracious Rain's blog post. Not my photo but it is my work in folding and straightening and a few of those are the ones I tied on too.
Another photo from tea rose home with me and my family in them. That is me in the back in white with black gloves on for tieing for 8 hours. My sister law in the black leather jacket next to me and another niece in the hat front right with another sister on law next to her in the black sweater. I also have nephew the blue blurr next to the sister in law in the black sweater and my three daughter here at this time helping. My husband came at the end to haul stuff to April's vehicles. It was a family thing for us.
Me and my husband and 3 daughters
3 sister in laws and 2 nieces and 2 nephews
12 Harbaughs that is one great family I have I love them so much
another blogger there diary of a quilter
Wednesday, March 16, 2011
Quilts for Japan...Help needed
There are people who need help, and warmth. Lets help them. This was not my doing but I want to help and go and contribute so it doesn't matter a good idea is a good idea. My little family of five was talking Monday night about what we could do to help the people in Japan. I said I wish I knew how to donate fabric for quilts we prayed for answers for what we could do. Today my sister in law sent me an email with this information in it so here we go.
Saturday, March 19th
8 a.m. to 4 p.m.
1075 W 1100 N (church building)
Orem, Utah
Come tie quilts to be donated to Japan. If you have twin or larger sheets, batting, or yarn you can donate, bring those as well. If you already have quilts made that you want to donate bring them and drop them off. If you have quilt tops made that you will never finish here is a good place to put them to use. If you bring some already done quilts and find me there I will have some of my yo-yo crochet books available to give out (I will sign them if you like) as a thank you coming with one or more pre-done quilts (meaning tied bound and ready to go) I will do that till I run out of my books I think I have about 15 left. Hope to see you there. Sorry if i run out of books but it is the service that maters most as there are people in need. But I wanted to say thank you in a small way.
Cookies provided. :)
Anyone who comes to help for at least an hour, or who donates materials will be entered to win a prize.
Please, if you’re in the Utah valley area, consider coming to help, if you’re not in the area, please donate as you are able to whatever relief effort you can.
Comment with any questions. Pass the word along to anyone who is willing to help.
Thank you, thank you, from the bottom of my heart.
more information here and here
updates here on this project
To cut or not to cut...
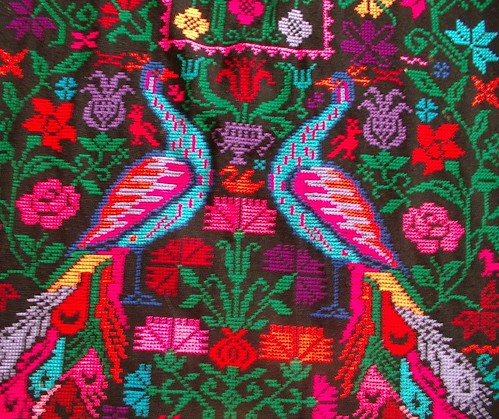
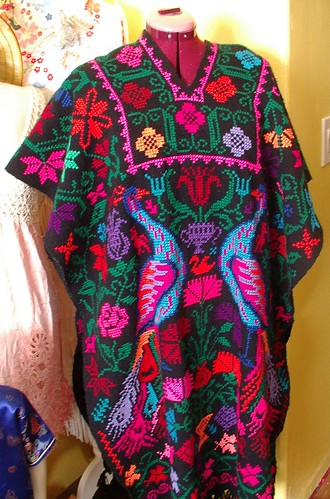 I got this serape about 5 years ago at a thrift store for about 3 to 5 dollars. I held on to it becasue I love the bright colors on the embroidery. This is vintage probably from the 60's or 70's. I have seen similar ones on the internet for between 175 dollars and 200 dollars. It said it is made out of wool so I had hopped it would felt and make a nice thick fabric to make a pencil skirt or suit skirt out of.
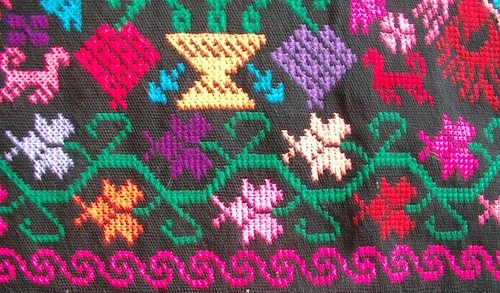
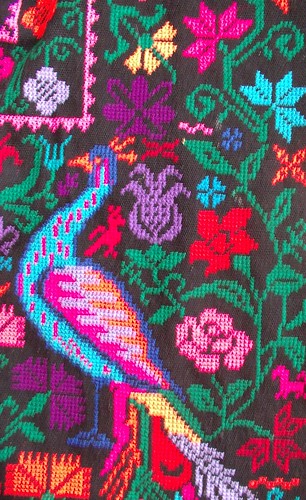 May still make the skirt but it would not be as warm as I had hoped it would be becasue it did not felt at all trust me I tried several times. So here is my question is it a bad idea to cut up this. I know it has a ton of embroidery in it and I know I will never wear it as a serape. I would wear it as a skirt. Should I feel bad about cutting into this piece of fabric and in that process tossing some of the embroidery. I really would like some feedback on this. There are more photos of this on flickr sorry I had a hard time getting a good photo of it.
Monday, March 14, 2011
Bits of this and that
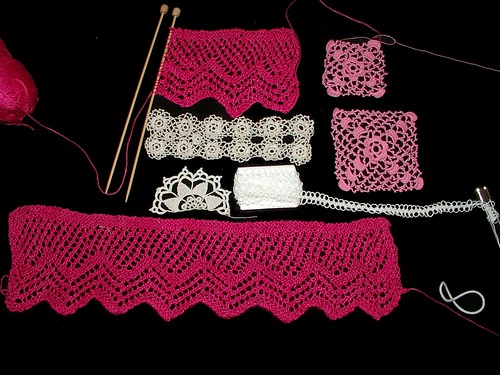
I have been working on little ideas here and there some I can't show some I can. A little knitting a little crochet some hairpin lace and such. These are the accumulation of the projects I have been caring around with me over the last little bit.
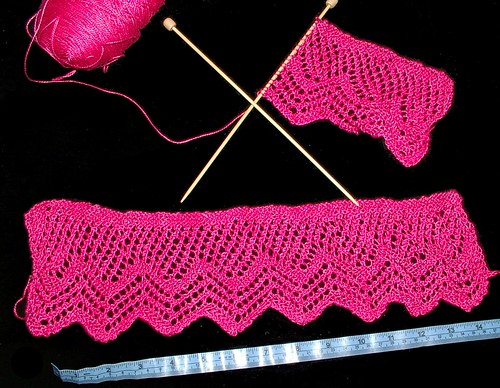
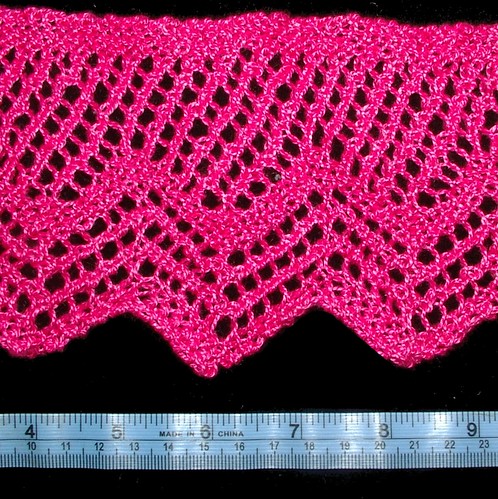 I am thinking this pink knitted lace will become the cuffs of a knitted sweater. I am still just trying to get rid of this pearl cotton I have made several things with it. It was a thrift shop find and it has gone on way longer than expected. This is a large pearl cotton not sure exactly what size other than the label info. UKI, dk fuchsia, number 56, size 5/, lot 2017
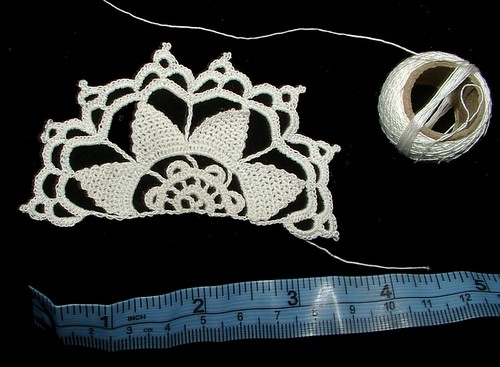
Have not totally decided what these will be yet but I am leaning towards the cuffs of a set pink gloves. This is size 30 antique crochet thread another thrift shop find on the thread.
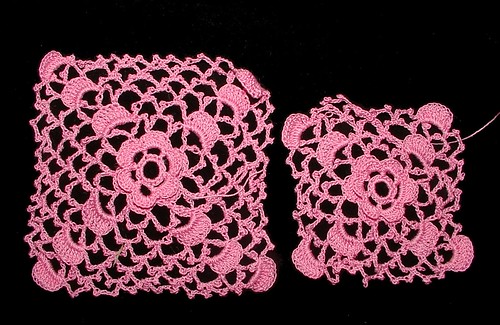
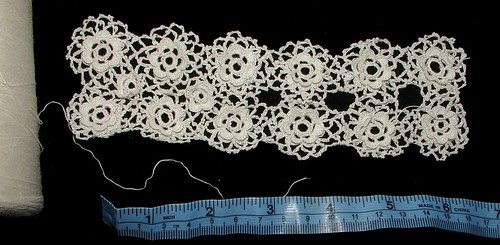
This is some more Irish lace I have been playing with I am thinking this will be the collar of a shirt I am thinking of starting. This to is vintage thread and by the looks of the cone I could probably make a few shirts and this amount of flowers didn't even make a dint in the size of the cone. Thread made by Winton (3 ply) lusterite mercerized 6000 yards 1519 eggshell.
This one is an experiment as well but this is done in size 8- tatting thread another thrifting find the thread that is.
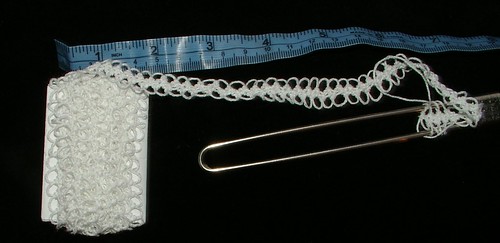
making hairpin lace I am thinking this is the start of a skirt depending if I don't get sick of making the lace. The hairpin fork is an antique store find.
This one is an experiment as well but this is done in size 8- tatting thread another thrifting find the thread that is.
This is size 10 thread (hey look new thread but it was on clearance) and I am
Friday, March 11, 2011
We ate cake..
My husband surprised me with this cake. Thought I would share it with you. So cool! To see how she did this go to her blog cake notes. Those are real bamboo knitting needles on the cake but the yarn is food.
Tuesday, March 08, 2011
Let them eat cake...
 A little over a week ago. My husband came home from work telling about his new co-works wife and the website she has about her hobby making cakes. I stopped by it and took a look she has several pages of cakes but enclosed in this post are just a few of my favorite ones from her site. If you check out her blog say Wendy sent you. For this being her hobby I think she has done a wonderful job. The other need part is to go through her pages and see how she has progressed in her art. I wish her many more hours of fun and enjoyment working/playing with this art-form. She is self taught in this hobby similar to I am in most of my hobbys. I did however take classes years ago when I worked at a craft shop to learn how to make cakes and decorate them (the class was free becasue at the end of class I would ring people up for the supplies they wanted to buy so instead of a paycheck during that time for working I got to take the classes). If you have not ever done this I recommend it (cake decorating that is not working at a craft shop). It is a fun project to learn how to do and even more fun to see the happiness on your families face when you bring the cake to the party. The first two wedding cakes in this post are are very elegant to me they show pension for hi detail and simplicity at the same time.
I love the giraffe on this one so much wimsy.
Oh the flower one in the vase is cupcakes so pretty would be great for Mother's day or Valentines.
All the photos in this post are from cake notes blog I do have permission to use them they are not my work.
Friday, March 04, 2011
Beaded Renaissance hat
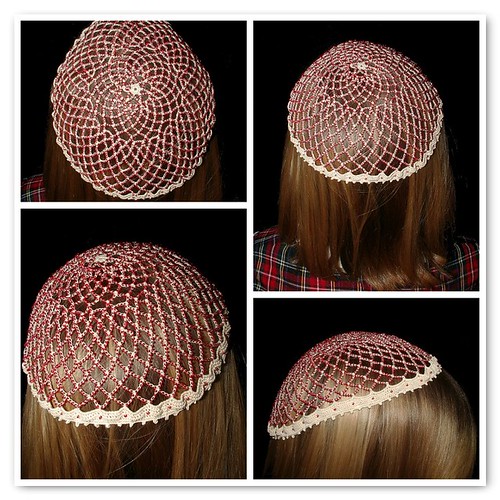
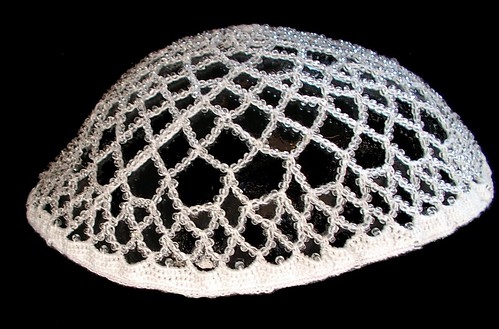
I made another beaded renaissance hat for my children to wear during Shakespeare week at their school. I made a white one a while back.
But the girls are always sad when one of the other two sisters is wearing it. This one is a little larger than the last one and covers more of the top of the head and some of the back as well. I also decided I am making at least one more so we will have three of these total less arguments that way amongst the children. I want to make one that is long and can hold long hair sort of like a snood but more of a Shakespeare type of look. I think the next one will be more of a natural color in the beads sort of a golden yellow.
Thursday, March 03, 2011
Bag of Lace
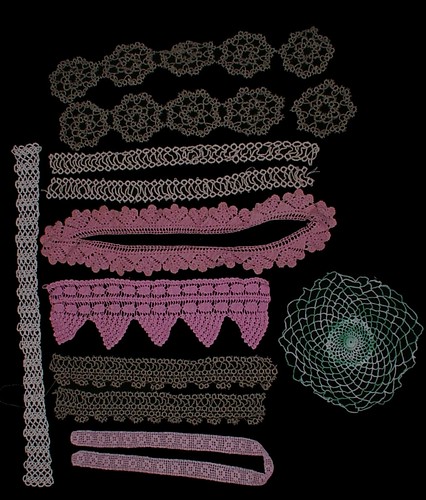
Here are the other pieces of lace that had been in the bag that I bought for 2.99. I think it was a great find. Just sad that someone didn't like their work enough to keep it.
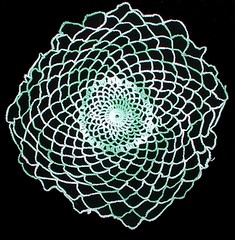 This green one isn't too interesting to me but I will figure something out for it. Maybe take it down to the center section by removing all the chains and make a bun cover for my girls. That would make it at least useful again to someone.
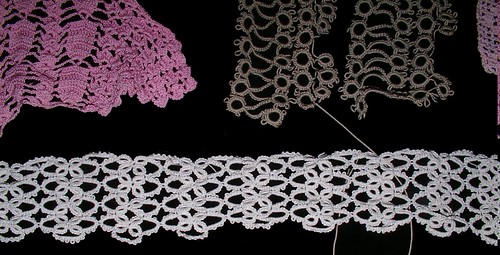
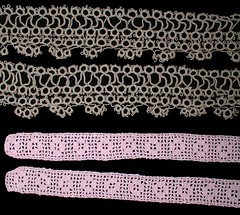 The pink one I want to copy the pattern the tatted piece in this photo may end up becoming the edge of set of wrist warmers to make lace that hangs over the hands. If you want to see these photos better click on them and it will take you to a bigger photo on flickr.
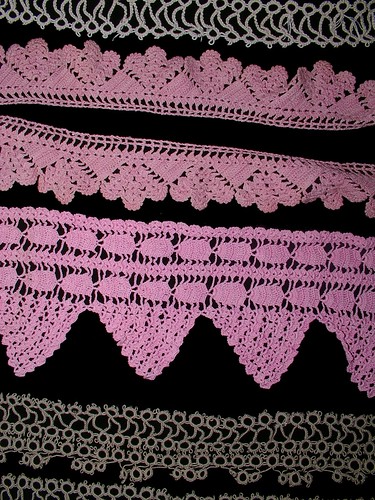 The top piece that is cut off matches the thread used in the last tatted photo above and at the bottom of this photo so might figure out a way to add them to one another. The top pink one is crocheted in the round and has some slight damage so not sure if I am going to fix it and make it into something else or just copy the pattern. The next pink one I know I want to make more of it so I will be coping that pattern I think it is so pretty.
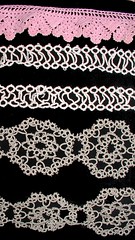 The tatted medallions in this next photo are just tied together with a separate piece of string so I am thinking I will separate them and figure out what to do with them at that point. They are made out of a pearl cotton. You can see I have already separated one in the very top photo of this post.
Nice white tatted edging haven't a clue what to do with it at the moment it will just go into my lace box for future use.
 This green one isn't too interesting to me but I will figure something out for it. Maybe take it down to the center section by removing all the chains and make a bun cover for my girls. That would make it at least useful again to someone.
 The pink one I want to copy the pattern the tatted piece in this photo may end up becoming the edge of set of wrist warmers to make lace that hangs over the hands. If you want to see these photos better click on them and it will take you to a bigger photo on flickr.
 The top piece that is cut off matches the thread used in the last tatted photo above and at the bottom of this photo so might figure out a way to add them to one another. The top pink one is crocheted in the round and has some slight damage so not sure if I am going to fix it and make it into something else or just copy the pattern. The next pink one I know I want to make more of it so I will be coping that pattern I think it is so pretty.
 The tatted medallions in this next photo are just tied together with a separate piece of string so I am thinking I will separate them and figure out what to do with them at that point. They are made out of a pearl cotton. You can see I have already separated one in the very top photo of this post.
Nice white tatted edging haven't a clue what to do with it at the moment it will just go into my lace box for future use.
Tatted Capelet
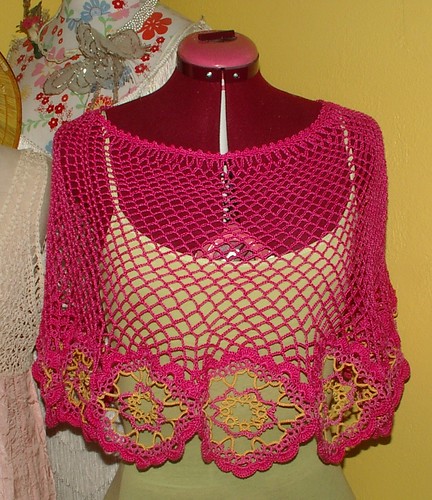
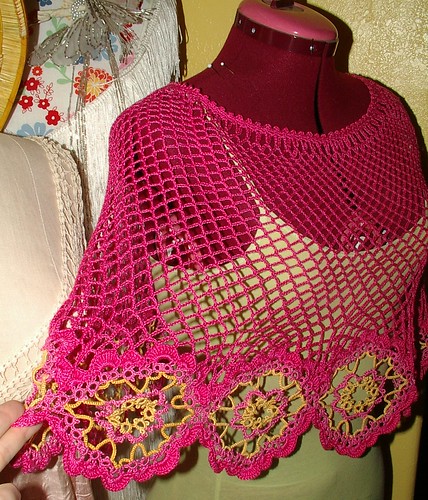
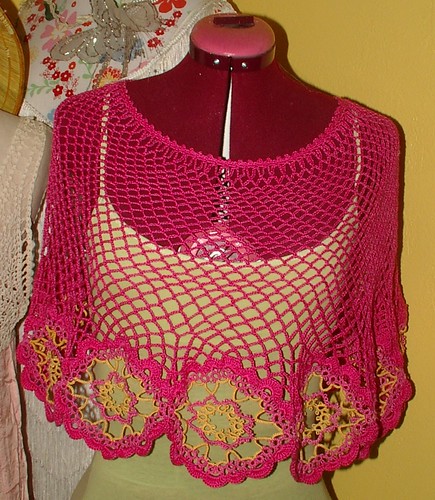
I found this large bag of lace scraps at a thrift store the entire bag cost less than $2.99 and had at least 5 such pieces in it plus a lot of crochet too. There are several usable pieces of crochet and tatted lace in the bag I just have to figure out what to use them for. The first piece I decide I would use was this piece of tatted lace made out of pearl cotton. It was already connected into a continuous piece. So I decided I would make it into another capelet.
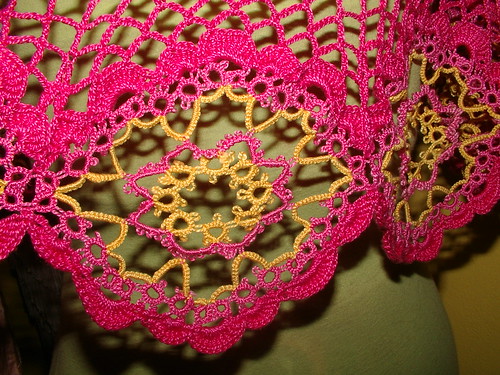
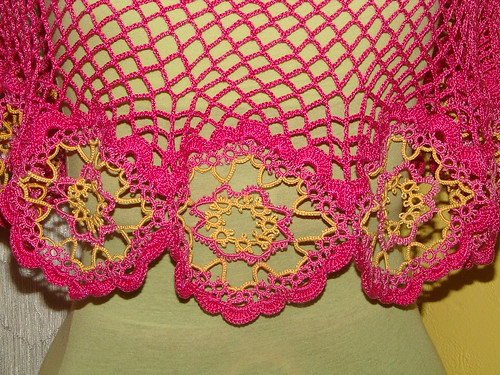
The pieces of tatting are so large they make a strong focal point. It was very simple to do put a shell edging around the already tatted pieces which added strength to them. Since the tatter is unknown I was not sure how strong the person was in their skills of finishing work. Upon inspection on the piece, the creator only tied knots at the end of their work and didn't weave the ends in so it is a fragile piece and will have to be washed by hand. I rarely find tatted pieces that have the ends finished in a good way. Yet it would be sad to toss that much work and not enjoy it. Which means it would have to be made into an item that could easily be hand washed and not something that would get a lot of wear and tear. So after I had added the shells I started into the mesh area working with different techniques to get the valleys between the motifs to the same high so I could then just work up the piece simply with rounds of chains that get less and less number of chains near the top. At the necks edge I once again lengthened the chains to give ease in the drape and finished it of with a picot edge took less than a day to do this transformation. Those that know me know I do not usually wear pink. But every now and again it is nice, would have been good at Valentines but I didn't have the scrap of tatting then. Since the pink pearl cotton I used was also found junking(thrifting) a long time ago. I have made a pair of gloves already with this thread. So the few dollars I spent on that cone has gone a long way. The whole item cost me less than $2.00 probably not even $1.00. Not bad!
The pieces of tatting are so large they make a strong focal point. It was very simple to do put a shell edging around the already tatted pieces which added strength to them. Since the tatter is unknown I was not sure how strong the person was in their skills of finishing work. Upon inspection on the piece, the creator only tied knots at the end of their work and didn't weave the ends in so it is a fragile piece and will have to be washed by hand. I rarely find tatted pieces that have the ends finished in a good way. Yet it would be sad to toss that much work and not enjoy it. Which means it would have to be made into an item that could easily be hand washed and not something that would get a lot of wear and tear. So after I had added the shells I started into the mesh area working with different techniques to get the valleys between the motifs to the same high so I could then just work up the piece simply with rounds of chains that get less and less number of chains near the top. At the necks edge I once again lengthened the chains to give ease in the drape and finished it of with a picot edge took less than a day to do this transformation. Those that know me know I do not usually wear pink. But every now and again it is nice, would have been good at Valentines but I didn't have the scrap of tatting then. Since the pink pearl cotton I used was also found junking(thrifting) a long time ago. I have made a pair of gloves already with this thread. So the few dollars I spent on that cone has gone a long way. The whole item cost me less than $2.00 probably not even $1.00. Not bad!
Wednesday, March 02, 2011
RPL alternate simple cords
These are cords that you can use to add to your Romanian lace. I still recommend the first cord as your main cord because it unravels both ways where as these only unravel from one end and are more decorative than helpful in construction.
**If you like my blog and the free patterns and tutorials and want to say thank you
I have a wish list on ravelry of patterns I would like to make.
Thank you in advance for being kind and
saying thank you back.
Love Sunshine
But please do not feel like you have to**

row 1 sc in second chain from hook and in each chain across chain 1 turn( 3 sc)
row 2 *sc in each sc across chain 1 turn work(3sc)* repeat to desired length
row 1 1sc in second chain, 3 sc in last chain, chain 1 turn work ( 4sc)
row 2 *1sc in 1st sc, 3 sc in next sc , chain 1 turn work (4 sc)* repeat to desired length
**If you like my blog and the free patterns and tutorials and want to say thank you
I have a wish list on ravelry of patterns I would like to make.
Thank you in advance for being kind and
saying thank you back.
Love Sunshine
But please do not feel like you have to**

Cord 1
basic cord
Cord 2
extra wide sc cord
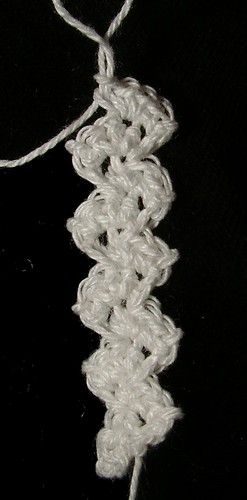
chain 4row 1 sc in second chain from hook and in each chain across chain 1 turn( 3 sc)
row 2 *sc in each sc across chain 1 turn work(3sc)* repeat to desired length
Cord 3
small shell sc cord
chain 4row 1 1sc in second chain, 3 sc in last chain, chain 1 turn work ( 4sc)
row 2 *1sc in 1st sc, 3 sc in next sc , chain 1 turn work (4 sc)* repeat to desired length

