Use desired yarn or thread and hook to match yarn size. I would suggest lace weights or thread and yarns of that sort to make it airy.
Of course you can do yours in what ever color you like a long color shaded one would be lovely.I did mine in one color just to help you see stitches in the photos better. But I did the tutorial in different colors for each round so you could see the rounds better.
special stitches
- V stitch : (dc, ch 2, dc) in the same stitch or space
- sm shell: 3 treble crochet, ch 2, 3 treble crochet all in the same space when worked over previous small shell it is worked over the chain 2 space
- lg shell: 8 treble crochet all in the same space
- picot: ch 3 and sc into 1st chain
- go around front of post and go around back of post
Before starting work: There are times when you will be going around the post of a treble crochet to make your stitch. Doesn't matter if you are working on the right side front or wrong side/back side of the work these stitches always go around from the back side. Which means sometimes you go around the front of a post and sometimes the back side of a post. Other wise your fans will face both front and back mine are always facing front you can do that (make them face both ways I might make a sample that way and add to this) but I do not think it would be as pretty when done. Mark your front/right side with the first or third row so you are aware of which side is front. After a while you will not need the marker but at first it is helpful.
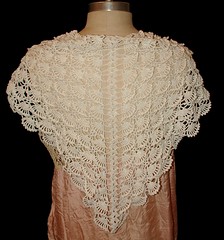 Foundation Chain ch 13 turn work
- (front/right side)dc in 5th chain from hook (V stitch made), chain 4 skip 3 chains on foundation chain, small shell( this is your center back) in next chain,chain 4, V stitch in last chain of foundation chain. turn work (should have 2 V stitches and 1 small shell)
- (wrong/back side)slip stitch into V stitch, chain 4 counts as first treble of Lg shell finish large shell in this V stitch, chain 4, work sm shell over sm shell, chain 4, work lg shell in last V stitch, turn work (should have 2 lg shells, and 1 small shell)
- (front/right side) chain 7, sc in 3rd chain from hook (counts as first treble and first picot, treble,picot in every treble of large shell (should have 8 trebles and 8 picots) chain 4, sm shell over sm shell, chain 4, Treble picot across all 8 stitches of lg shell, turn work ( should have 16 picots and small shell)
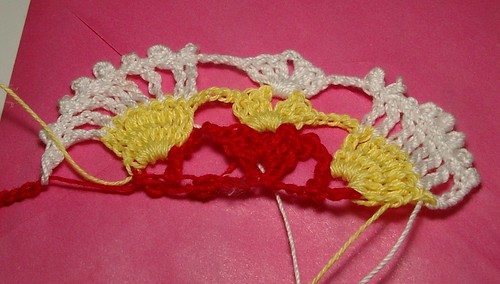
- (wrong/back side)slip stitch around first treble crochet post, chain 5, dc around same treble post ( first V stitch made), chain 4, sc around 3rd treble post this is around the front of the post (even thought these are going around the front of the post they are always on the back side or wrong side of the entire piece), *chain 3, sc around next treble post* 3 times,chain 4, V stitch over chain 4 space before sm shell on previous round, chain 4, sm shell over shell, chain 4, V stitch over chain 4 space after sm shell on previous round,chain 4, sc around 3rd treble post, *chain 3, sc around next treble post* 3 times,chain 4, V stitch around last treble post of previous round, turn work (should have 4 V stitches and 1 small shell)
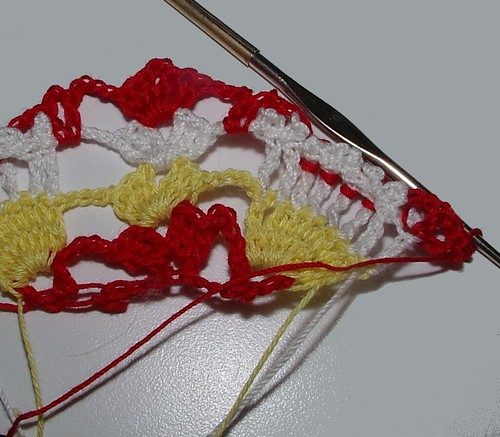
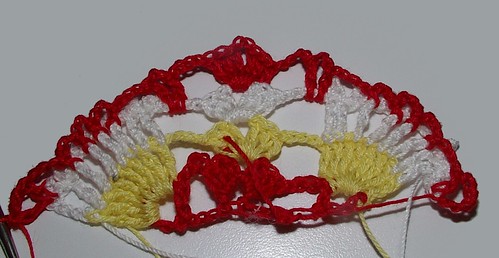
- (front/right side) slip stitch into V stitch, chain 4 (counts as first treble of Lg shell) finish large shell in this V stitch, *chain 4, sc in ch 3 loop, (ch 3, sc in next loop)2 times chain 4, work lg shell next V stitch,* chain 4, sm shell over shell, chain 4, lg shell over V stitch space, chain 4,sc in ch 3 loop, (ch 3, sc in next loop)2 times chain 4, work lg shell over V stitch, repeat between stars , turn work (should have 4 lg shells, and 1 small shell)
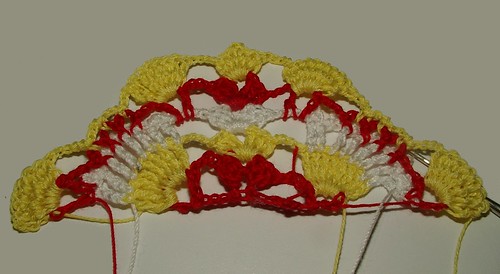
- (back side) chain 7, sc in 3rd chain from hook (counts as first treble and first picot), treble,picot in every treble of large shell (should have 8 trebles and 8 picots) chain 4, sc in chain 3 space, ch 3, sc in next ch 3 space, chain 4,Treble picot across all 8 stitches of lg shell,chain 4, sm shell over sm shell, chain 4, Treble picot across all 8 stitches of lg shell, chain 4, sc in chain 3 space, ch 3 sc in next ch 3 space, chain 4,Treble picot across all 8 stitches of lg shell, turn work (should have 32 picots and 1 small shell)
- (front/right side)slip stitch around first treble crochet post, chain 5, dc around same treble post (first V stitch made), *chain 4, sc around 3rd treble post around from the back of the post (remember these stitches that go around post are always done on the back side of the work even when working from the front), (chain 3, sc around next treble post) 3 times, chain 4, V stitch over chain 3 loop * repeat 1 more time between*last time have the v stitch over a chain 4space, chain 4, sm shell over shell, chain 4, V stitch over chain 4,**chain 4, sc around 3rd treble post, (chain 3, sc around next treble post) 3 times, chain 4, V stitch over chain3 **repeat 1 more time between**(in the repeat the last V stitch goes around the back post of the last treble crochet post..( should have 6 V stitches and 1 sm shell)
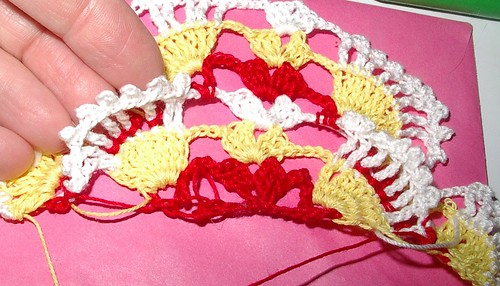
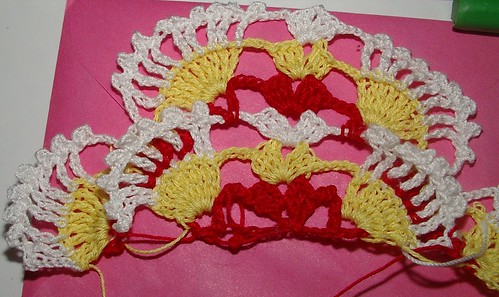
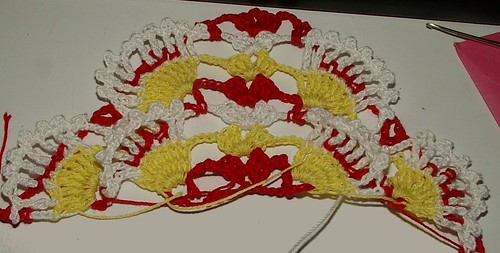
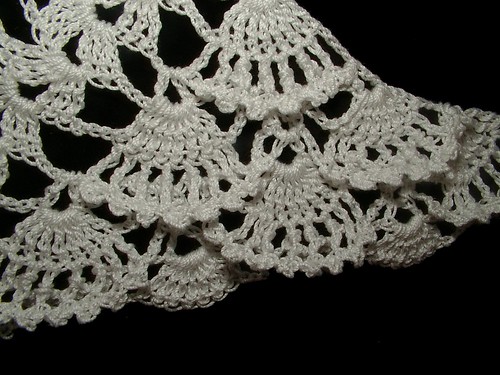
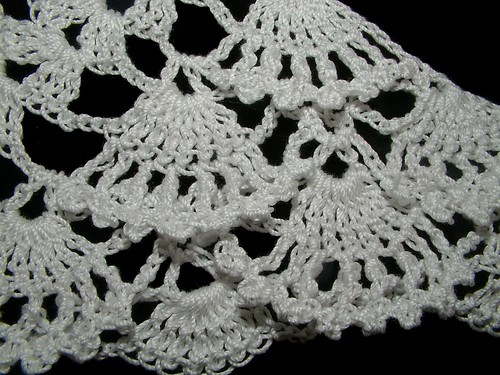
continue in established pattern to the length of shawl you want end on a round with picot edges. (ruffly repeat rounds 5 through 7 each time you repeat these rounds you will also be increase the number of shells by two please pay attention to the first seven rows and how they increase as beyond that you should have the pattern established in your head as it isn't written)
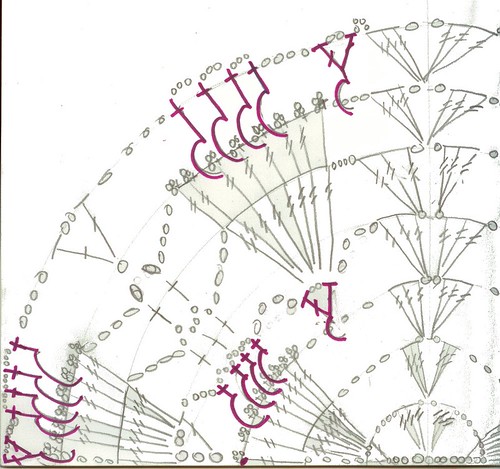
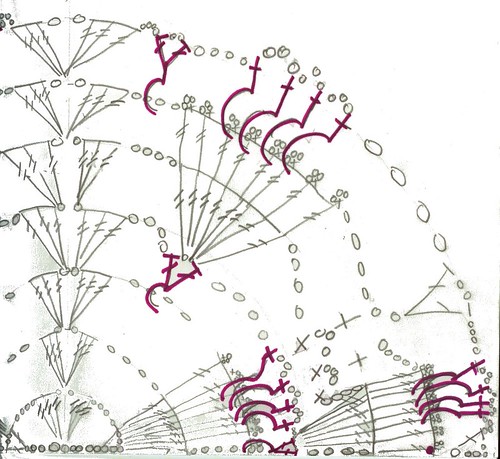
I added a graph hope this helps those who don't speak English. Sorry It is hand drawn and in two pieces.
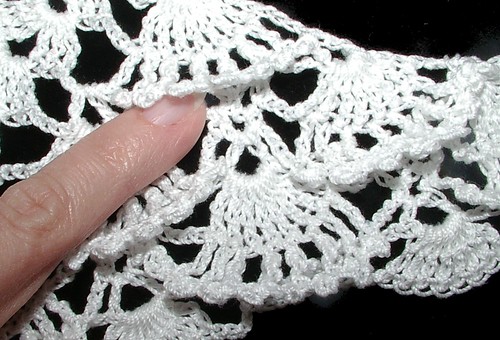
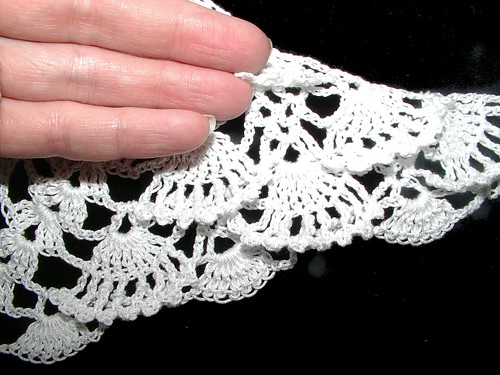
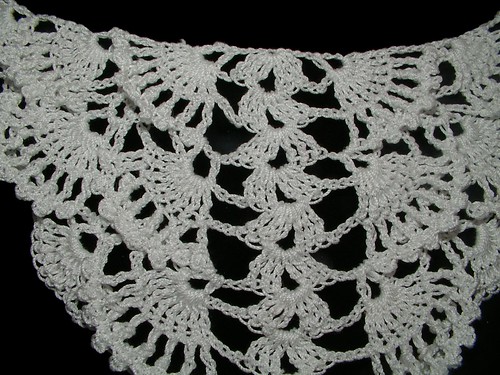
If you would like the shells/fans to stand up more and have a great 3D effect I have made some modifications on a yellow wool shawls I am making and have posted those modifications here so you can do them too if you would like.
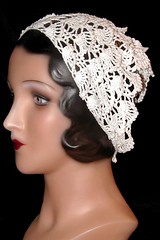
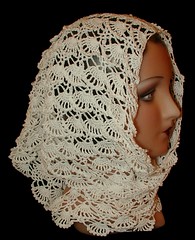
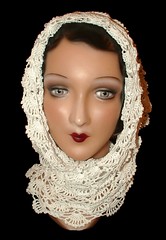
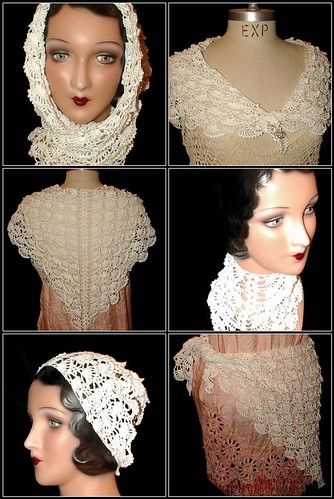
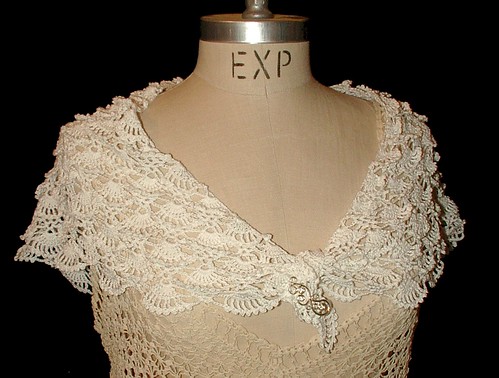
 If you want to make a hair or neck scarf out of this use size 10 thread and a size 5 hook. When finished to desired length ( which for me was when I had completed 7 large rounds of shells). For the medium shawl using same size thread and hook as above make 14 large rounds. When I say large rounds I mean complete a repeat of the large shell all the way to the picot that is one complete large shell round. When I get the large shawl done I will post that as well for size 10 thread.I left it simple but you could put a picot edge across the front. Then just tie ends to hold in place.
Do not use this pattern to make things for sale for personal use only fine to give as gifts for Christmas and Mother's Day and things of that sort.

103 queues
French version of the same pattern
 points spéciaux
-------------------
* Point V : 1 bride, 2 mailles en l’air, 1 bride dans la même maille ou 1 espace formé par 2 mailles en l’air.
* Petite coquille : 2 doubles brides, 2 mailles en l’air, 2 doubles brides dans le même espace.
Une petite coquille est faite à chaque rang sur la petite coquille du rang précédent.
* Grande coquille : RANG 1 = 8 doubles brides dans le même espace de 2 mailles d’un point V, RANG 2 = 8 doubles brides + picots sur les 8 doubles brides du rang 1.
* Picot : 3 mailles en l’air fermé par une maille serrée dans la 3ème maille en l’air du crochet.
Base du travail : 13 mailles chainettes.
1. 1 bride dans la cinquième maille chainette en partant du crochet (= faire un Point V).
Sauter 3 mailles, faire une petite coquille dans la maille suivante (ce sera le centre du travail).
Faire un Point V dans la dernière maille de la chaîne de base.
Tourner le travail.
Le premier rang doit avoir 2 points V et une petite coquille au centre.
2. Faire 1 maille glissée dans le point V, 4 mailles chainettes (pour faire la première double bride du RANG 1 de la grande coquille), faire 7 doubles brides sur les 2 mailles en l’air du point V (= Rang 1 de la grande coquille = 8 doubles brides).
Faire 4 mailles en l’air, 1 petite coquille sur l’espace de 2 mailles en l’air de la petite coquille du rang précédent.
Faire 4 mailles en l’air, 1 grande coquille (= 8 doubles brides) dans le groupe de 2 mailles en l’air du second point V.
Tourner le travail.
Vous devez avoir 2 grandes coquilles (Rang 1) et 1 petite coquille au centre.
 3. 7 mailles en l’air, 1 maille serrée dans la 3ème maille à partir du crochet (forme la première double bride + le picot), 7 doubles brides et 1 picot dans chacune des triples brides du rang précédent (= Rang 2 de la grande coquille = 8 doubles brides et 8 picots).
4 mailles en l’air, 1 petite coquille dans l’espace de 2 mailles en l’air de la petite coquille du rang précédent.
4 mailles en l’air, faire le Rang 2 de la 2ème grande coquille. *1 double bride et 1 picot de 3 mailles en l’air fermé par une maille serrée*, répéter 8 fois sur chacune des doubles brides du rang précédent.
Tourner le travail. On doit avoir 2 grandes coquilles (soit 16 picots) et 1 petite coquille.
4. Sur l’envers du travail.
1 maille glissée autours du jambage de la première double bride, 5 mailles en l’air, 1 bride autours de la même double bride (forme le point V)
4 mailles en l’air, 1 maille serrée autours de la 3ème double bride (resteront sur l’envers du travail),
* 3 mailles en l’air, 1 maille serrée autours de la double bride suivante*, répéter 3 fois.
4 mailles en l’air, 1 point V dans l’espace de 4 mailles en l’air avant la petite coquille.
4 mailles en l’air, 1 petite coquille sur la petite coquille.
4 mailles en l’air, 1 point V sur l’espace de 4 mailles en l’air après la petite coquille.
4 mailles en l’air, 1 maille serrée sur la jambe de la 3ème double bride, *3 mailles en l’air, 1 maille serrée sur la jambe de la double bride suivante* répéter 3 fois.
4 mailles en l’air, 1 point V sur la jambe de la dernière double bride.
Tourner le travail. Vous avez obtenu : 4 point V et 1 petite coquille.
5. 1 maille glissée dans le point V,
4 mailles en l’air, 7 doubles brides (= Rang 1 grande coquille) dans le point V.
4 mailles en l’air, 1 maille serrée dans l’arceau de 3 mailles en l’air, *3 mailles en l’air, 1 maille serrée dans l’arceau suivant* répéter 2 fois.
4 mailles en l’air, Rang 1 grande coquille dans le point V suivant.
4 mailles en l’air, petite coquille sur la petite coquille.
4 mailles en l’air, Rang 1 grande coquille sur le point V suivant.
4 maille en l’air, 1 maille serrée dans l’arceau de 3 mailles en l’air, *3 mailles en l’air, 1 maille serrée dans l’arceau suiant * répéter 2 fois.
4 mailles en l’air, Rang 1 grande coquille sur le Point V suivant.
Tourner le travail. Vous avez obtenu : 4 grandes coquilles (rang 1) et 1 petite coquille au centre.
6. 7 mailles en l’air, 1 maille serrée dans la troisième maille en l’air du crochet (compte pour la première double bride et le premier picot), *1 double bride + 1 picot* répéter 7 fois dans chacune des doubles brides du rang 1 de grande coquille (vous obtenez 8 triples brides + 8 picots = rang 2 de la grande coquille),
4 mailles en l’air, 1 maille serrée dans l’espace de 3 mailles en l’air, 3 mailles en l’air, 1 maille serrée dans l’espace de 3 mailles suivant,
4 mailles en l’air, 1 double bride + 1 picot sur chacune des doubles brides de la grande coquille (=Rang 2 grande coquille),
4 mailles en l’air, 1 petite coquille par-dessus la petite coquille du rang précédent,
4 mailles en l’air, une double bride + 1 picot sur chaque double bride de la grande coquille, tourner le travail. (Vous devez avoir 4 grande coquilles avec 32 picots et une petite coquille).
Faire 4 mailles en l’air, 1 maille serrée dans l’espace de 3 mailles en l’air, 3 mailles en l’air, 1 maille serrée dans l’espace de 3 mailles suivant,
4 mailles en l’air, une double bride + 1 picot sur chaque double bride de la dernière grande coquille, Tourner le travail. Vous devez avoir 4 grandes coquilles avec 32 picots et une petite coquille au centre).
7. 1 maille coulée autours de la première double bride, 5 mailles en l’air, 1 bride dans le même espace (1 point V)
4 mailles en l’air, 1 maille serrée autours de la 3 ème double bride, *3 mailles en l’air, 1 maille serrée autours de la double bride suivante * répéter 3 fois
4 mailles en l’air, point V sur la chainette répéter 2 fois,
4 mailles en l’air, point V sur l’espace avant la petite coquille,
4 mailles en l’air, petite coquille sur la petite coquille,
*4 mailles en l’air, 1 maille serrée autours de la 3ème double bride, (3 maille en l’air, 1 maille serrée autours de la double bride suivant) 3 fois,
4 mailles en l’air, 1 point V par-dessus la chainette ** répéter 2 fois
4 mailles en l’air, 1 point V autours de la dernière double bride.
Tourner le travail. Vous obtenez 6 point V et 1 petite coquille. Vous ferez les 6 grandes coquilles sur les 6 points V au rang suivant.
Continuer le modèle jusqu’à obtenir la taille désirée.
This translation was done by Marie C. Cudraz of flicker, MarieMarie on ravelry she is also a painter. If you have a question on the French part please ask her as I haven't a clue how to help you there.

Pouvez-vous SVP regarder ce même point sur mon blog, je l'ai créé pour faire des bracelets et autres objets
ReplyDeletehttp://dulcinae.canalblog.com/archives/2010/05/09/17839078.html
Qu'en pensez-vous ?
that is nice and sweet that you gave it to a friend. We are using a similar type of technique you did very well too.
ReplyDeleteJe n'ai pas fait de tuto de ce point et j'aimerais savoir d'où provient le châle vu chez Eclectic Gipsyland; s'agit-il d'un point ancien connu ?
ReplyDeleteI have not seen that before so sorry I do not have the pattern if that is what you are asking but it is similar in technique to what I posted here so this post may help you
ReplyDeleteDulcinae I am not sure I have understood your question. I think you are asking where can you get the pattern for the bracelet. I do not know where to get it so sorry there. I do not know how that one is made I can tell it has rolled stitches (bullions) and that it is three dimensional like mine but looks like the construction is totally different. that goes around in a complete circle and is a much thicker less lace like than what I am doing. If you are trying to make one I don't know where to direct you to find the pattern. But I am confused I thought from the google translation I read that you made it. I am not understanding something.
ReplyDeleteHave you thought about making an afghan with this pattern without the center small shells?
ReplyDeletepraise2godalways4ever@yahoo.com
yes, but i have thought about it more as a medallion in the center with this going out to the four corners as a decorative finish I also thought of a a dress, skirt, and sweater using this stitch too
ReplyDeleteGreath! Lovely scarf and very nice that you posted the pattern! Thank-you! Cathy
ReplyDeleteWould the paton's lace yarn work for this? I'm kind of confused on what type of yarn/thread to use for this beautiful shawl & how much I need. It would be my 2nd time making a shawl (the first one I did was a Polish Star Shawl for my Grandma in a heavier weight yarn). Any ideas/suggestions? Thank you for posting such a lovely creation!
ReplyDeletei am sure it would work fine for this project. hook size might be trial and error as I do not know your tension, yardage will depend on you meaning if you want a neck scarflett of a very large shawl or somewhere in between
ReplyDeleteDo you repeat all of the rows or just 5-7? I got to row 7 & then got confused as to where to go next...
ReplyDeleteyou repeat rows 5-7 the reason it reads ruffly is because there is a right and a wrong side to the piece and all the picots need to be made on the right side of the work which you have to be aware of as every three rows it switches which side you are working on but you must always keep the same side as the right side which is the right side from the first set. that way all your picots face one side of the shawl
ReplyDeleteI just finished row 7 and being a new crocheter, I’m a little unsure of how to continue….I see where you say repeat rows 5-7 and to add to it…I know you say 2 shells have to be added so is this right? on the next round (large shell to picot) I will have a total of 6 large shell and then on next round 8…??? and I just continue repeating 5-7 but adding 2 rounds(shell to picot) each time… I know I’m repeating myself but I just want to be sure I have it right….nothing else on the pattern changes except the addition to the (shell to picot count)?
ReplyDeleteI’m making it out of yarn like your blue one 4 ply….I would love to make one out of 10 but it is so yard for me to hold that yard with stiff hands…but I might give it a try…thank you so much…this is the prettiest shawl I’ve see on the internet and I’ve been searching for one for over a month…
merci pour les explications en français :)
ReplyDeletethis is so beautiful, I thank you for sharing the pattern :)
ReplyDeleteBella! Very beautiful.
ReplyDelete