
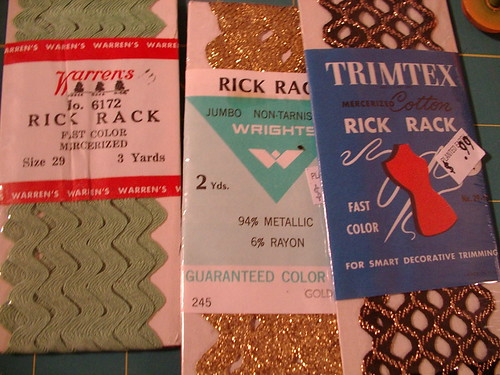
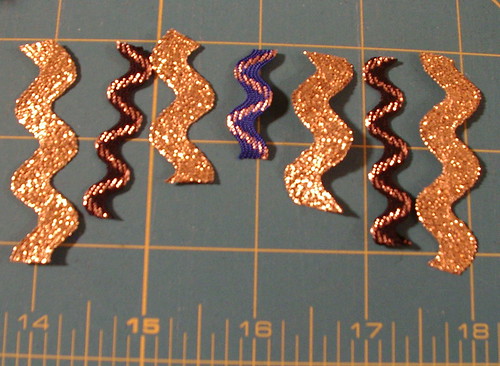
- rick rack or double sided satin ribbon
- fray check
- needle
- thread
- embroidery thread
- beads version two
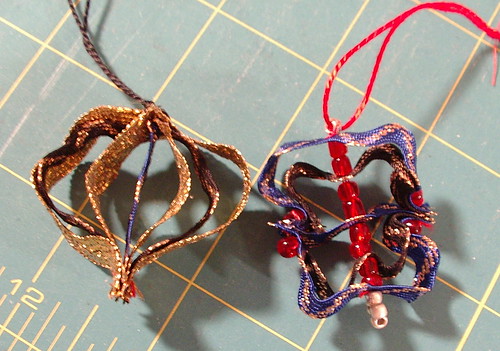
Version 1:
- Cut rick rack or satin ribbon to length.
- Fray check all ends; let dry.
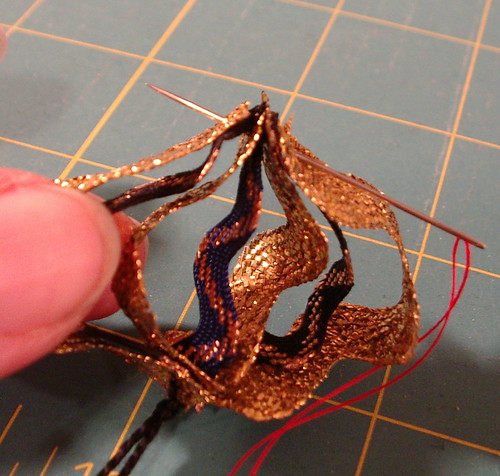
- Sew one end then the other making sure to go from longest to shortest then back up to the longest.

- Add hanger.
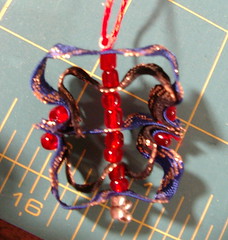
- Cut rick rack (RR) or satin ribbon to length.
- Fray check all ends; let dry.
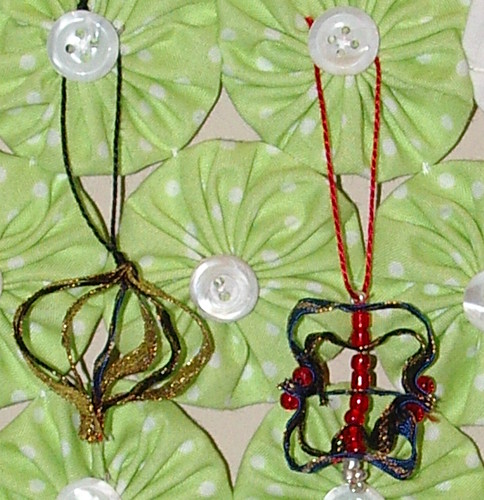
- Sew one end then the other making sure to go from longest to shortest then back up to the longest. I also added one bead to each side of the ornament (see finished ornament to see what I mean).
- String beads through middle of ornament going sideways. I did the following pattern: 1 bead for future hanger bead, RR, 2 beads RR, 2 beads, RR, 2 beads, RR, 2 beads, RR, 1 bead, then three beads; turn, go through all again; tie off.

- Add hanger in top bead; done (this ornament hangs sideways to the first).
When I finished this, I looked around to see if someone had the paper version that I remember making as a kid. Here is one, so if you have quilling paper, you can do that instead of ribbon or rick rack.
DO NOT USE ANY OF THESE PATTERNS TO MAKE THINGS TO SELL FOR PERSONAL USE ONLY!!!!
I feel like I have found a goldmine!! I have always loved yoyo's but have never seen them used this way and these ornaments are outstanding!! Thanks for sharing all your wonderful ideas!!
ReplyDeleteSmiles, Debbie debsews2002@yahoo.com
I really appreciate all the work you have put into this great tutorial. Now I just have to make my first yoyo!
ReplyDeleteThanks, Donna
Miamadre1952@yahoo.com
Good stuff. I'm liking your collection.
ReplyDelete